For the last 6 months, we have enjoyed beautiful, unique, and inspirational projects brought to us by our talented Design Team members but now it’s time to say goodbye. Thanks to all our talented Facebook DT members Swarna Raman, Divya Balasubramanian, Kriti Mishra, Vidhu Thareja, Nandhini Vasandan, Nivisha Jain, Virti Pankaj Mehta, Sri Gowri Rajesh, and Kasturi Mairal. We really appreciate your amazing creations and the way you enthused us week after week. We will truly miss you! We thank Read more…
Month: July 2021
Altered Metal Effect Box
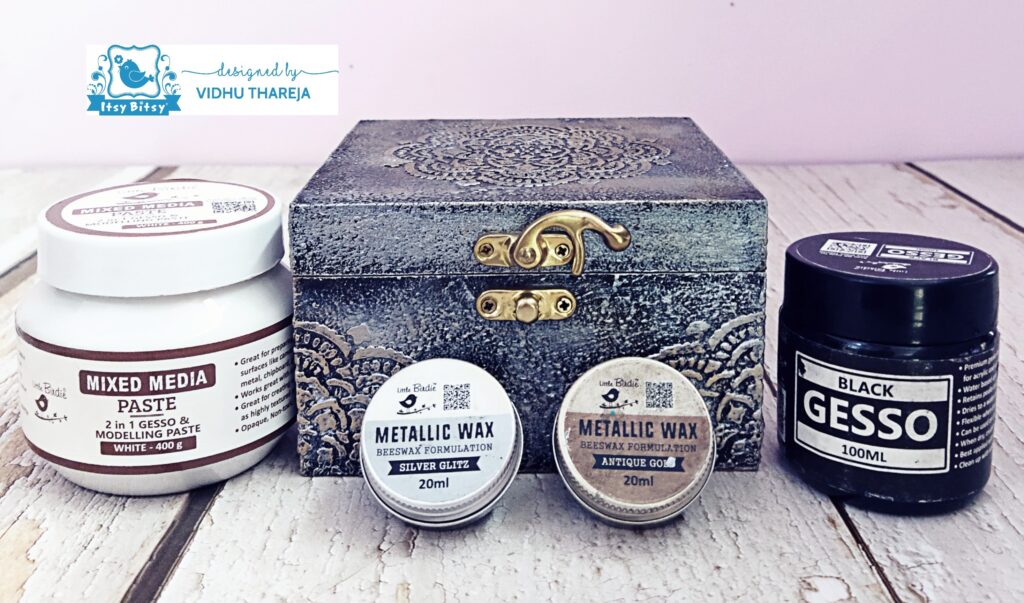
Hello friends. I hope you’re all having a great time crafting . Today I, DT member Vidhu Thareja am back on the blog with a new inspirational project. This is my last project here, so I wanted to thank team Itsy Bitsy for having faith in my creativity and giving me the opportunity to be a part of their prestigious Design Team. When it comes to choosing a gift for my loved ones, I prefer to go for something handmade. As festive season approaches, we all look for new ideas to create something unique Read more…
Mandala Bangle Box
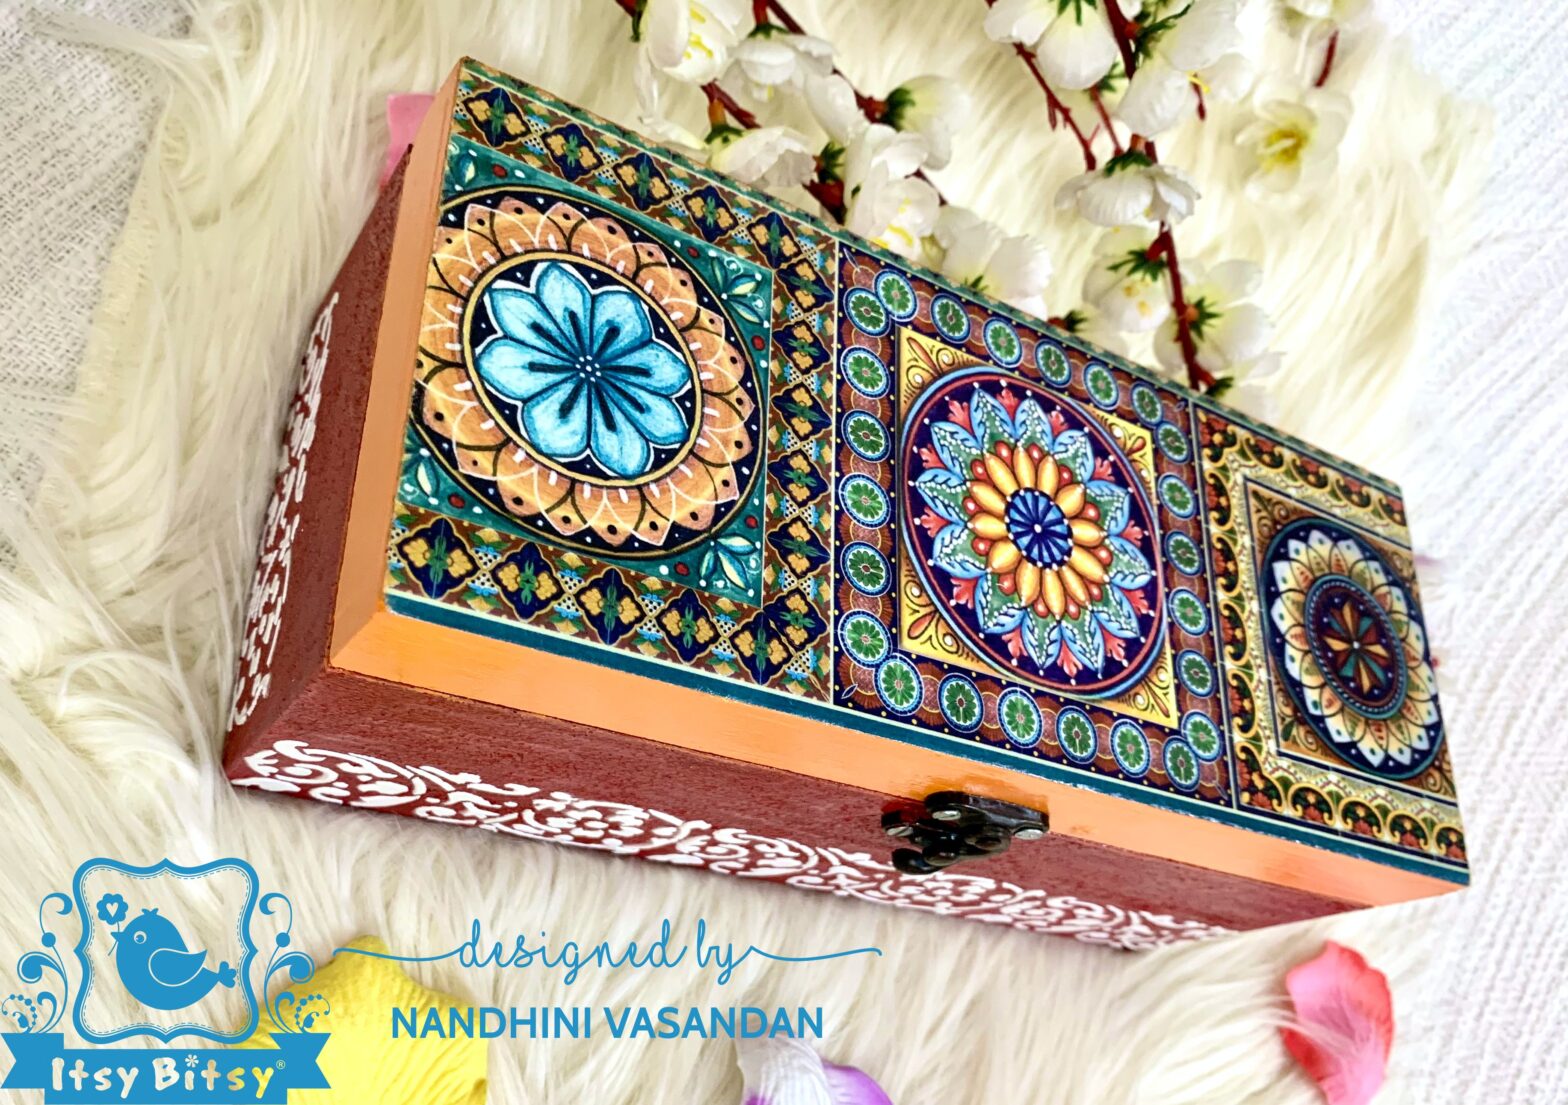
Hello friends, DT member Nandhini Vasandan here, with a bright and elegant bangle box tutorial, for all the lovely ladies! The box is a cool means to store all your beautiful and precious bangles in a modern and safe manner. I have taken an MDF Box and primed it with white gesso. Then I used multi-surface Apricot Butter and chalk paint – Charcoal (black) to colour the sides of the box. I applied one step crackle medium over the black surface and left it for drying naturally. I Read more…
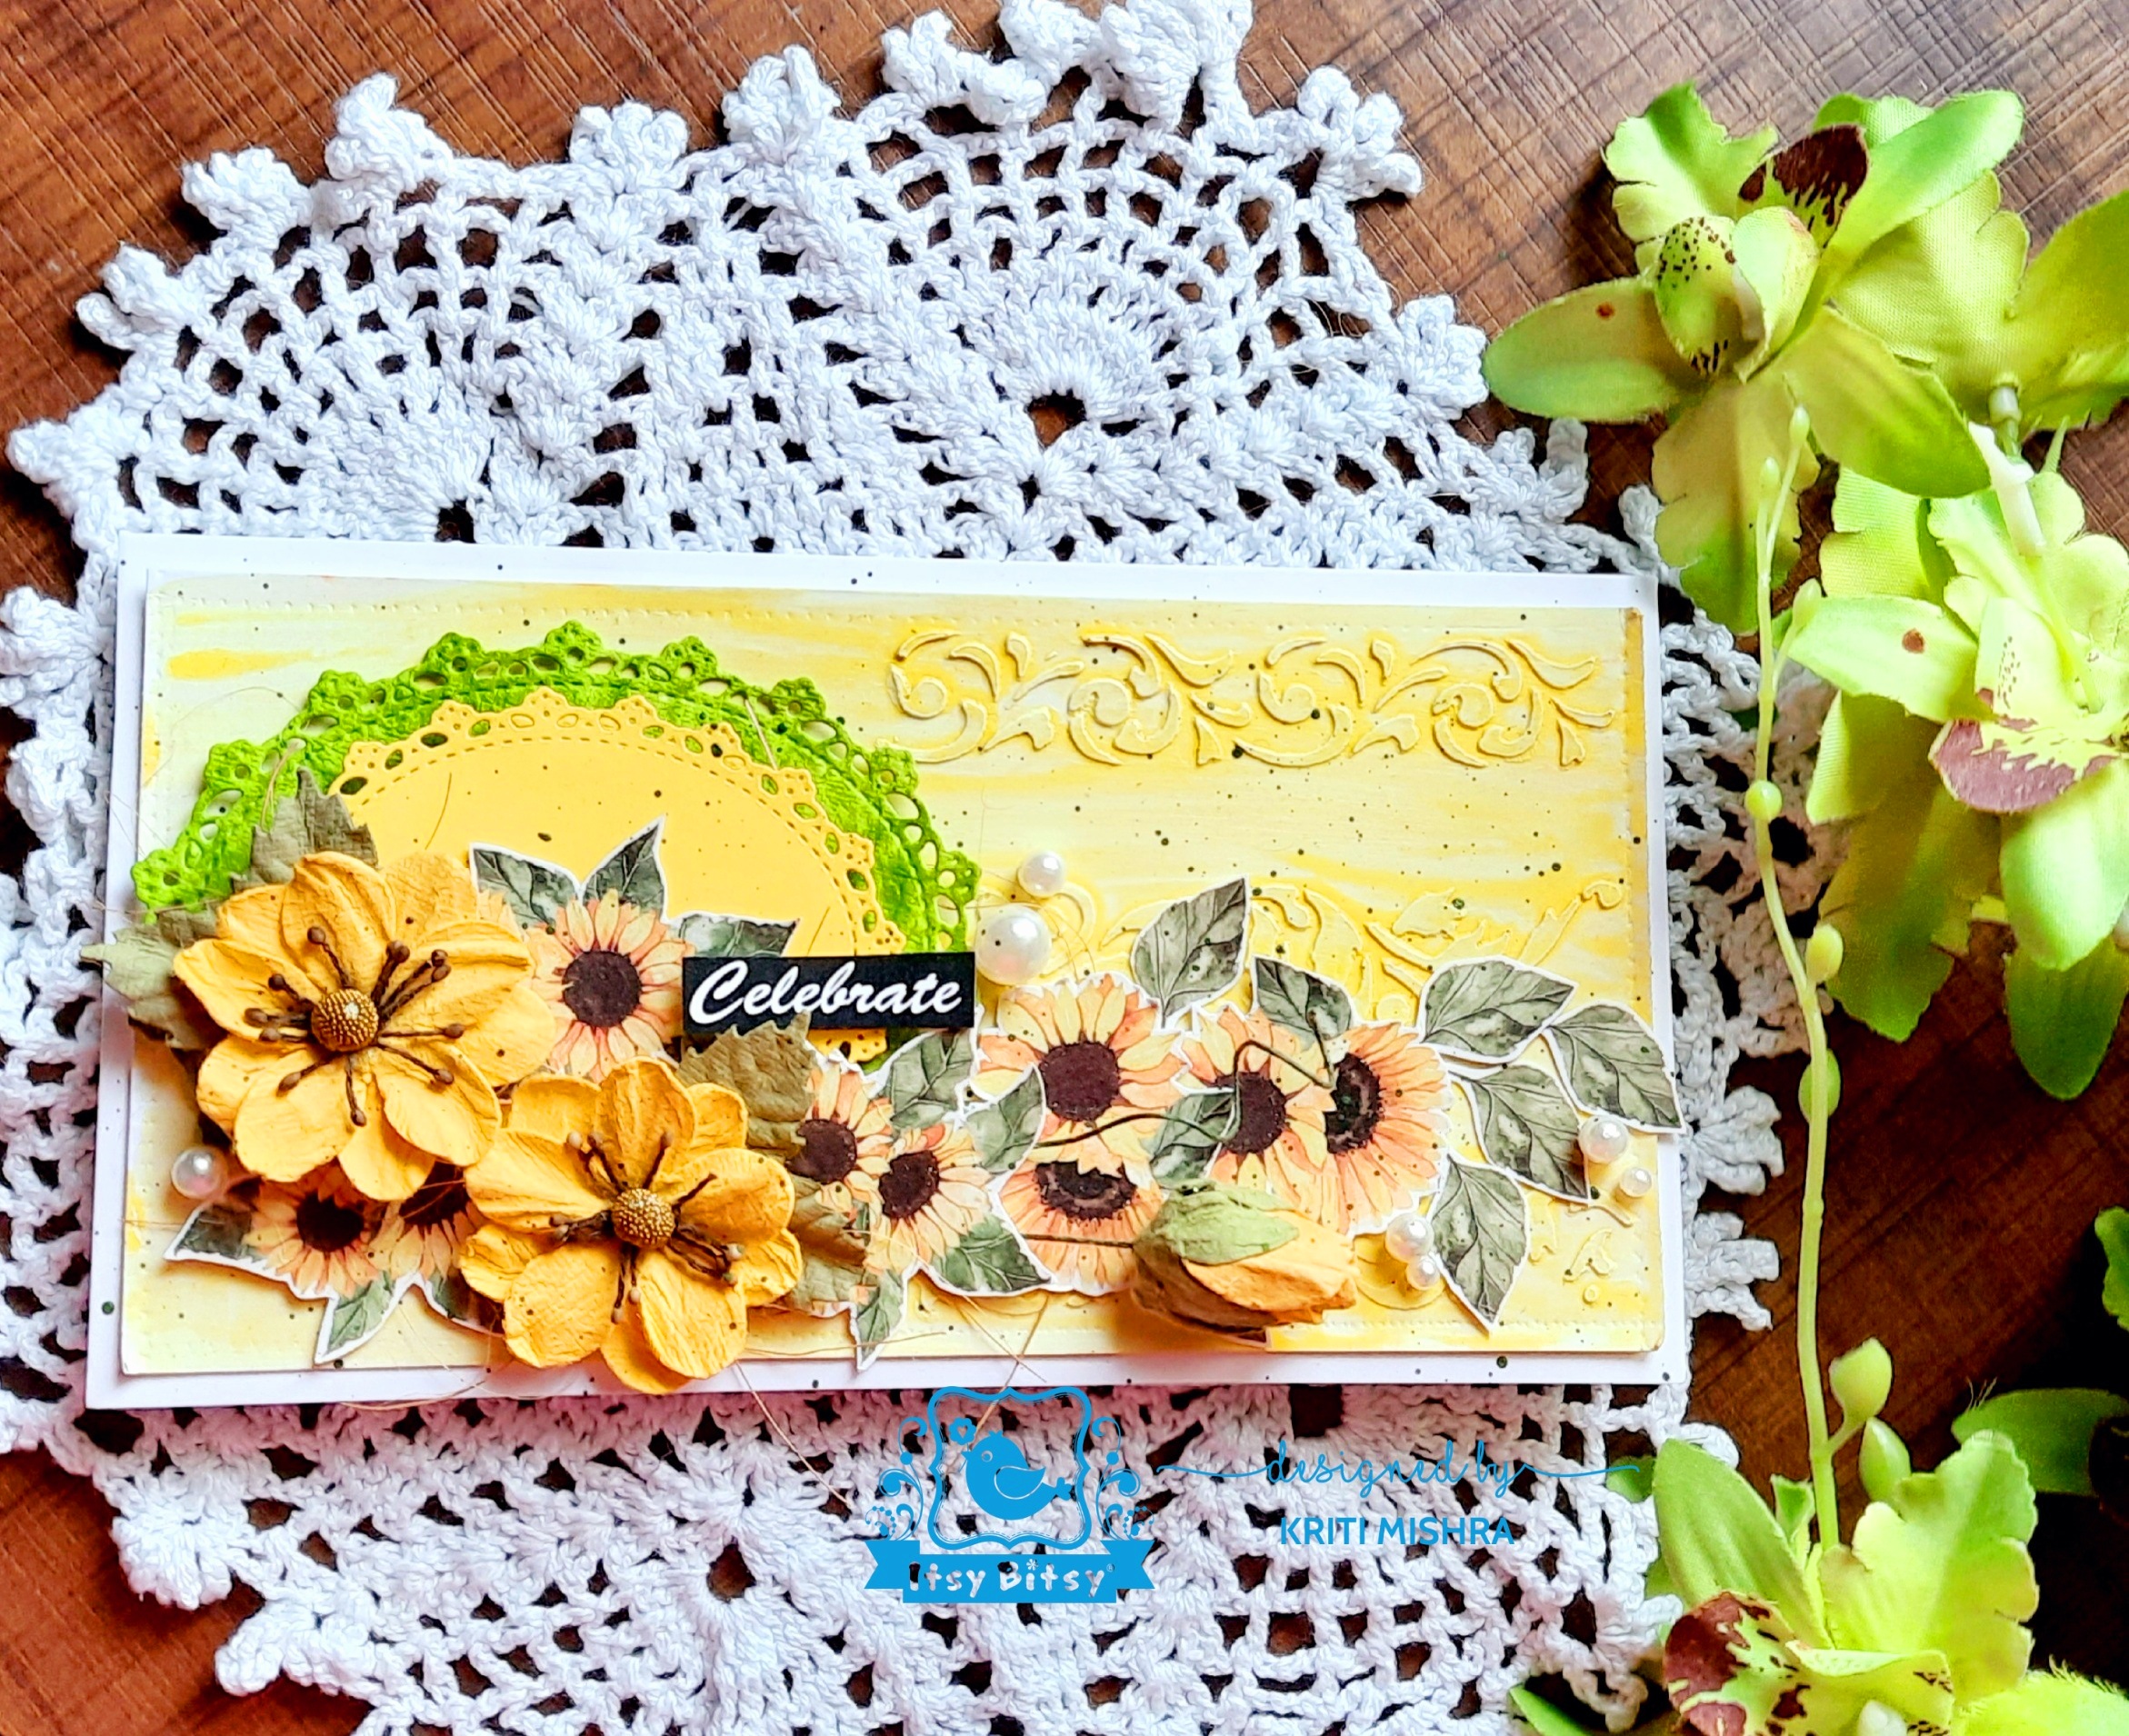
Celebrate Life Mini Album
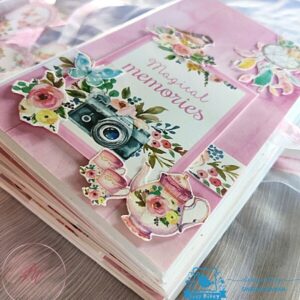
Hello everyone! Here is another video tutorial from my side and it’s a mini-album. I have explained from scratch how to create a beautiful photo mini album and also a storage box with supplies from Itsy bitsy store. Here is the Video: Measurements to follow: STORAGE BOX To create the box: Take two pattern papers of 12 by 12″. Score 3″ on all the 3 sides for both the papers. Cut 2 pieces of 3″ squares on one pattern paper, while creating a slit on the other paper. ( please refer Read more…
Altered Journal Cover
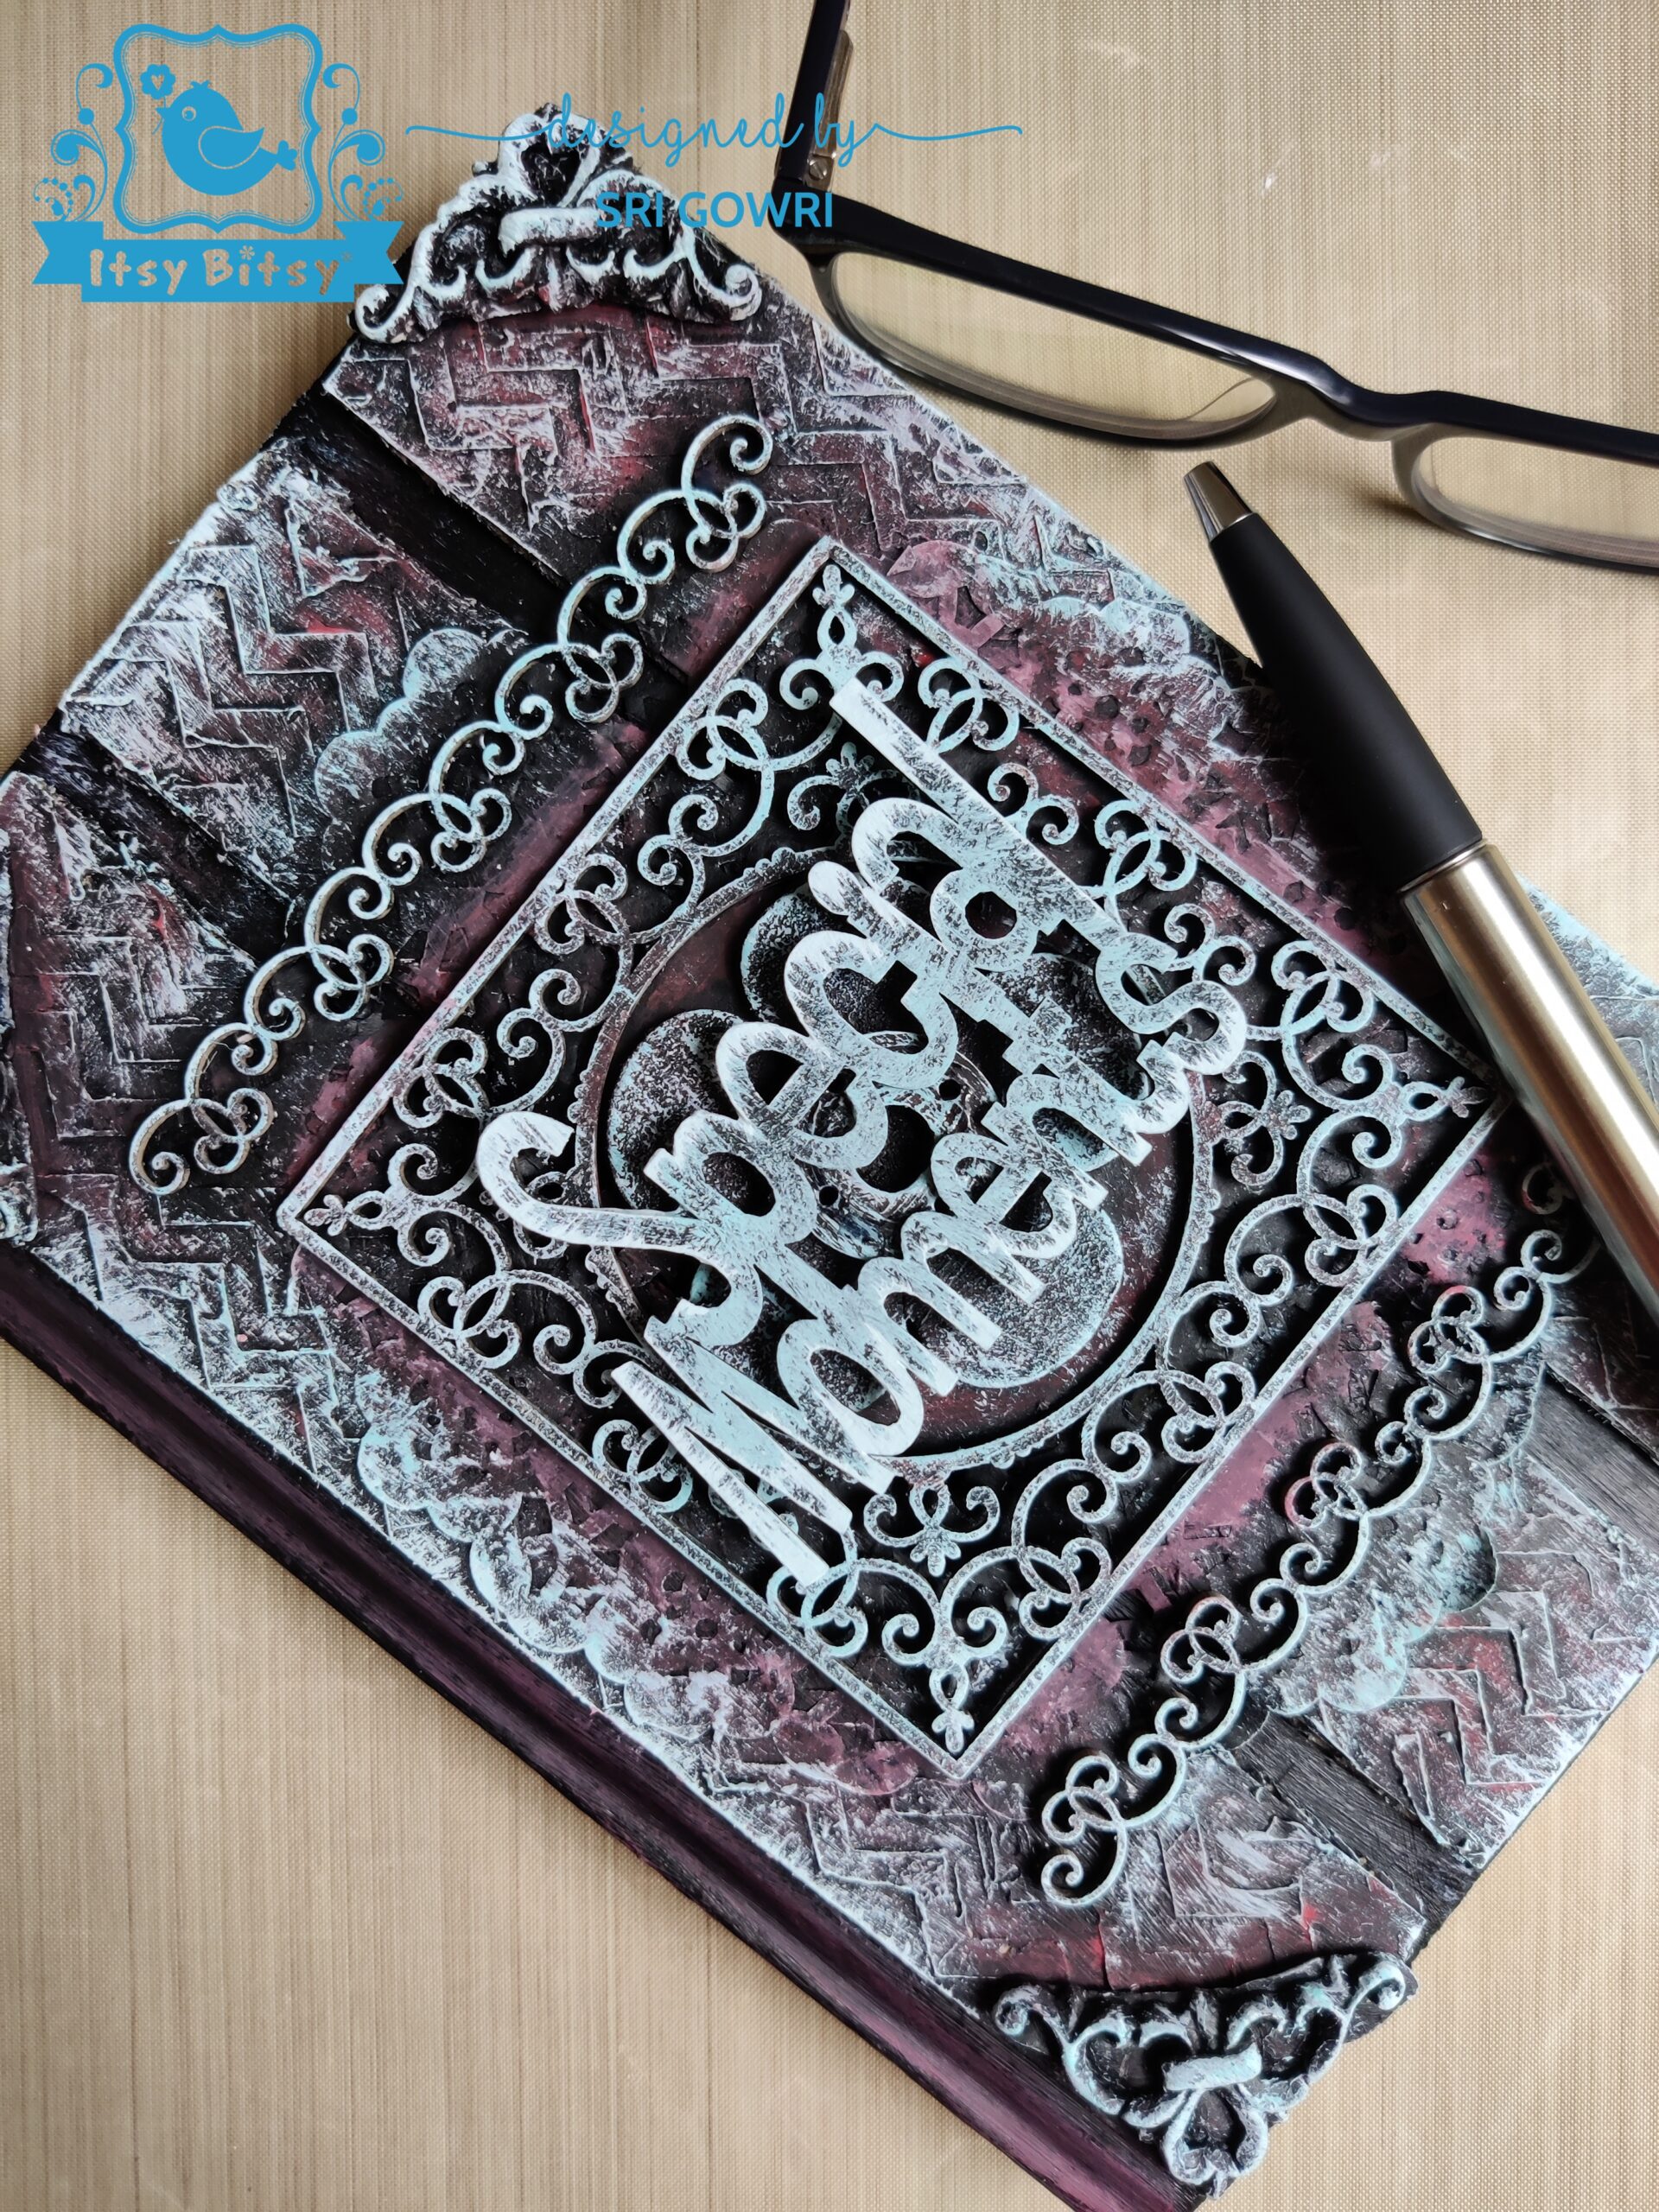
Hi all, Srigowri Rajesh is on the blog today to show you how easily we can decorate a journal cover with mixed media techniques, using Little Birdie’s wide range of mixed media products. This is my last project as a design team member. Here, I take the opportunity to thank all the Itsy Bitsy family members, who gave me the chance to exhibit my talents and explore the variety of mediums to try and share the knowledge with all craft lovers. Once again thank you team Itsy Bitsy. Now, will go into the Read more…
Boho Wall Hanging
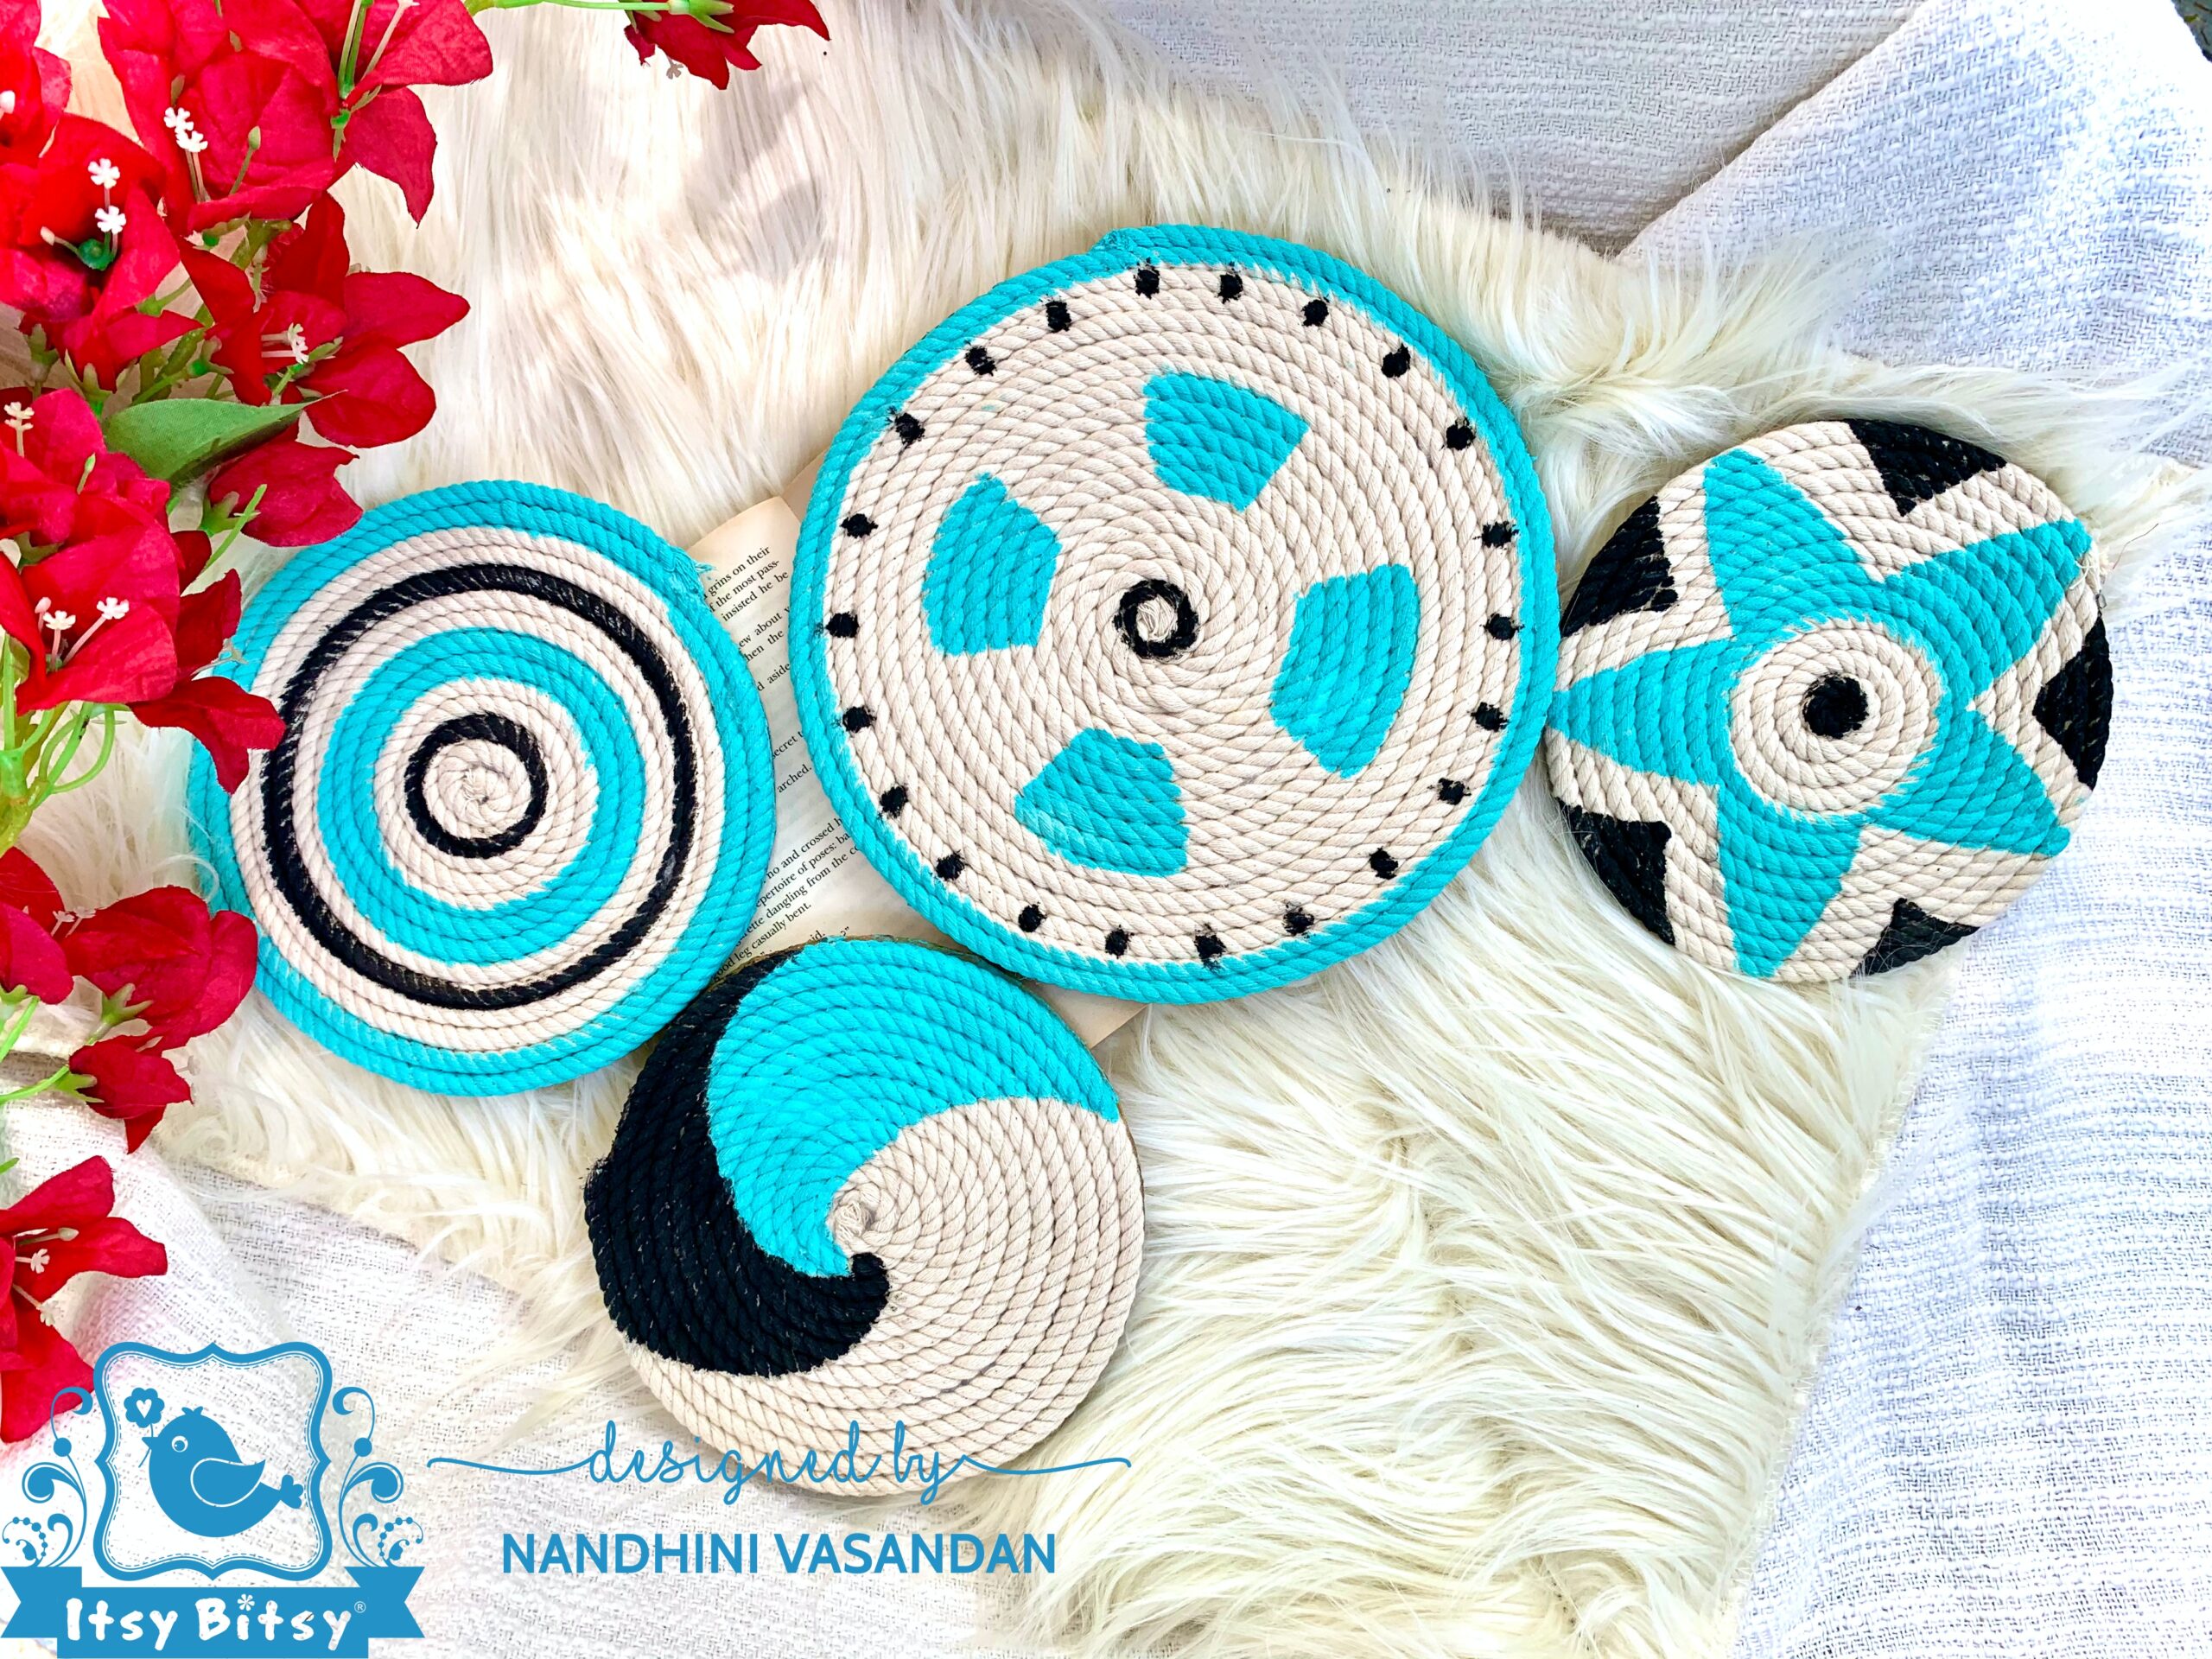
Hello friends, DT member Nandhini Vasandan here are two different themes I worked on to create these wall hangings to decorate our homes. Apart from decoupage, I was trying different crafts. Itsy Bitsy is a one stop destination for experimenting with different art forms. First I will illustrate the boho wall decor. I took a cardboard and cut out four different circles and used 6 mm cotton cord from the store. Starting with the centre, I pasted the cotton cord in the circles on Read more…
Home Decor with Deco Transfer
Hello Dear Friends… DT member Divya here and I am back with another beautiful project done with Deco transfer sheets. I am here to show you a home décor name plate project done with Deco Transfer sheets. Little Birdie ‘Deco Transfer ’ sheets have made it easier for making such awesome projects . So let’s see the project. Here is my project with cute little designer pots. So let’s see what to start with. STEP-1 : I have taken this MDF base and some terracotta designer pots and sand Read more…
Mixed Media Envelope
Namaste Friends!! Kriti this side and today! I am sharing a mixed media envelope. You can use such envelopes to put cash or notecards for gifting. To make this, I have used some awesome mixed media supplies from Itsy Bitsy. This is the envelop which I made…. Tutorial for the envelop Step 1: Take an A4 size premium white cardstock. Now, from the long side, score at 4″ and 8″, and from the short side, score at 0.5″ from both the ends. Step 2: Next, cut the Read more…
Antique Paper Mache Box
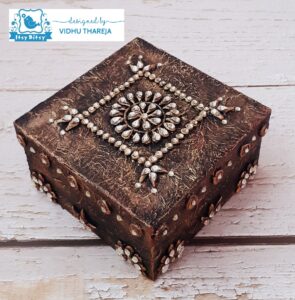
Hello my arty crafty friends. I hope you all are doing great. DT member Vidhu Thareja back on the blog with a new inspirational project. As festival season is approaching, you all must have started thinking like me about creating unique handmade gifts. Keeping in mind the upcoming festive season, I have designed a gift box which is very easy to make. I have a step wise picture tutorial so just relax and enjoy the tutorial. I had a square paper mache box measuring 5″x2.5″ which I had bought Read more…
Boho Style Step Card
Hi, creatives, Srigowri Rajesh on the blog today to show you how we can create a quick yet unique side step card for any occasion. This style of card is very versatile and we can change the position of steps anywhere we want. Here I am showing the step on the right side. Step 1 Take Little Birdie super white card stock measures 11 * 7 inches. Step 2 On the 7-inch side mark at 3.5 inches and draw a line. Step 3 On the 11-inches side make at 5.5 inches Read more…