
Hi crafty folks,
This is Priyanka Shashi, as you know I’m rather obsessed with making festive candles. And when Valentine’s Day is coming soon, I decided to make a heart shaped candle this week for the occasion. Check out how I made this easy DIY Valentine’s Day Candle right here!
Step 1. Gather your materials
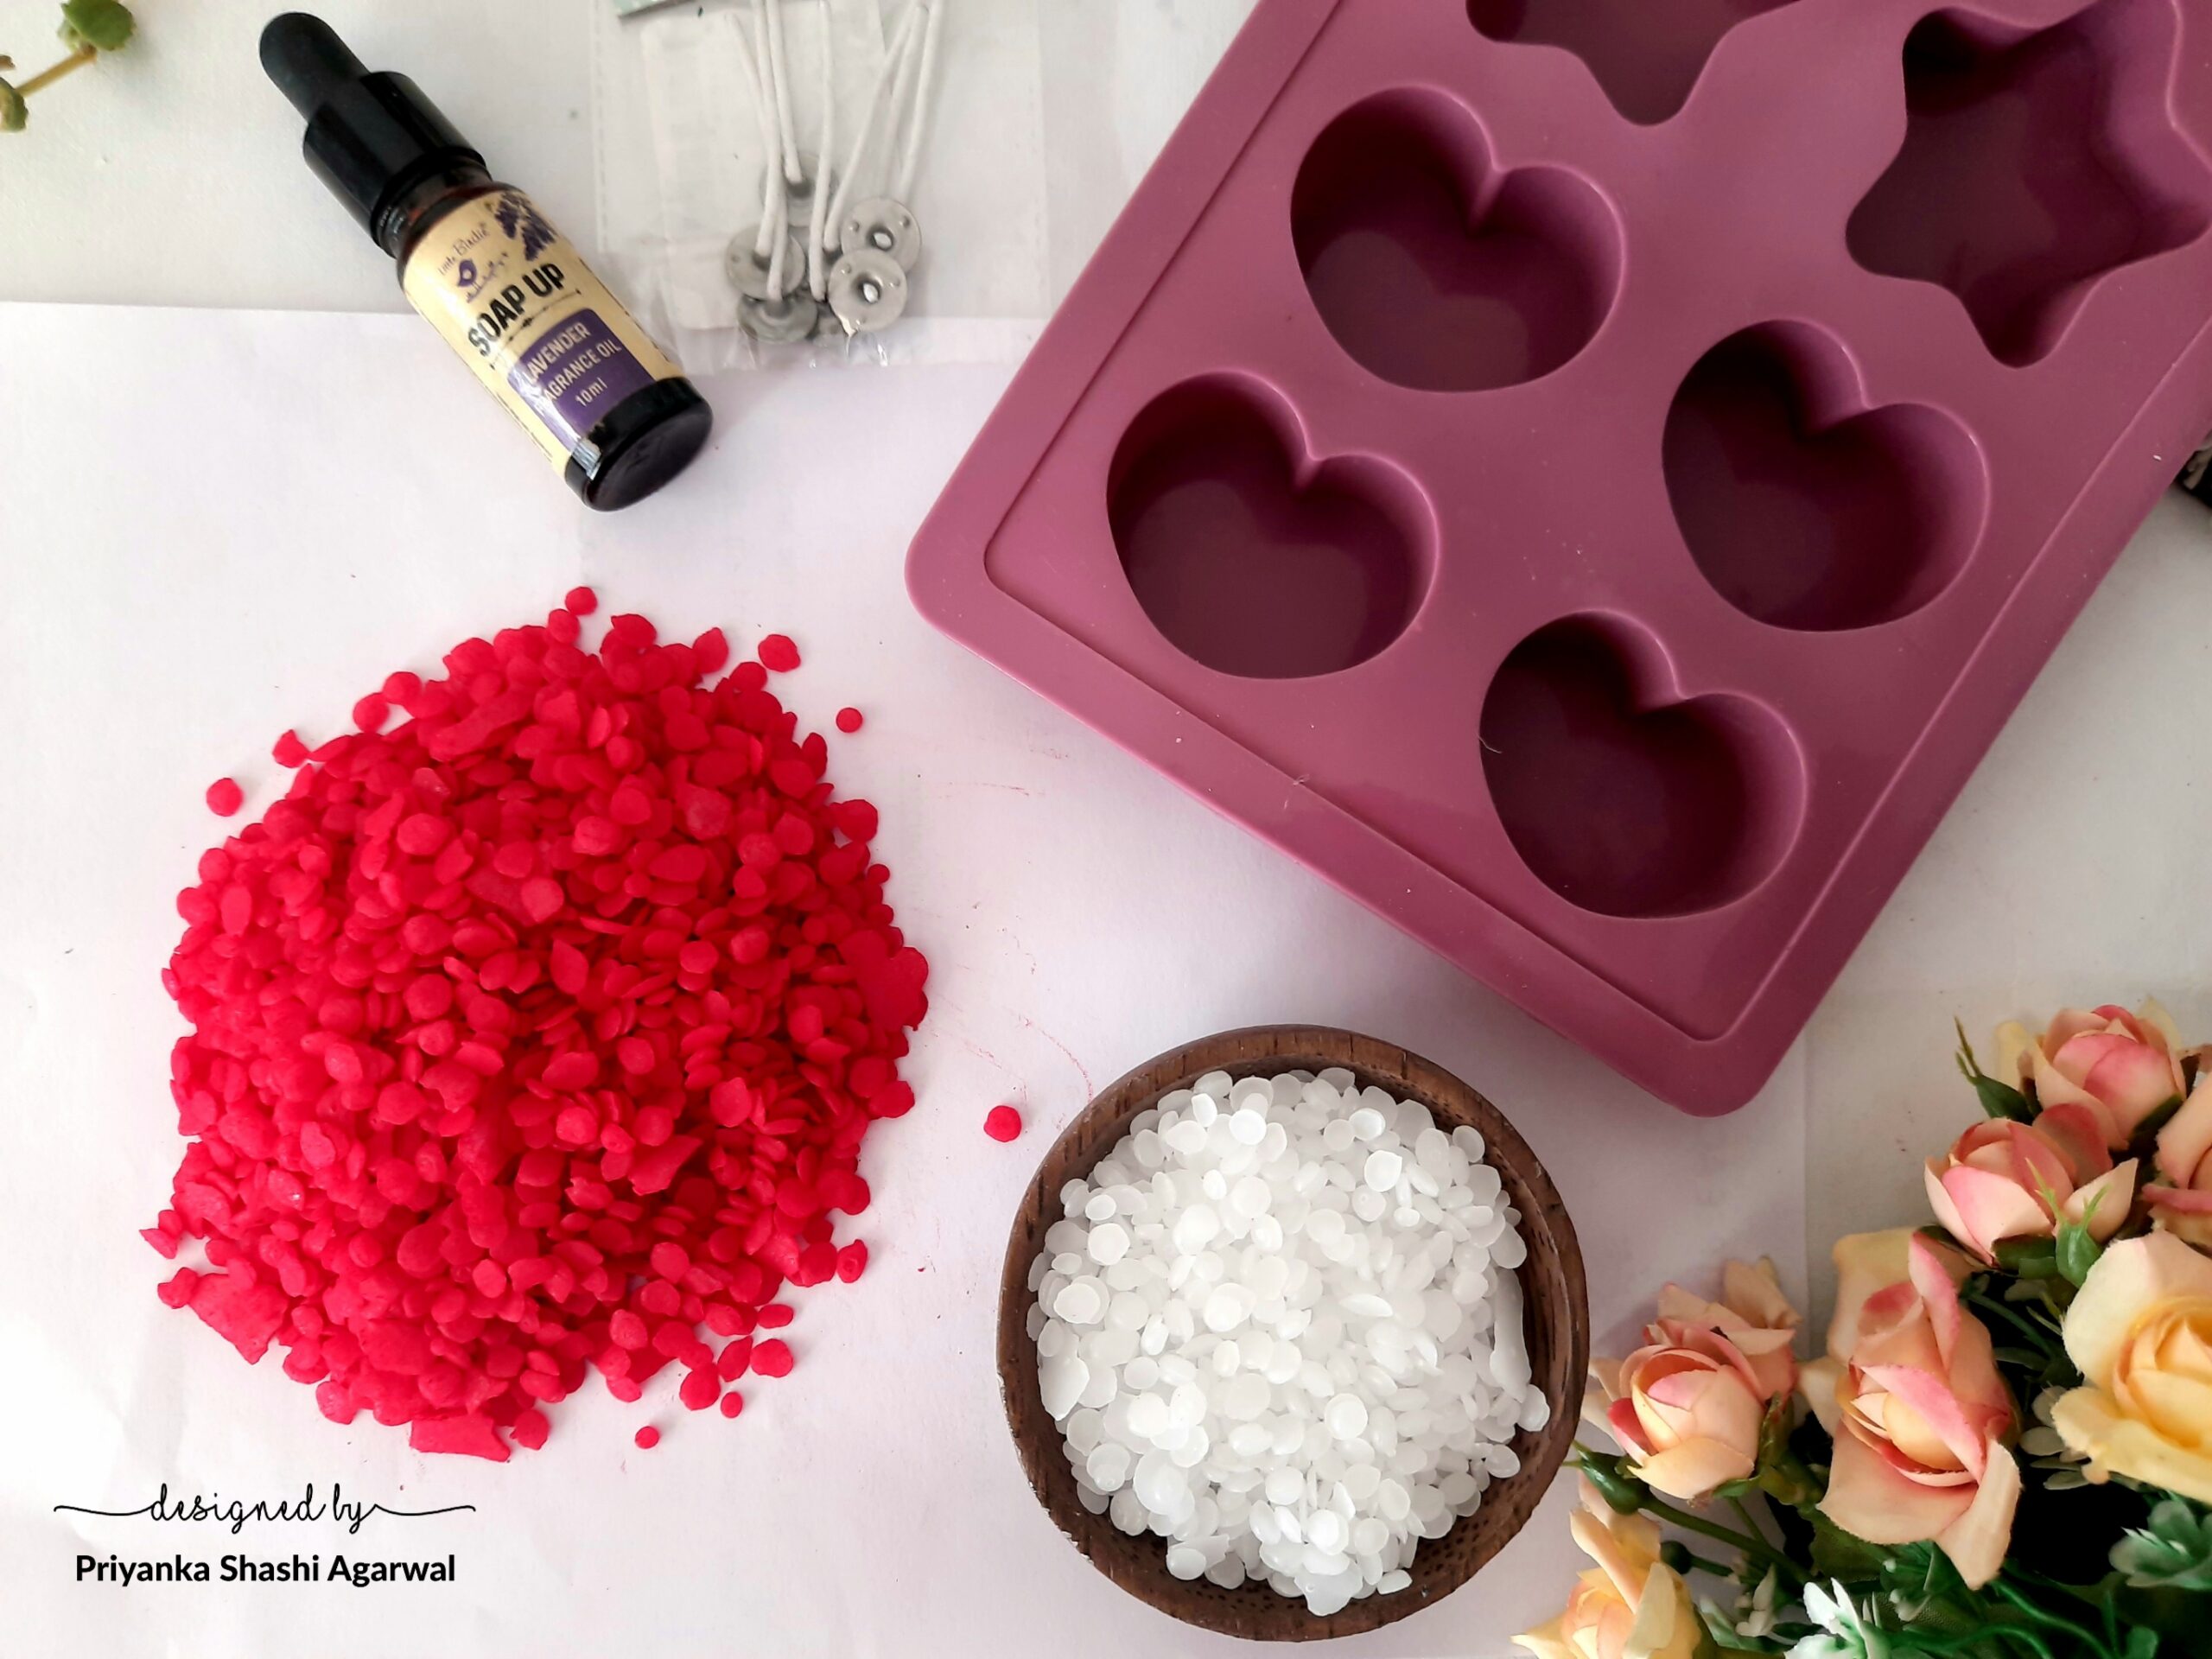
As I believe in minimalism, I’ve used very less material for these candles as well. For this project you will need a double boiler, red wax granules, paraffin wax granules, heart shape mould, tabbed wicks, fragrance of your choice. Other than these few things, from your stationery and kitchen things you will need are a marker, a ruler and a tray in which your mould can fit. Lets begin!
Step 2. Prepare your mould
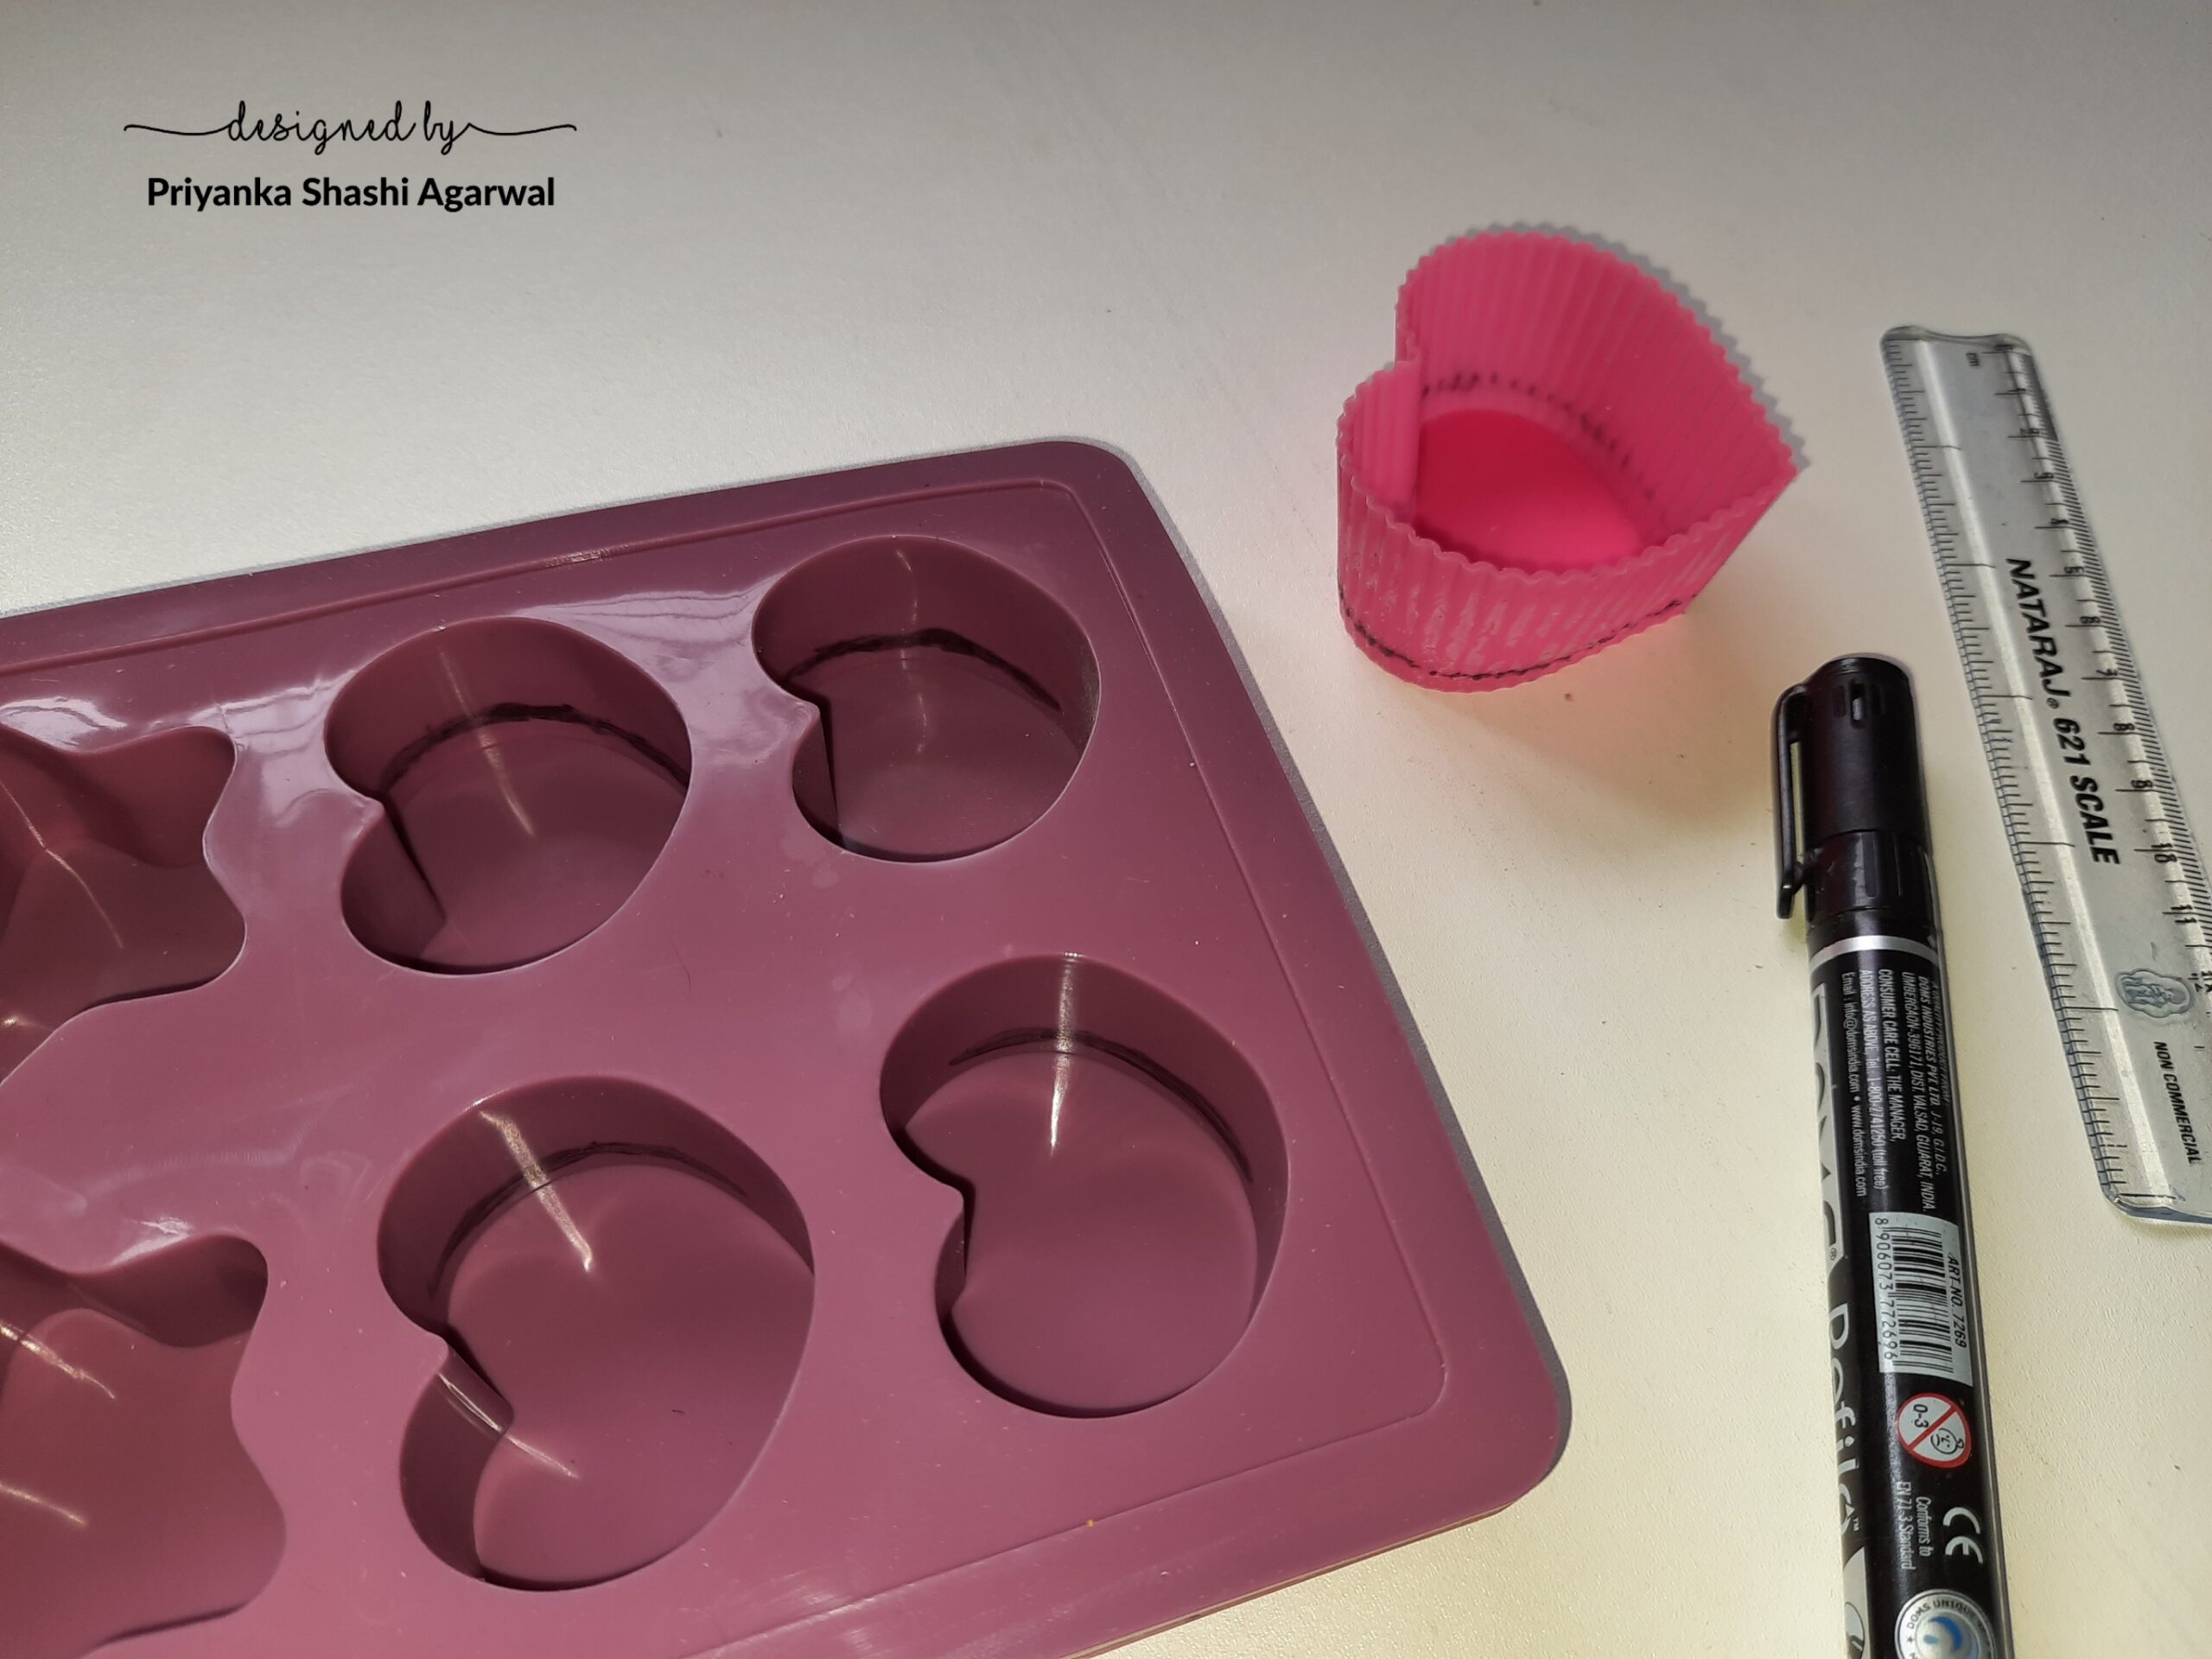
Mark about half cm outside and out at the bottom of each cavity of the mould with the help of a marker.
Step 3. Melt the wax granules
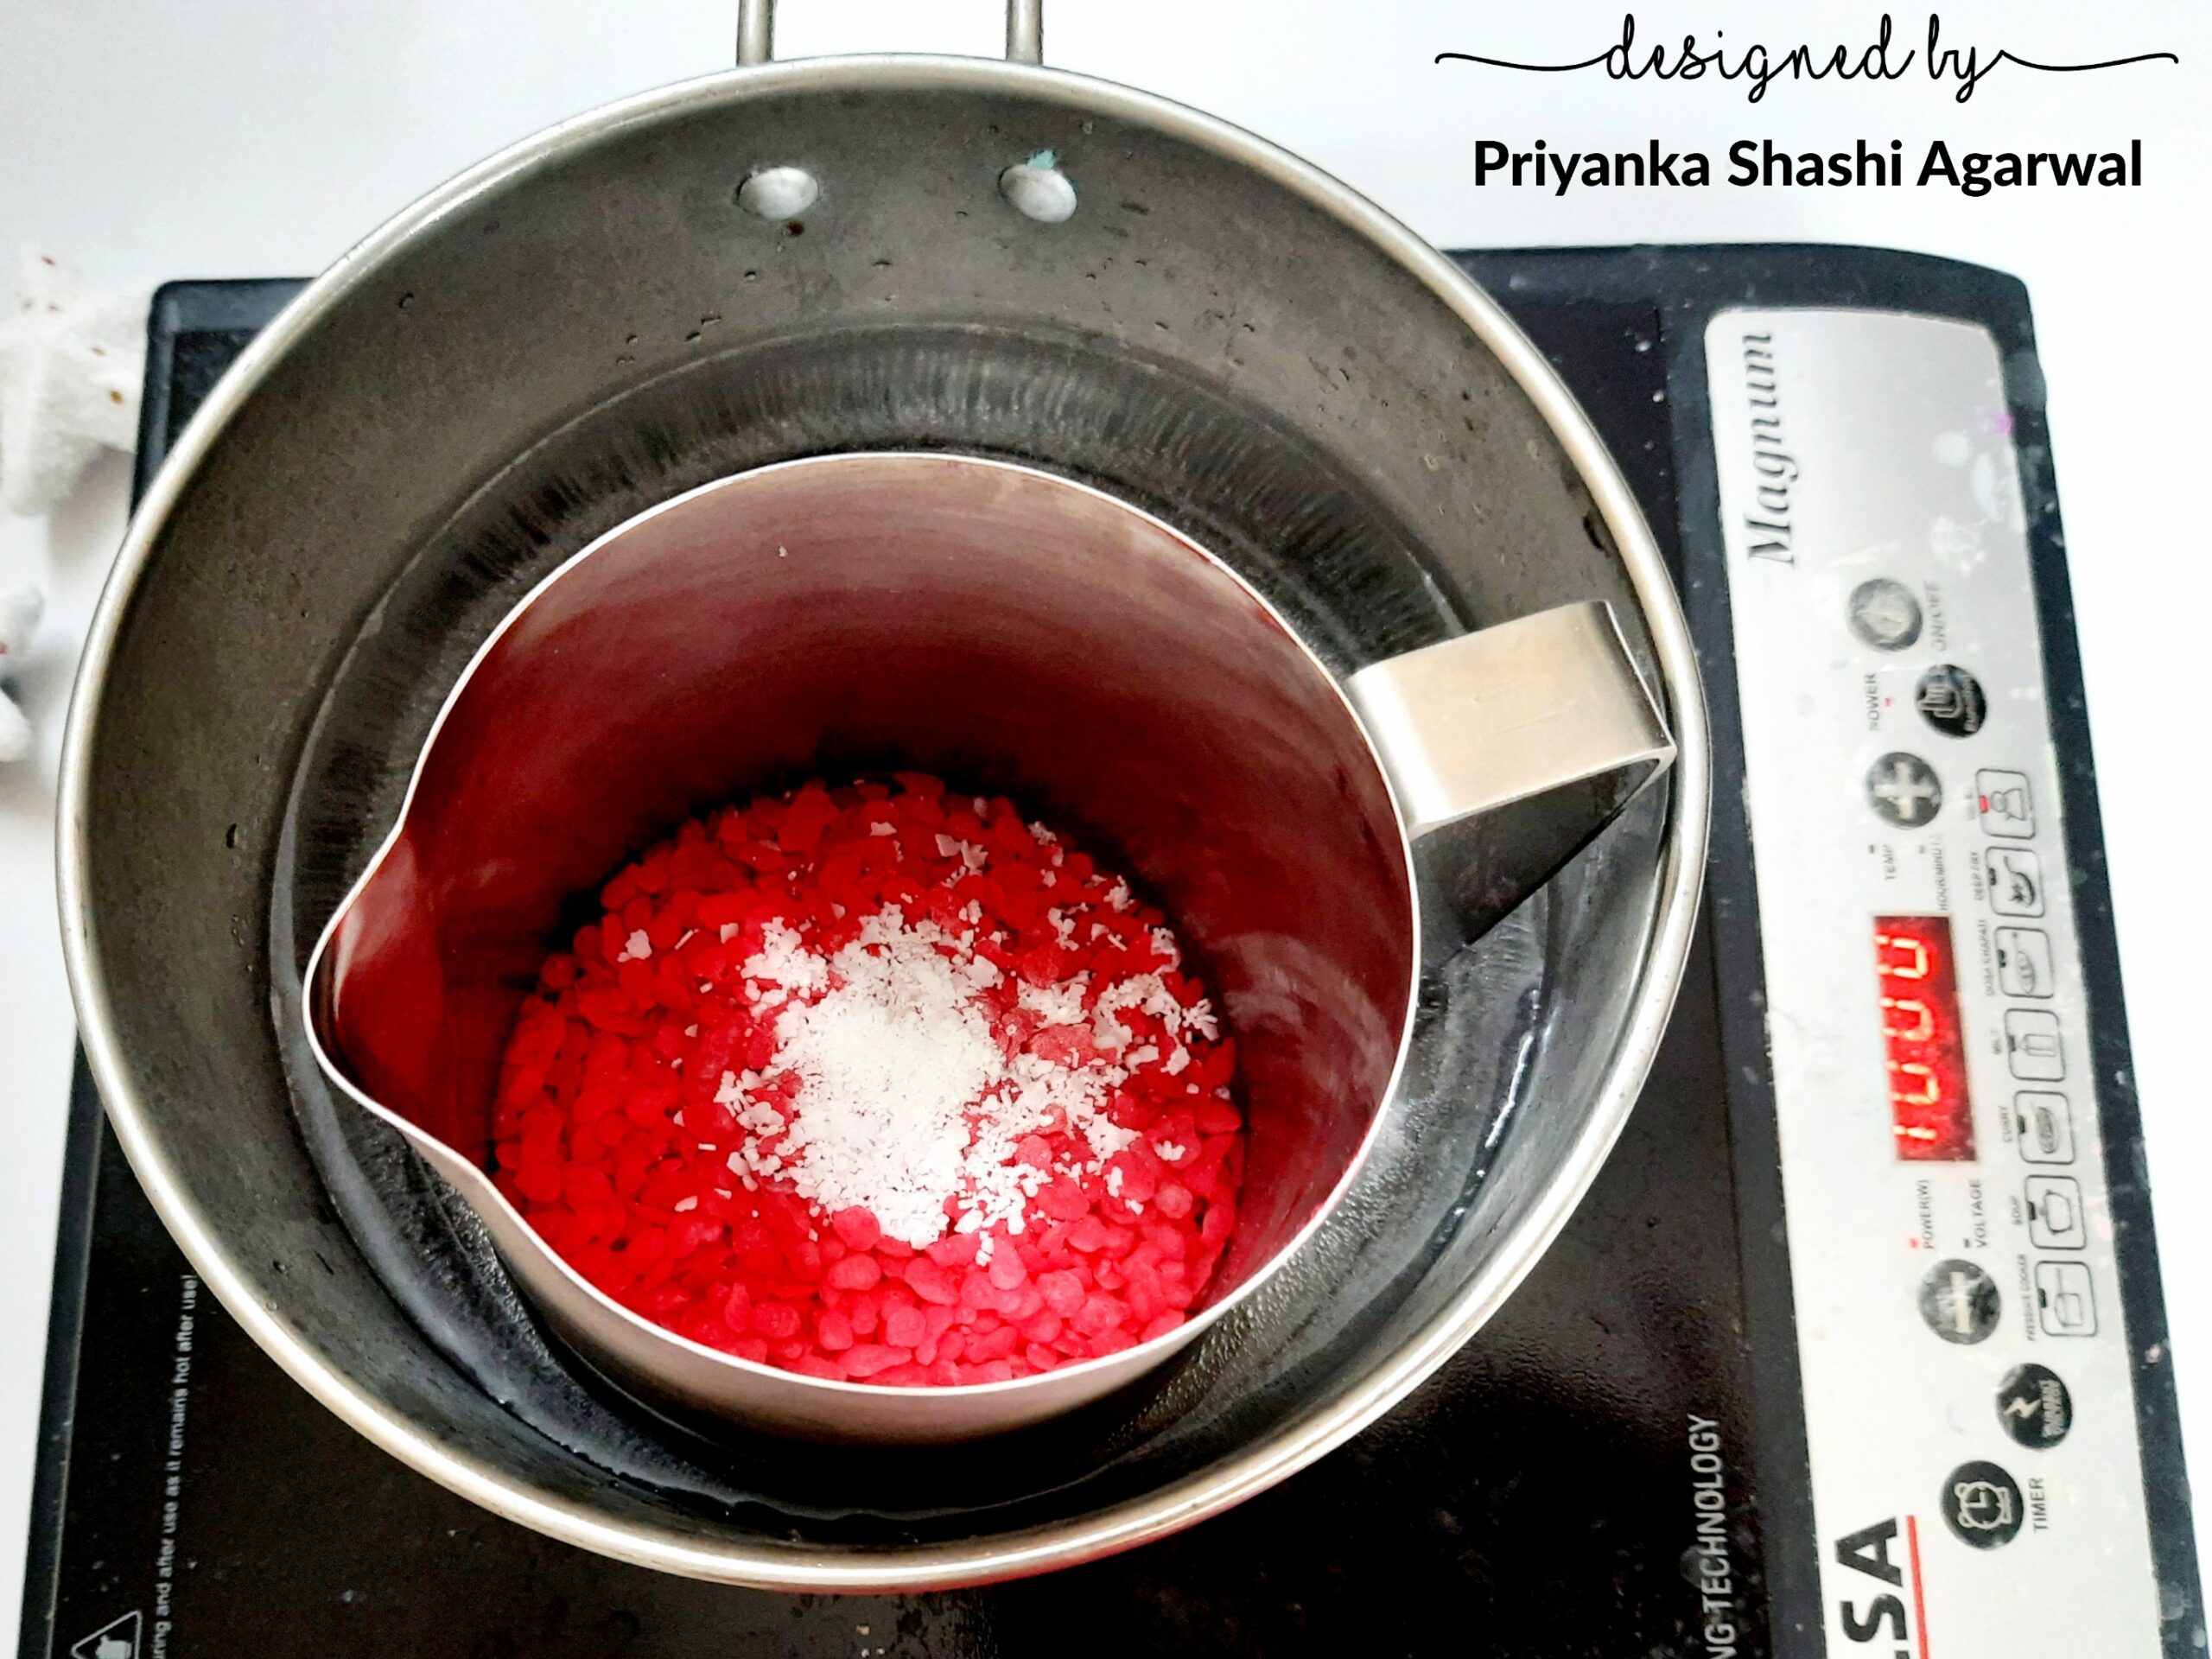
First you need to melt the red wax granules. You are going to pour less wax at a time but melt almost double what’s required. Add stearin to improve the burning time.
Step 4. Pour the wax
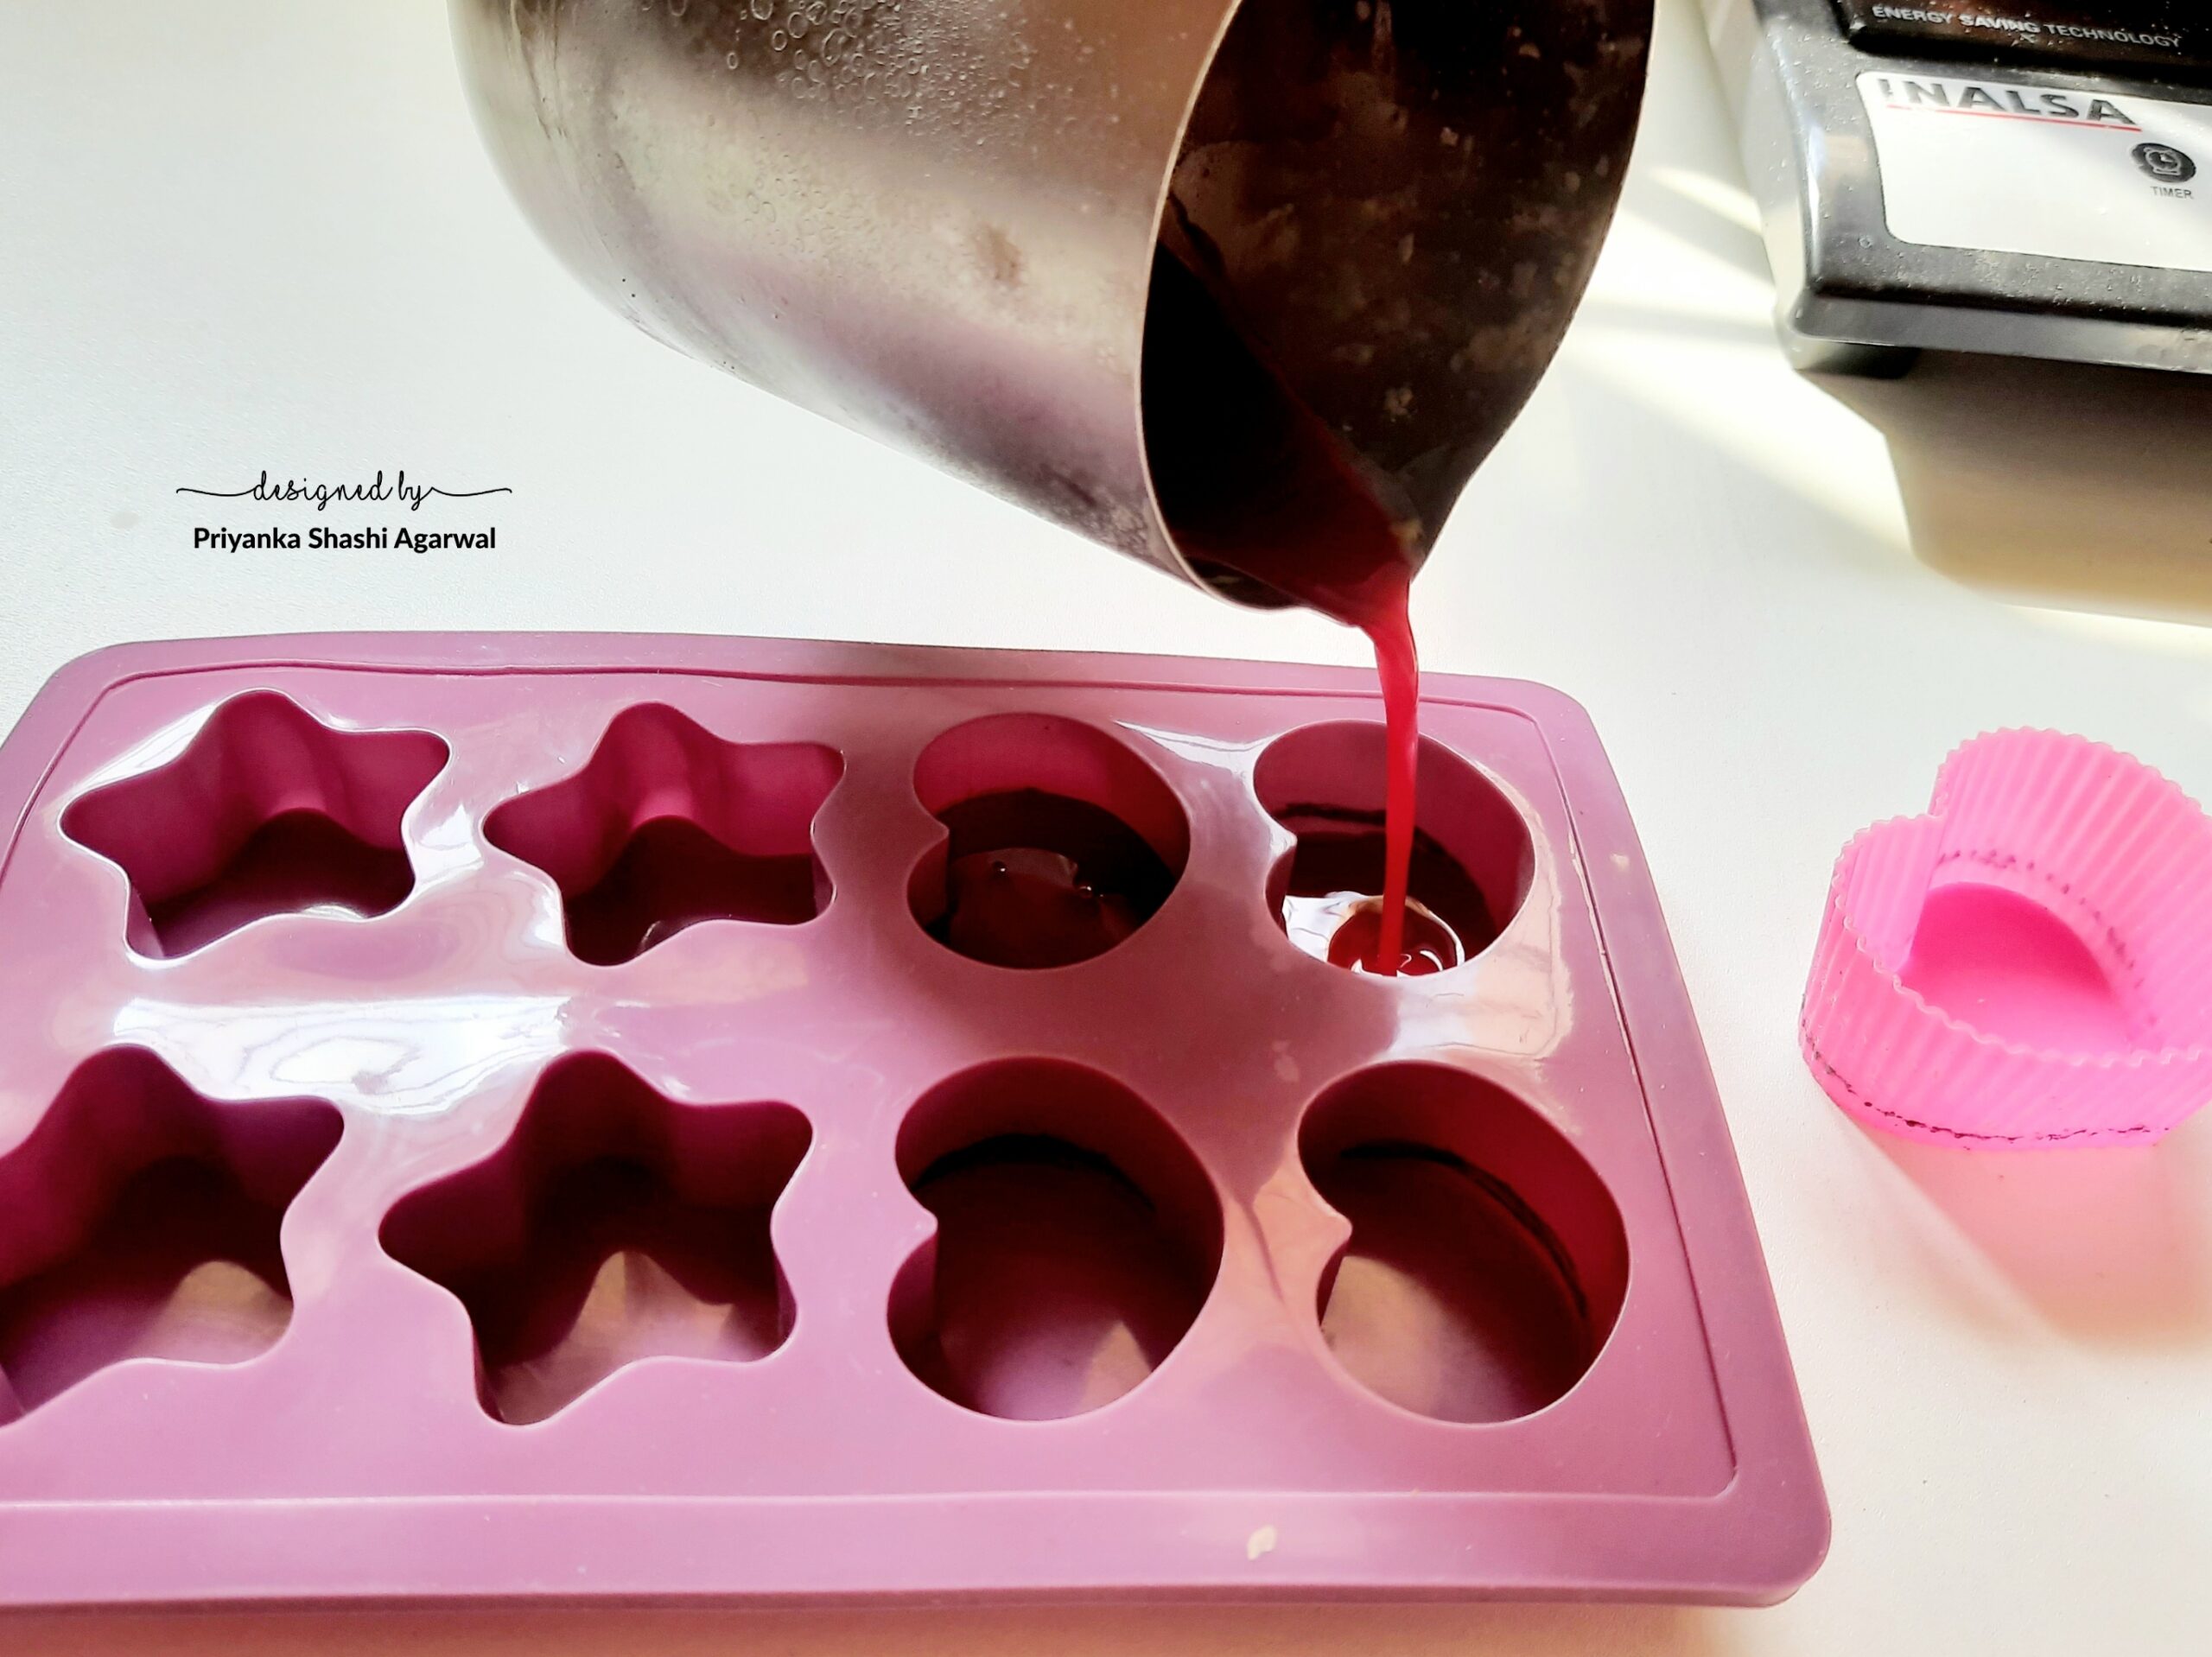
Before pouring the wax add your choice of fragrance in it. Pour the wax till the marks only.
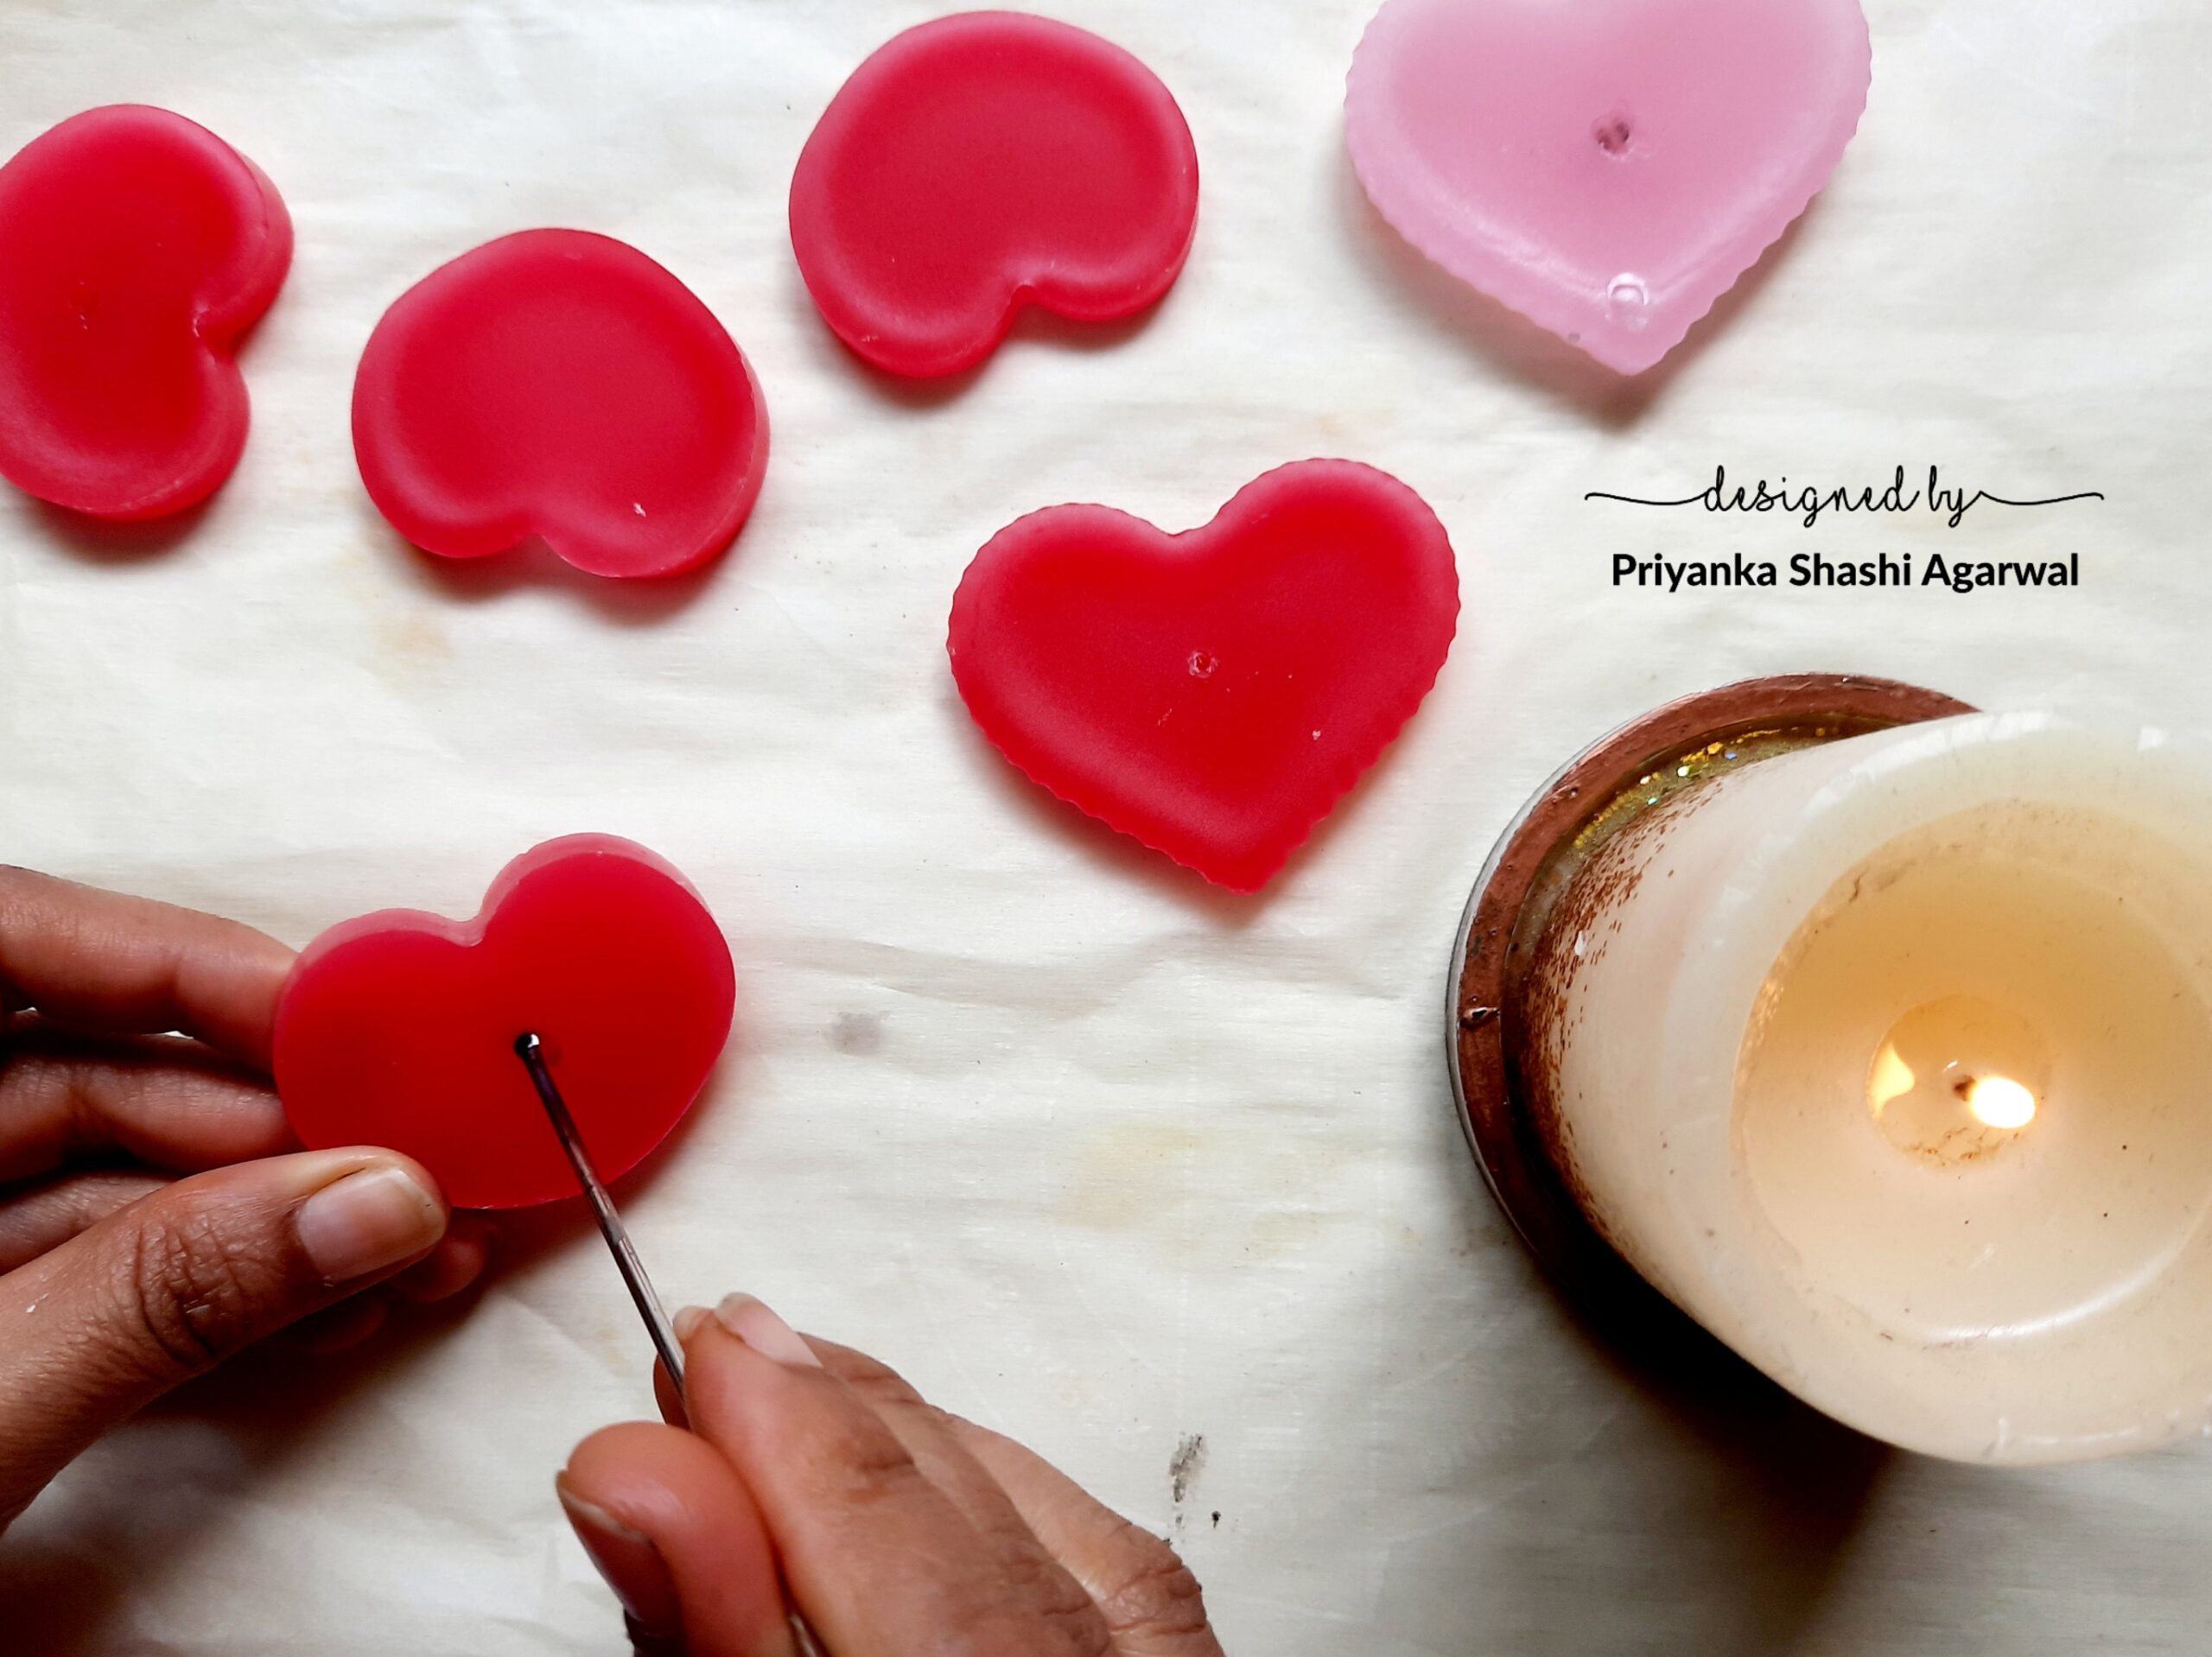
Step 5. Poke a hole
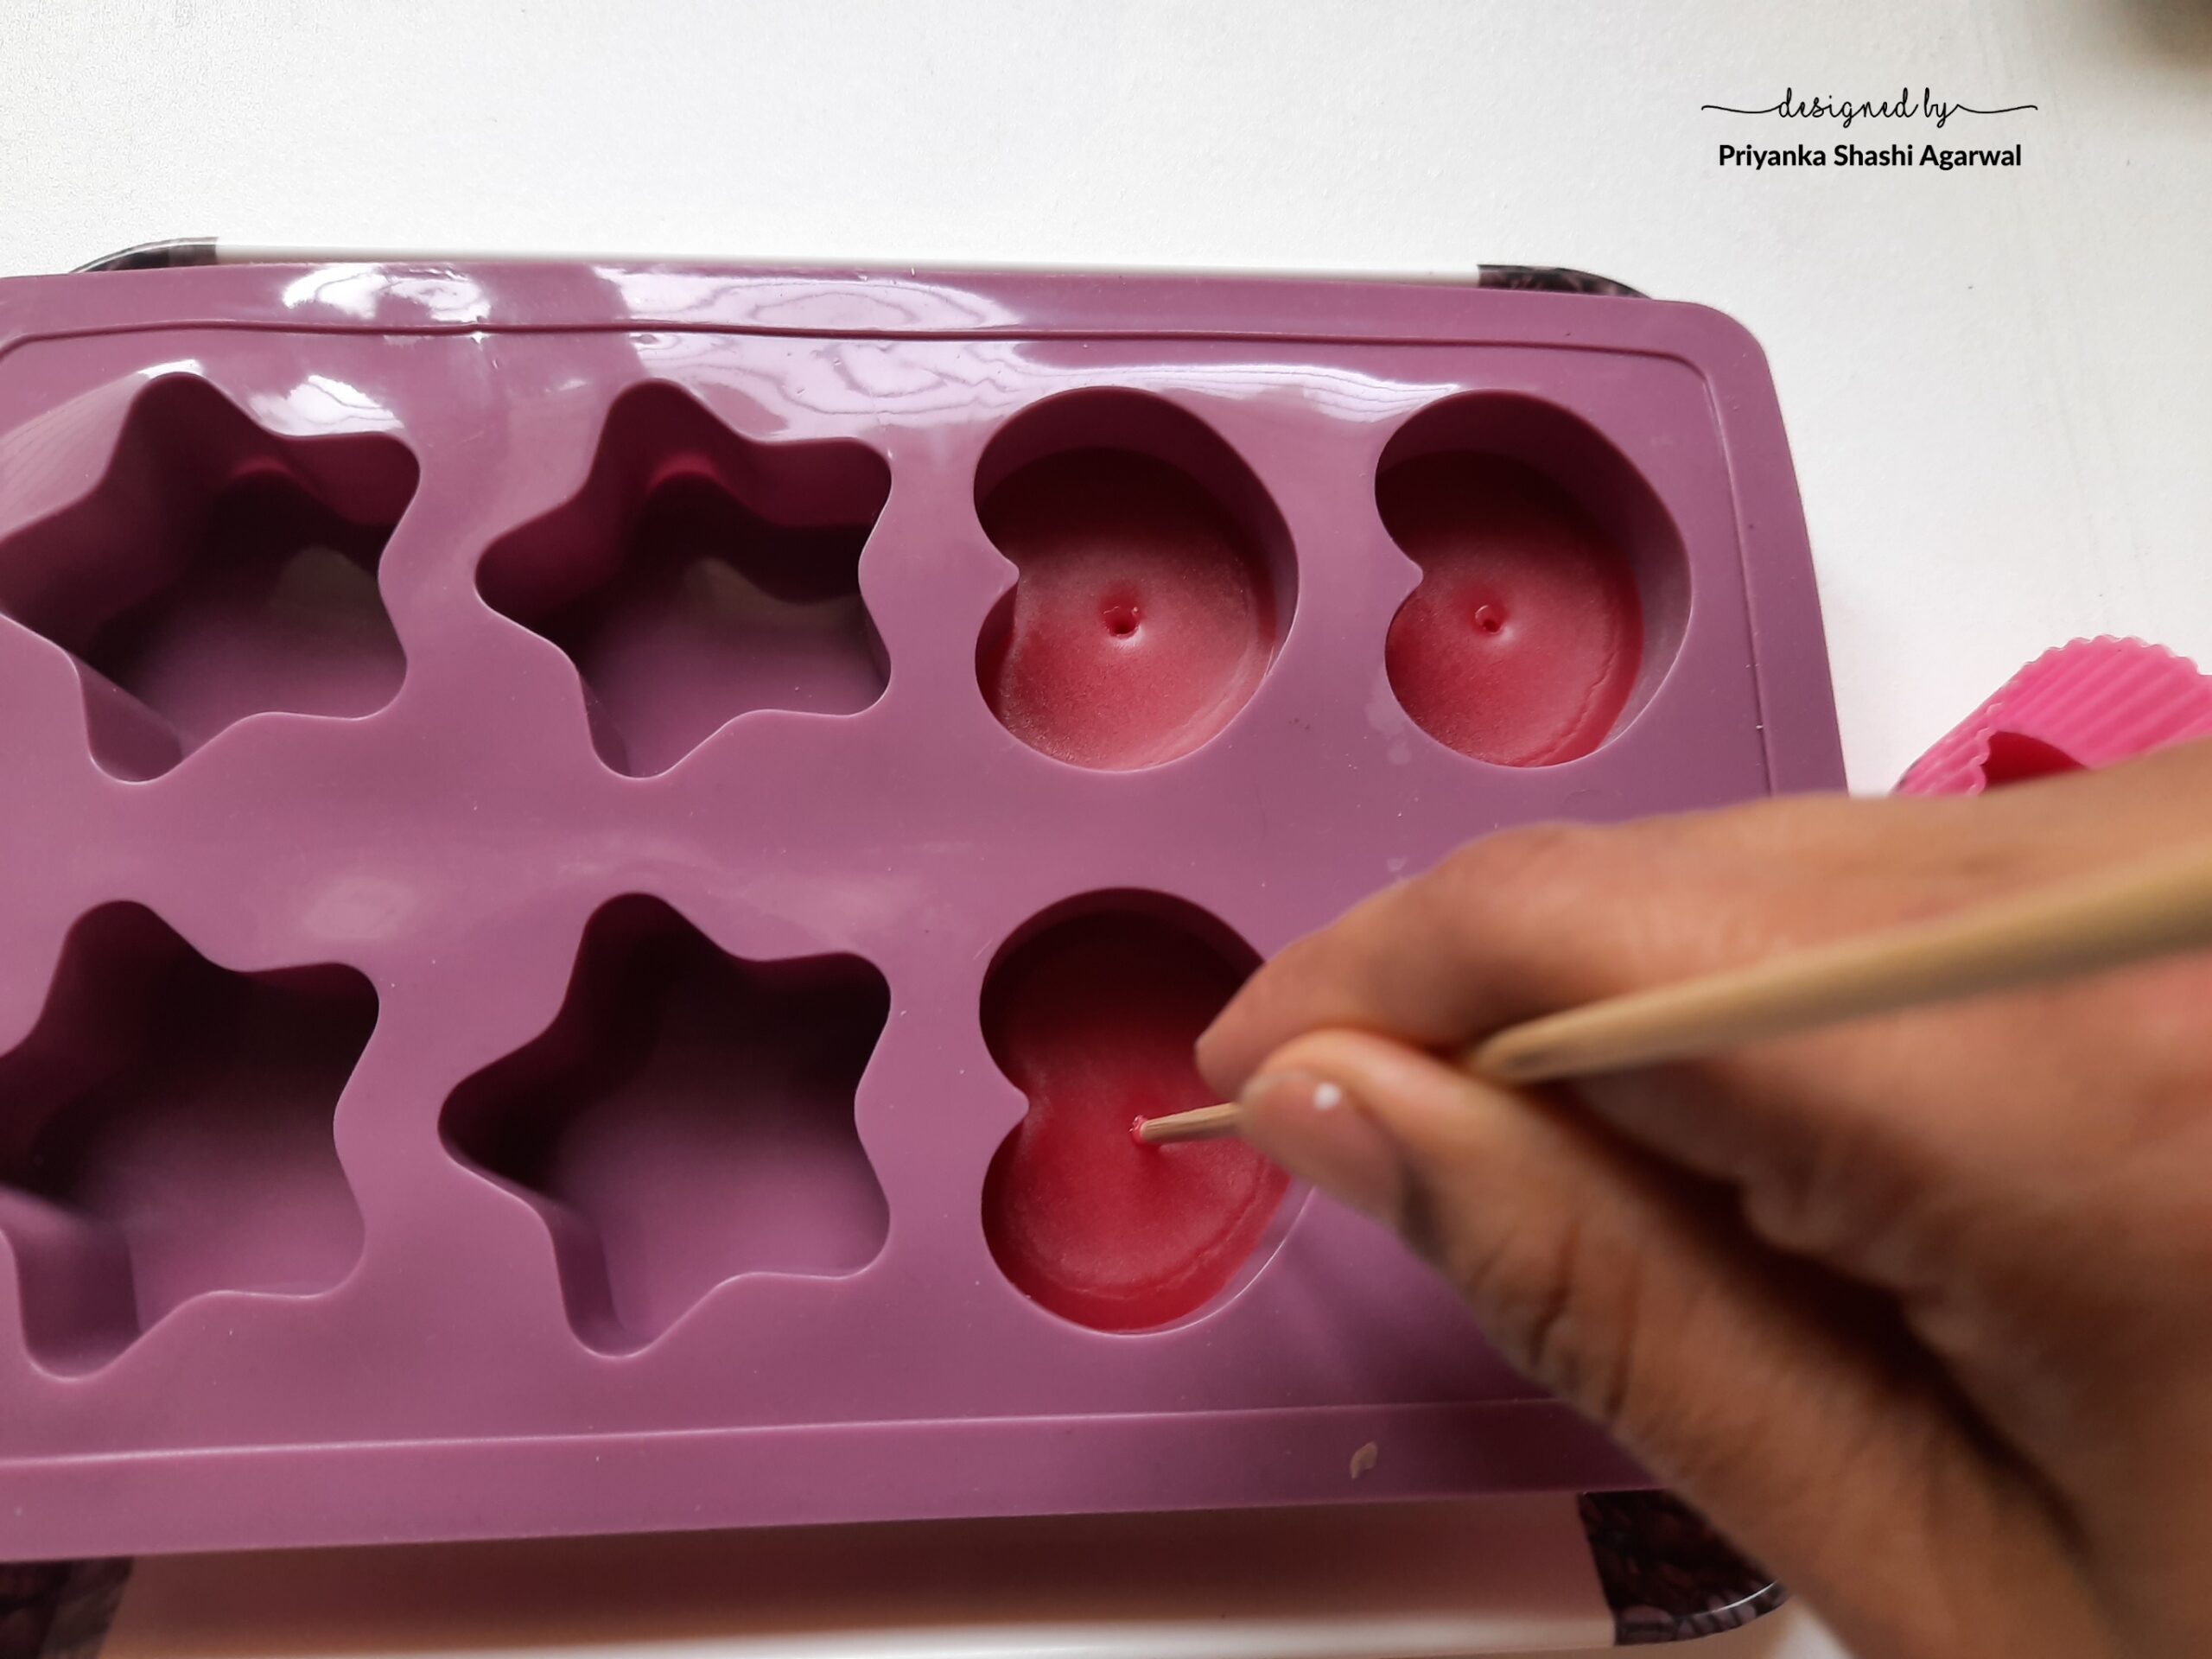
Once the wax start hardening but is yet soft, poke holes in each heart with the blunt side of a skewer.
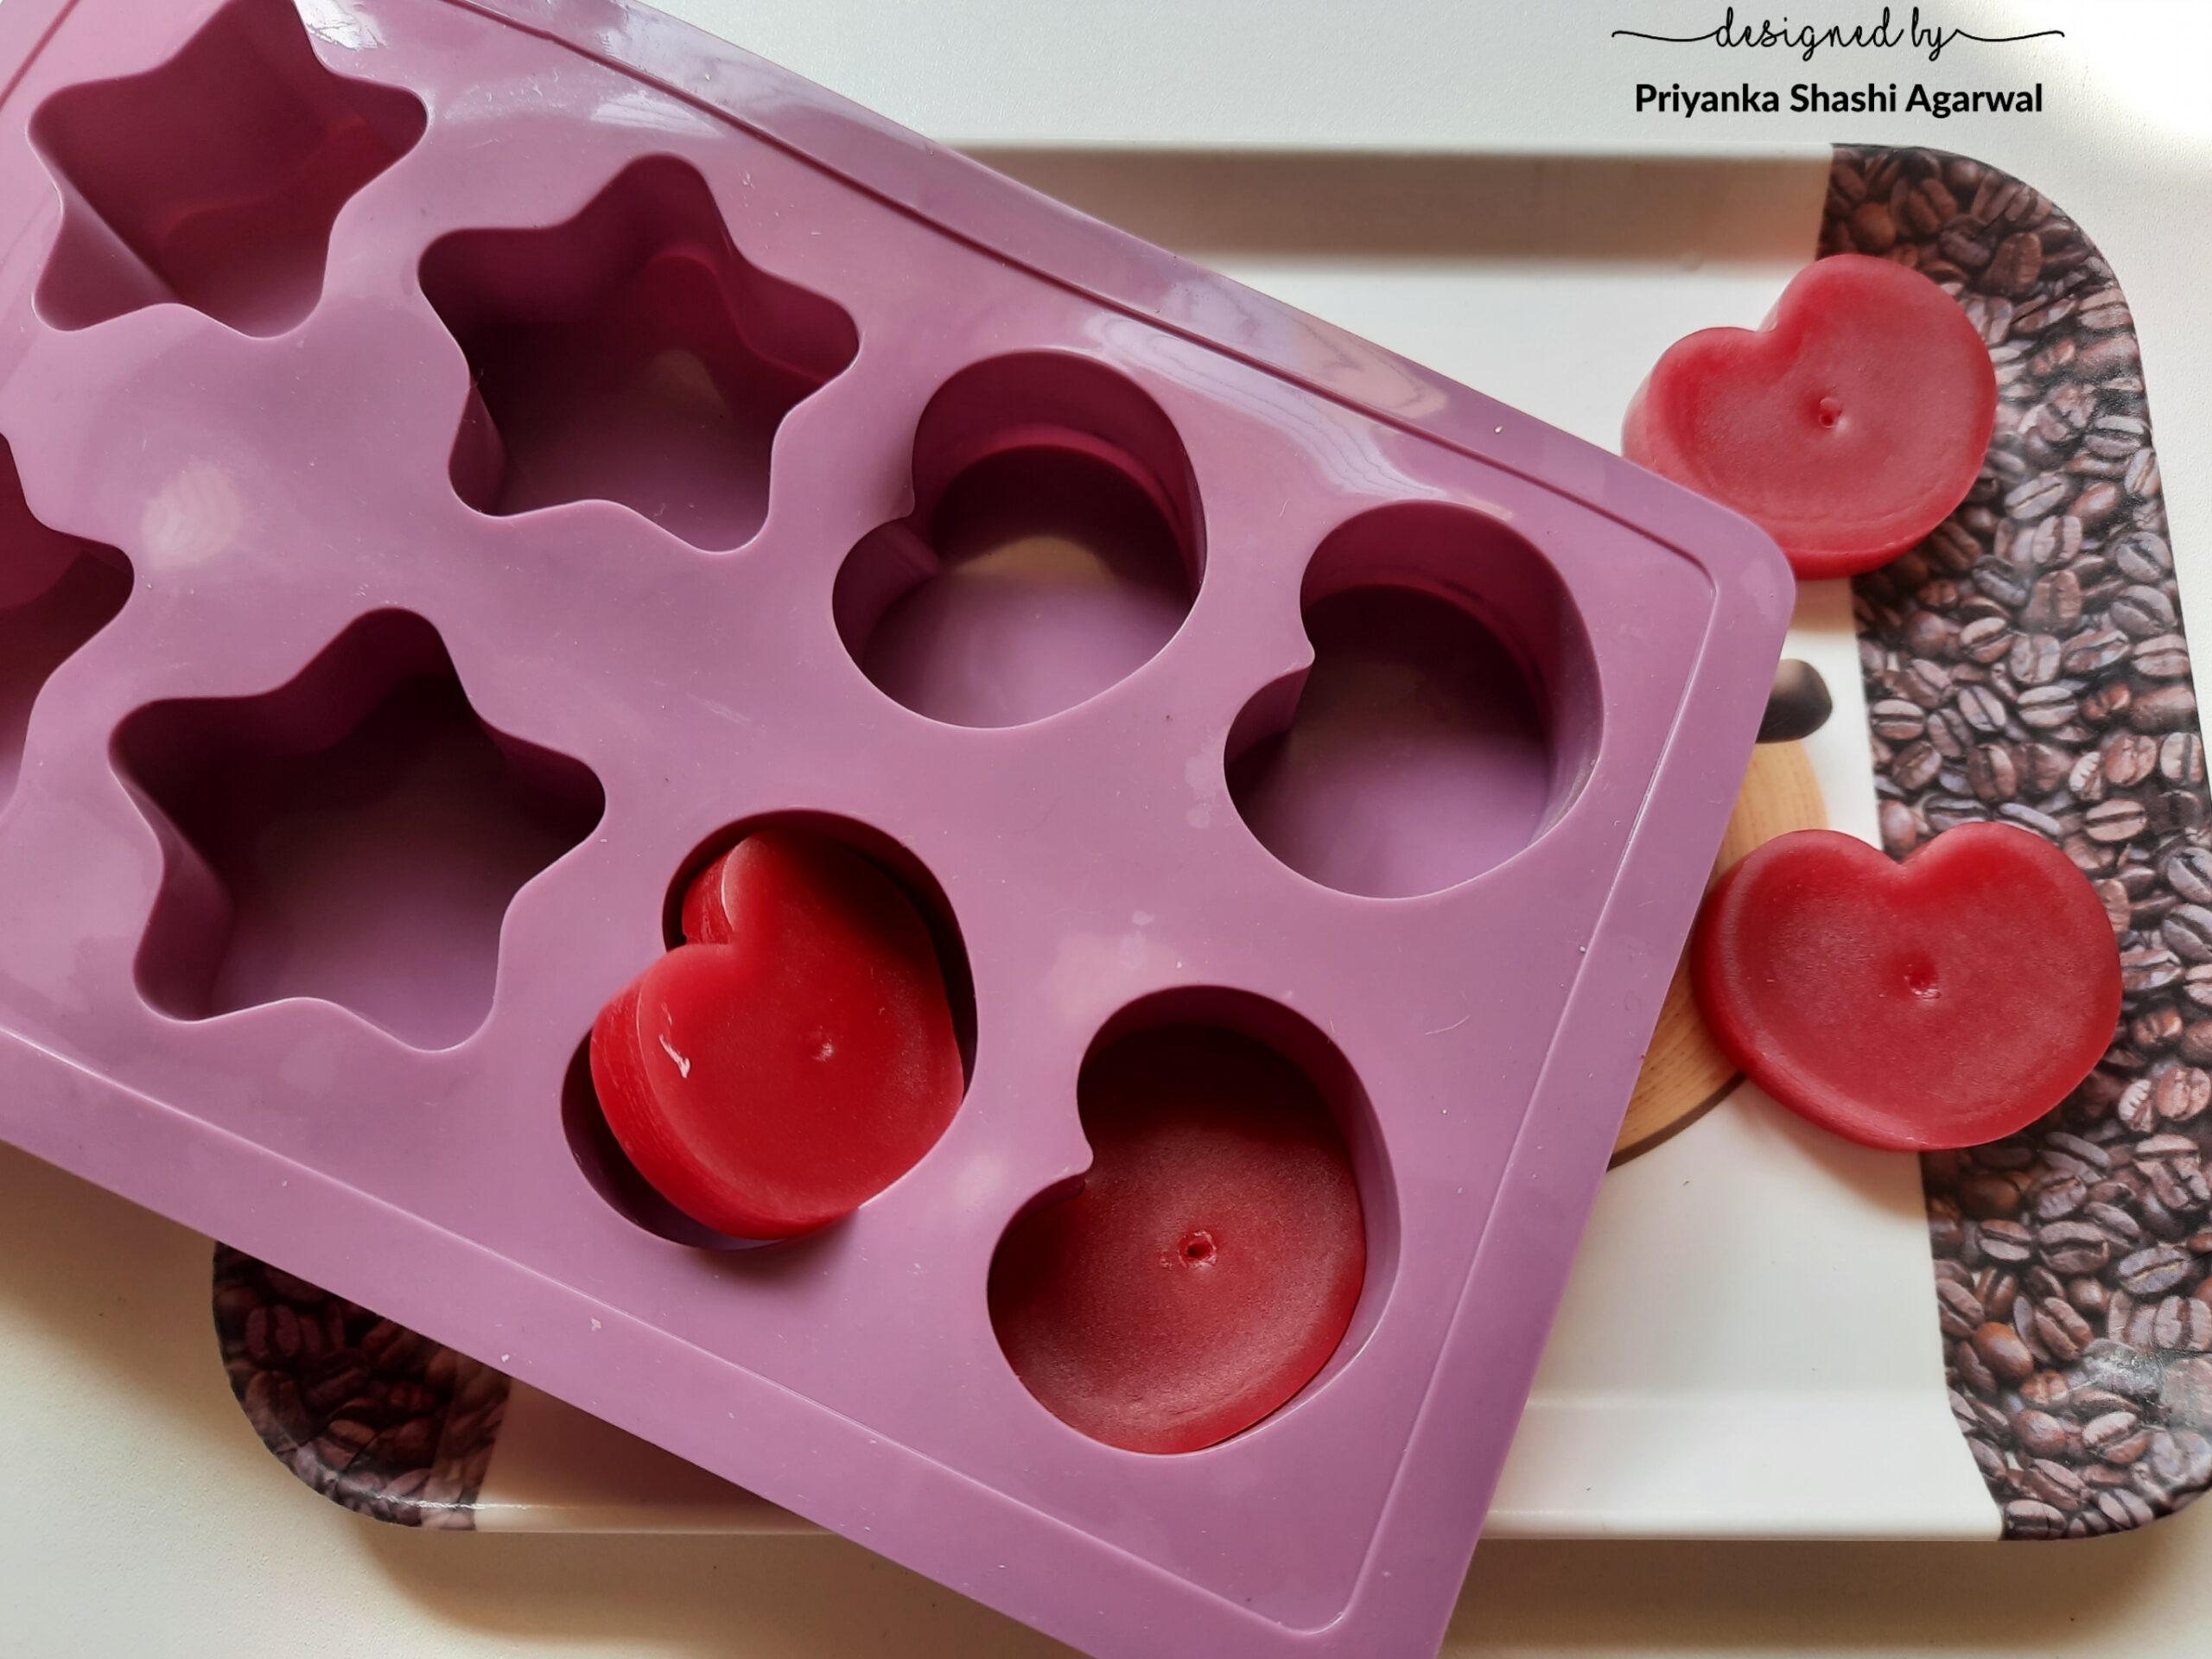
Step 6. Unmould the hearts
Step 7. Reheat the wax
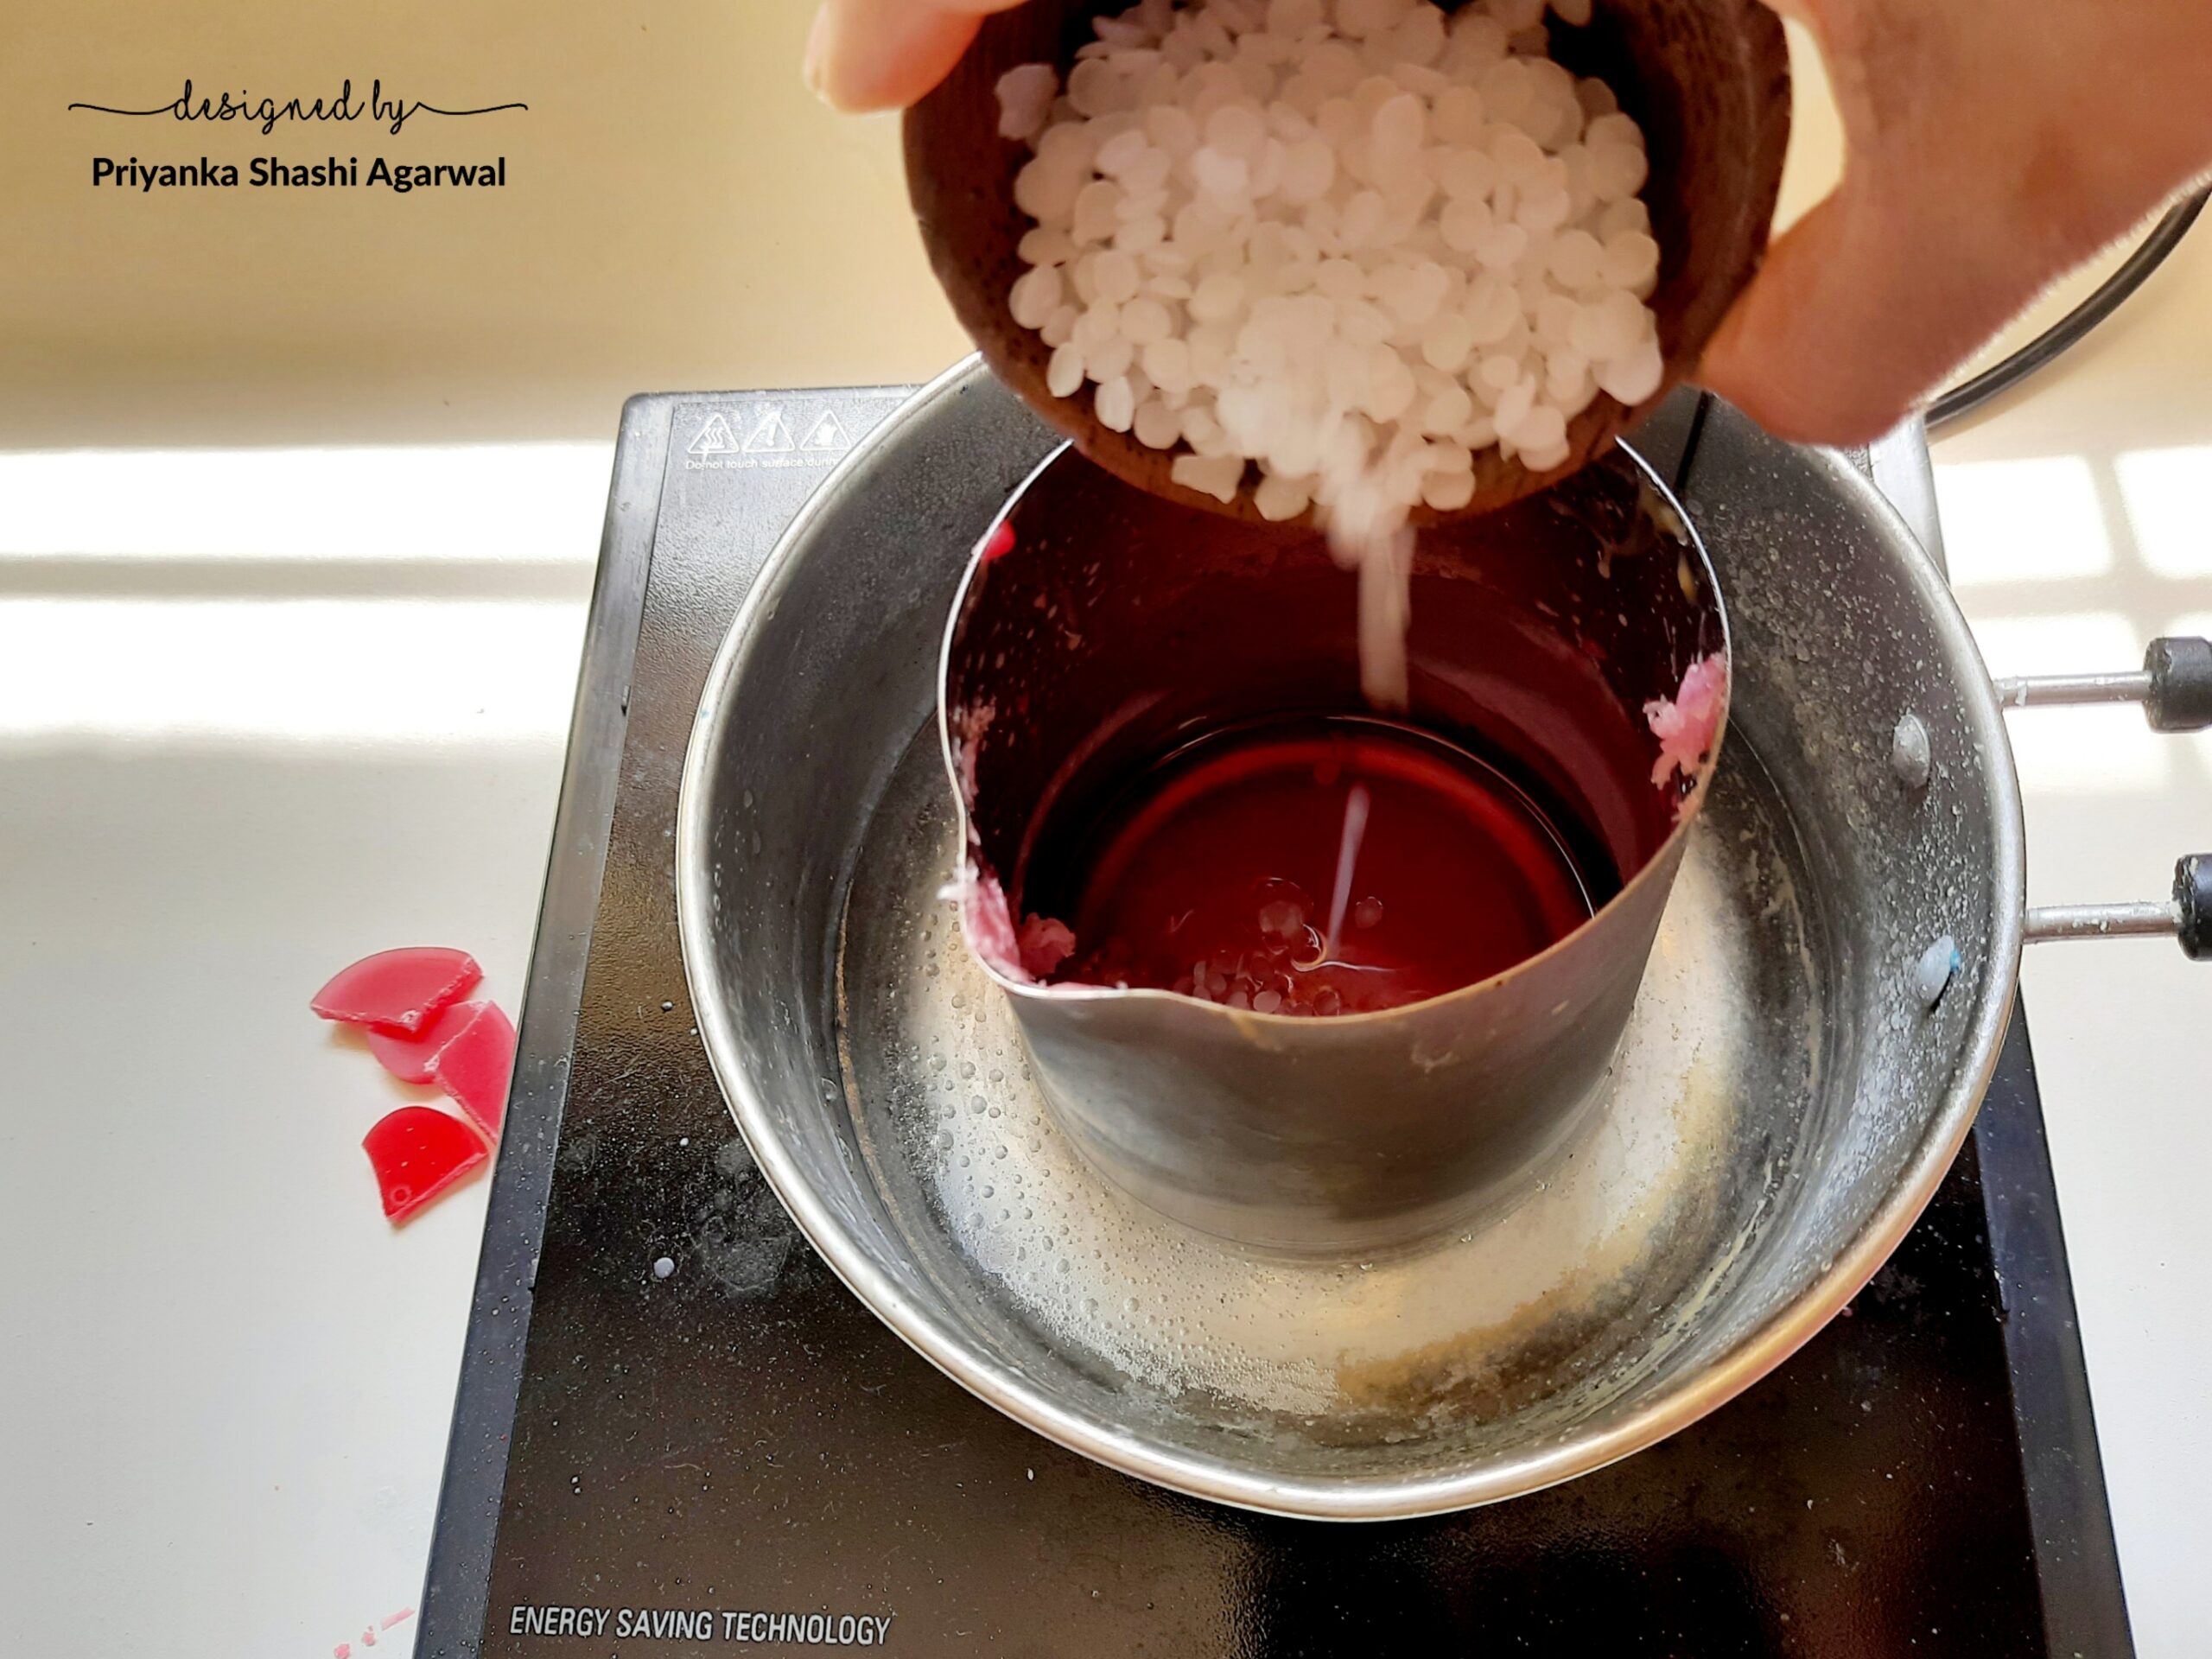
While the first pour is hardening, add white paraffin wax granules in the remaining red melted wax and re-melt it. It will create one tone lighter shade of red than the previous one. Keep this in your mind that add enough of paraffin wax so that it should be again extra than how much you have to pour.
Step 8. Repeat the process
Repeat the wax melting, pouring & unmolding process several times to get many layers. I did it seven times. Since you’re adding plain white wax to the remnants of your wax, it gets a shade lighter each time you melt it, making an Ombre effect.
Step 9. Check the holes
Check all the holes, if any of it got closed or shrank or like me, you forgot to poke one batch or two. Make the holes with a hot metal skewer/crochet needle.
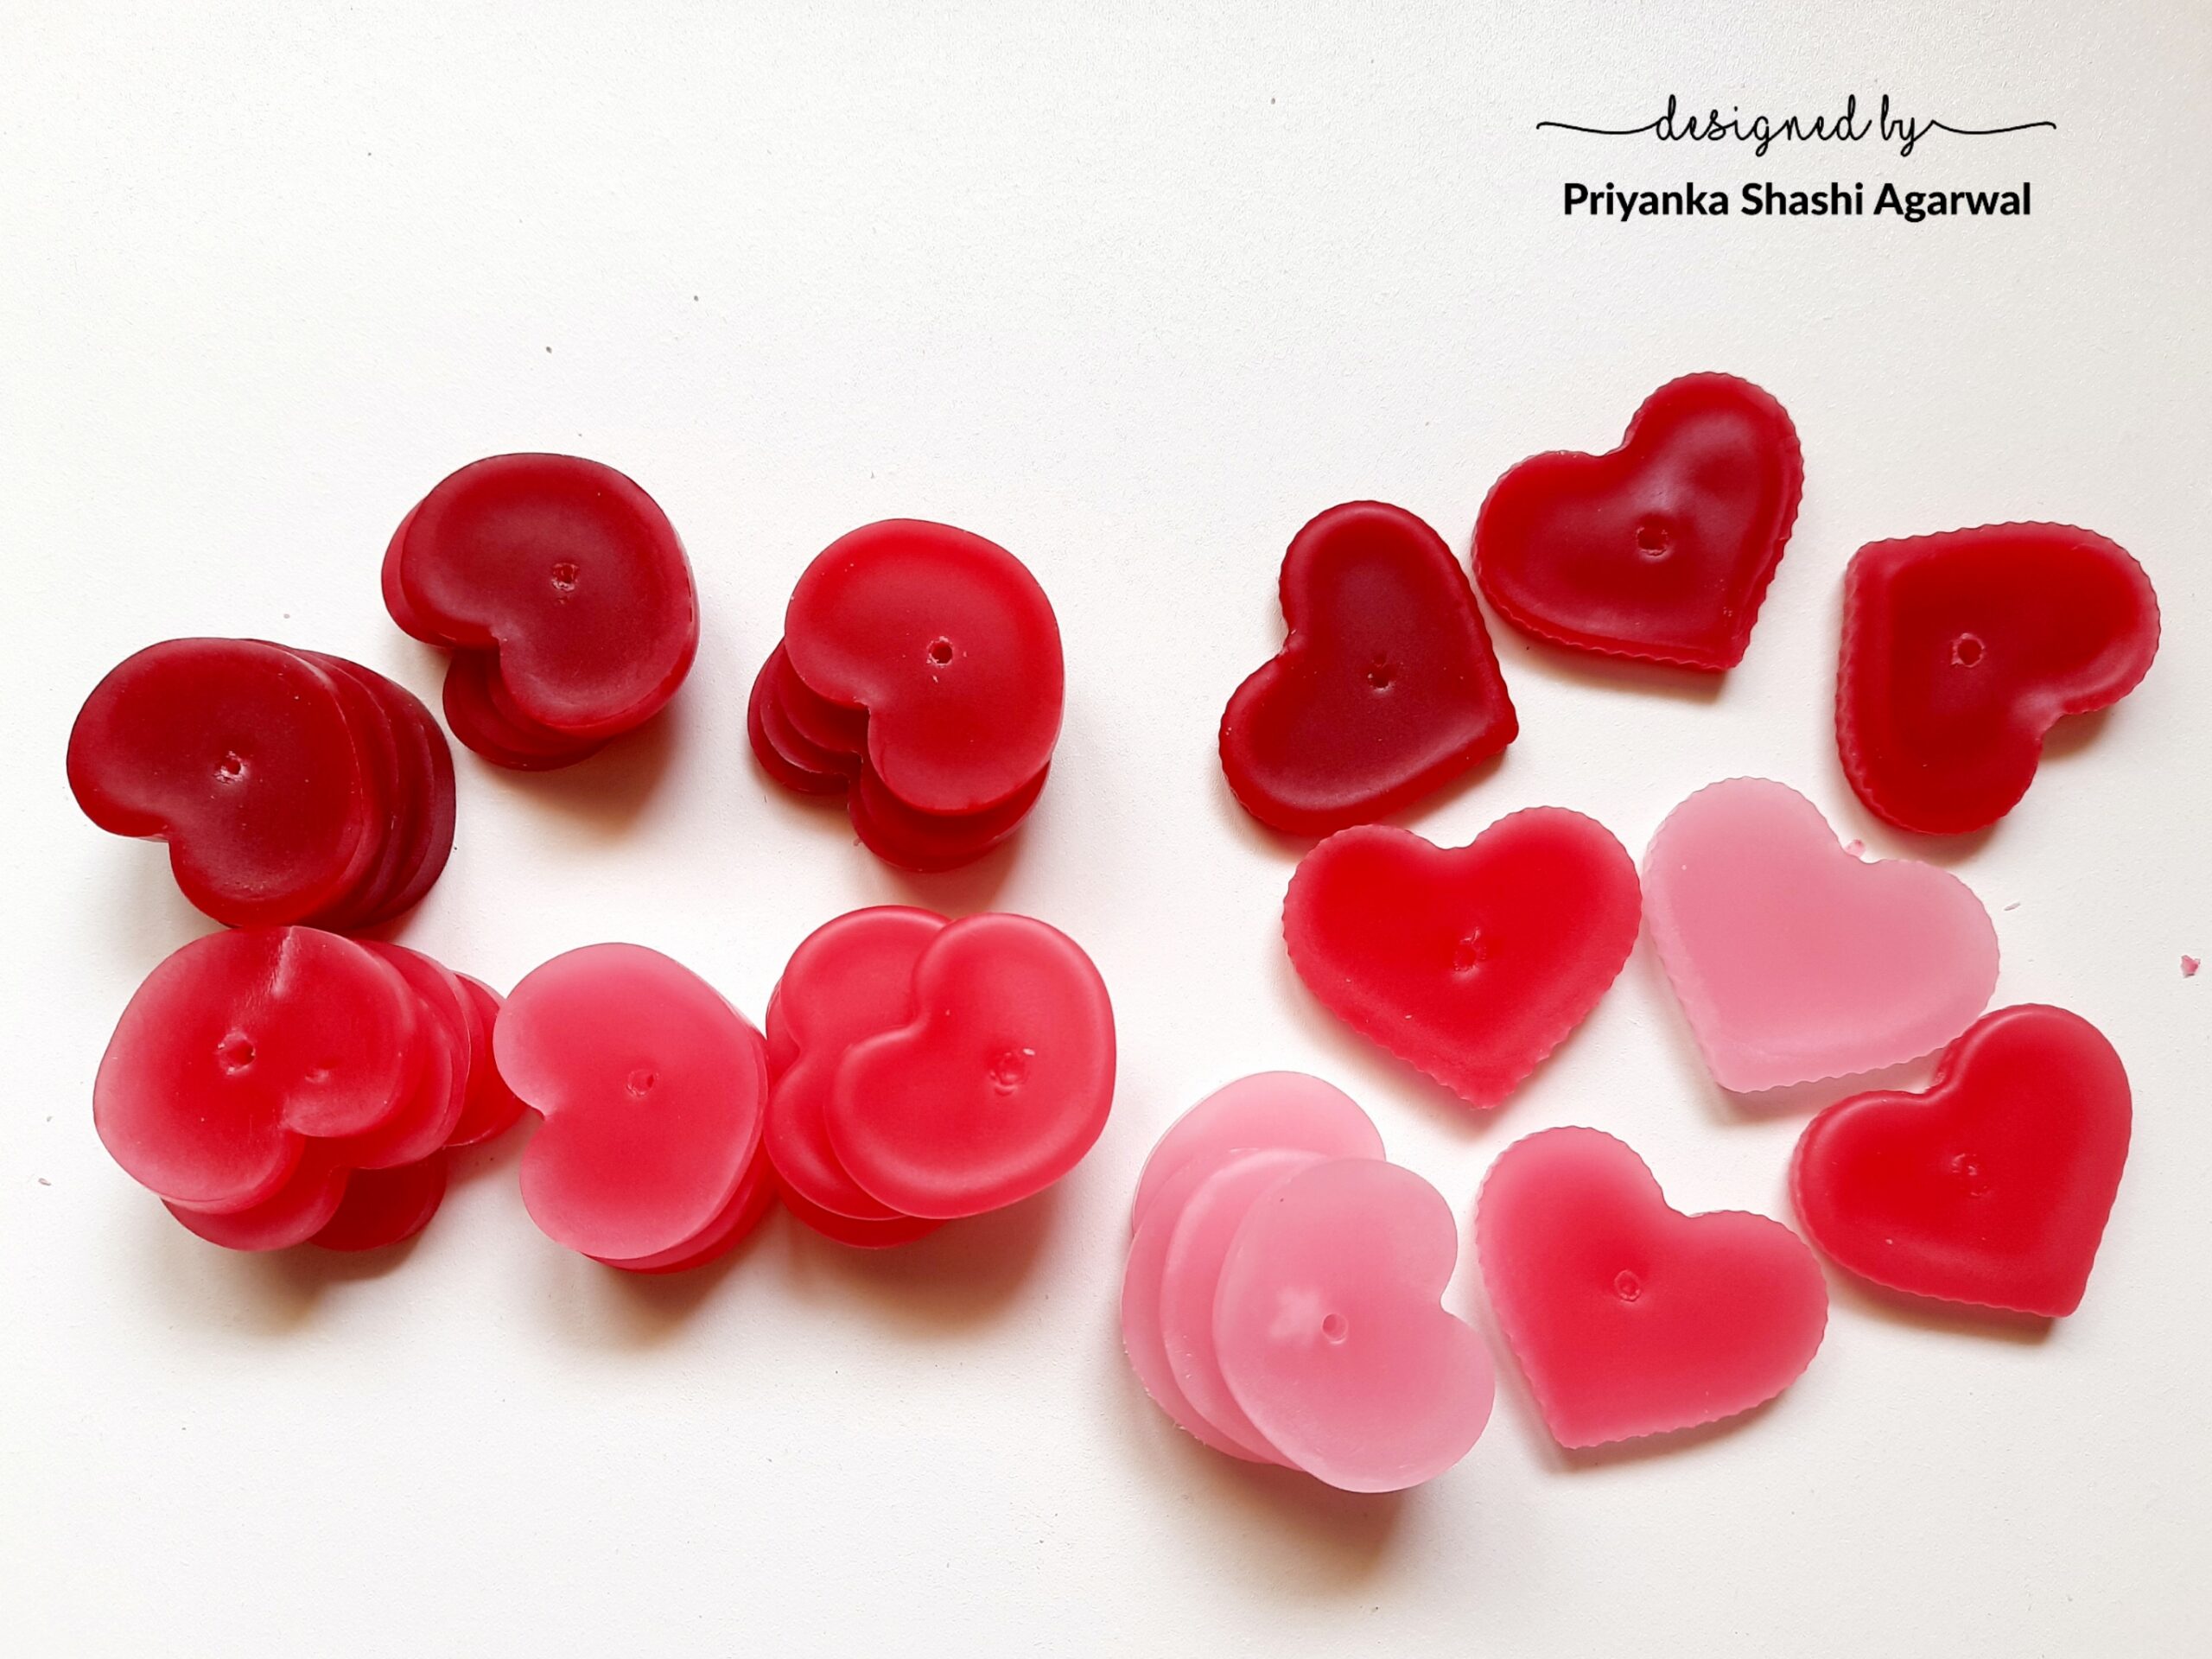
Step 10. Stack the hearts
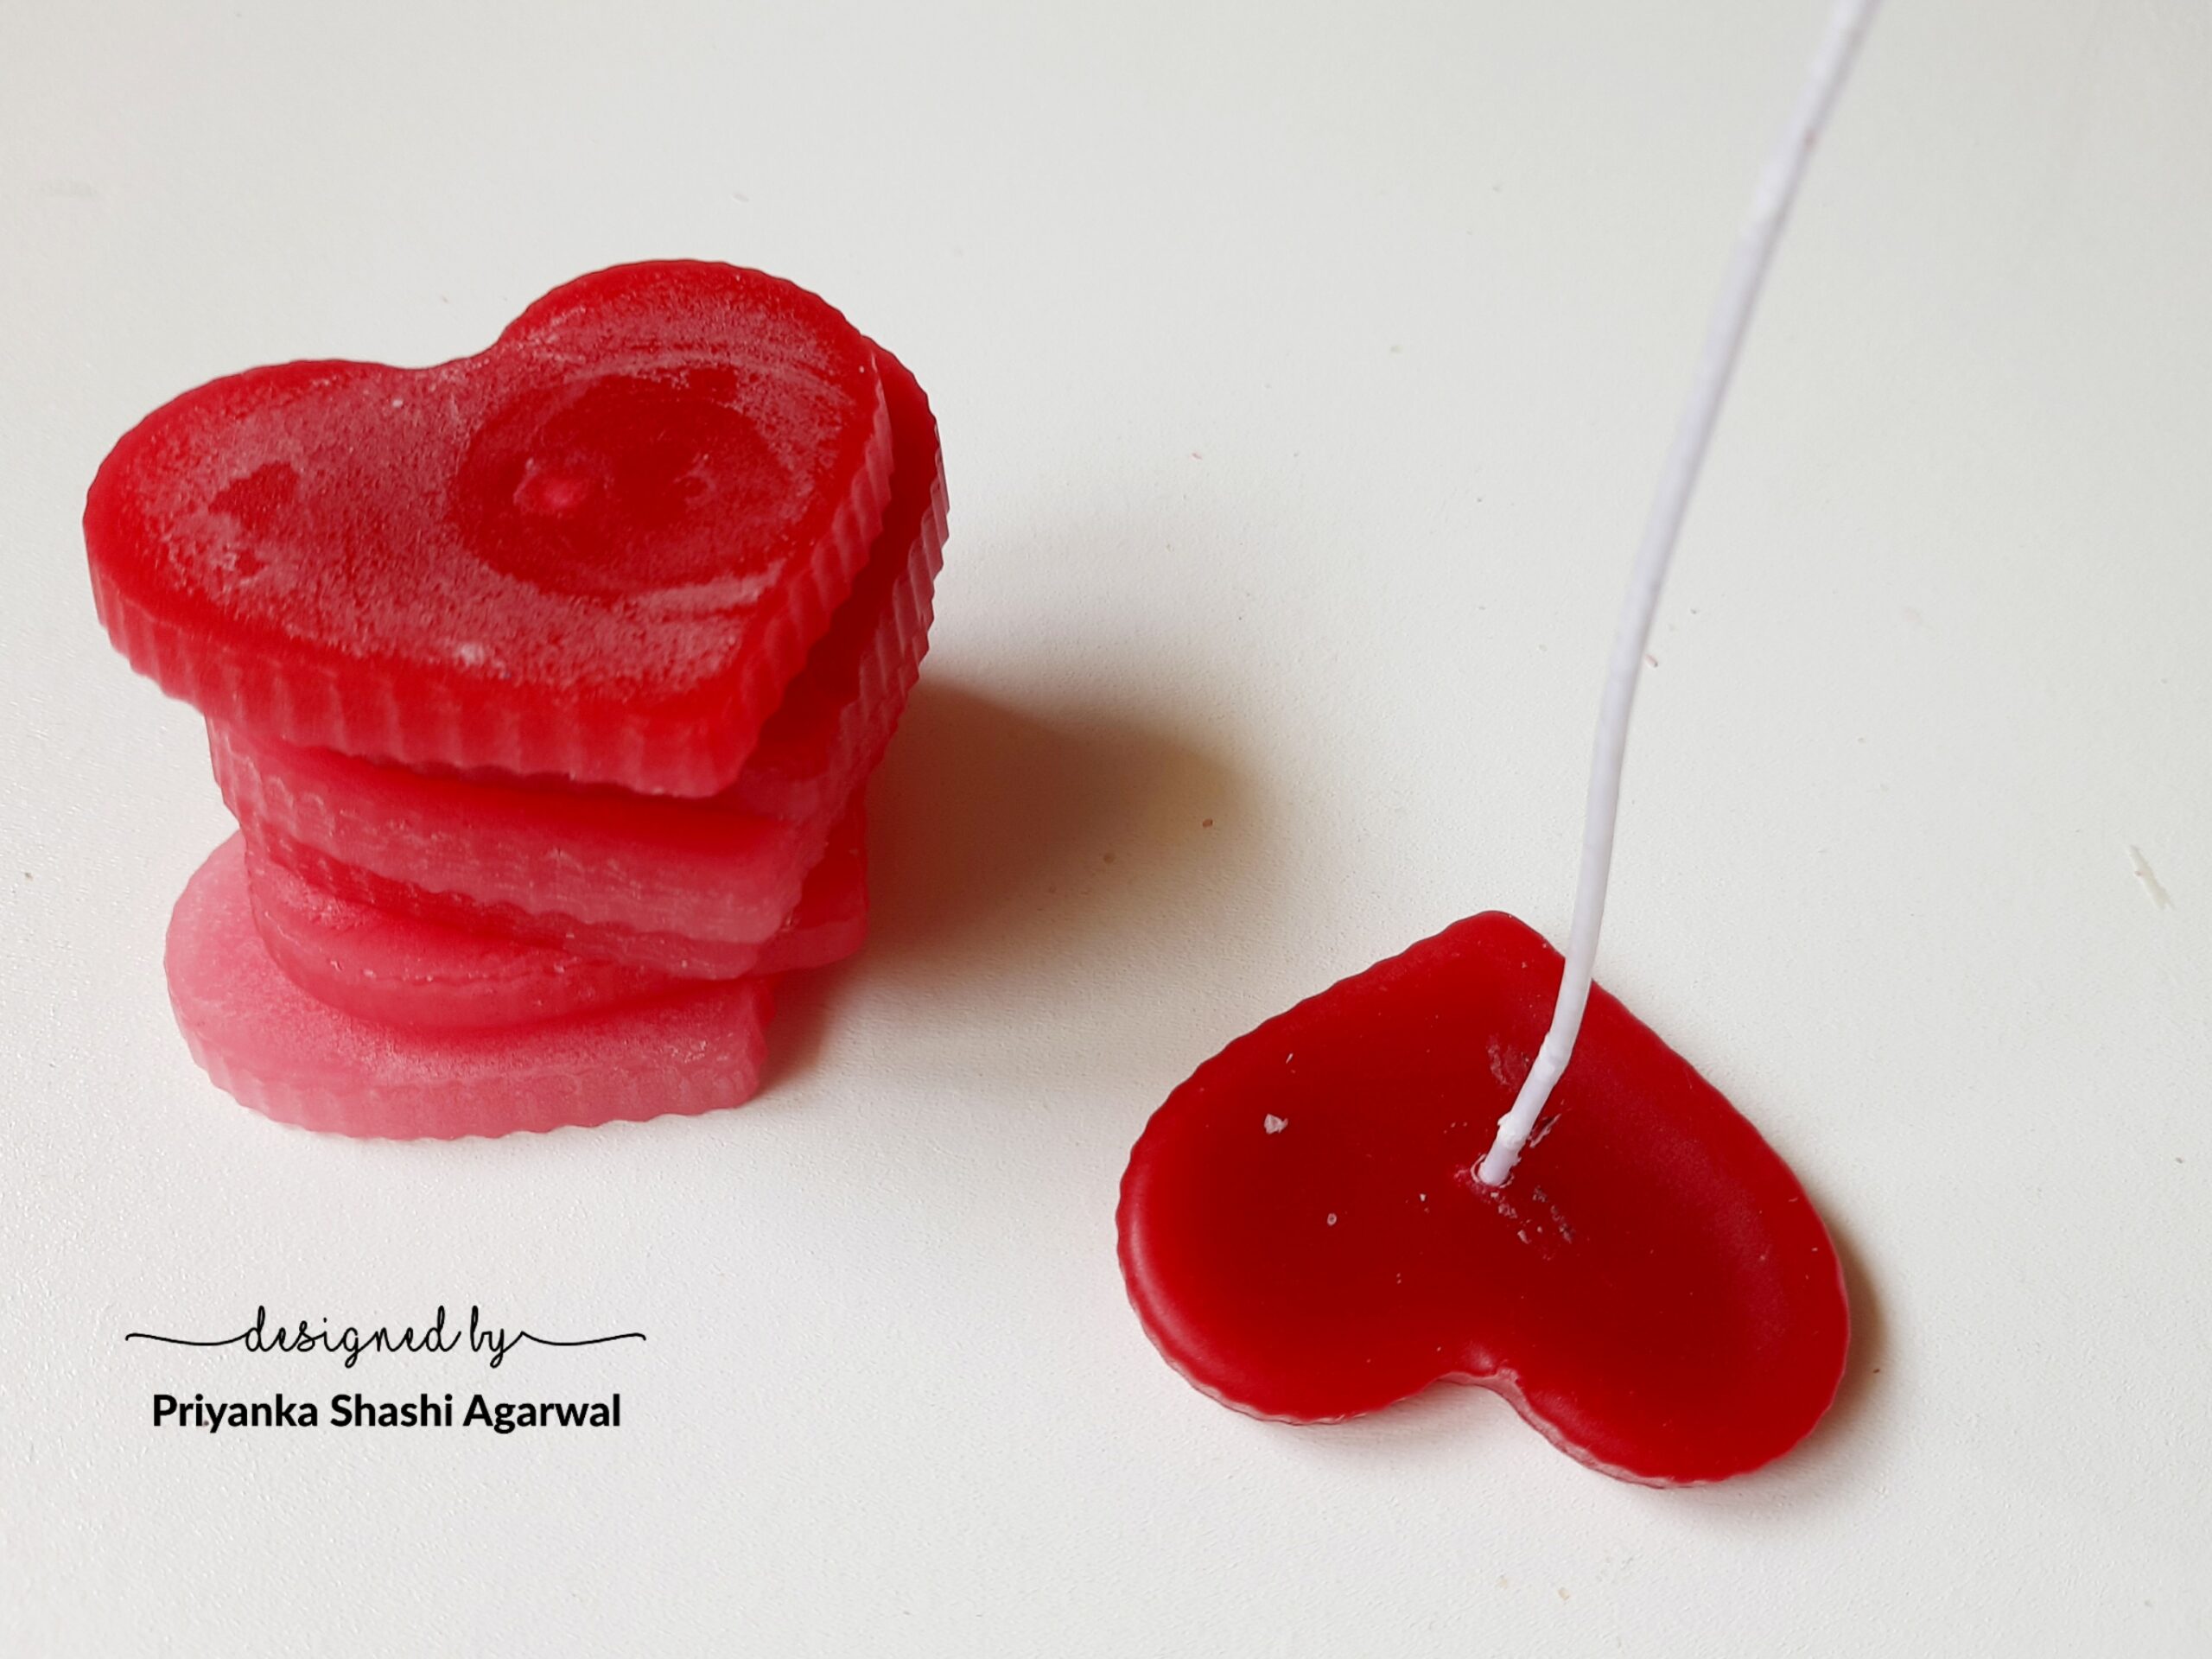
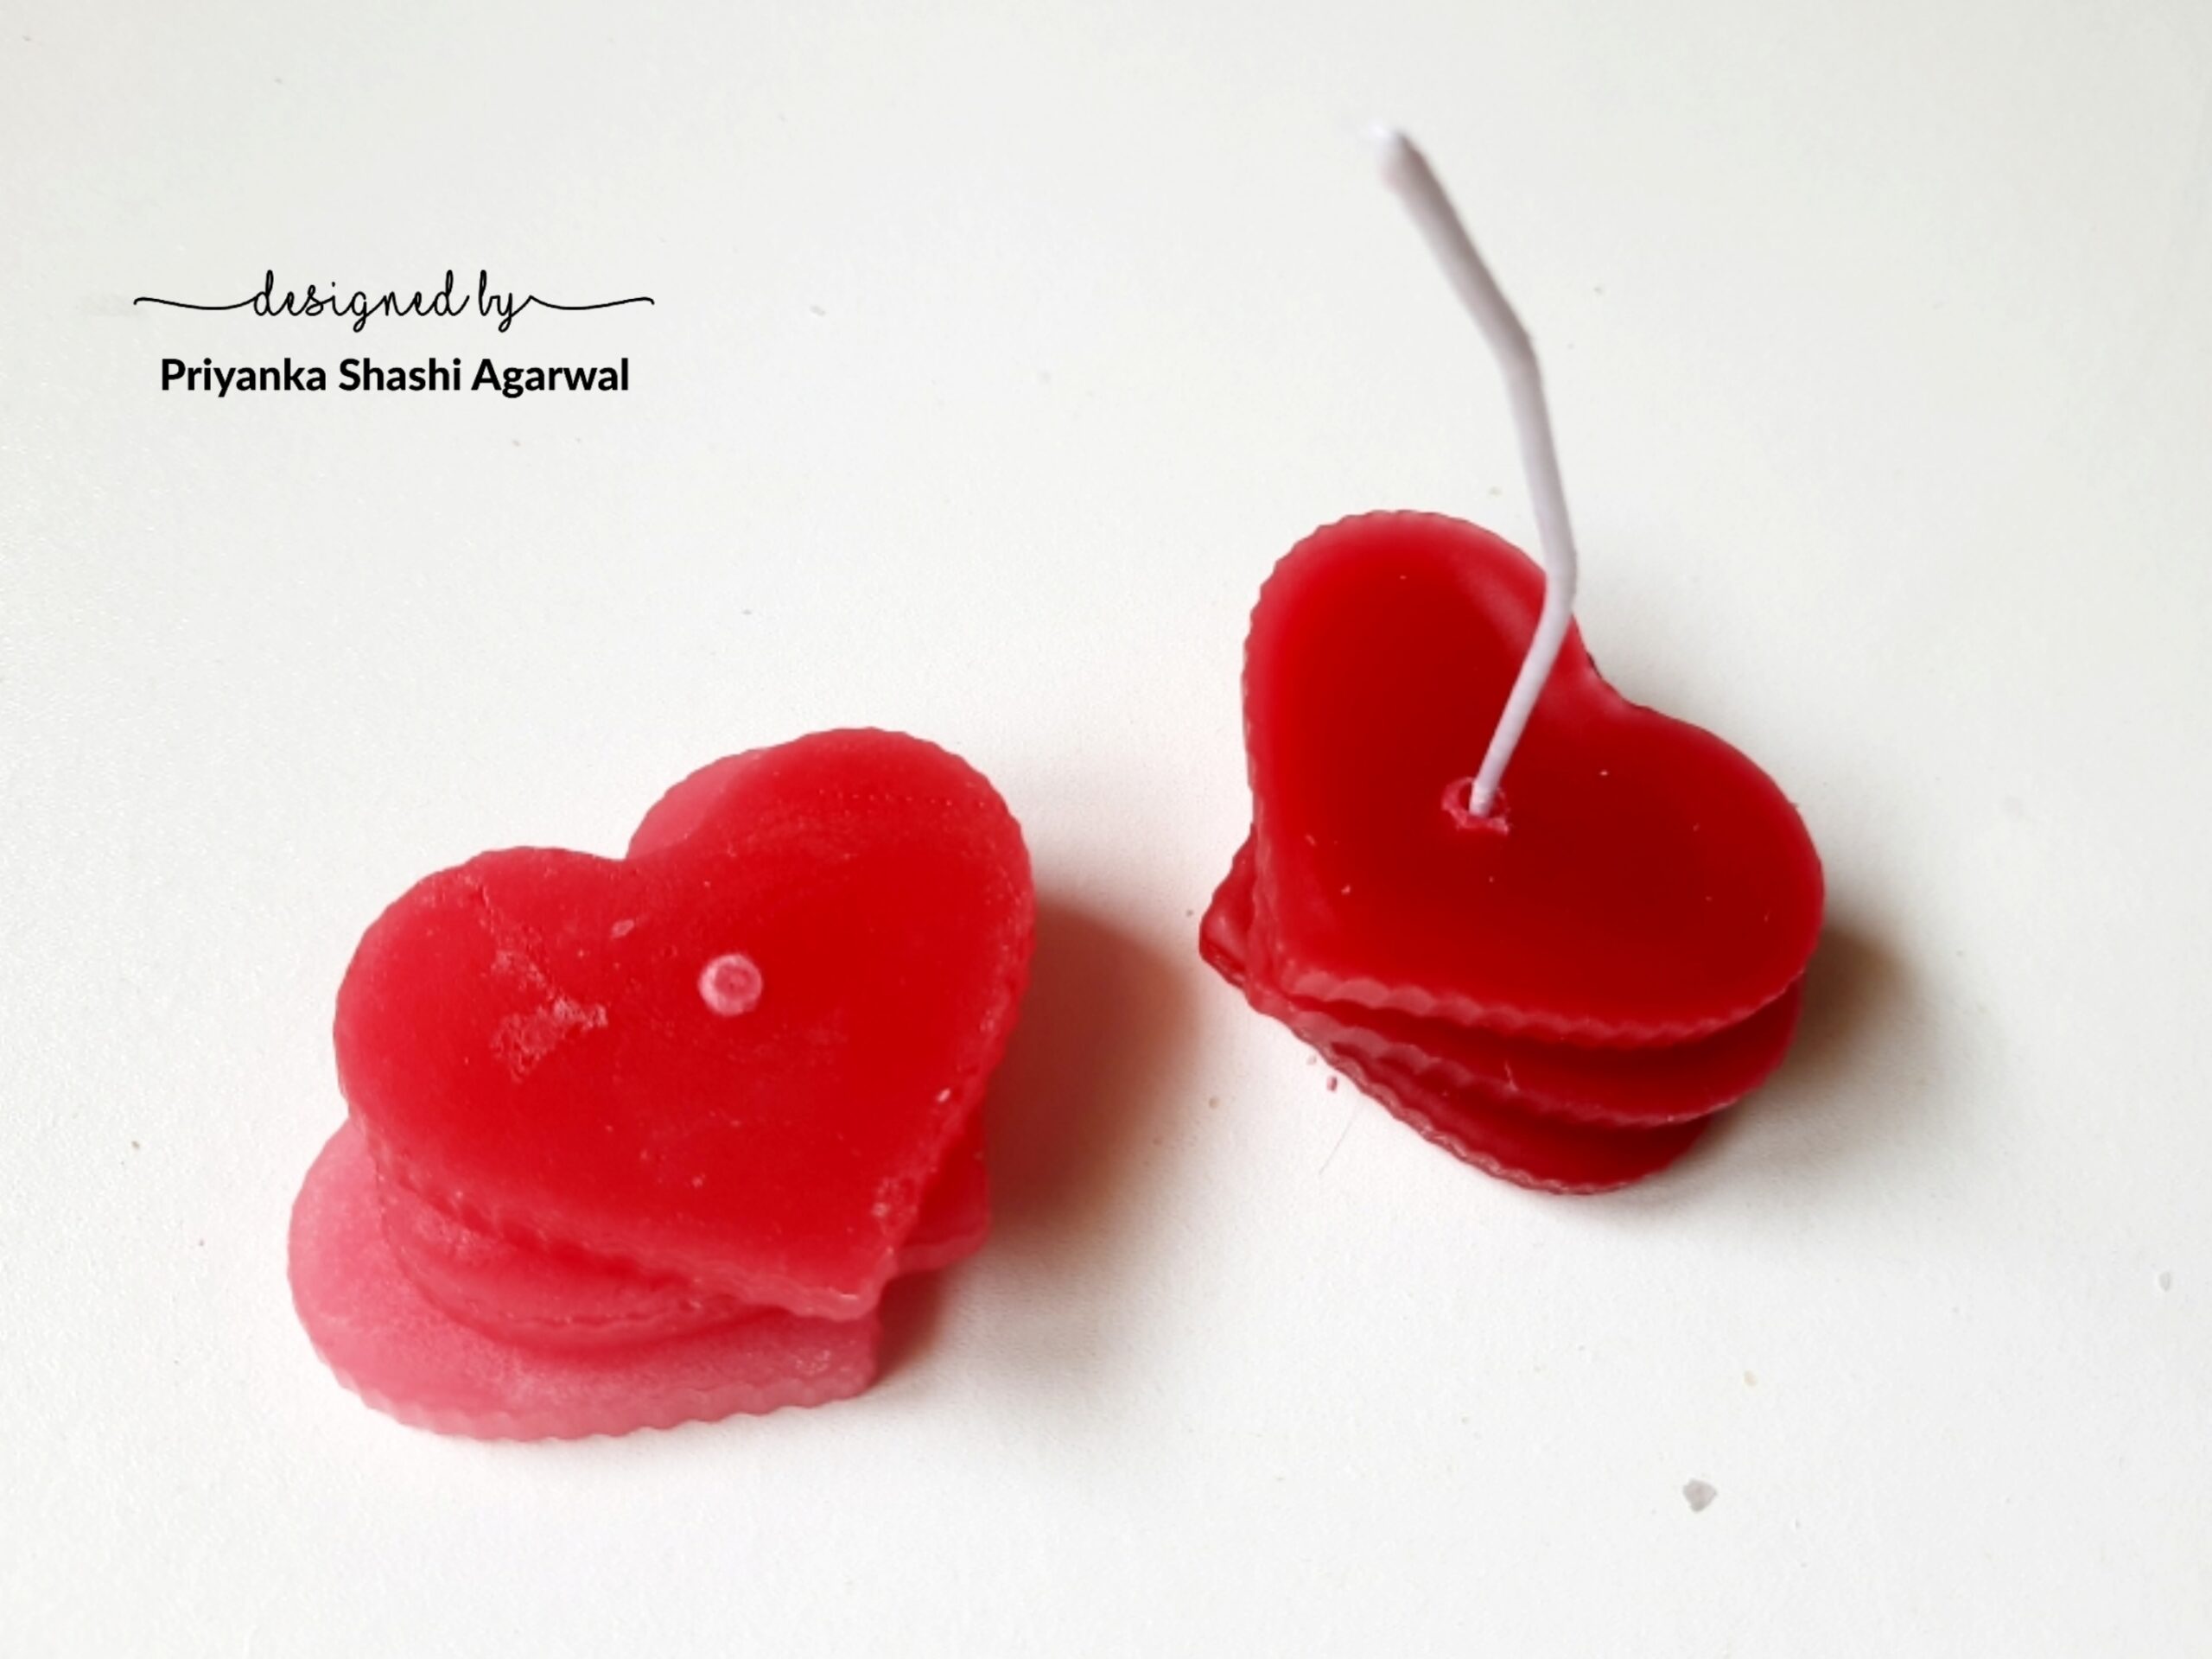
Stack the hearts onto a tabbed wick through the holes you poked in each heart.
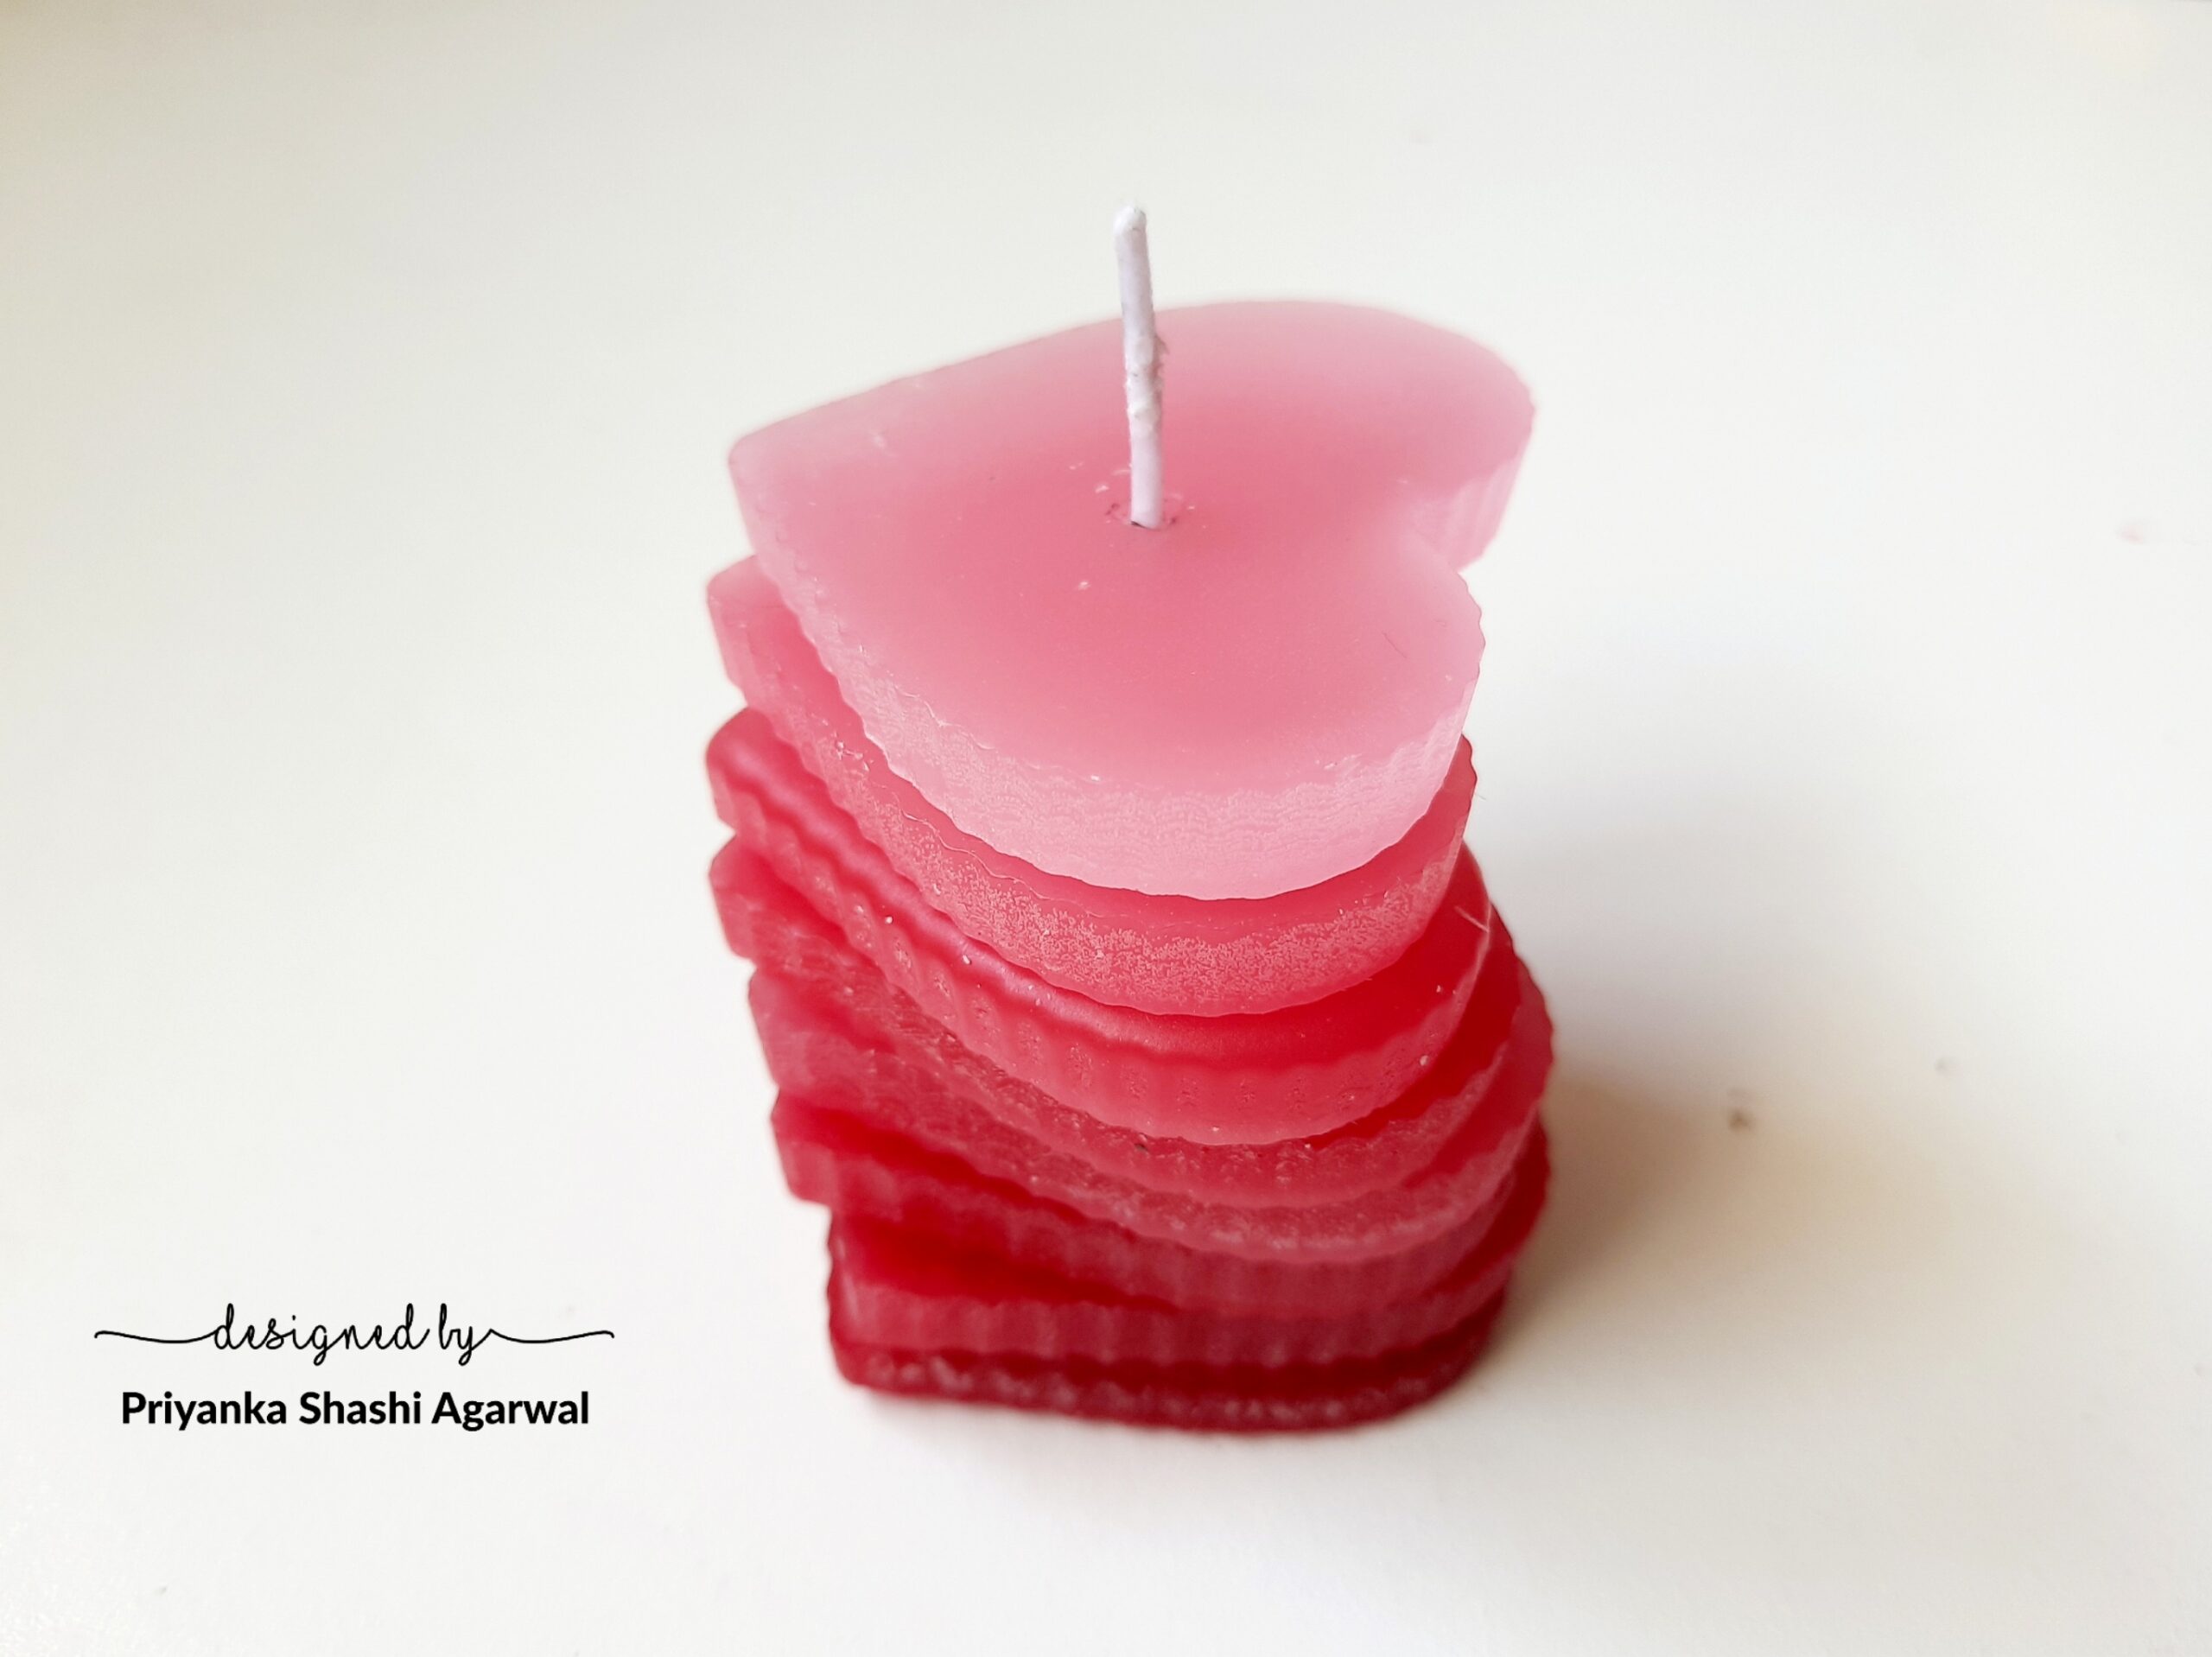
Place the hearts from red at bottom to the lightest pink on top to get an ombre (gradual shaded) effect. Trim the wick on top and you’re ready to go.
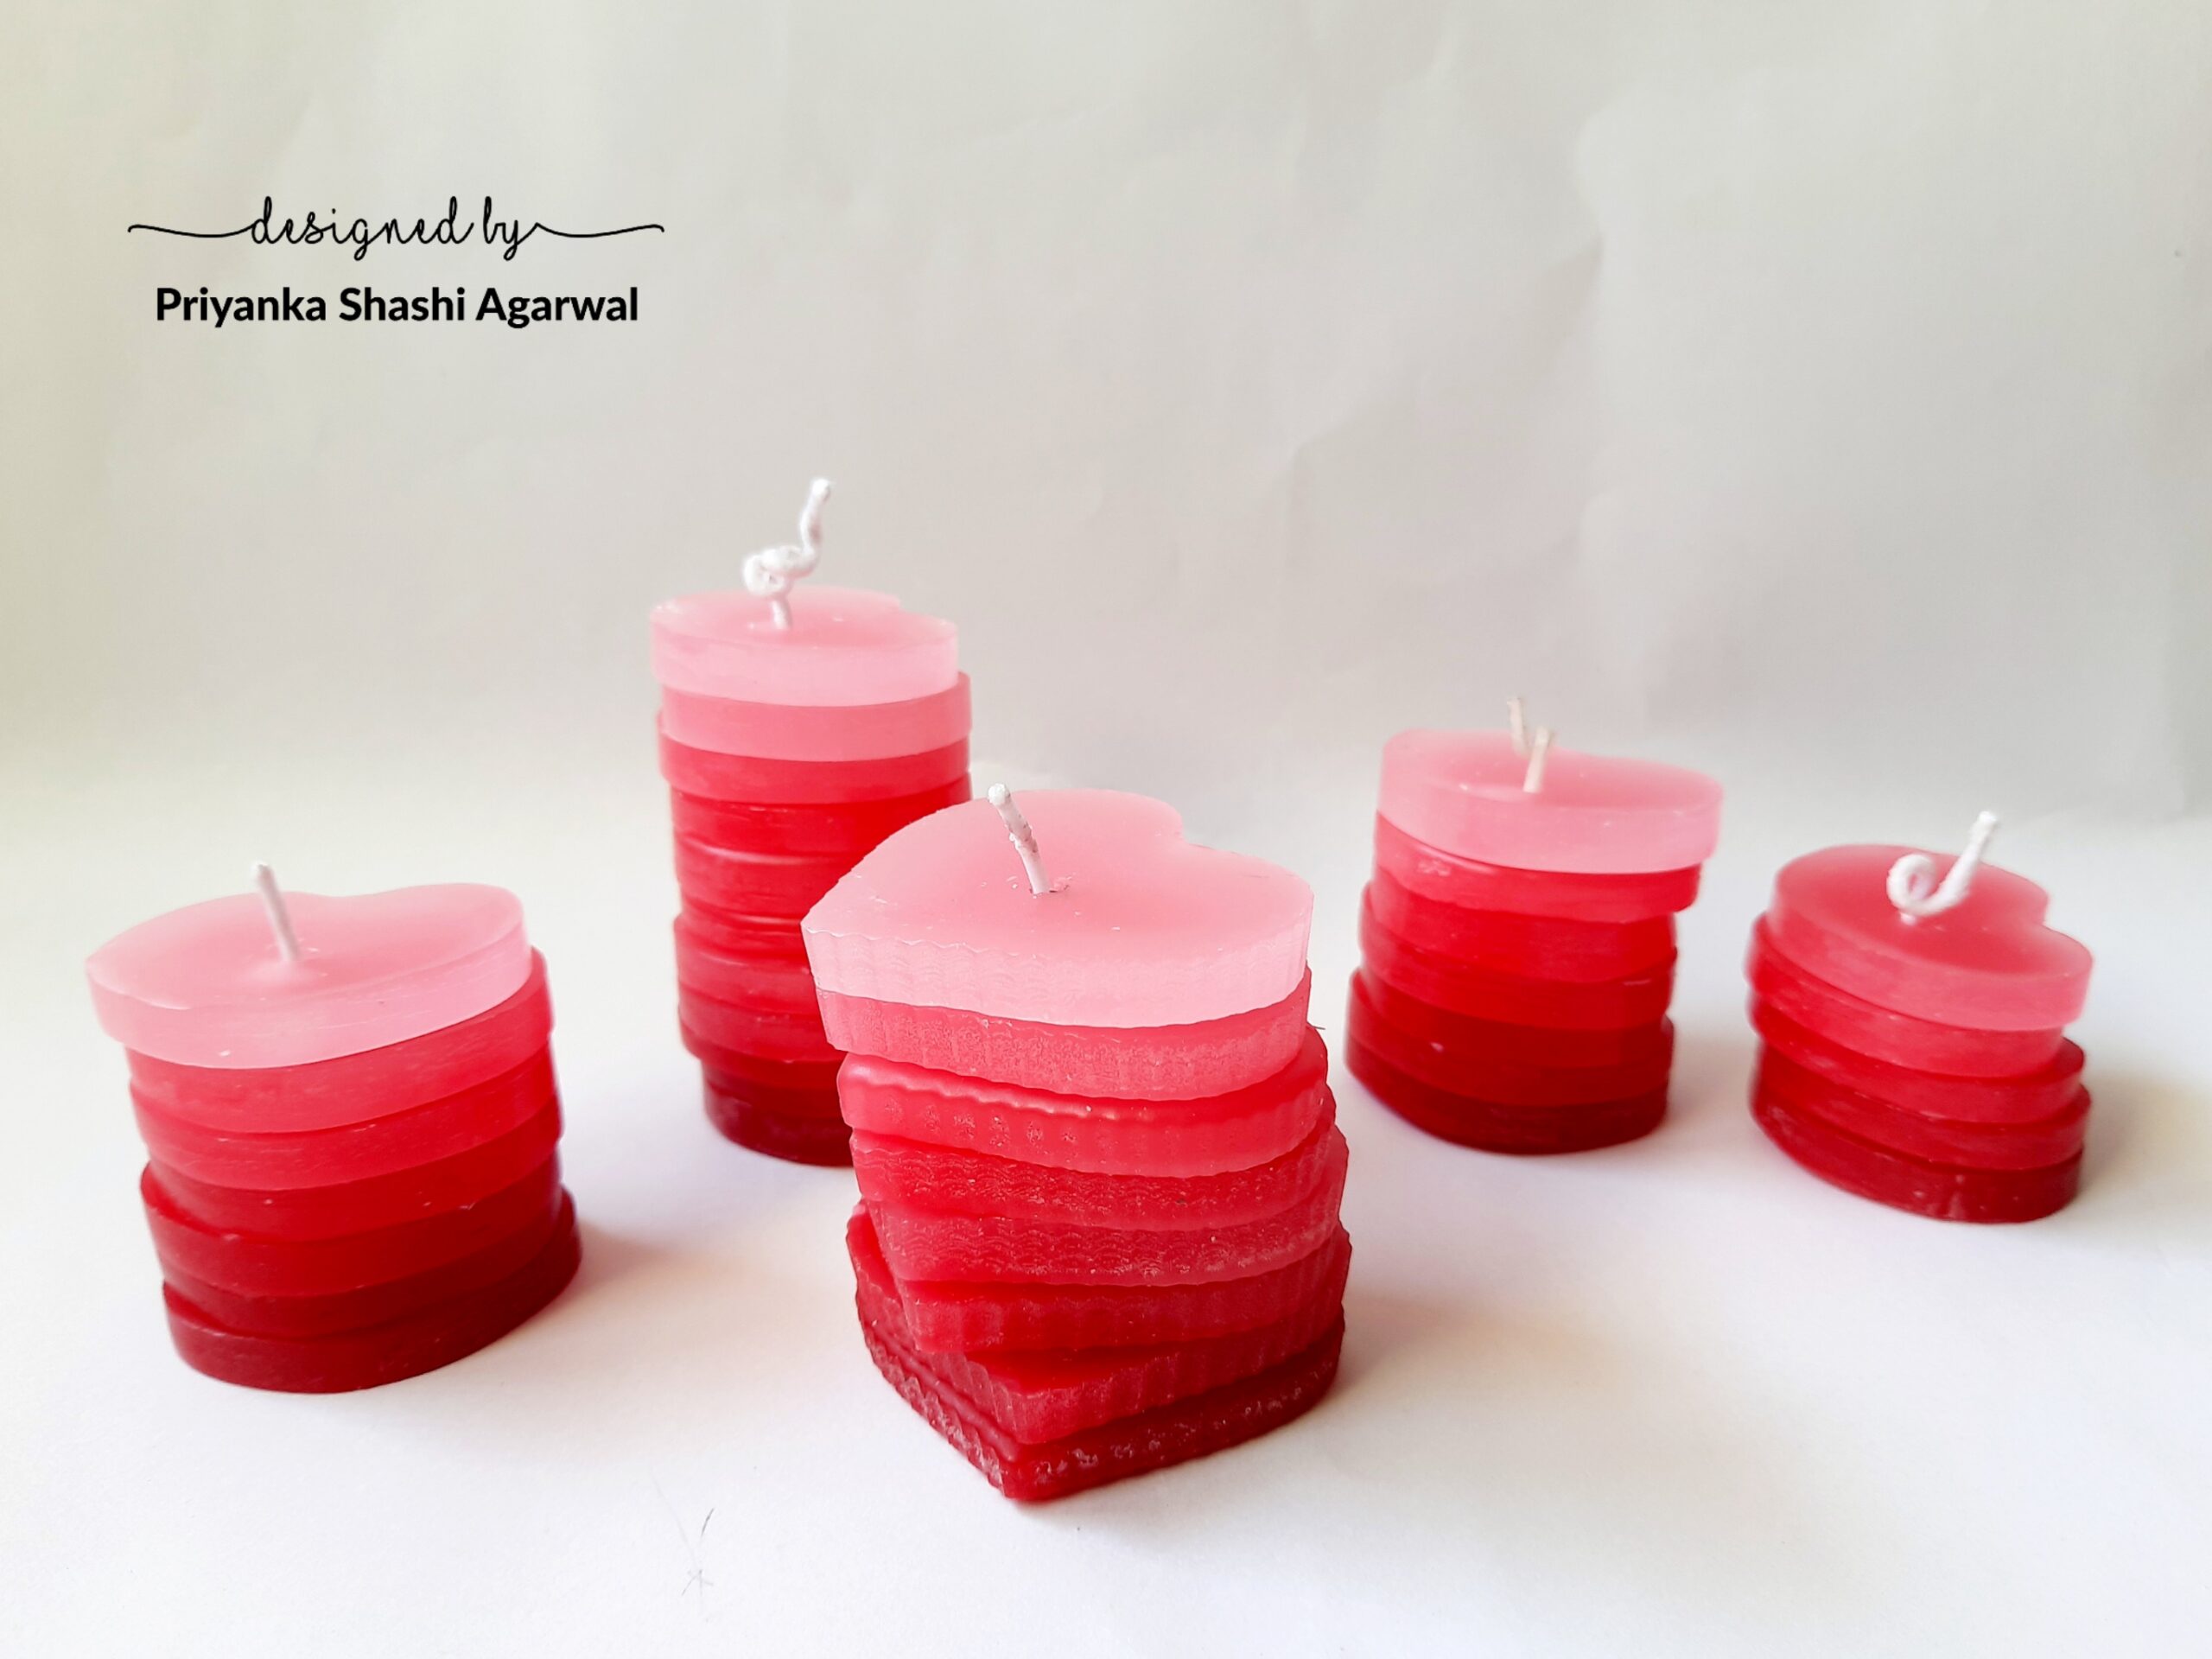
In the same way stack up all the other candles also. The uneven layers and non-precise centering make each candle unique. The sizes of the candles also necessarily need not be identical. Try random sizes from dark to light, that’s it.
See how beautiful they look when you light them.
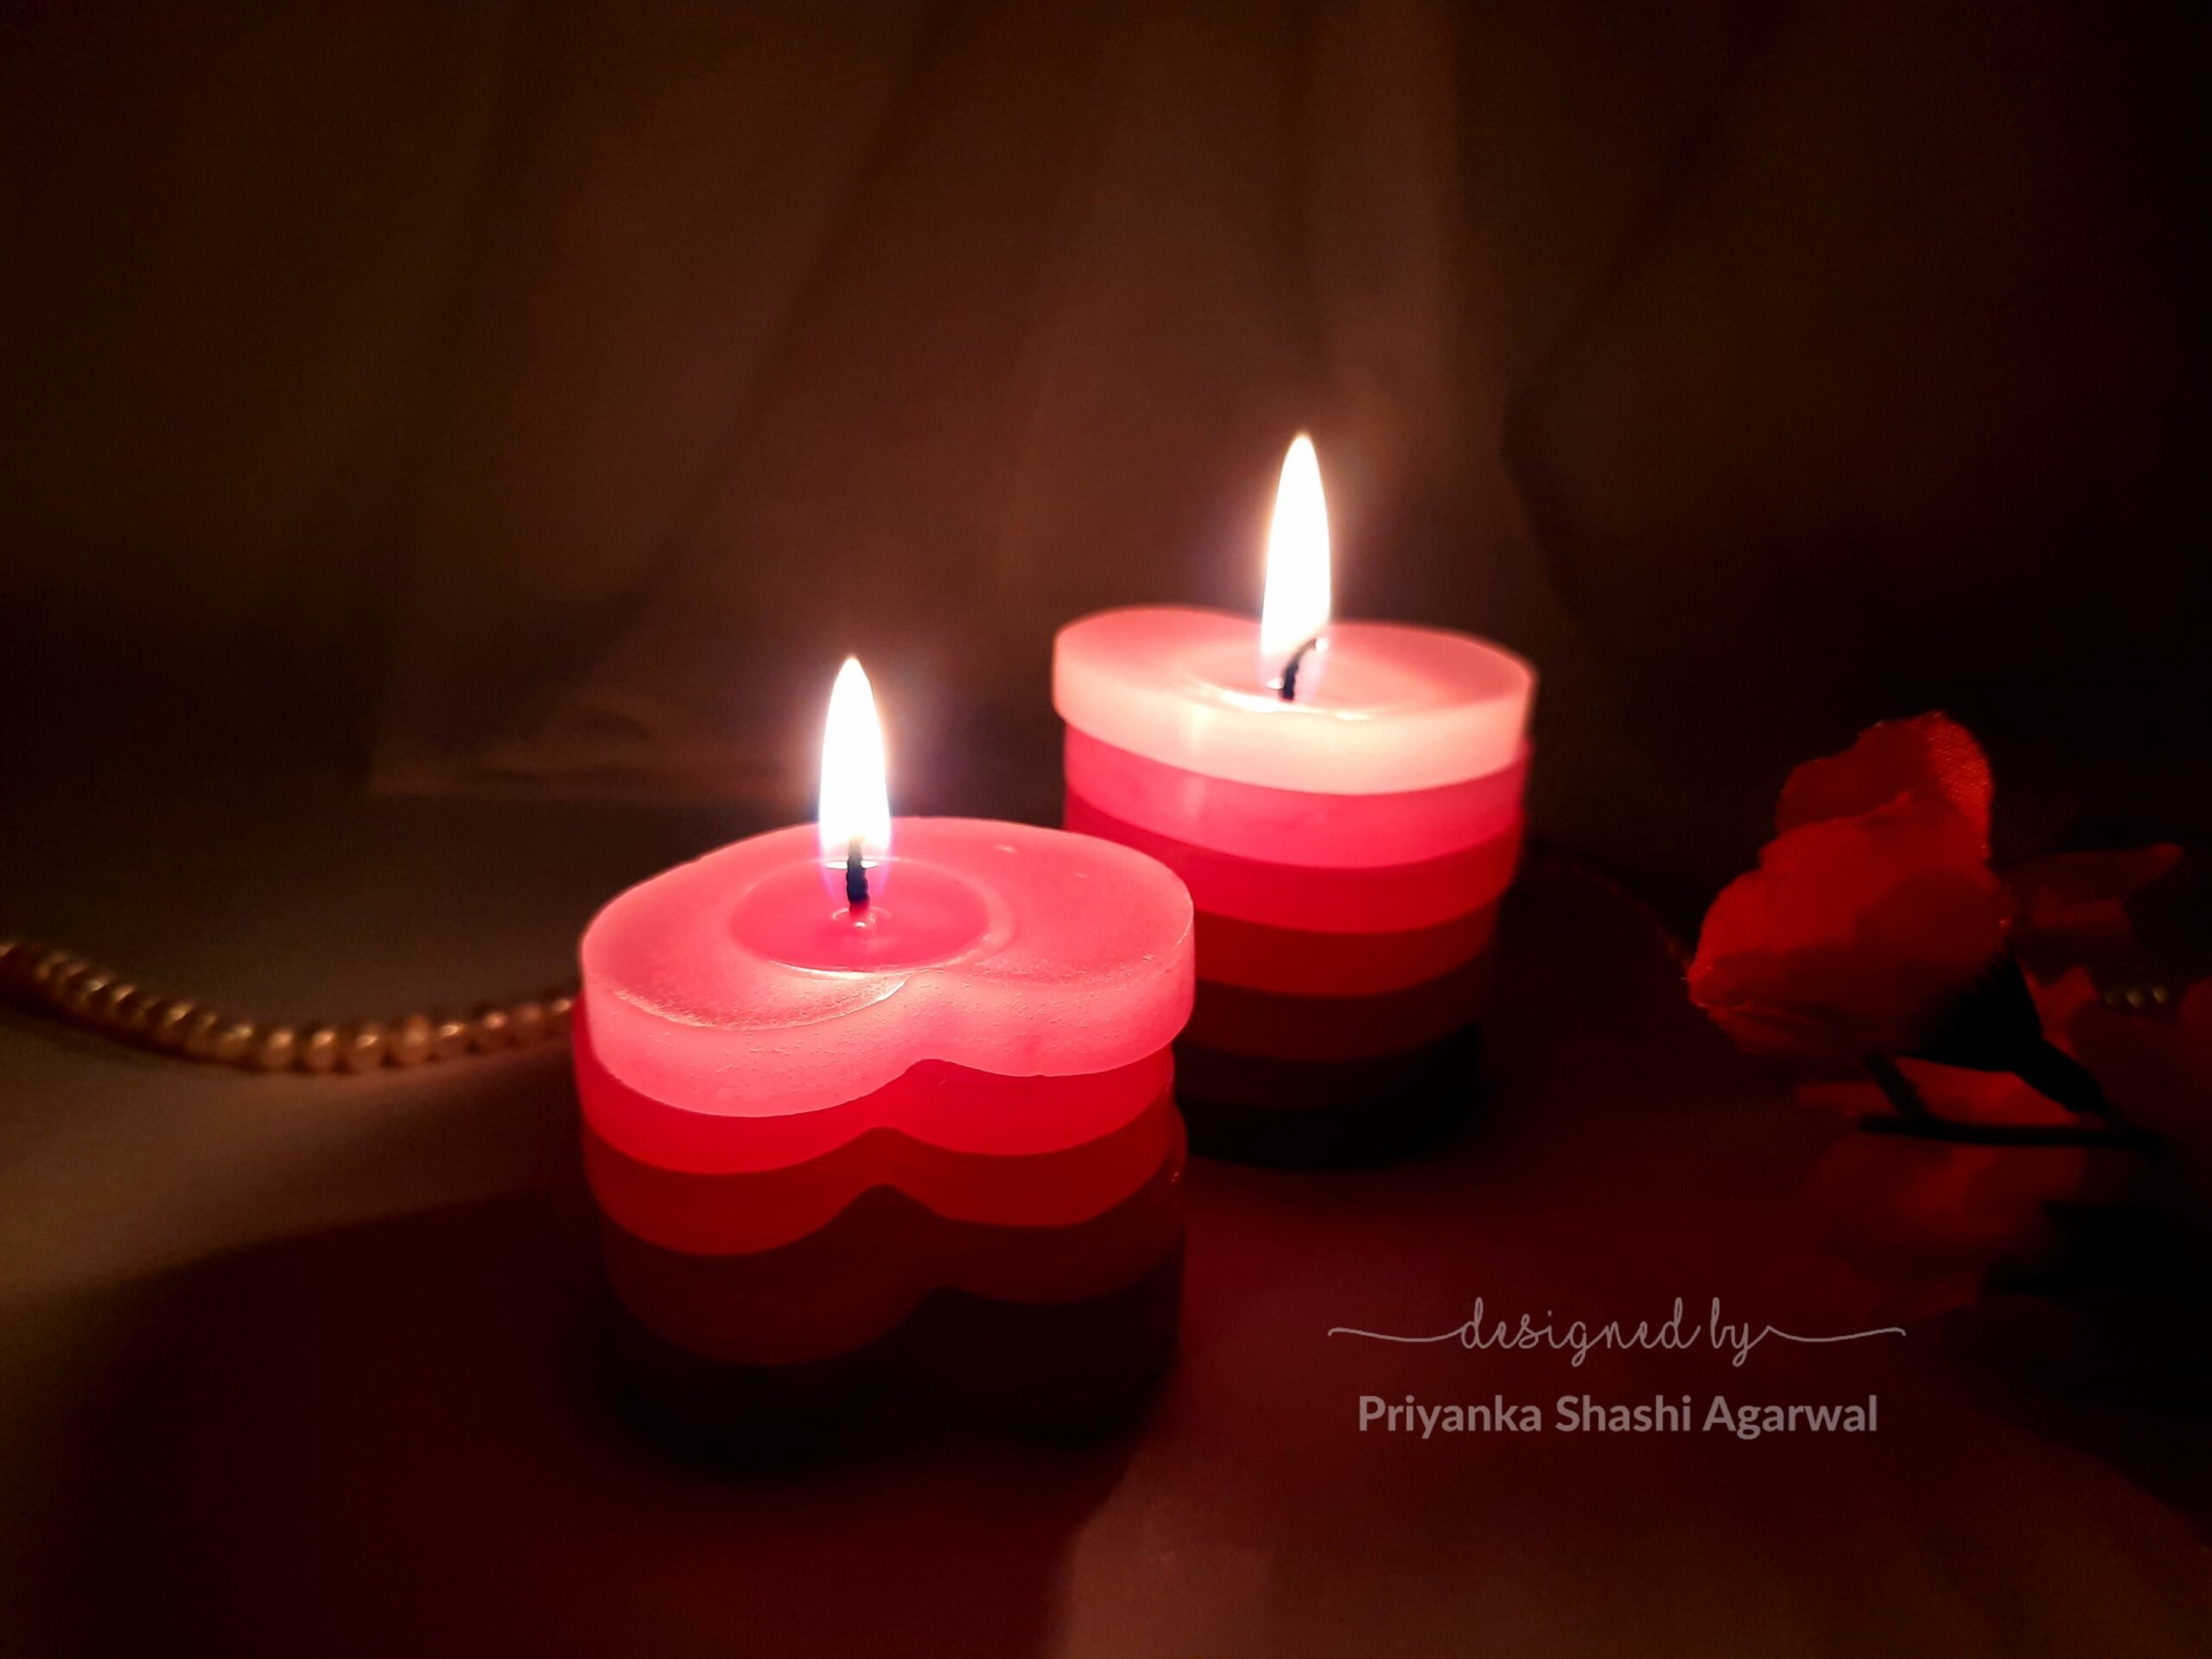
Make as many hearts as you want and stack them everywhere in your house on this Valentine’s Day. You can try this project even when you are a beginner, its easy to make these candles. You can try the same in different shapes, thickness and colours. So what are you waiting for? Order the materials now from Itsy Bitsy craft store. The links of the materials is given below.
Buy all the candle making and other craft materials at ITSY BITSY craft store online or offline. Use my code: PRIYANKASHASHI05 for extra 5% off on the online purchase of any craft materials. Hope you are liking my candle ideas. Do let me know in comment box.
Hugs, Priyanka Shashi.
Material Links:
Itsy Bitsy Candle Making Paraffin wax & Soft Wax- 910g + 90g
Little Birdie Wax Granules 200gm- Red – Itsy Bitsy
Itsy Bitsy Wax Coated Wick – 7 inch
Little Birdie Fragrance Oil Lavender – 10ml Bottle – Itsy Bitsy
Silicon Mould Stars & Hearts 8Slots 23.7X15X2.5Cm 1Pc – Itsy Bitsy