Hello Friends! I hope you all are doing Fine. DT member Vidhu Thareja back on the blog with a new inspirational project.
Have you tried Little Birdie’s fun Deco Transfer Sheets? They are super easy to use and create wonder on any surface in no time.
You can even involve your kids to create amazing projects. I personally like to design home decor projects so this time I thought of using one of the designs from the Deco Transfer sheet to create a wall plaque. Lets start the step wise tutorial….
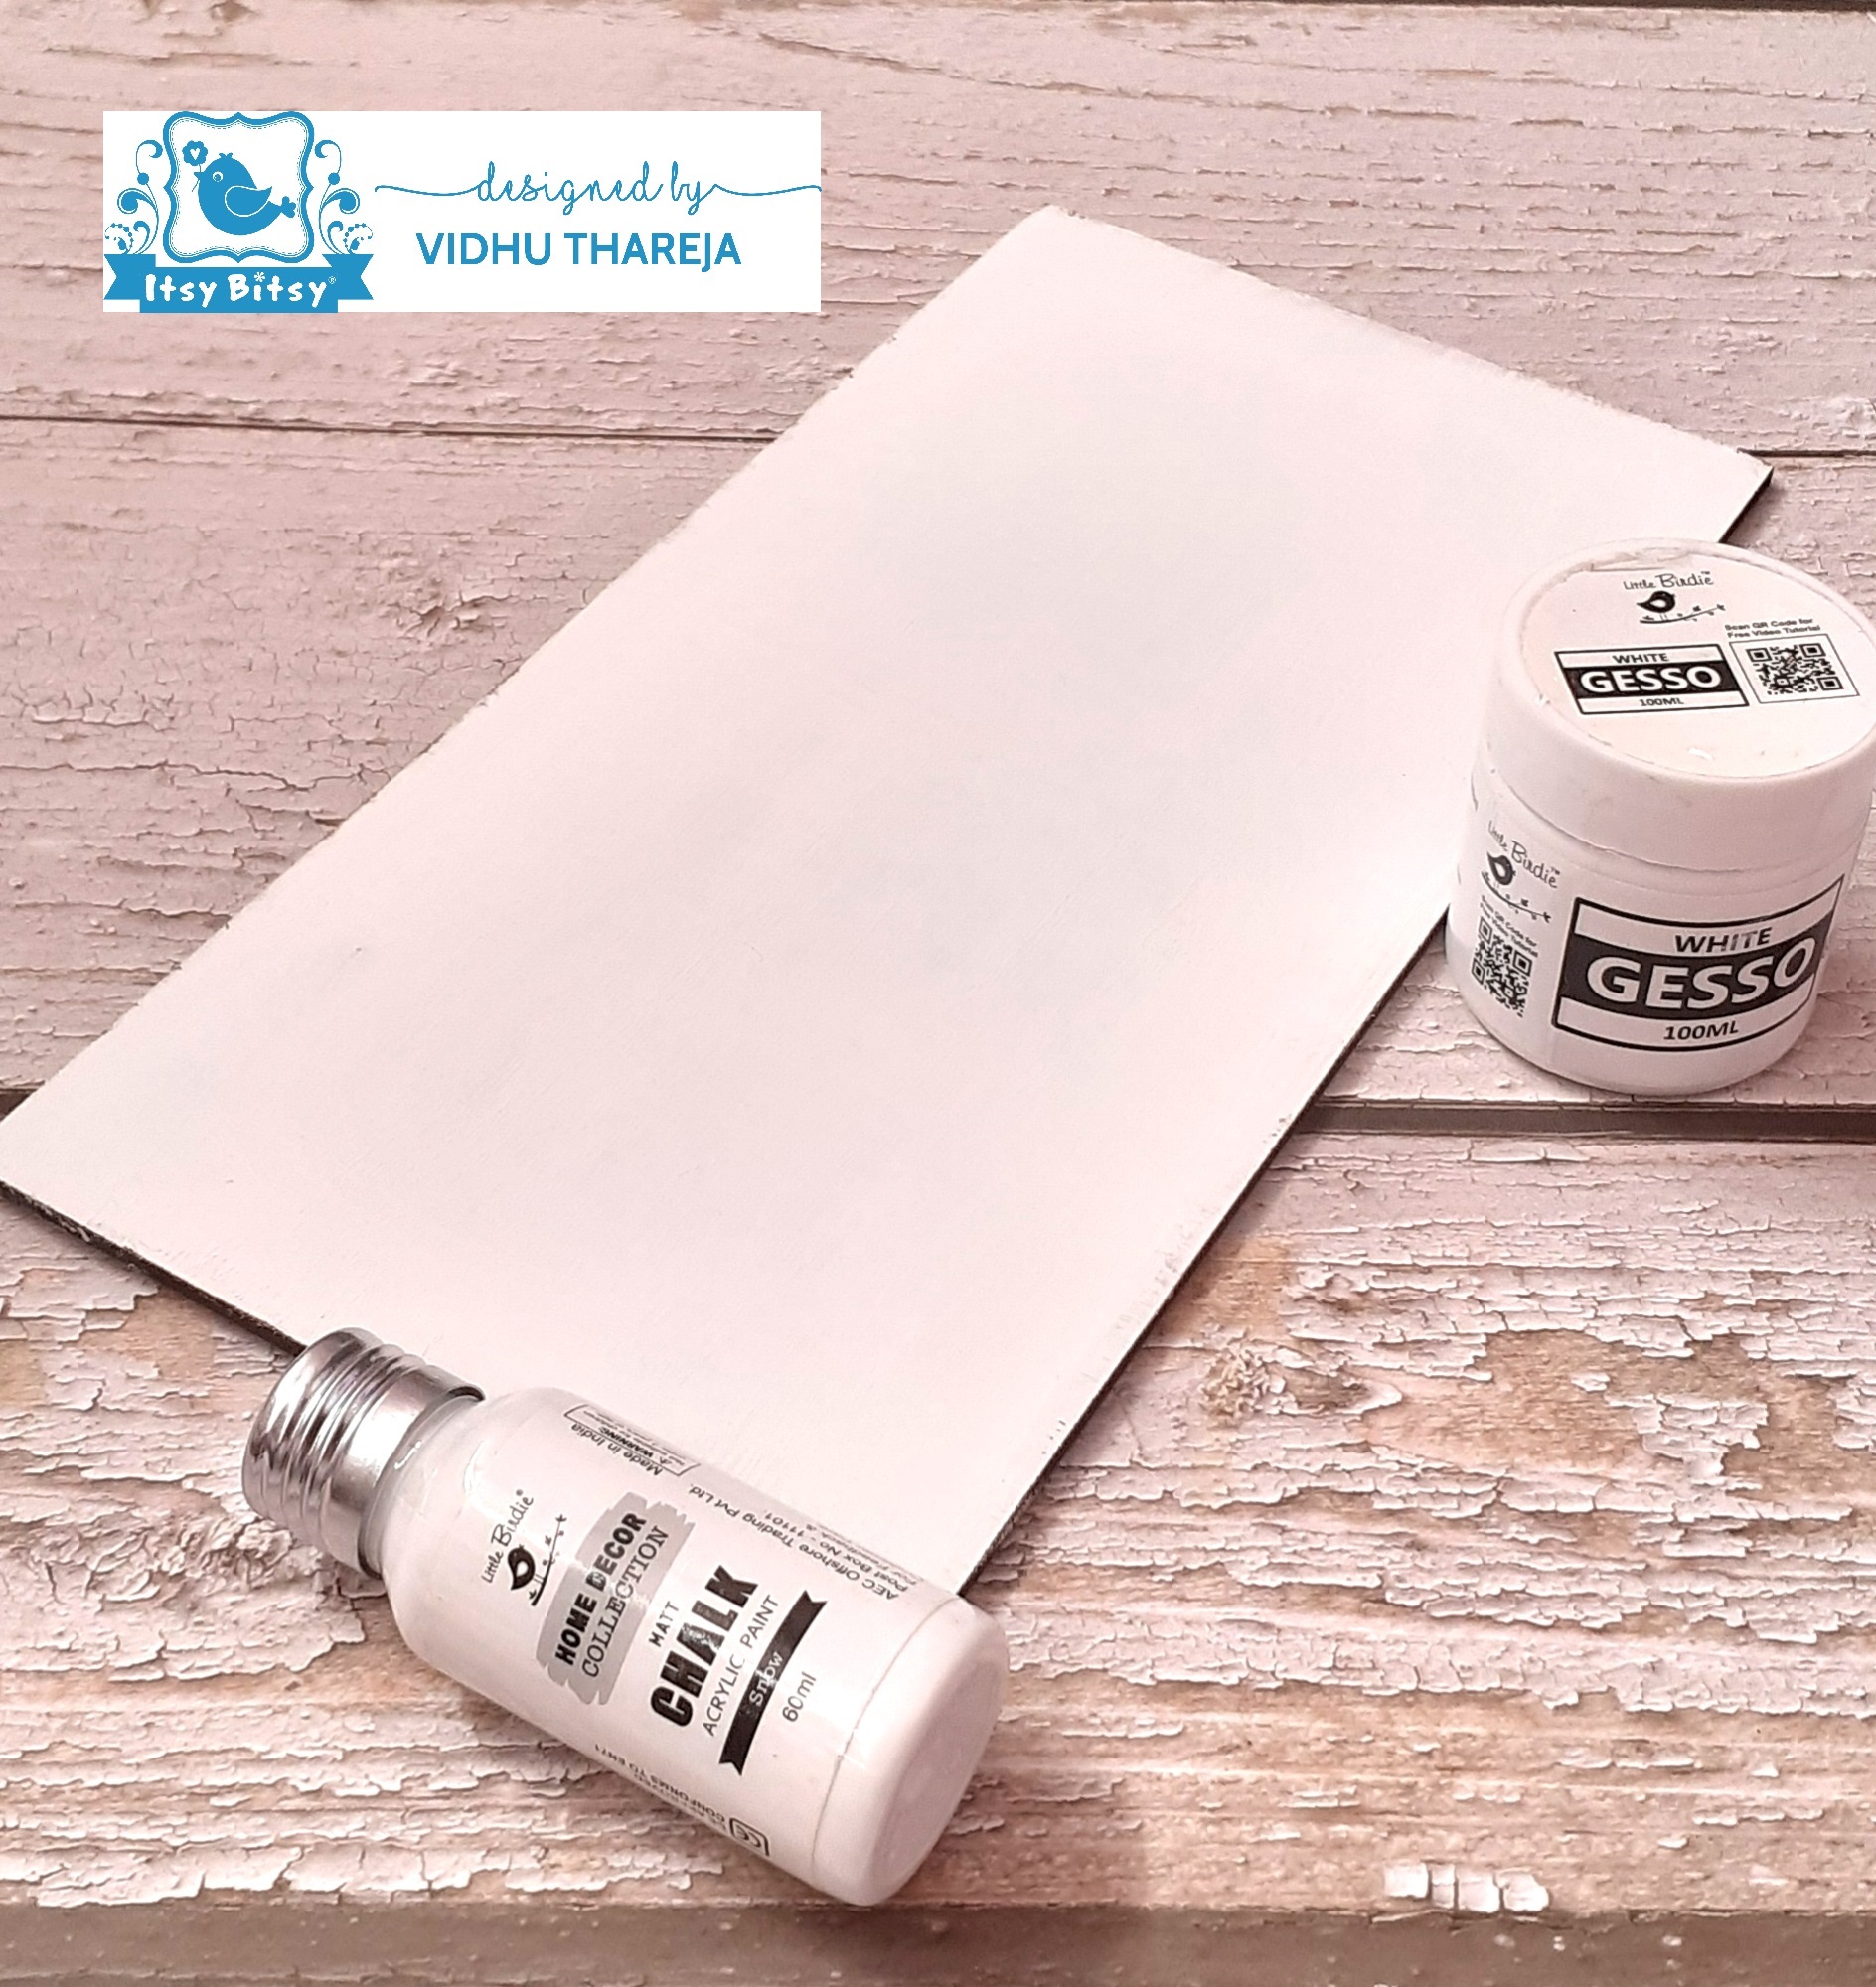
I had a MDF plaque measuring 12*6 inches in my stash. I started with sanding the surface. Then I applied a generous coat of Little Birdie Acrylic White Gesso and one coat of Little Birdie Chalk Paint ‘Snow’ with the help of a flat brush. I gave enough drying time between each coat of gesso and chalk paint.
 Next, I applied two coats of Little Birdie Chalk Paint ‘Terracotta’ with a flat brush and let it dry.
 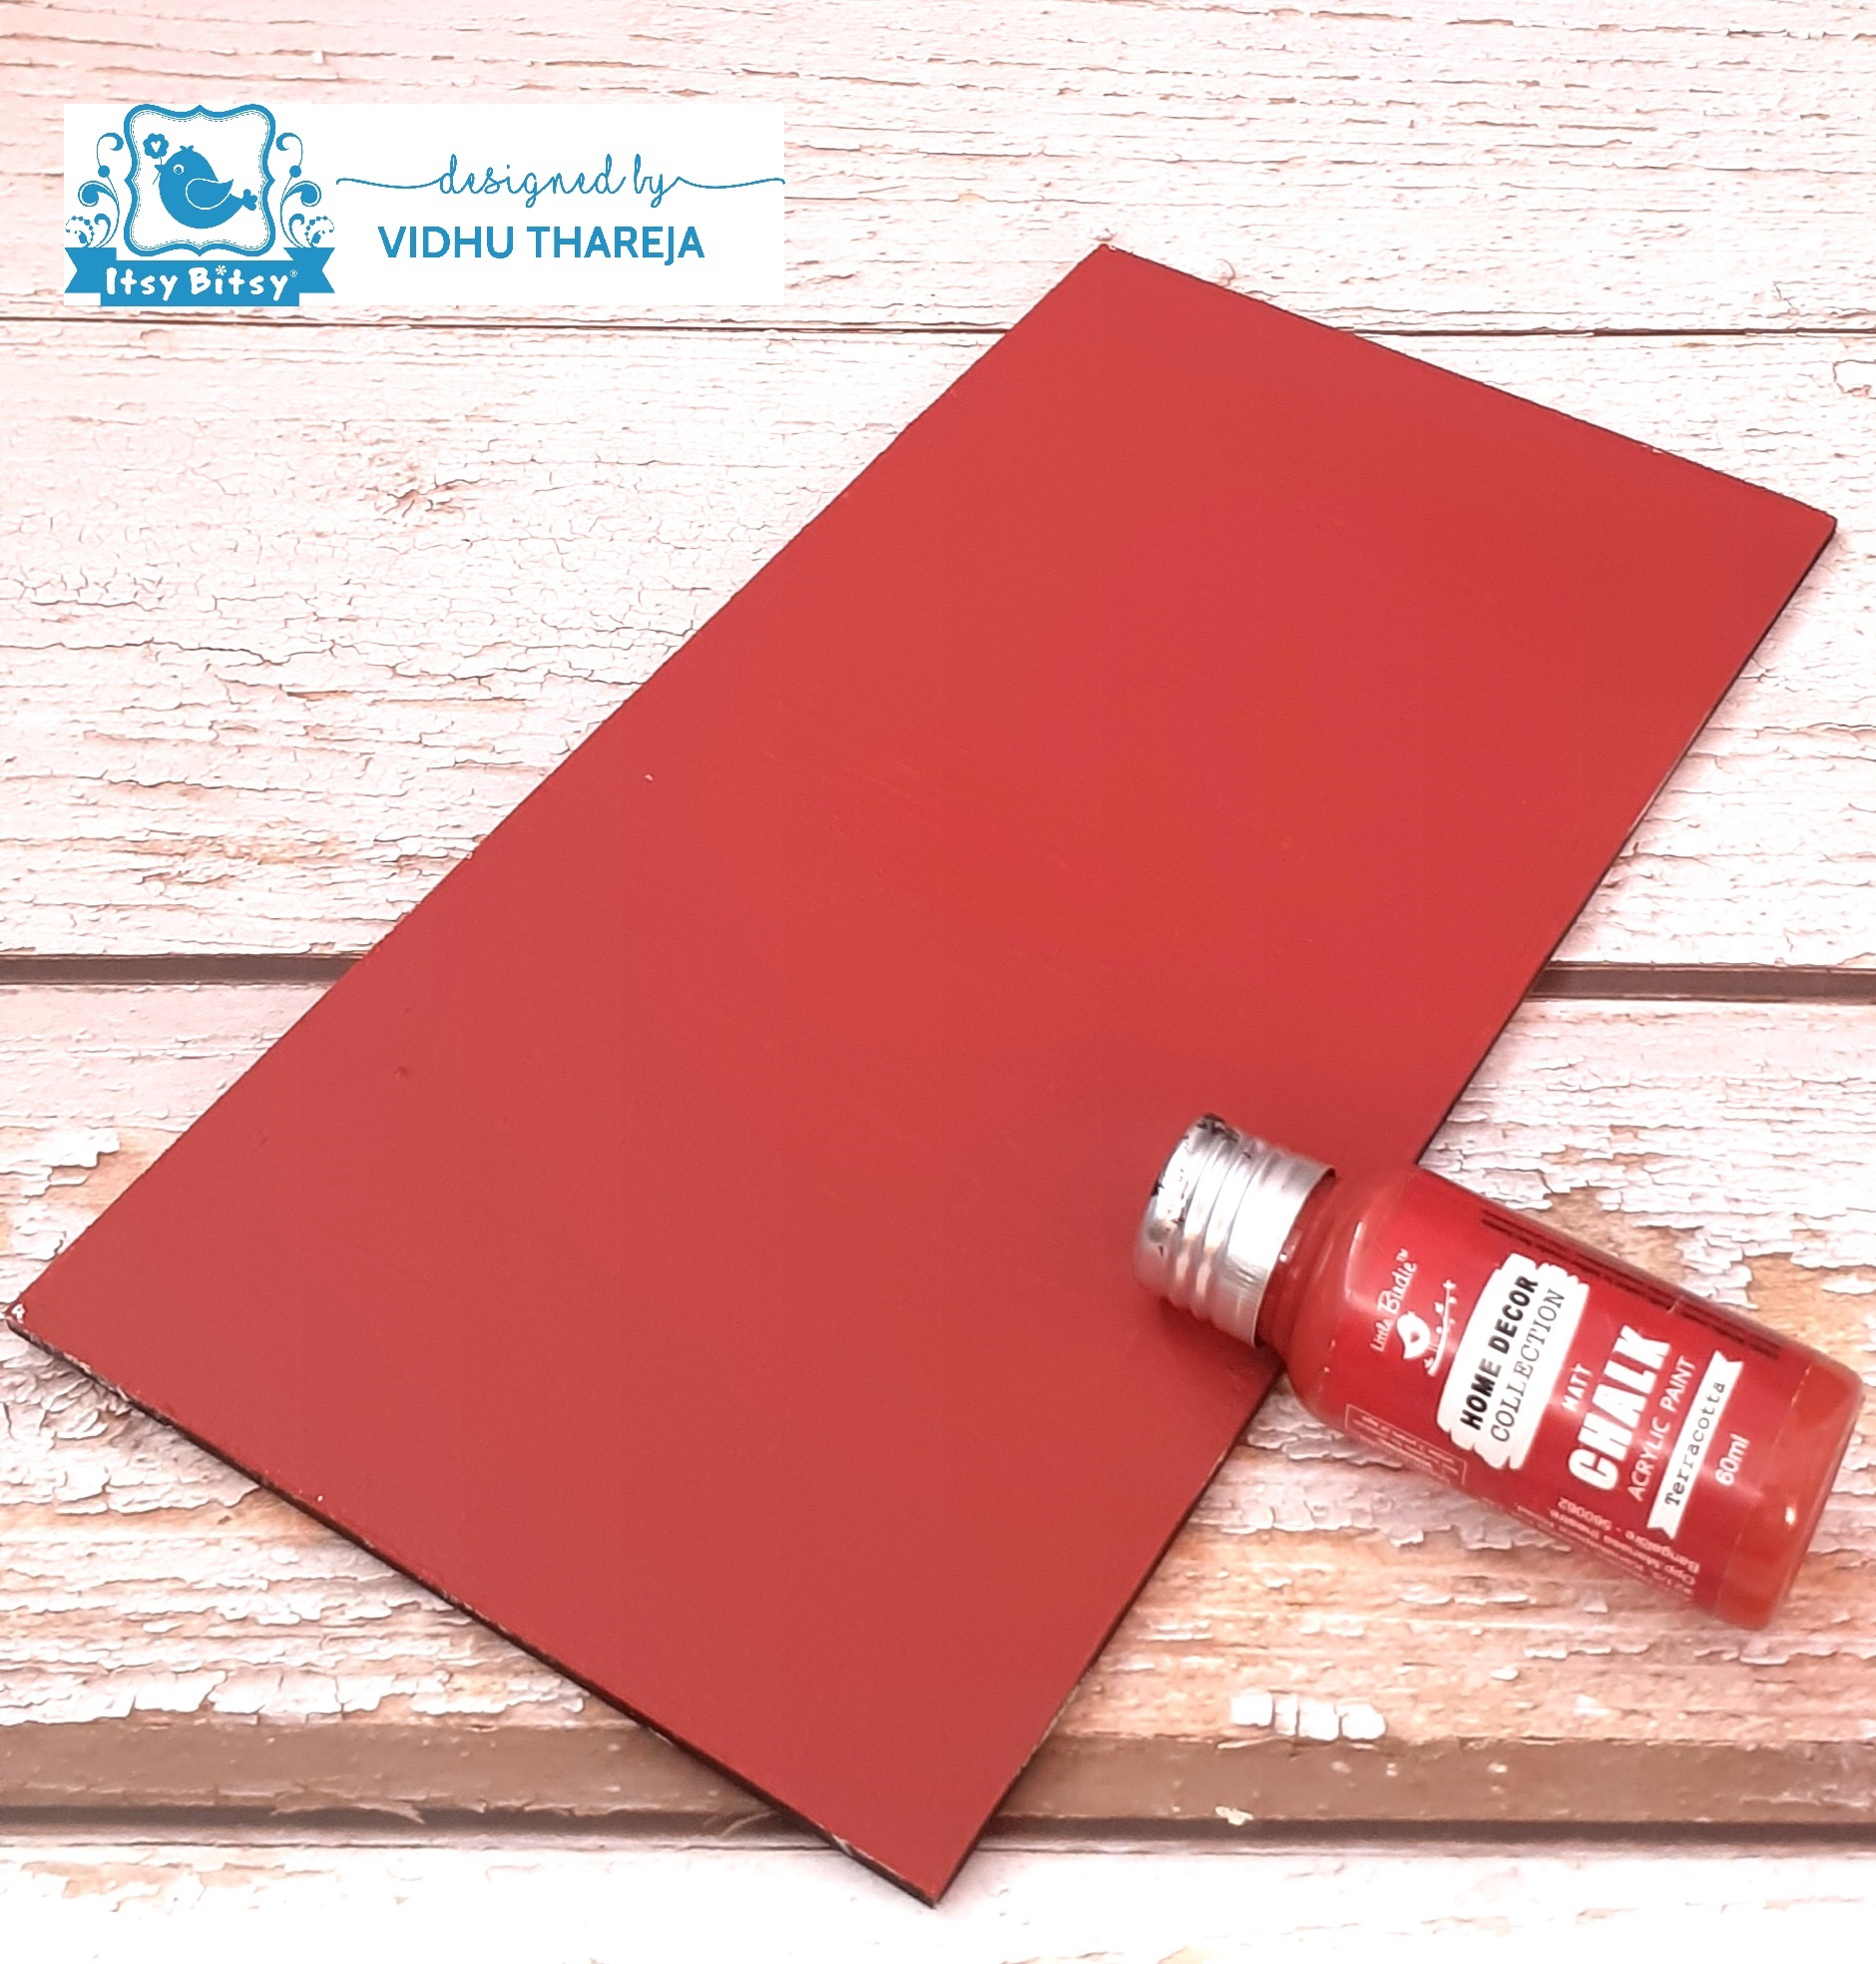 I wanted to give a weathered look to my base so I rubbed candle wax randomly and then cleaned the extra wax with a clean cloth. Then, I applied a generous coat of Little Birdie Chalk Paint ‘Buttermilk’. When it was dry, I sanded the surface using medium density sandpaper.
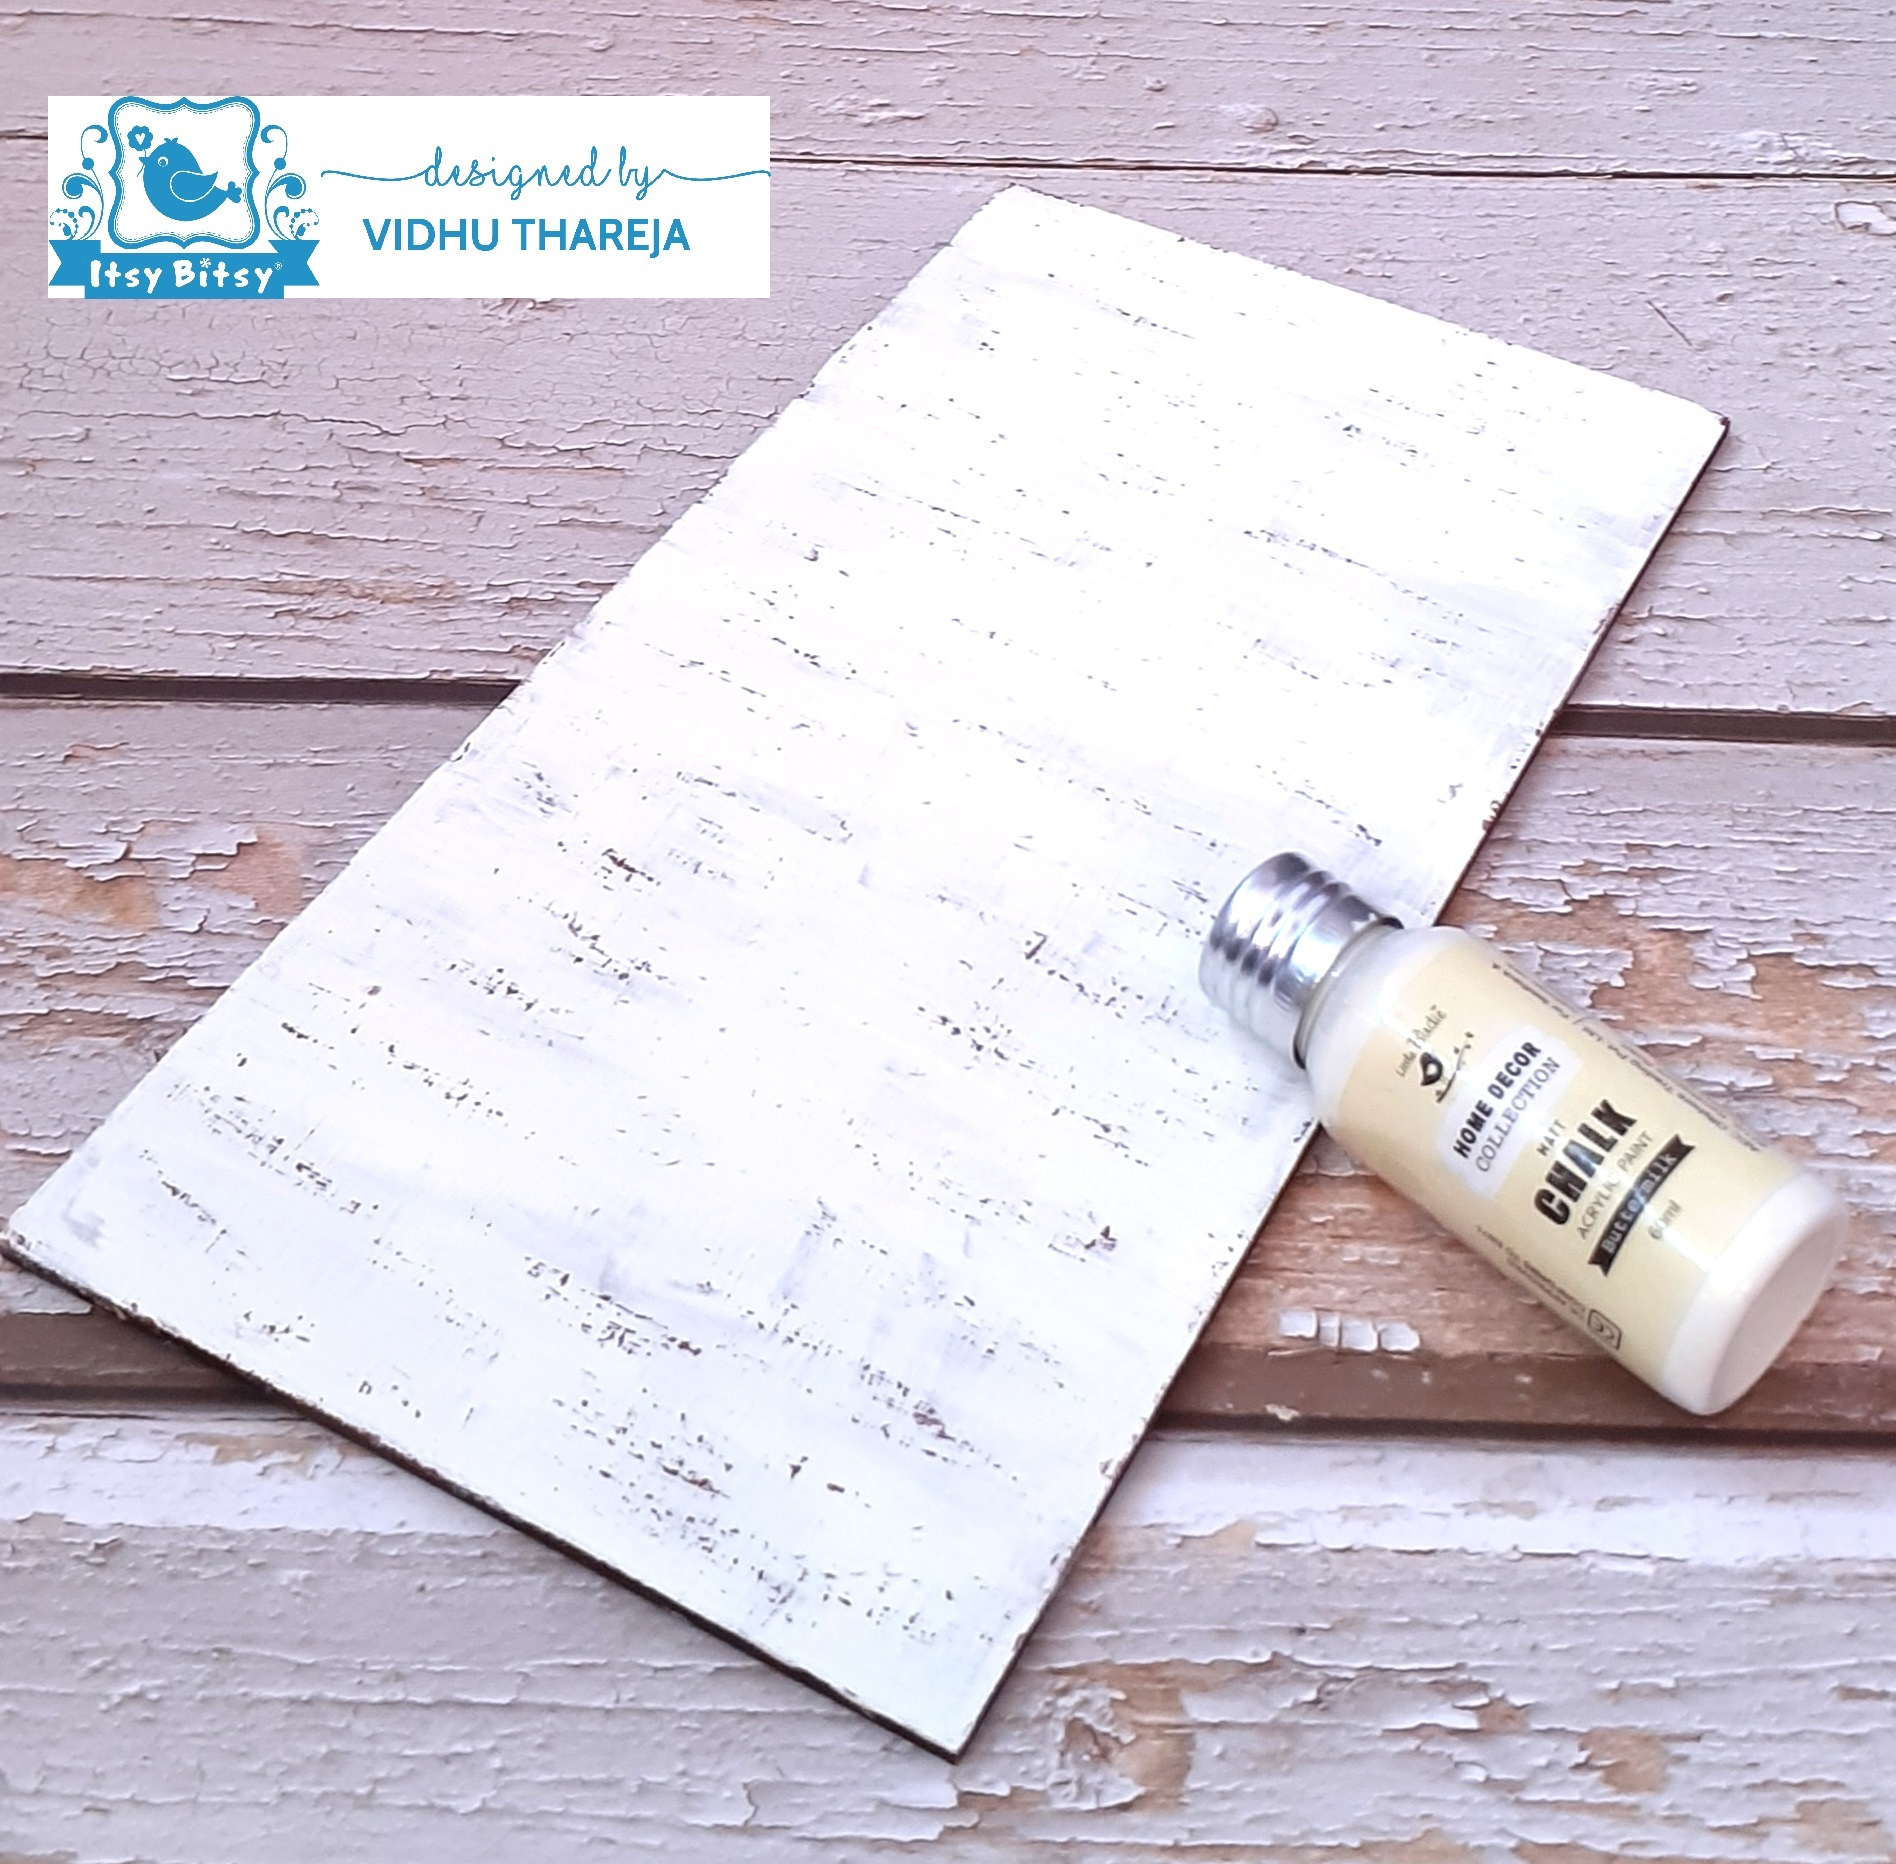
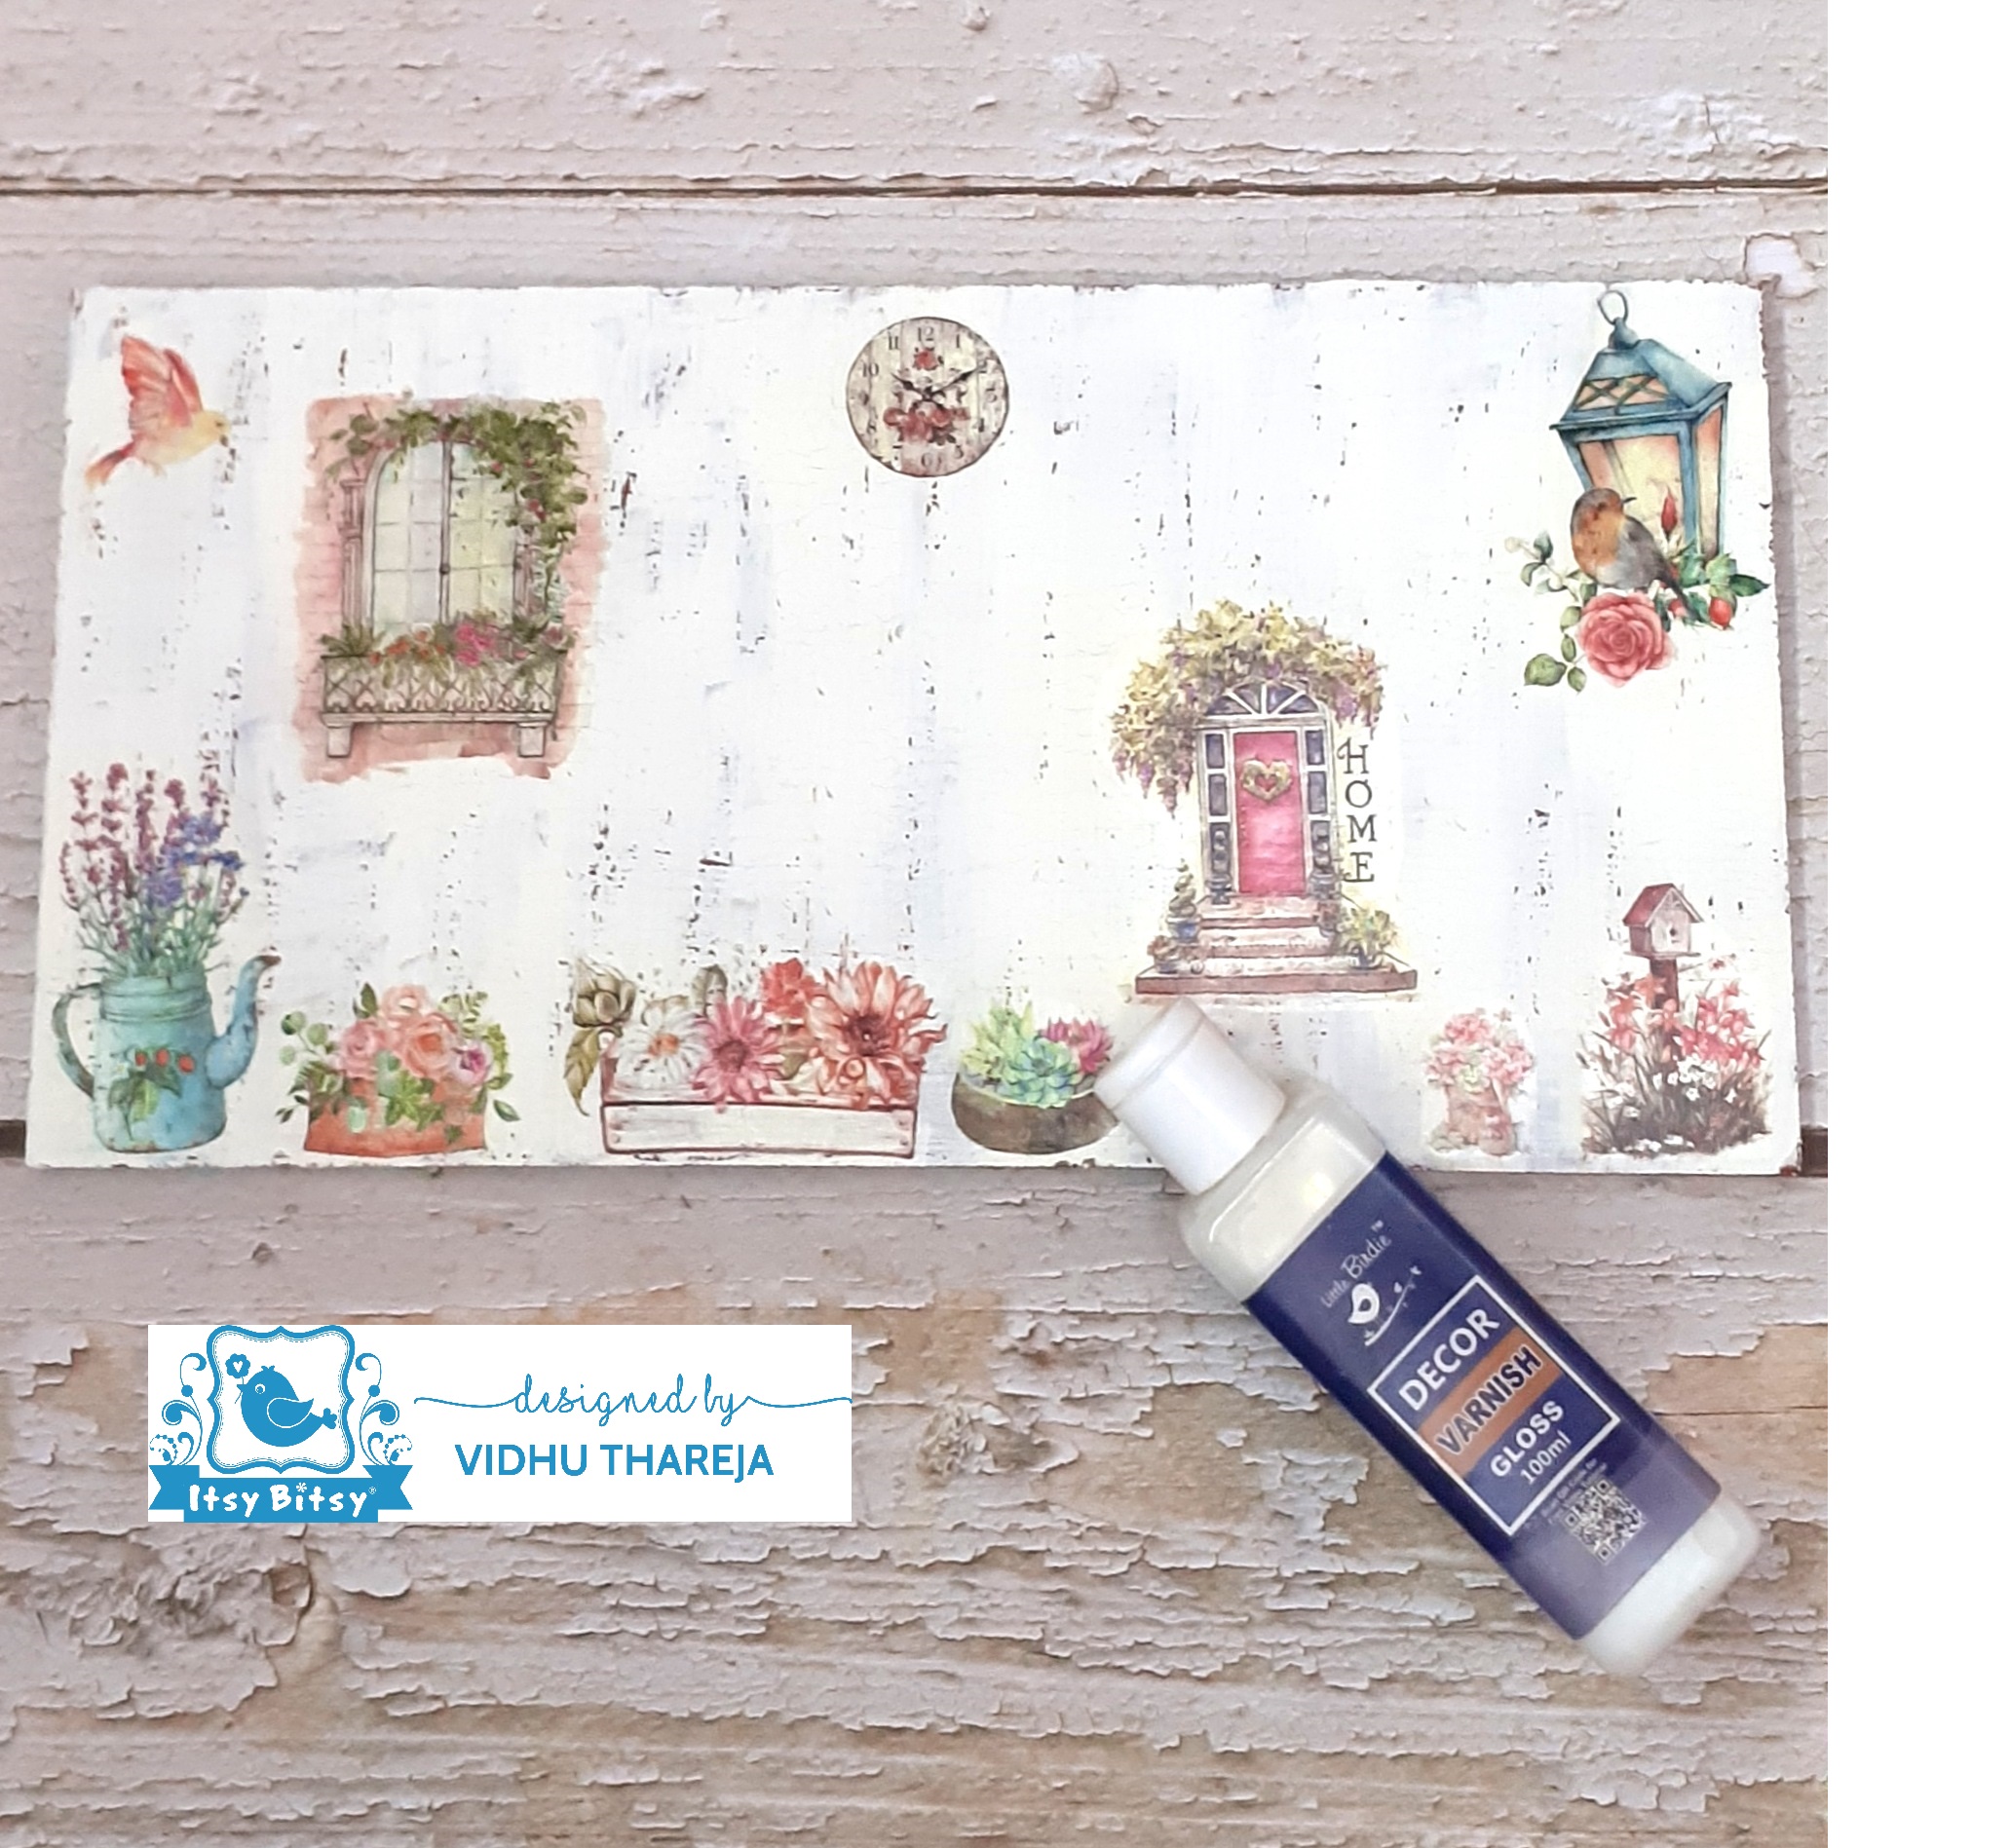
Now, it was the turn to use my focal product. For this project I chose a beautiful design ‘Doors and Windows’ from the collection of Deco Transfer Sheets.
I fussy cut the elements from the sheets and arrange them to see the placement. Then one by one I removed the transparent sheet and placed the element face down and pressed them gently so that there would be no air bubbles.
Next, I dabbed them with a wet sponge piece and pressed gently. Make sure there is no excess water in the sponge otherwise it will tear the white paper. I remove the white paper very carefully. As soon as you remove the paper, you will see the magic…. beautifully the images get transferred onto the surface. I completed all the elements one by one and left them to dry. In the end, I sealed the whole project with Little Birdie Decor Varnish – Gloss.
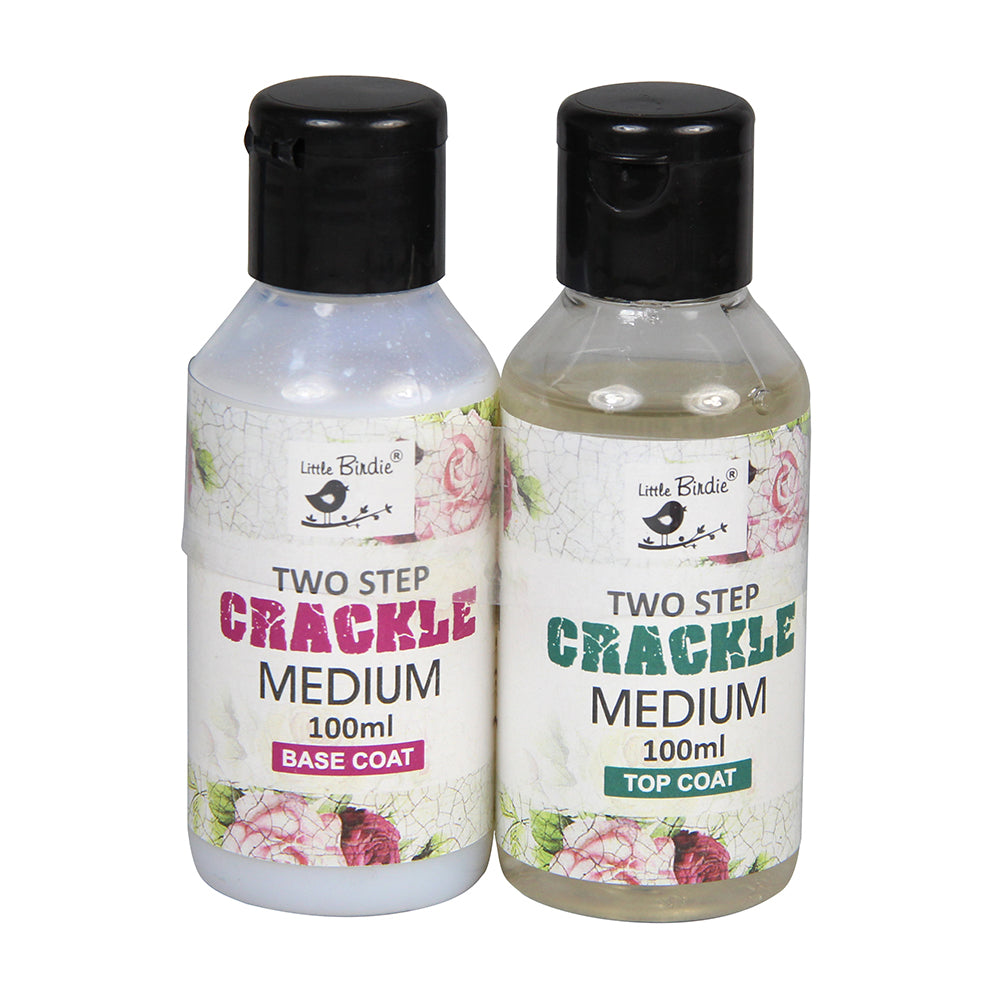
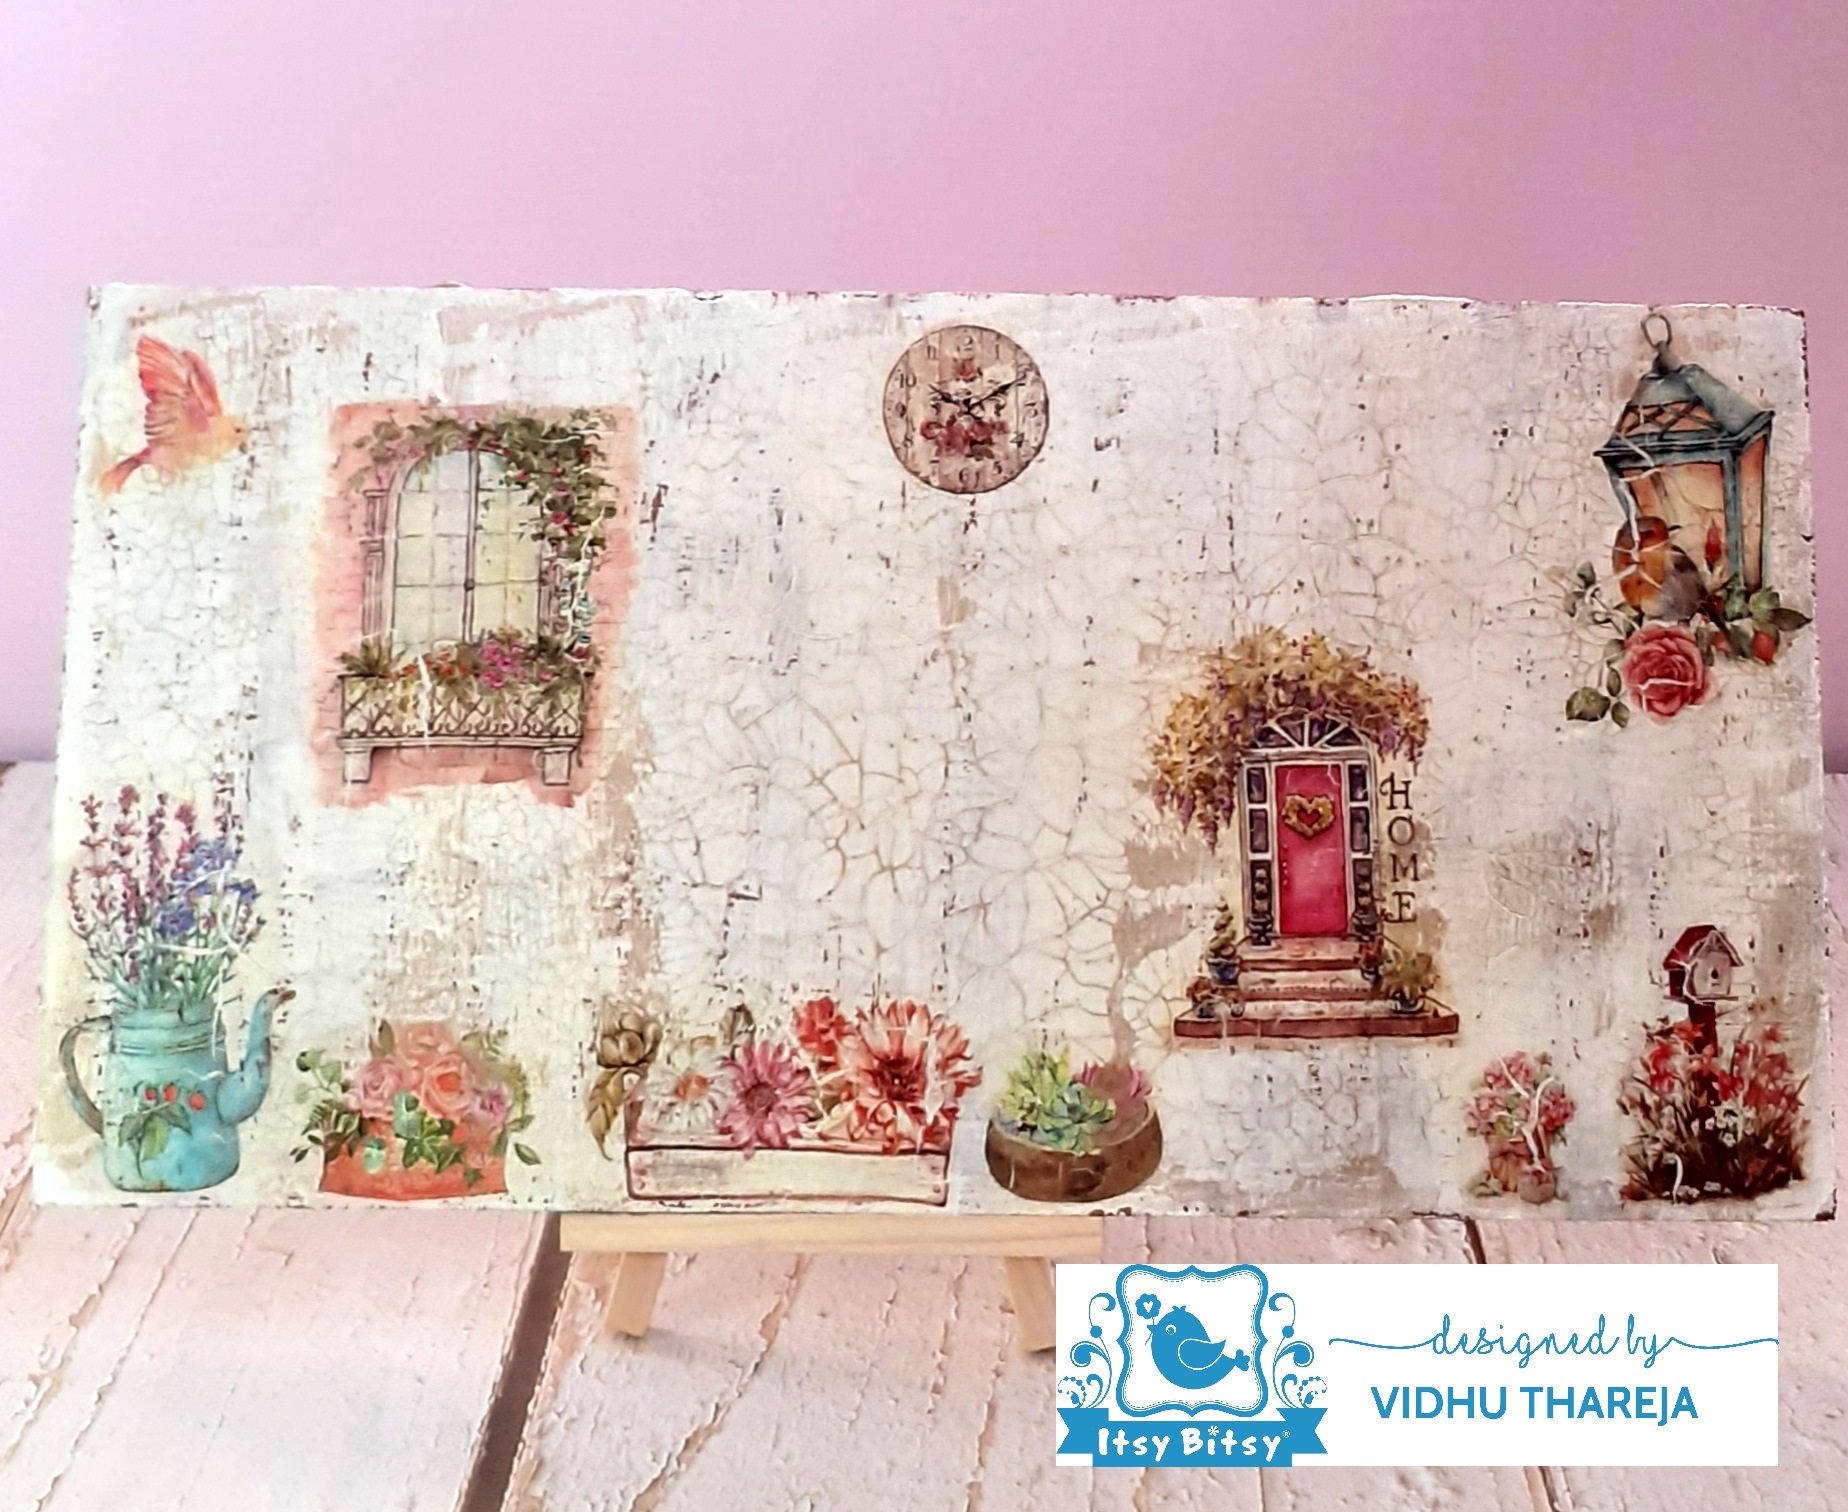
I wanted to add some more interest to my project so I used Little Birdie 2 Step Crackle Medium.
First I applied a base coat of crackle medium using the dabbing method and left it to dry on its own. The base coat looks milky but dries clear. When it was dry I applied the top coat of crackle medium using the dabbing method. Keep the direction of the brush same while applying both the coats. In two step crackle effect, we need to highlight the cracks. So for the purpose I used Little Birdie Metallic Wax – Antique Gold. When the top coat of crackle medium is dry, rub metallic wax with your finger and clean the excess with a clean cotton cloth.
 Since I have sealed my work with varnish before applying crackle medium, so there is no need to apply varnish on top of the crackled effect.
 A beautiful, easy to make wall plaque is ready!
I am excited to inform you that all these products come with a unique QR code!
Point your mobile phone at the QR code on the product & scan them to take you directly to our YouTube links where you can see how each of these products are used! Check out all our new products for QR codes in the future ( this will be either on the label or on cap of the bottle).
Use code VIDHU5 to buy any product at www.itsybitsy.in and get 5% discount on your total bill.
Happy Crafting and Stay Safe!
Vidhu Thareja
List of material ;