Hi everyone. I hope all of you are safe and sound. DT member Vidhu Thareja back on the blog with new project inspiration. Today I am sharing an exciting idea of creating a beautiful wall decor canvas.
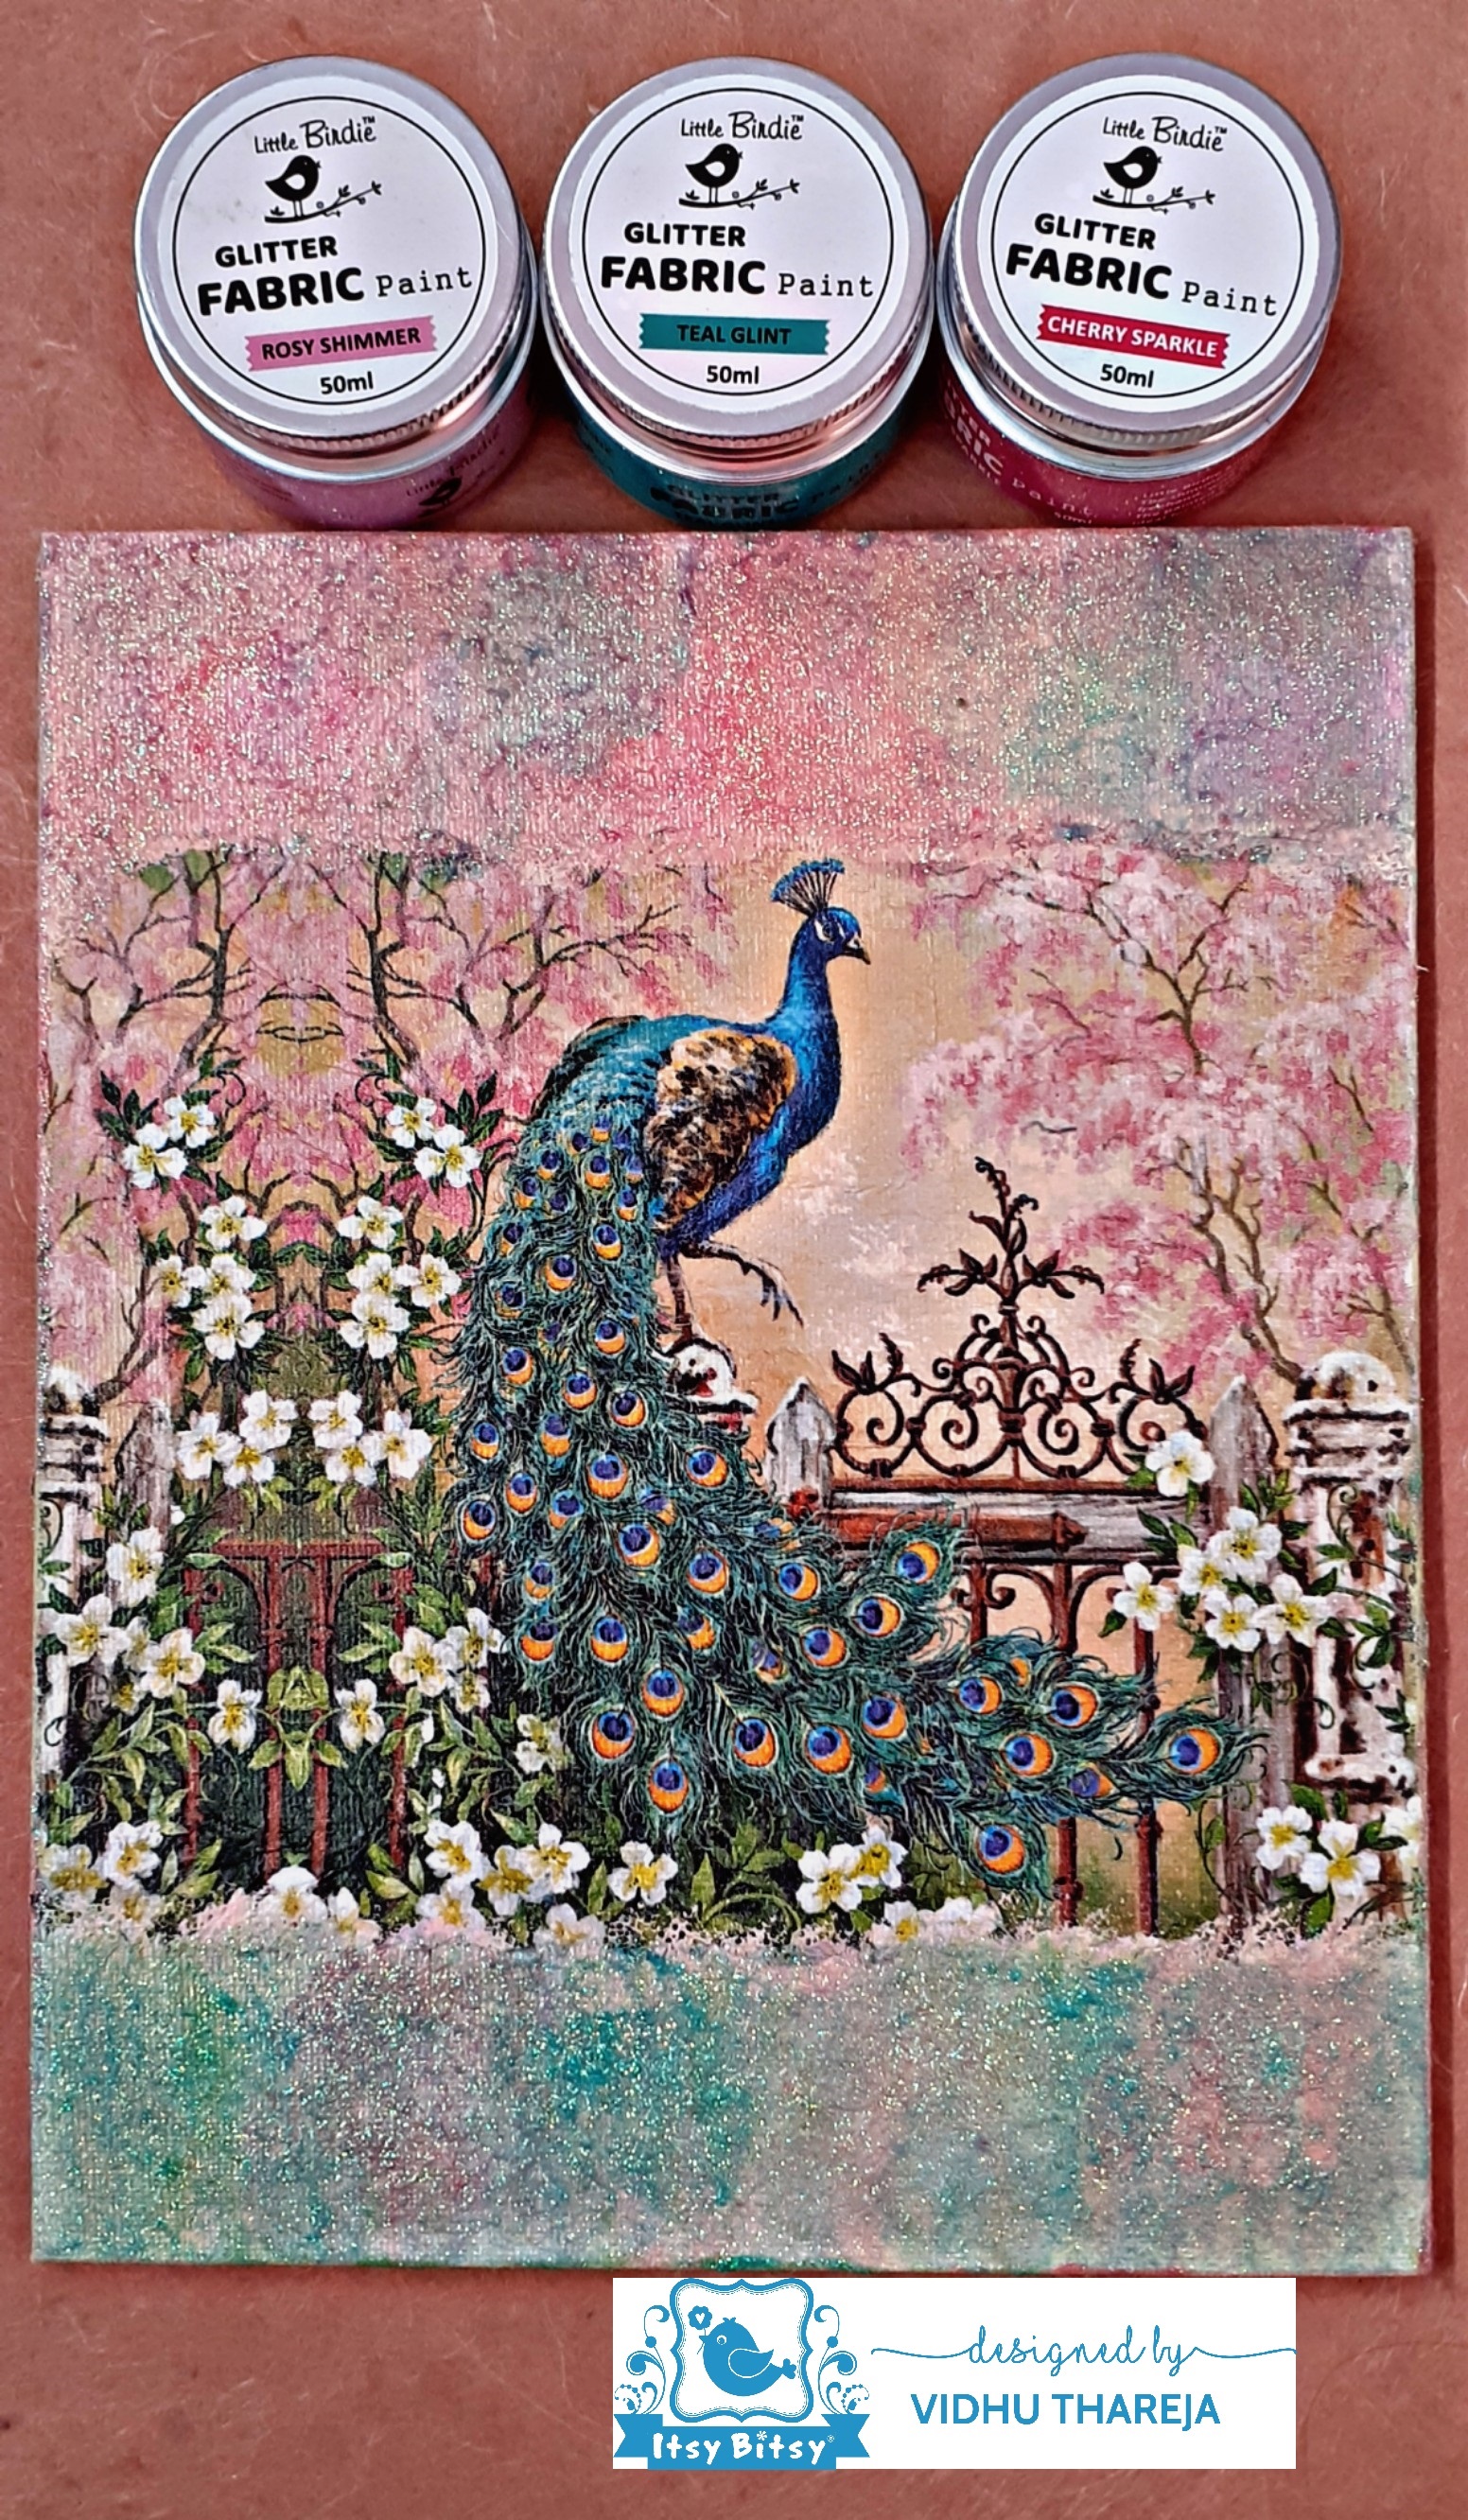
As we all are aware that the ongoing blog challenge #29 is about ” Anything goes using Little Birdie Glitter Fabric Paints” in your projects. Itsy Bitsy has recently introduced an one of its kind product in 12 exciting shades. This product is just perfect for DIY fashion, accessories and home decor projects. On top of the quality of the product, I loved the washable feature of the product. Yes, you heard it right. You can wash the fabric, once the Glitter Fabric Paints dry completely.
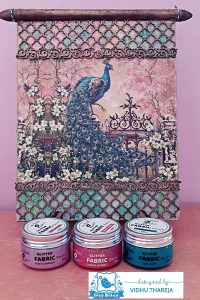
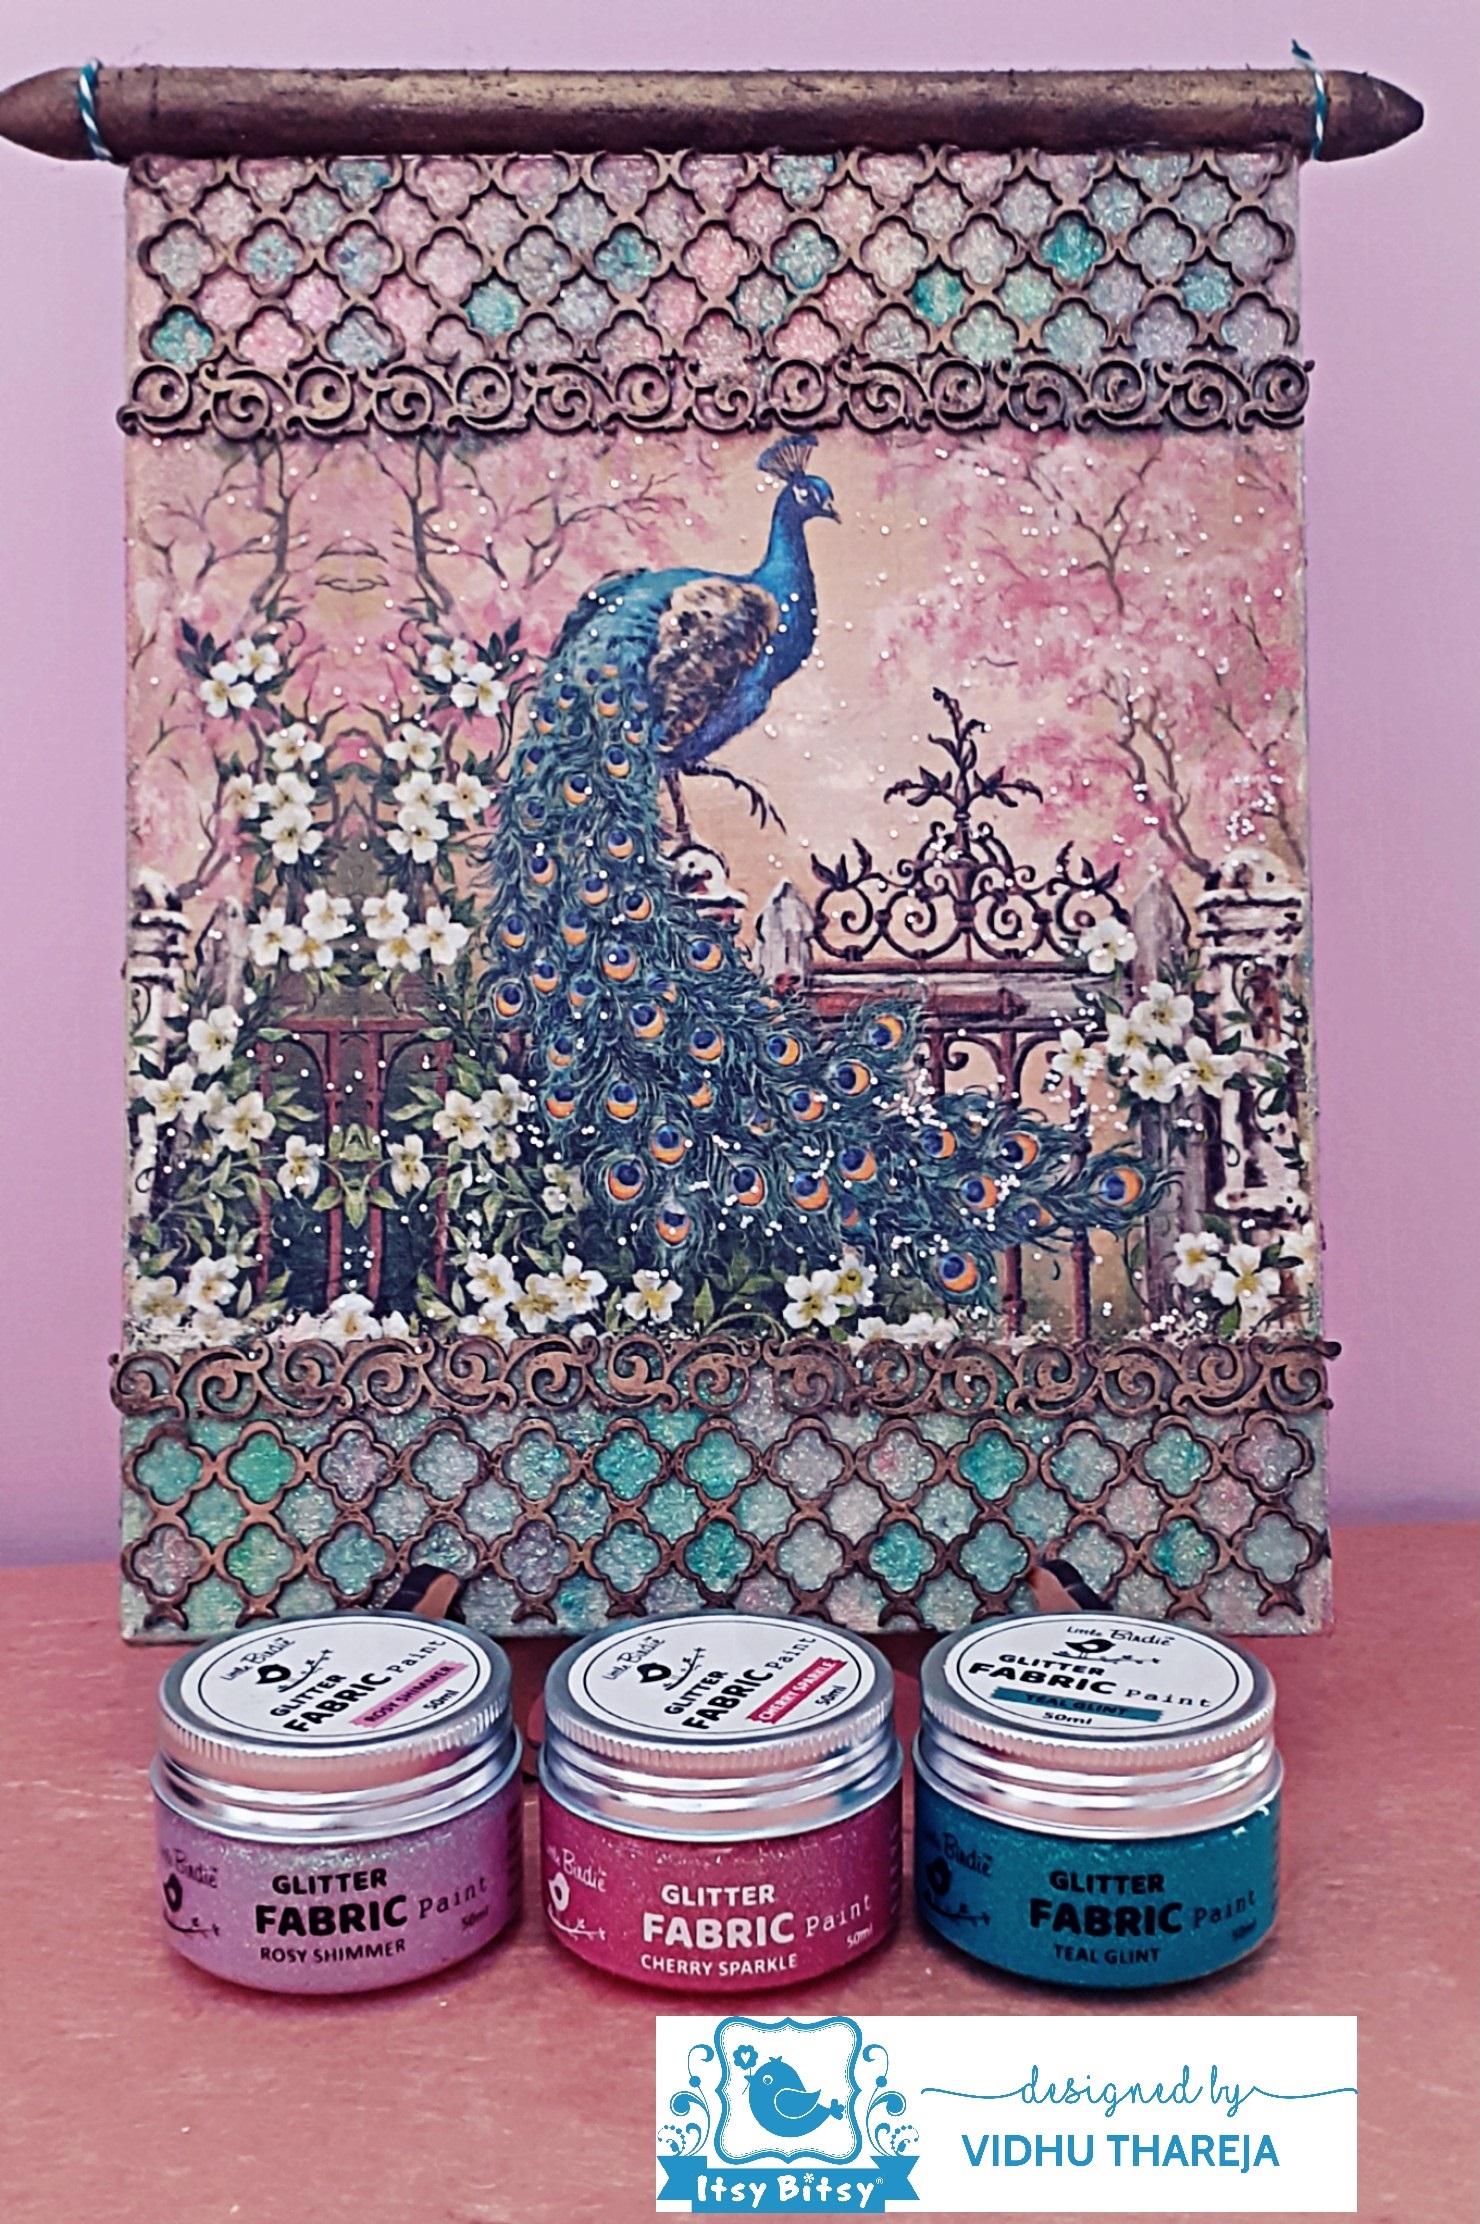
This time I have combined Glitter Fabric Paints with Decoupage on canvas to create a beautiful wall decor for my room. First have a look.
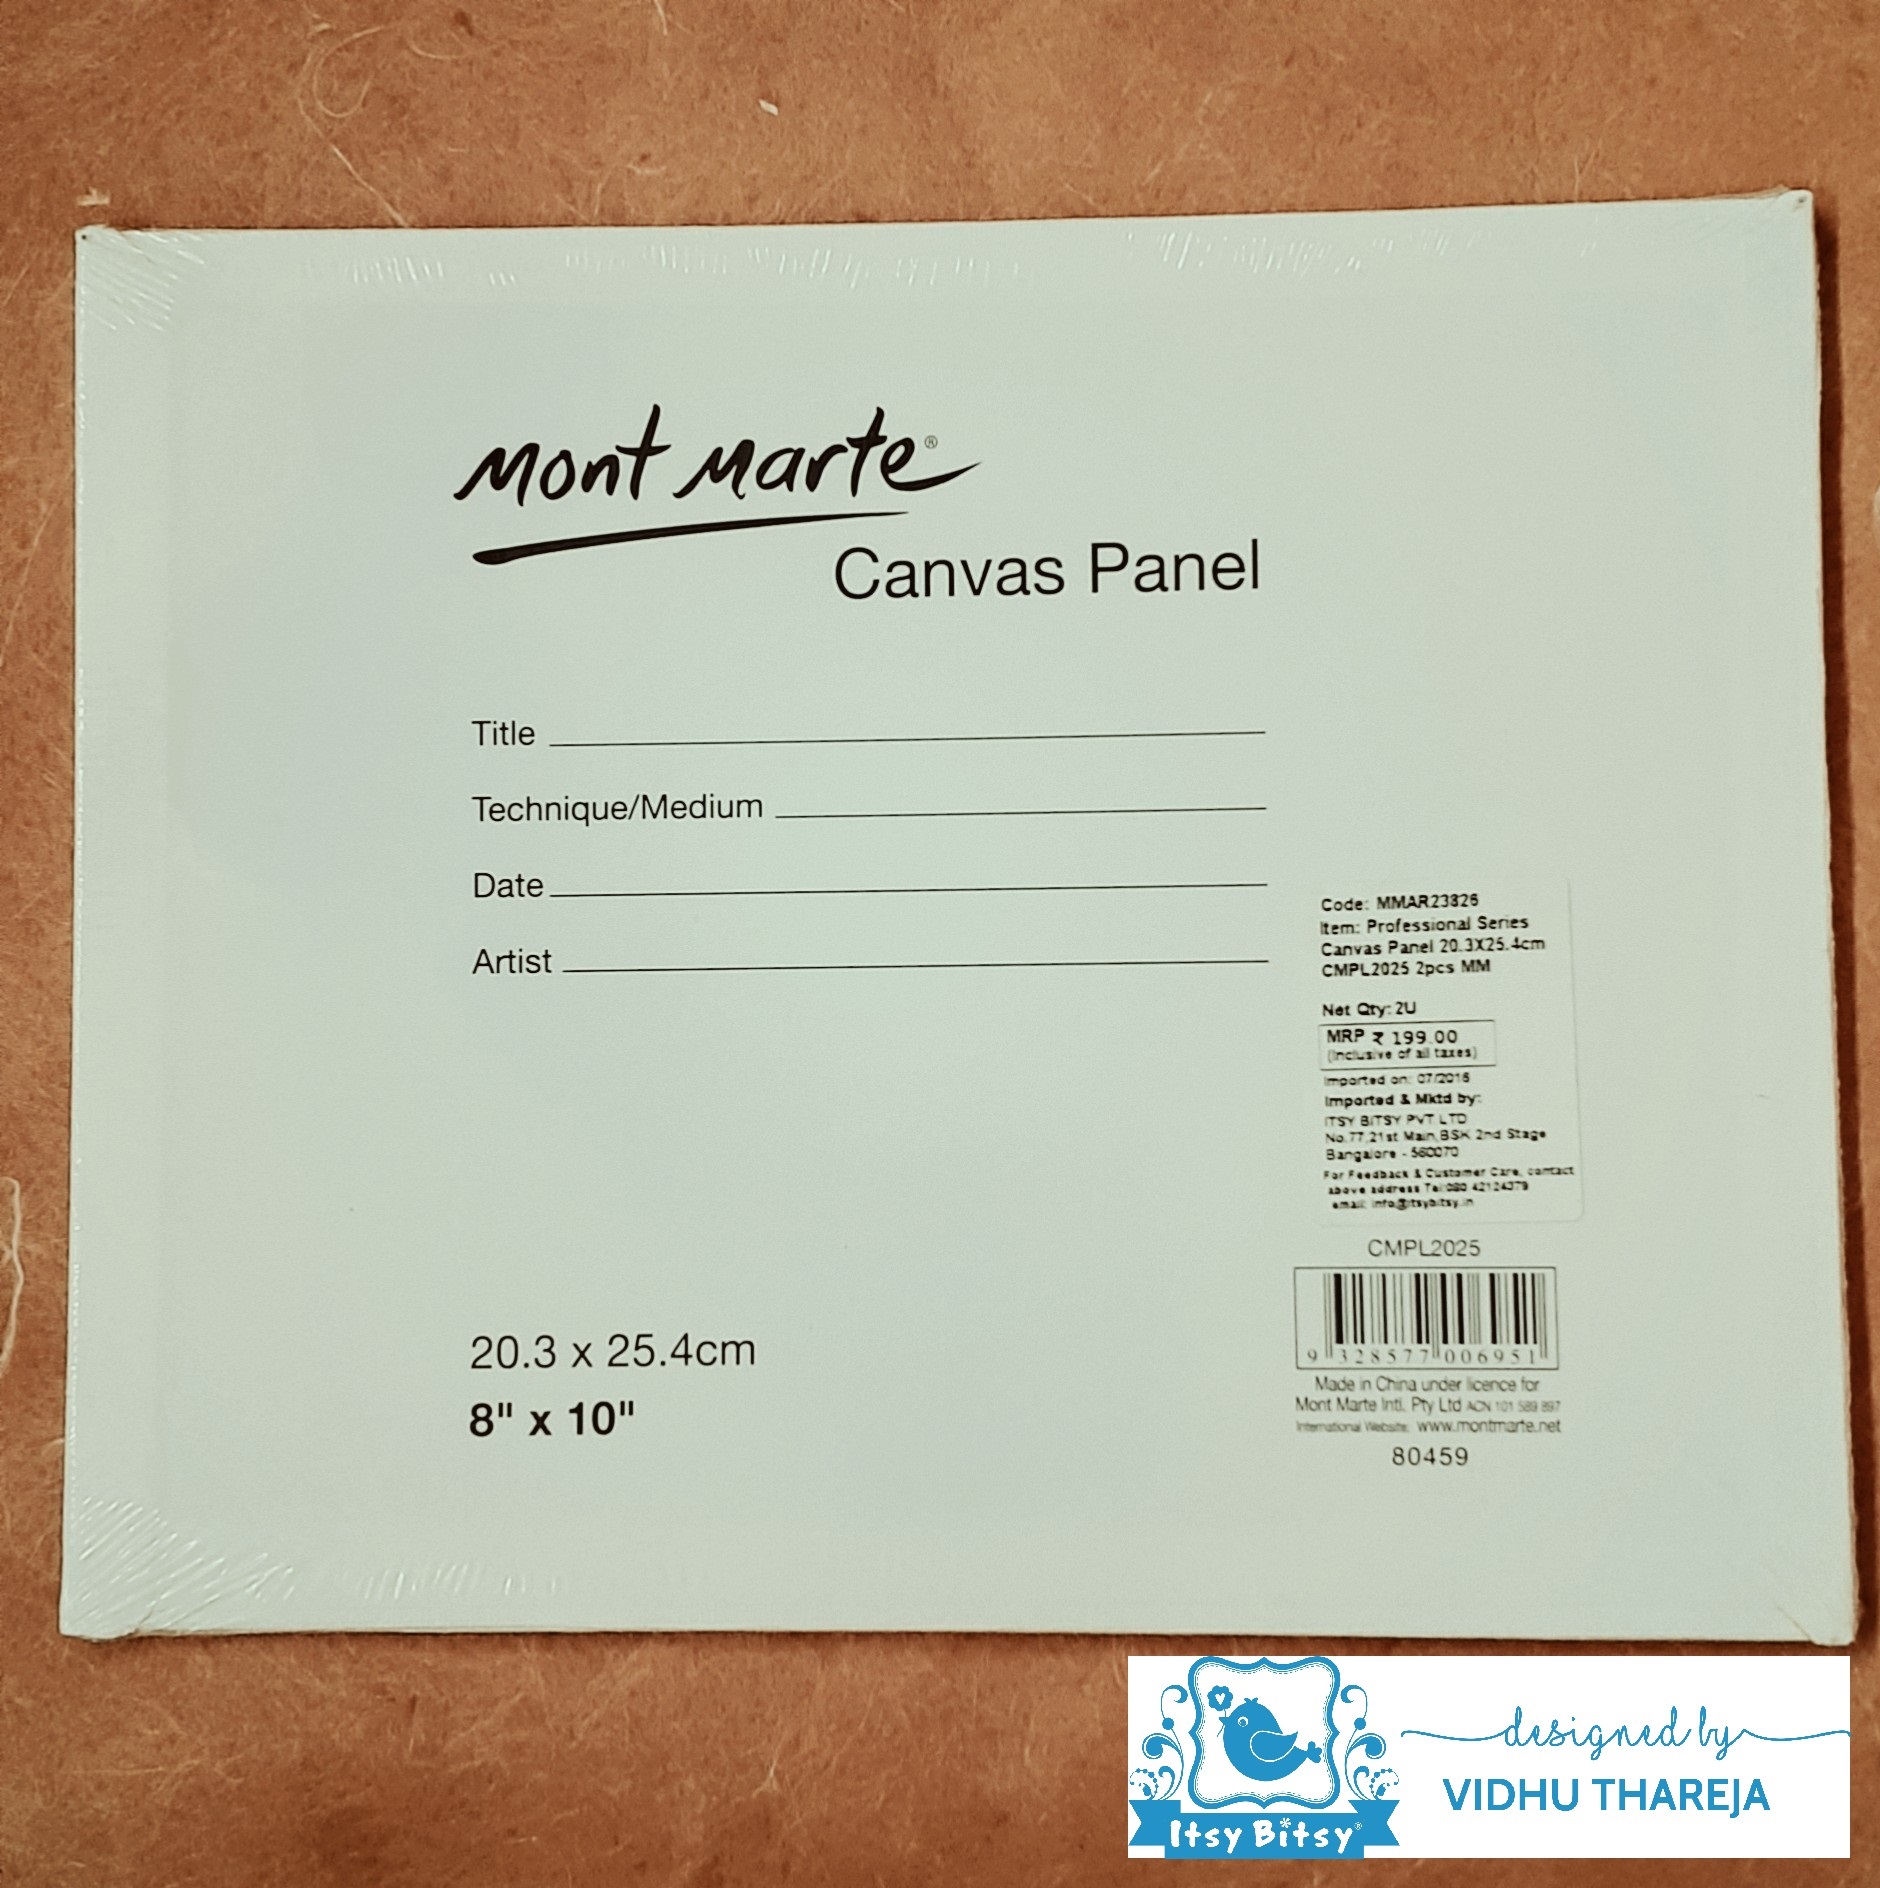
For this project I have used a canvas measuring 8*10 inches, which I had bought from the Itsy Bitsy store long back. Itsy Bitsy has recently launched new canvases in different sizes. Don’t forget to check the new collection.
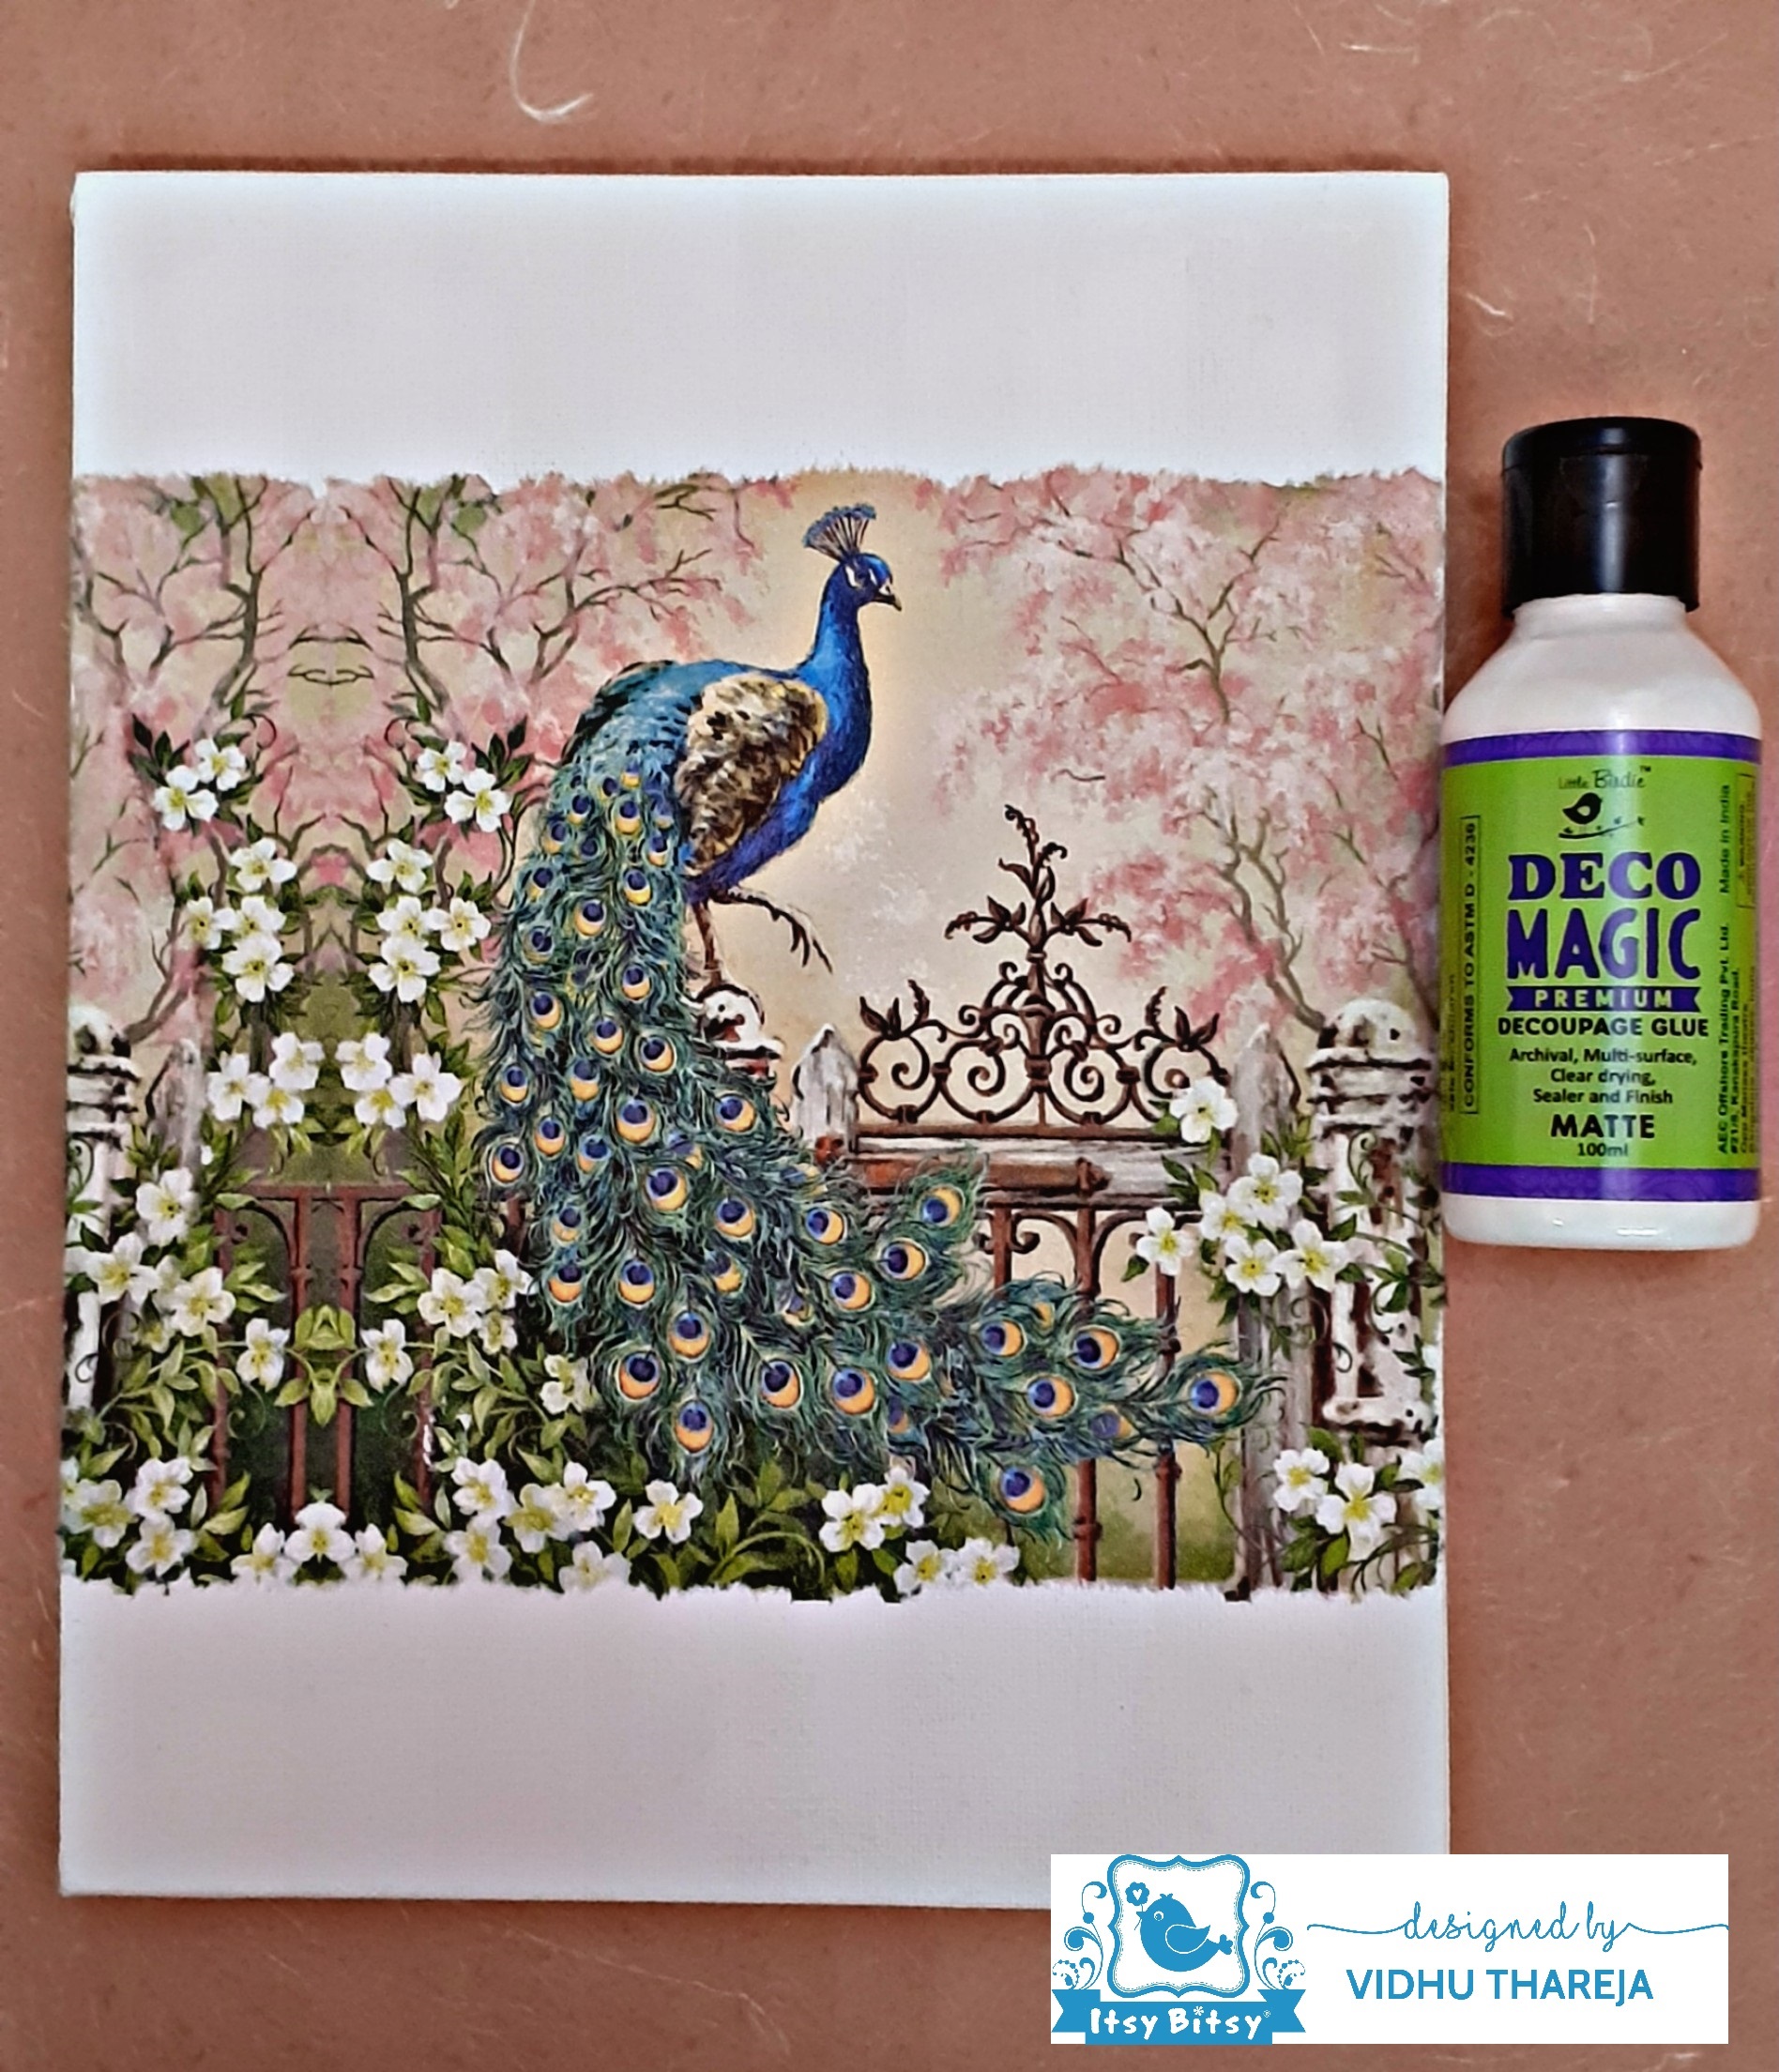
Since the color of the canvas is white so it gave me liberty to do decoupage directly. I remove the edges of a decoupage napkin with a wet brush so that the fibers of tissue gets easily blended with the base. Always use wet brush technique or tear the napkin with hand to achieve a blended look. Then using Little Birdie Deco Magic Decoupage Glue – Matte I adhered that napkin on the canvas. I left it to dry and then applied two coats of Little Birdie Deco Magic decoupage glue – Glossy to seal the decoupaged area. I gave enough drying time between each coat of Deco Magic glue.
Tip: Whenever you are using a decoupage napkin for your project, never adhere the napkin in one go. This helps in avoiding wrinkles. Apply glue on a small portion and adhere the napkin pressing gently with your hand. After adhering the napkin, place any old plastic sheet or cling film and press from the inward to the outward direction to remove any air bubbles or wrinkles.
Now it is time to do some colour blending around the napkin. For that I have used Little Birdie Chalk Paints – Butternut Squash, Fortune Cookie, Tattered Lace, Wild Wasabi and Rose Blush. Use sponge to blend the colours. I have used sponge to blend the colours. Always use a dry sponge for color blending and use the same sponge even if your are using multiple colours in your project.
Now it is turn to use the focal product – Glitter Fabric Paints on my project. Initially I was not sure that how these paints will look if I blend them together. I took a chance and went with the flow. I had Cherry Sparkle, Teal Glint and Rosy Shimmer shades of Glitter Fabric Paints which are perfectly going with the decoupage napkin. Here I have used sponge to blend these colours. I was so happy the way these colours blended together.
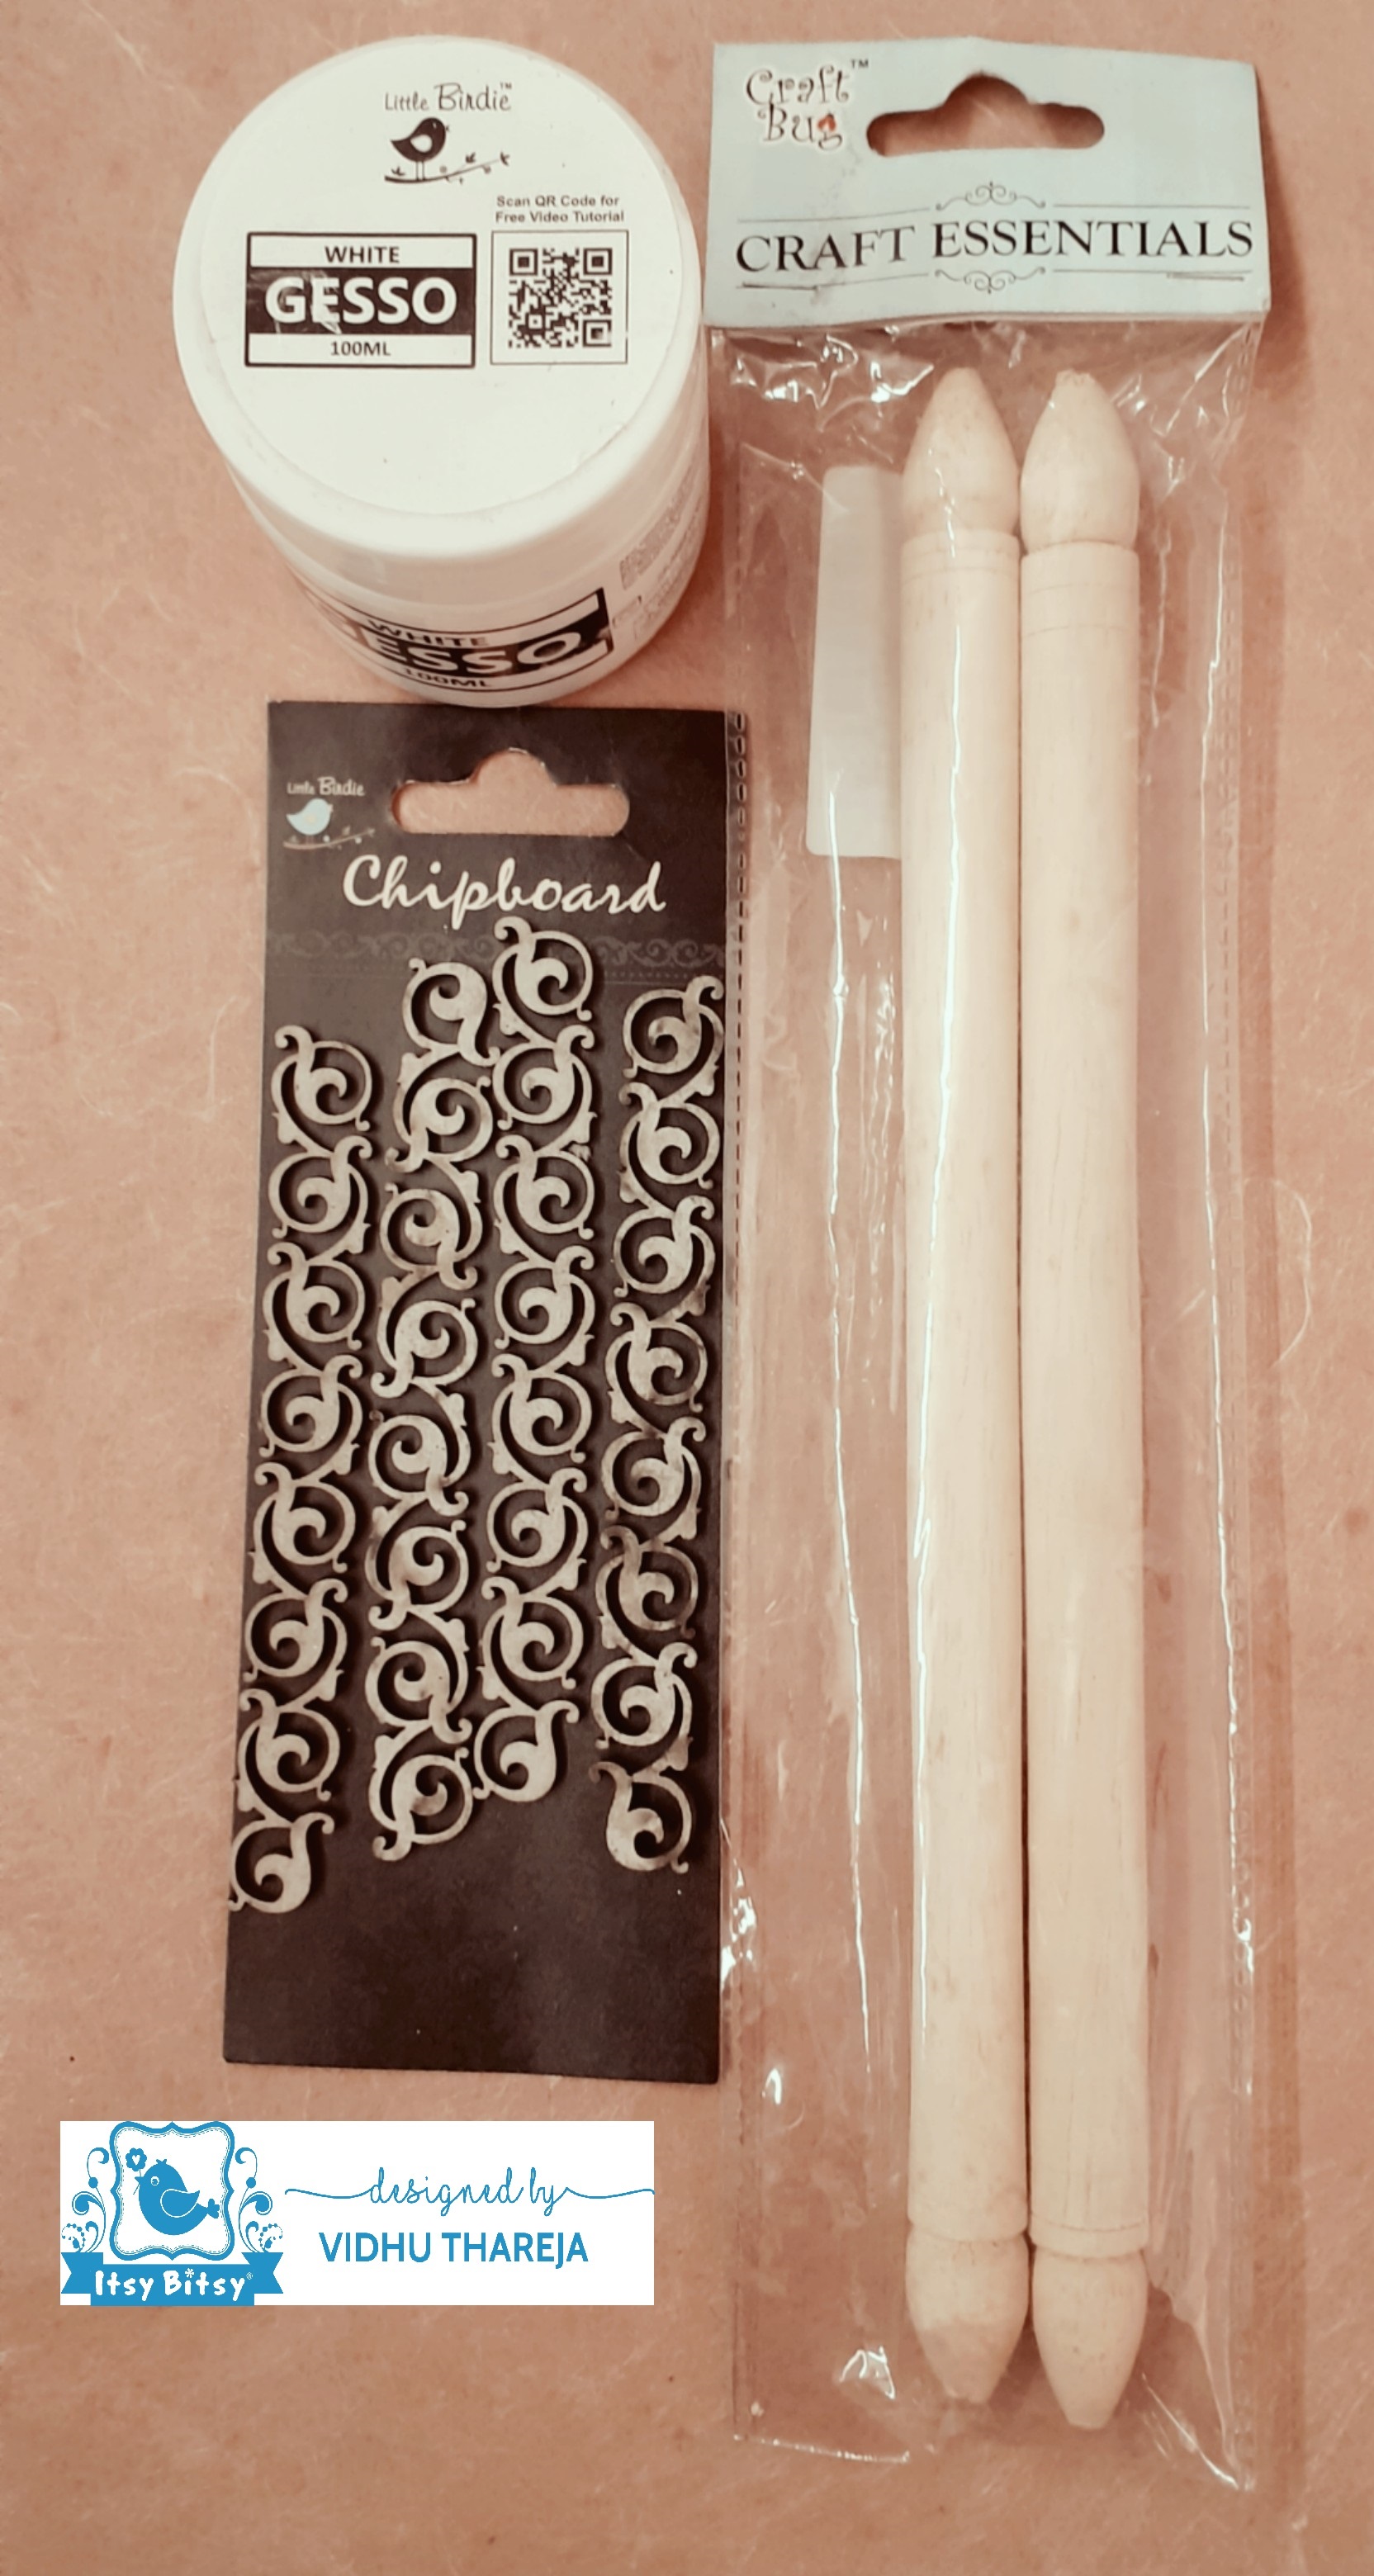
My project was looking little empty at this stage. Fortunately I had Little Birdie Chipboard Shapes- Ornate Borders in my stash. These chipboards are my favourite and I keep on adding them to my stash. These chipboards looks great on any type of project. Possibilities are endless. Here I want to mention that these chipboard shapes are from the old collection. Now beautiful primed chipboard shapes are available at Itsy Bitsy. I had wooden dowels also, which I had bought from the store of Itsy Bitsy store long long back but never got a chance to use them. You might not find the same type of wooden dowels now but wooden dowels in different sizes are available at Itsy Bitsy. I primed the chipboards and the dowels with Little Birdie Acrylic Gesso.
I left them to dry and then applied dark brown acrylic color. I left them to dry completely and then rubbed Metallic Wax – Rich Gold on the chipboard shapes and the dowels. I loved the Antique finish of the Metallic Wax.
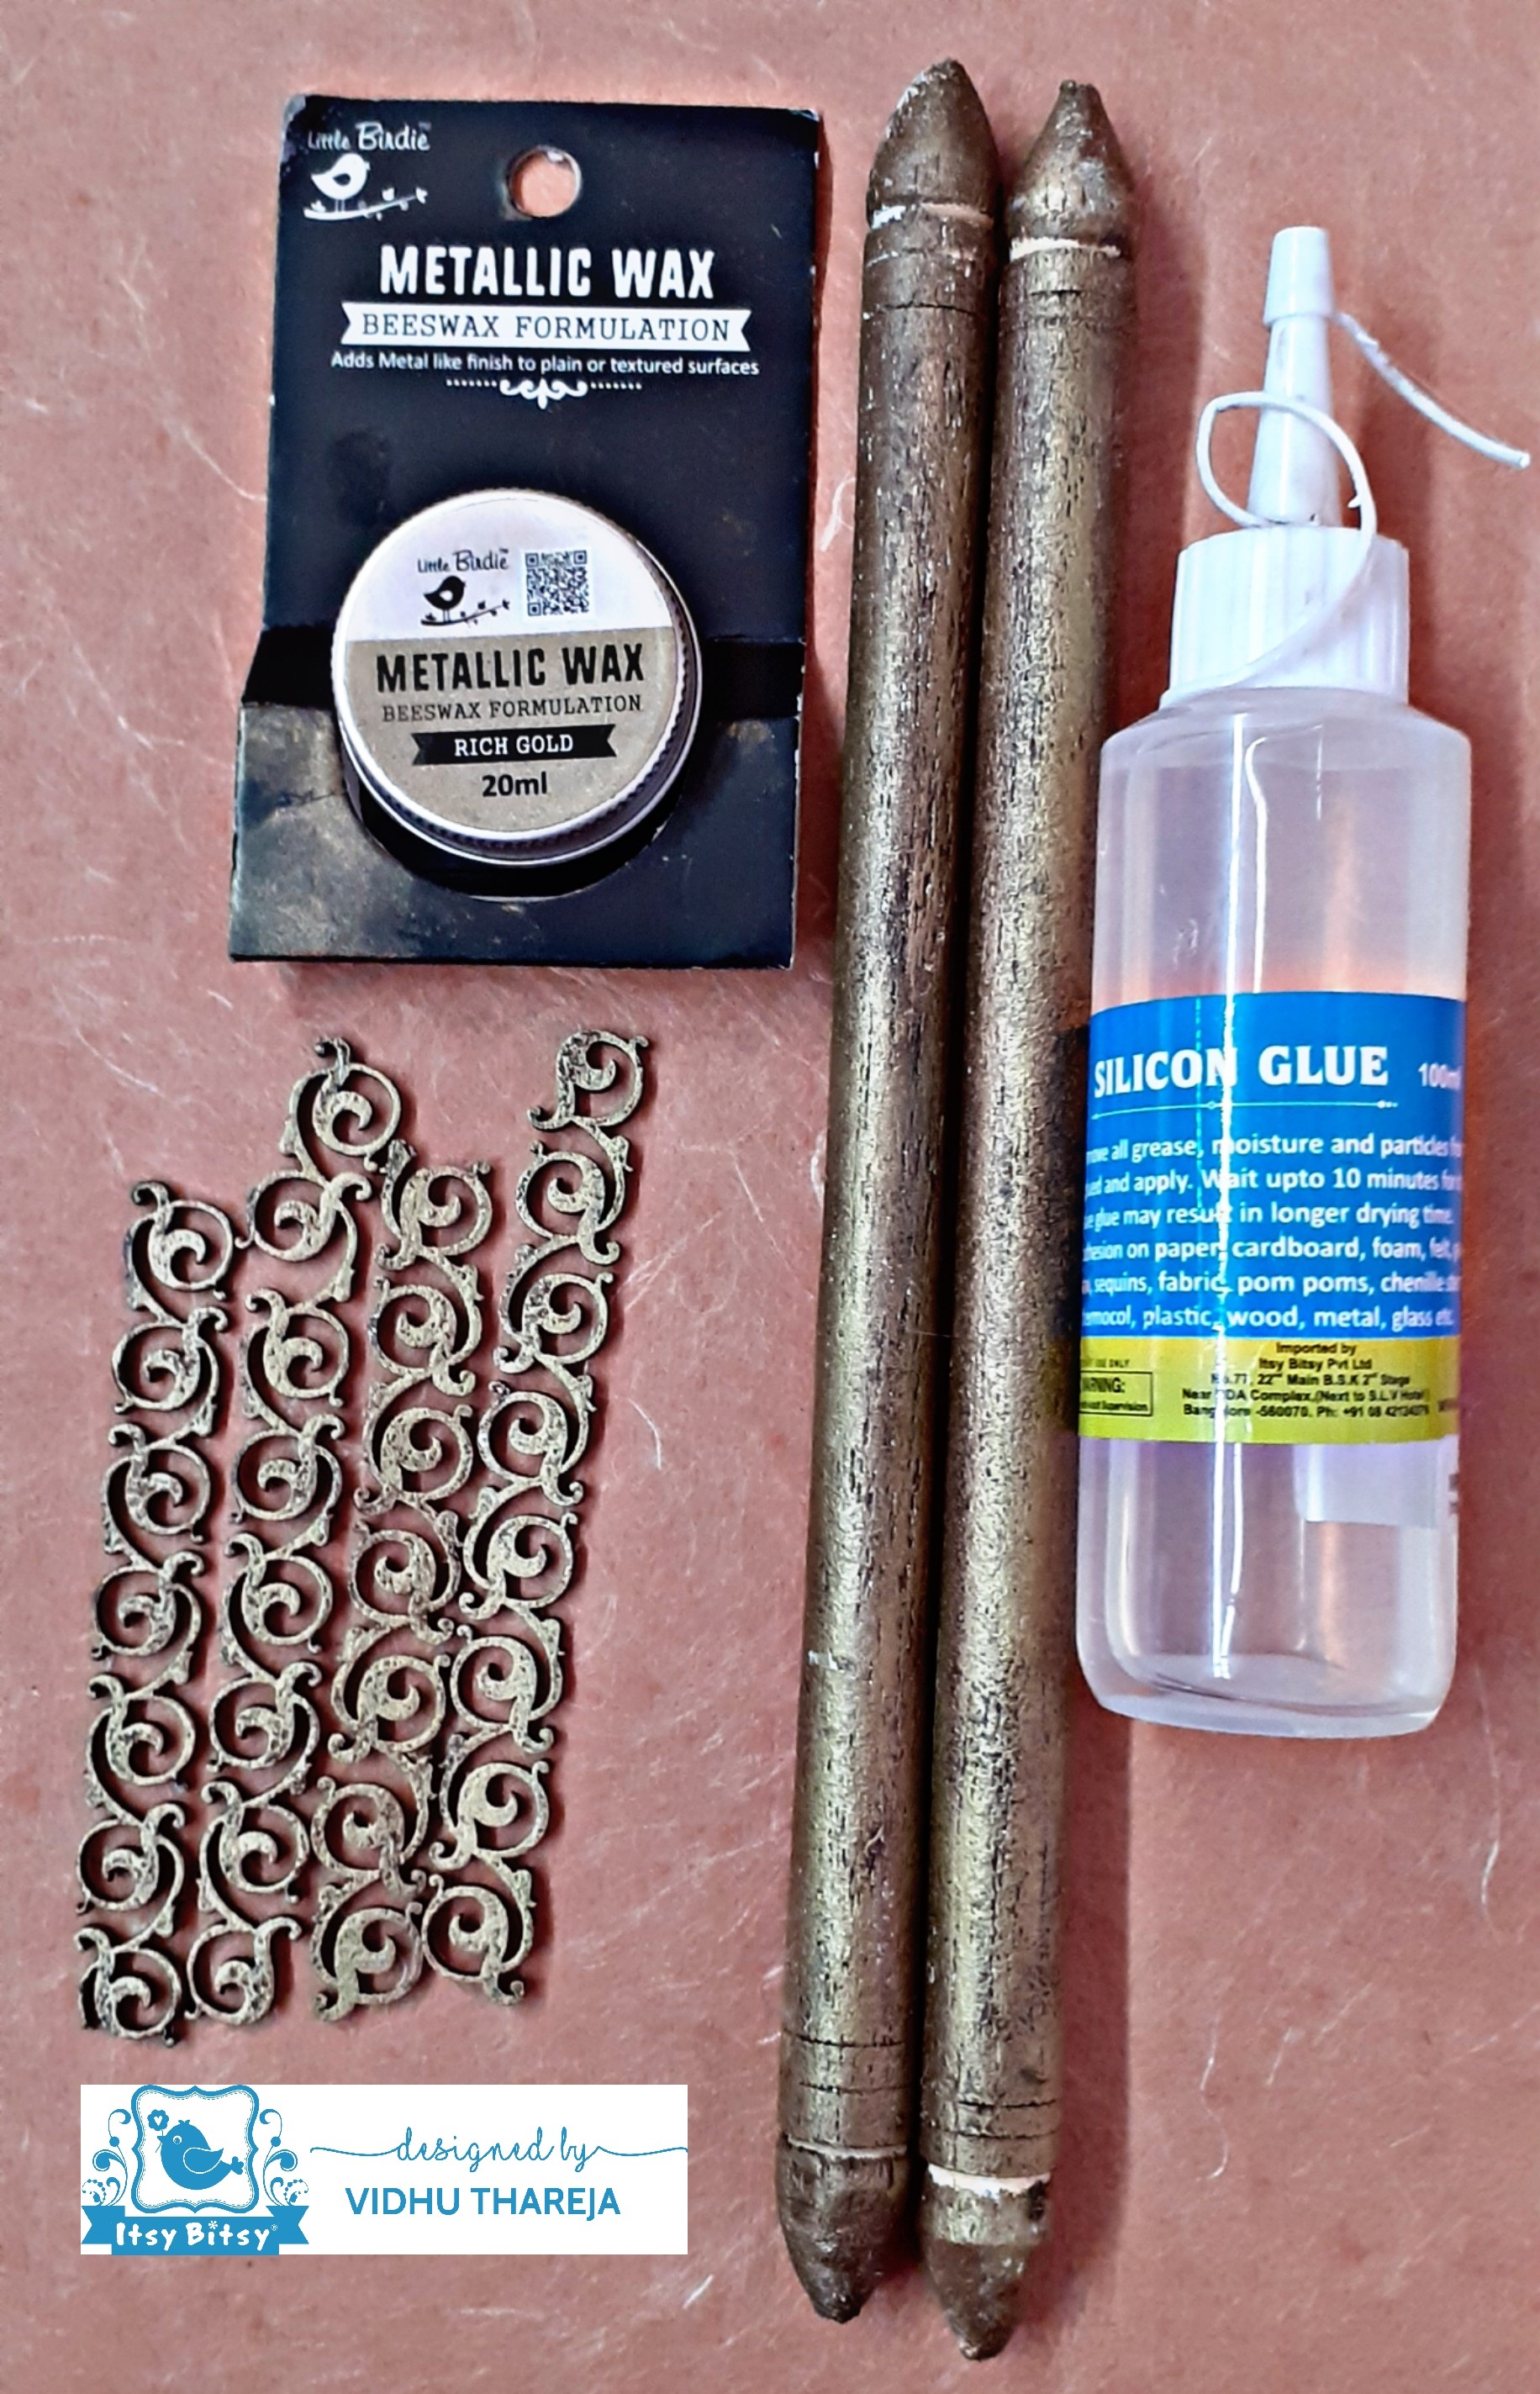
To fix the chipboard shapes I have used Little Birdie Silicon Glue, which is a integral part of my craft stash. To fix the dowel I have used my Hot Glue Gun.
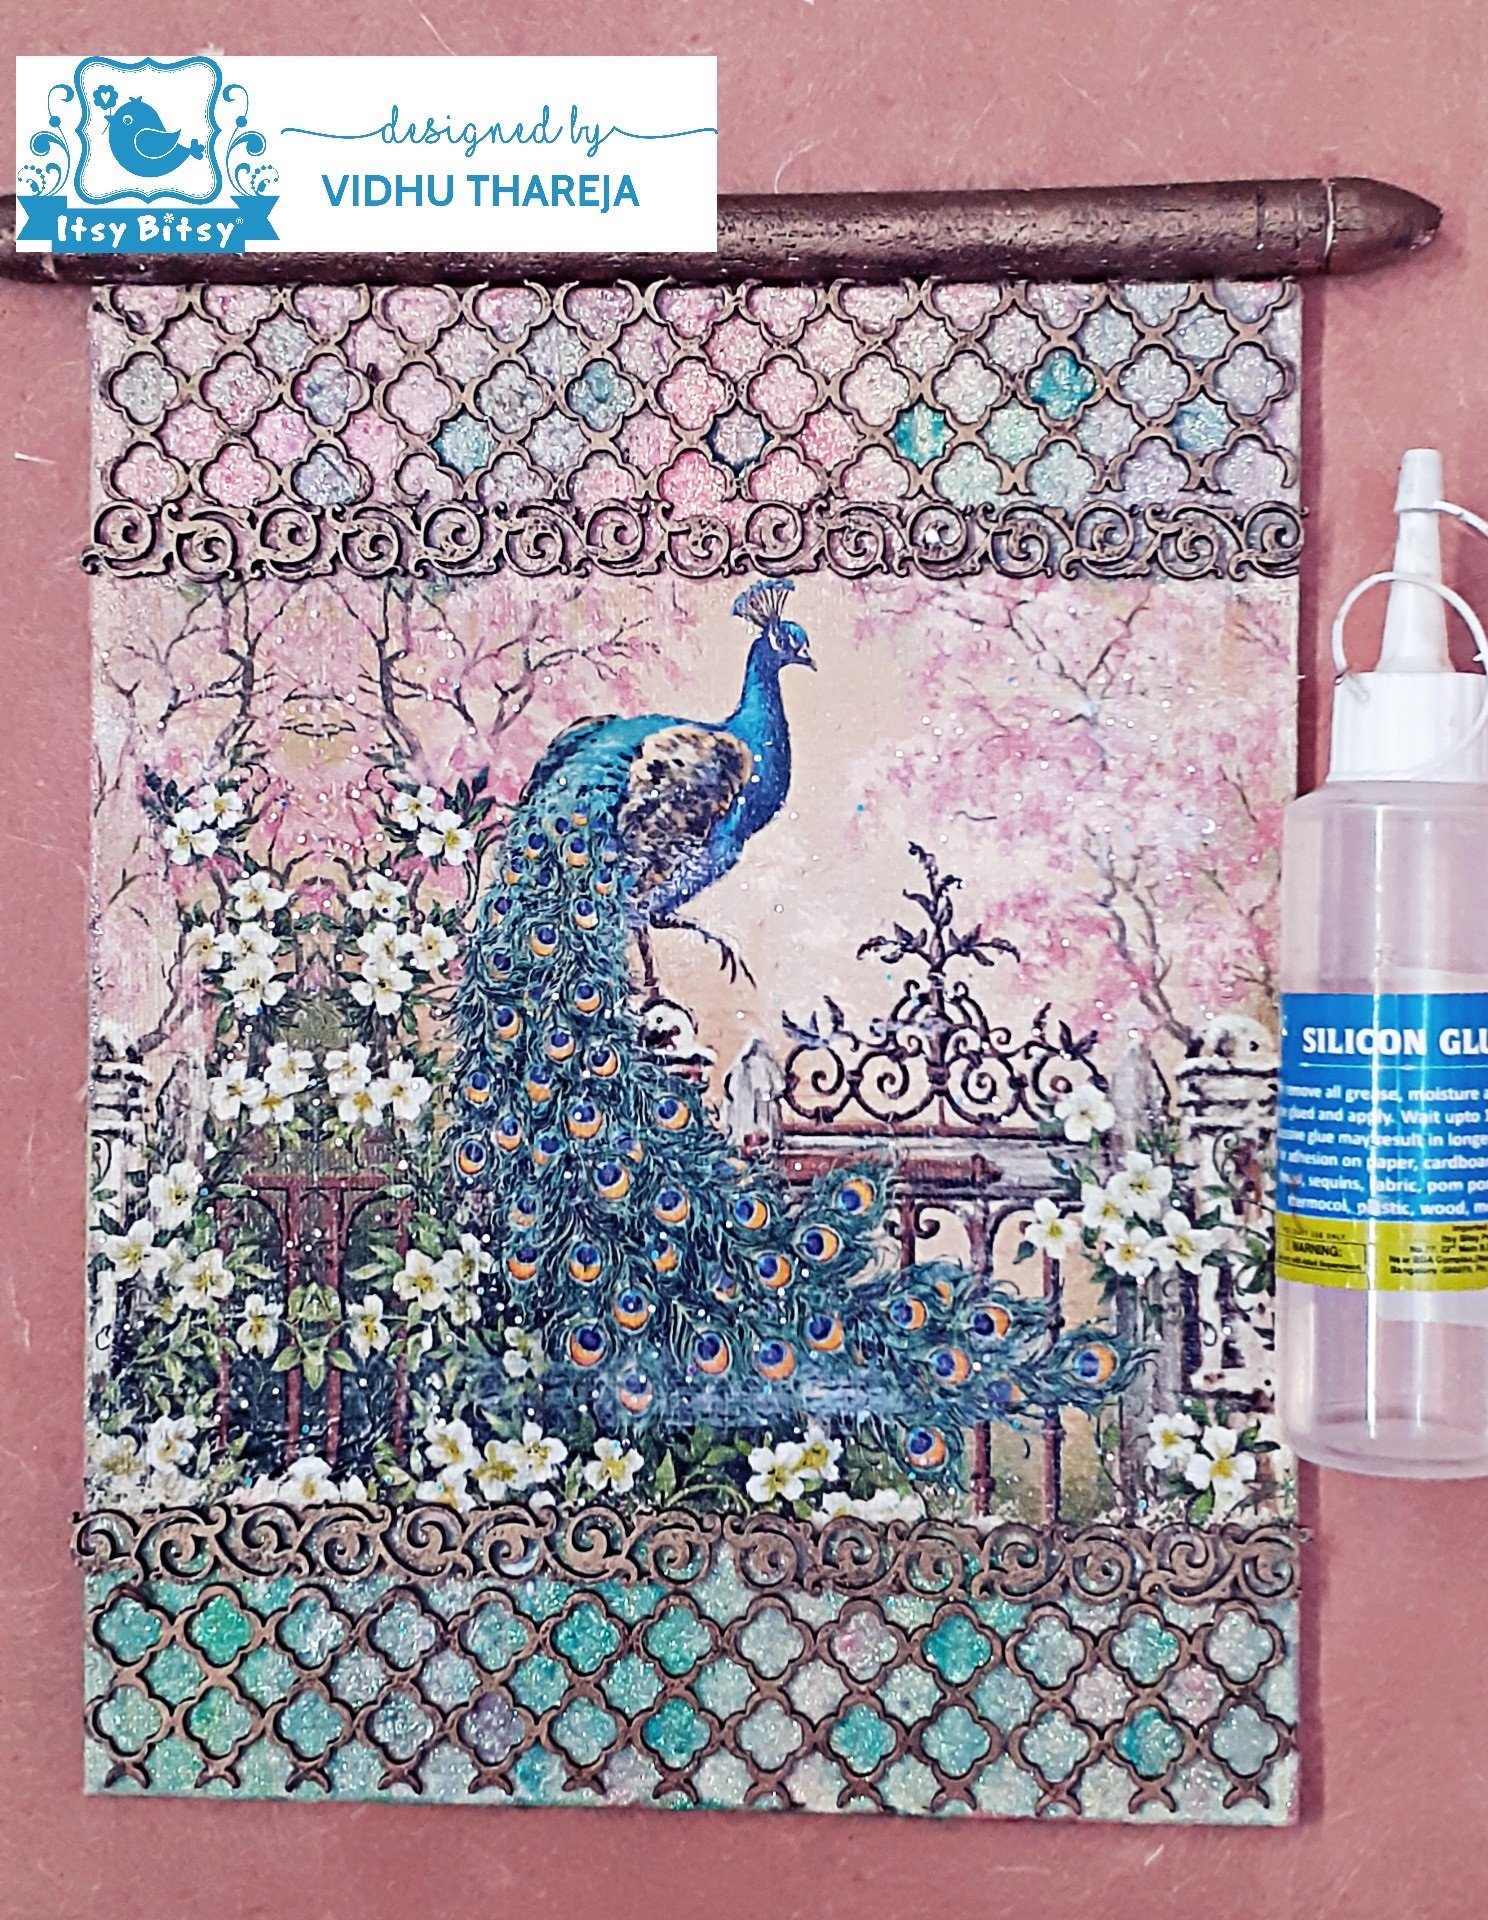
There is no need to seal the Glitter Fabric Paints and Metallic Wax but varnish plays an important role to make our decoupage projects long lasting. I give a coat of Little Birdie Decor Varnish and immediately sprinkled some glitter to add some interest. I let it dry and then applied another coat of varnish to seal the glitter.

A beautiful canvas to adorn the wall is all ready. I tied a twine with wooden dowel to hang it.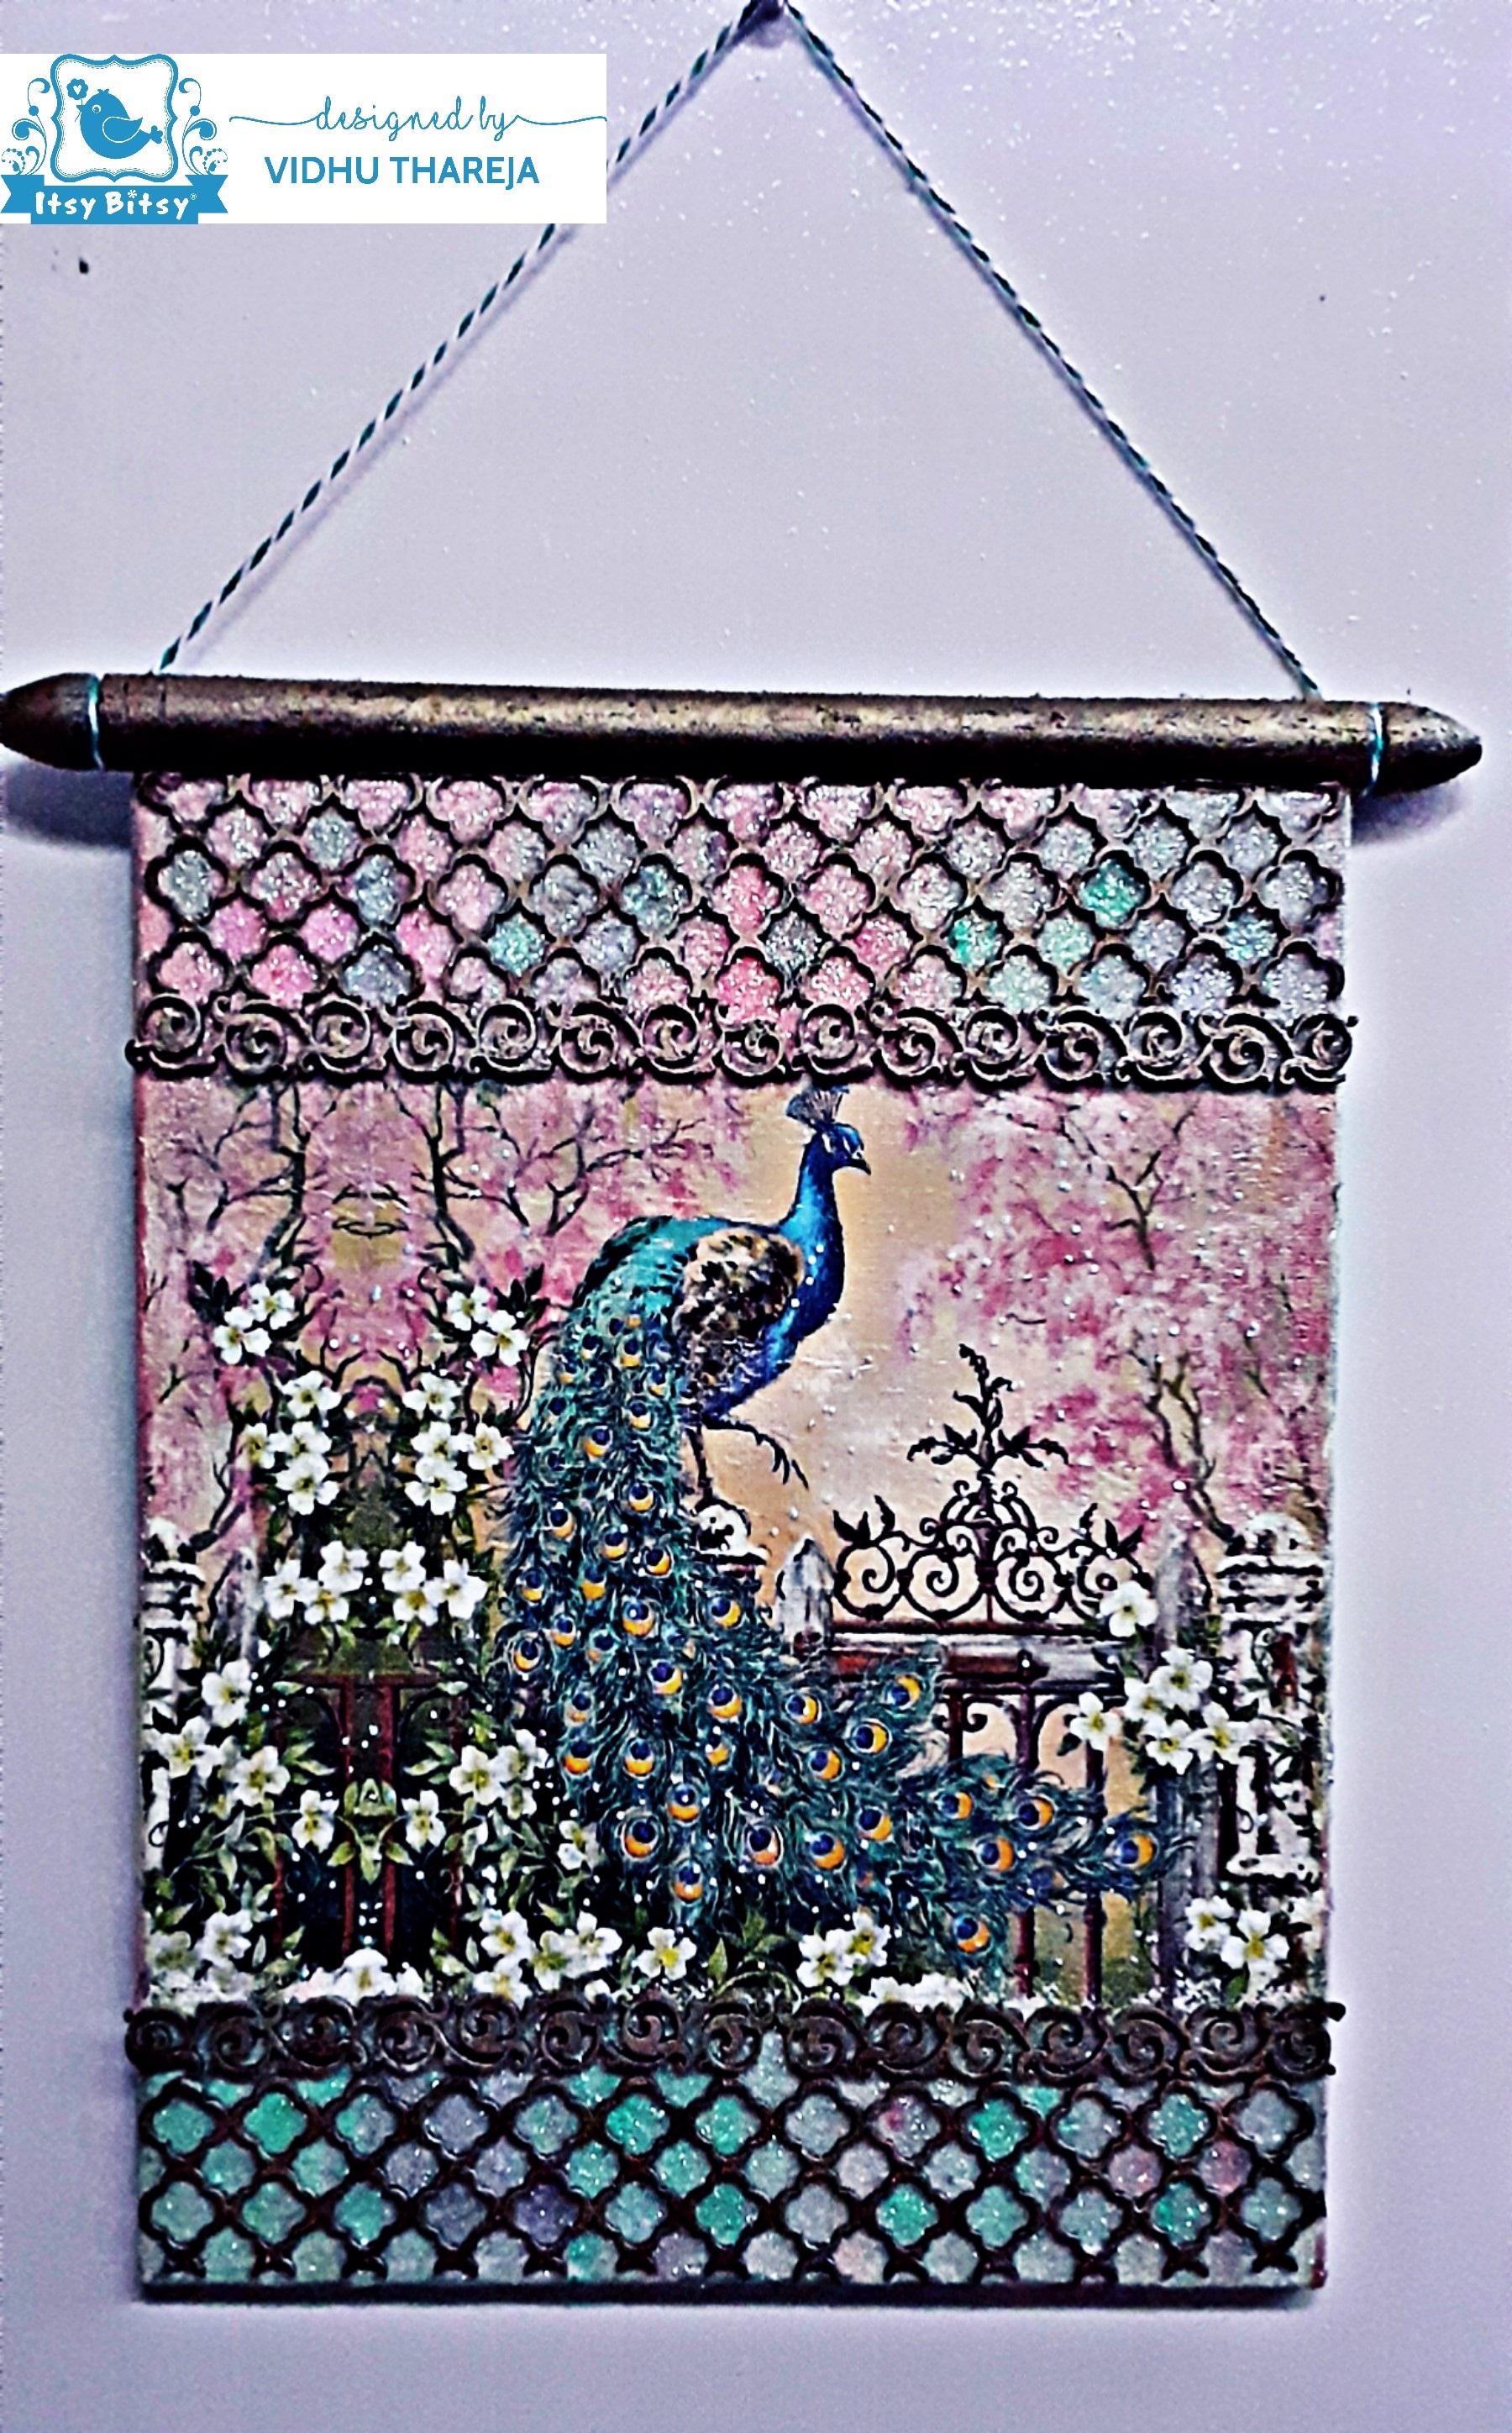
I am loving the sparkling effect of Glitter Fabric Paints. I hope you liked my project and find it inspirational also. Do not forget to participate in the current month’s blog challenge which is all about creating something unique with Glitter Fabric Paints with unlimited possibilities.
I am excited to inform you that all these products come with a unique QR code!
Point your mobile phone at the QR code on the product & scan them to take you directly to our YouTube links where you can see how each of these products are used! Check out all our new products for QR codes in the future ( this will be either on the label or on cap of the bottle).
Use code VIDHU5 to buy any product at www.itsybitsy.in and get 5% discount on your total bill.
Happy Crafting
Explore, Imagine, Create!!
Vidhu Thareja
List Of Materials used-


Lovely transformation !!
Thank you so much