Hello Everyone,
Vidhu Thareja here as a guest DT with a new project. I hope all of you are having a great crafty time. I would like to thank Itsy Bitsy for giving me this opportunity to create one more project using one of the many excellent products by their home brand Little Birdie. It’s none other than the Crackle Paste!!
Little Birdie Crackle Paste is a versatile product which can be applied on any surface like wood, glass, metal. So possibilities are endless. It is easy to apply and can be applied through a stencil or with a palette knife. It is a perfect product to achieve a vintage look on any project. I personally like vintage look and I love doing decoupage… so I have decided to create a new decoupage box and on top of the box I have used Crackle Paste. Here is a step wise picture tutorial.
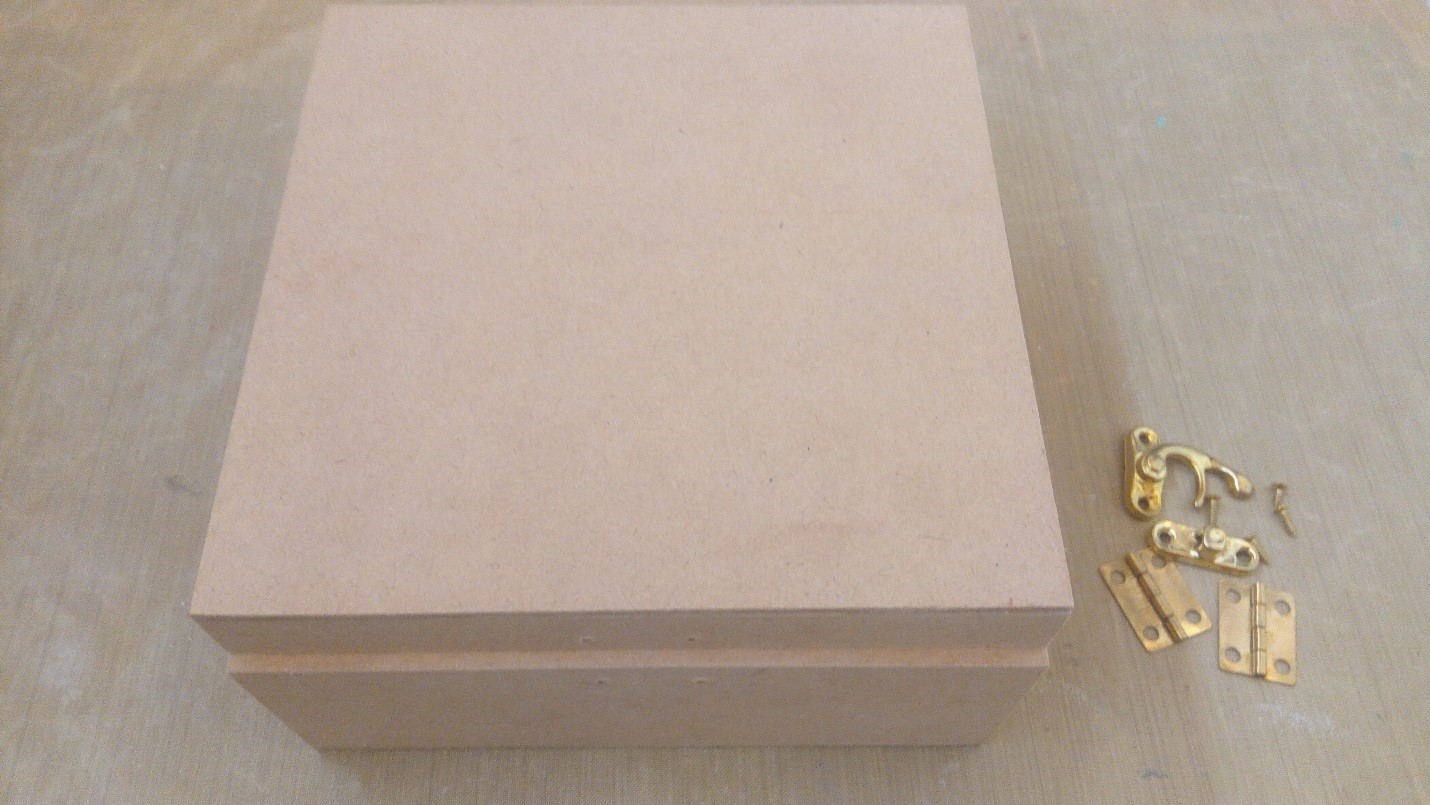
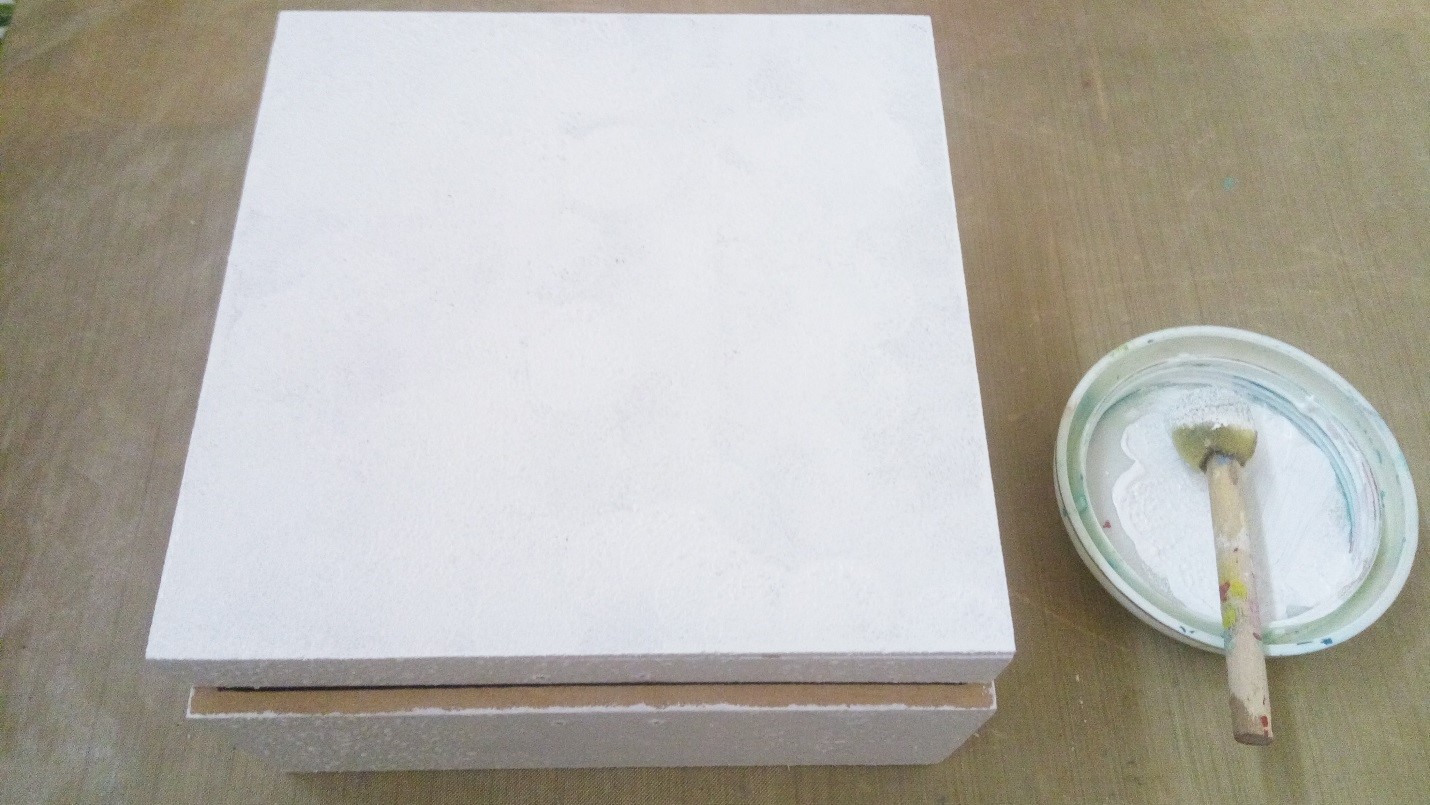
I took a MDF box measuring 6*6*3 inches. I unscrewed all the hardware and sanded the surface. Then I applied two coats of gesso and let it dry.
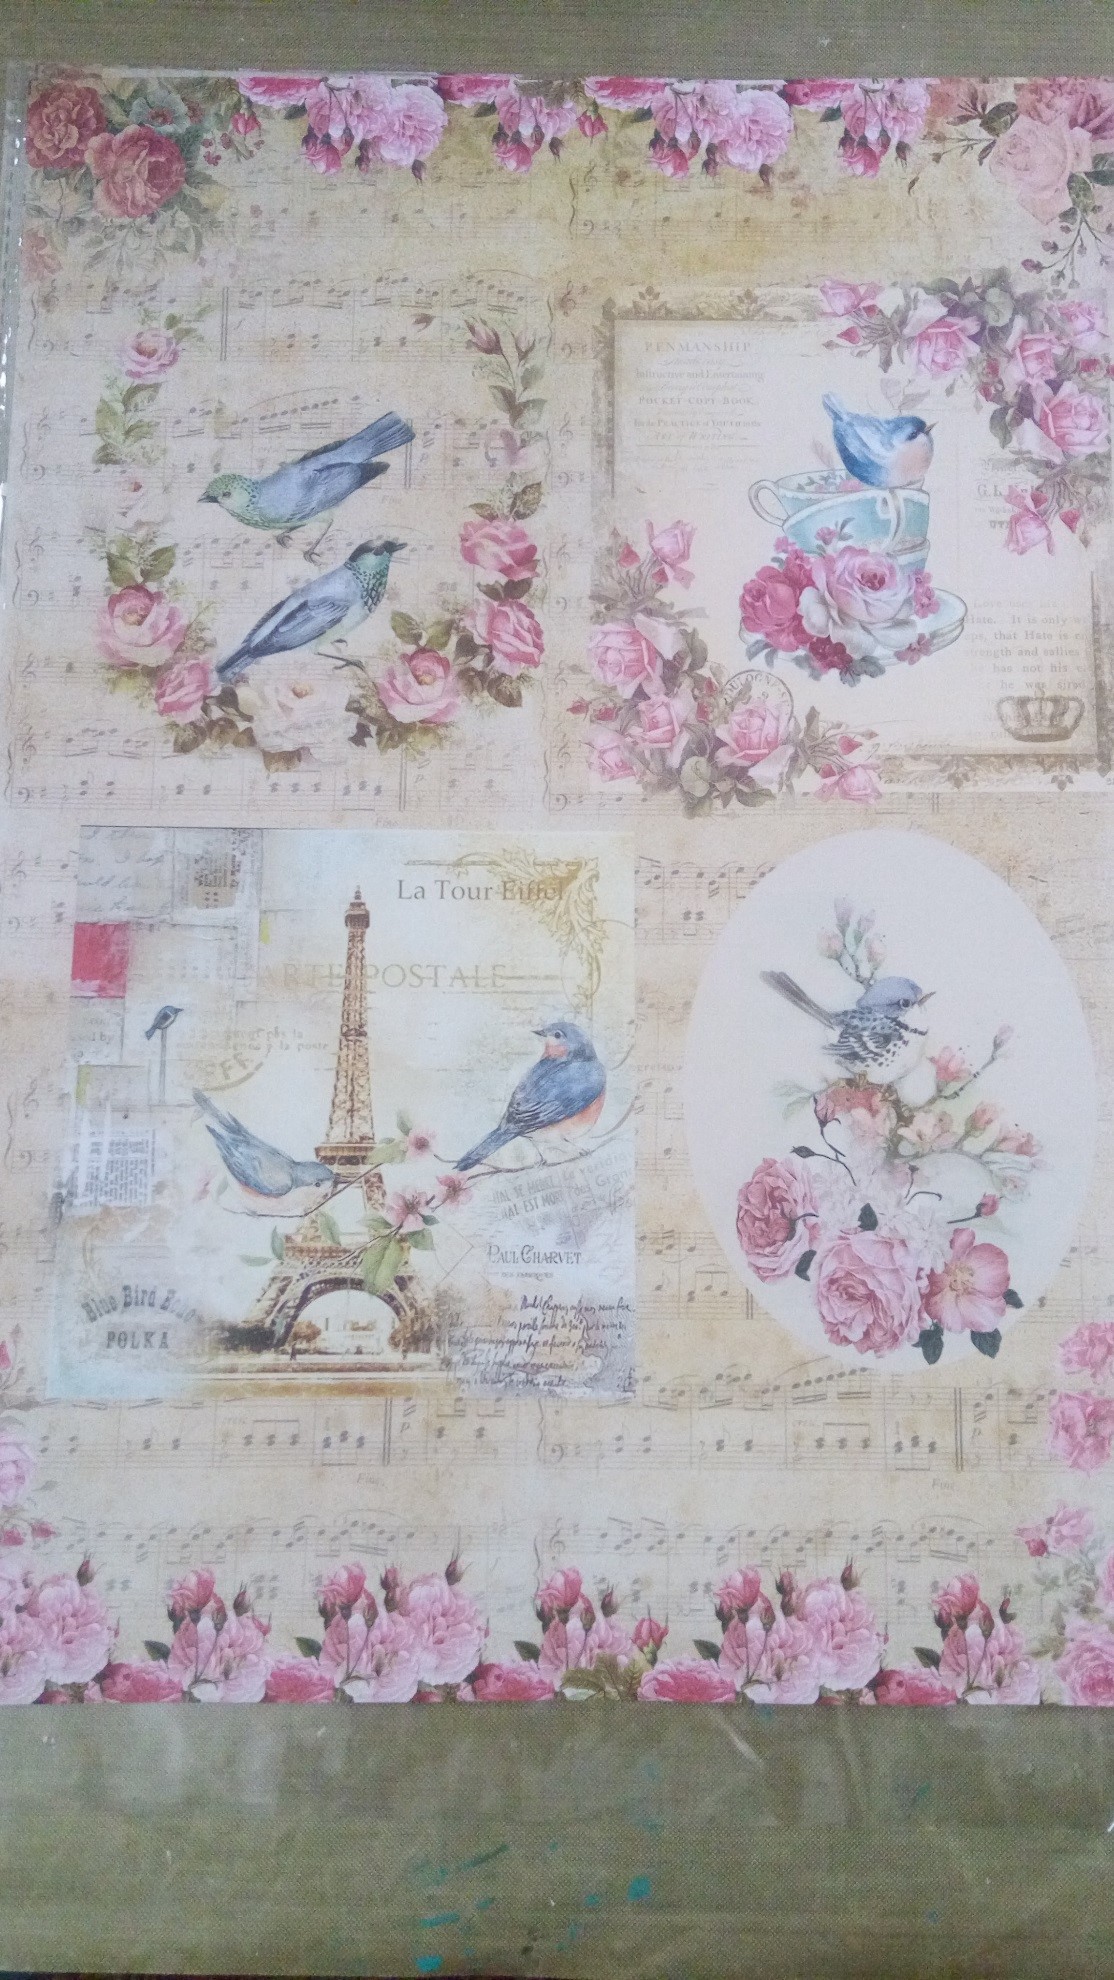
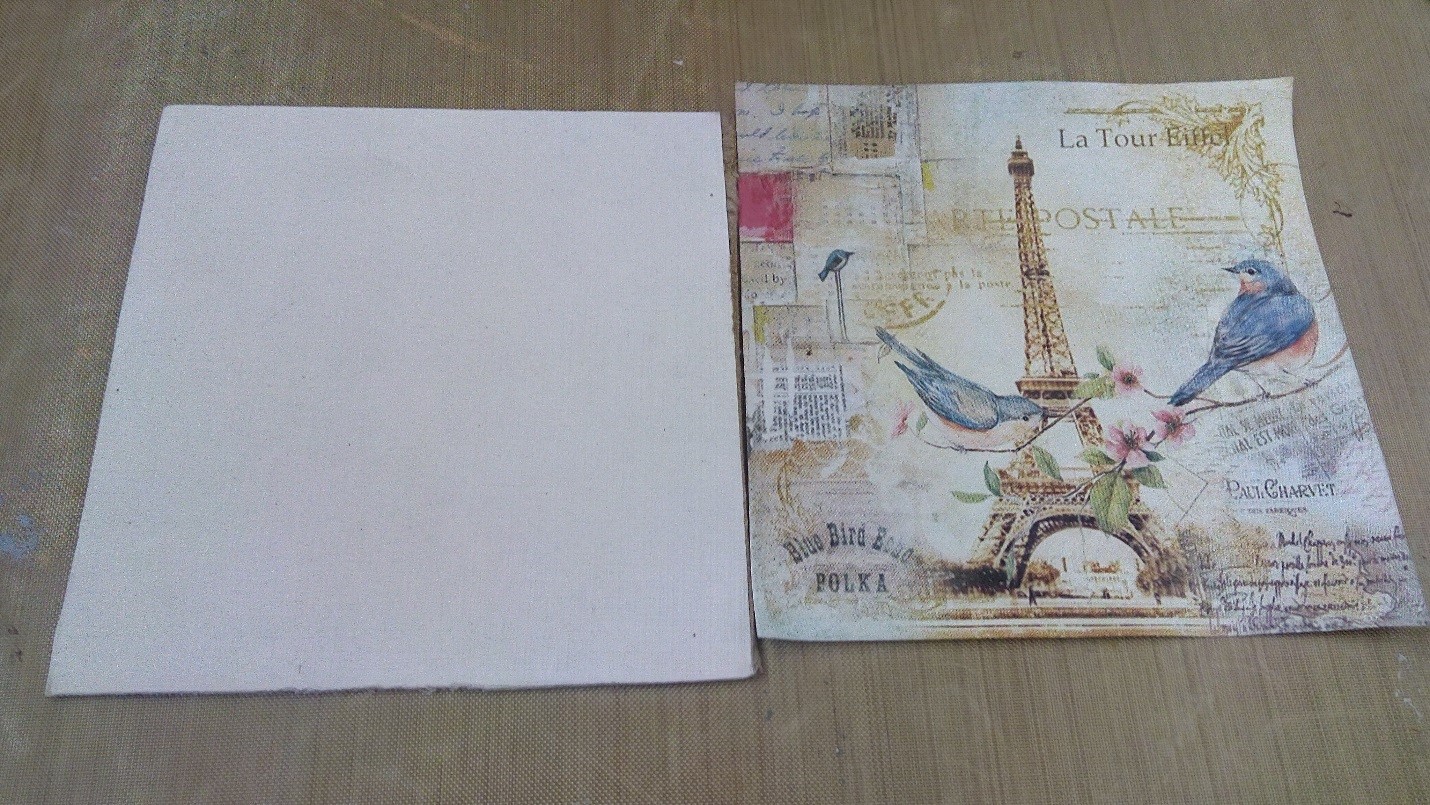
The next step was to choose a paper or tissue for my project. I decided to use decoupage paper, which I had bought from the store. Itsy Bitsy has a wide range of decoupage papers to choose from and these come in sets of four sheets.
Now it was the turn to some select matching shades of colors. Since I was using Crackle Paste, I decided to use Little Birdie Chalk Paints. Fortunately, I found the shades that matched the design perfectly. I selected, Chocolate Truffle and Misty Rose chalk paints from my stash.
First I applied the Chocolate Truffle on top of the box, covering all the four sides. I did this intentionally so that when the Crackle Paste dries, the chocolaty shade will be seen underneath.

Since I was using Crackle Paste for the very first time, it was a challenge for me to use it and get the perfect crackle effect. After thinking for a while, I decided to mix chalk paint directly in the Crackle Paste. So, I mixed Misty Rose chalk paint in the Crackle Paste to get the desired color. I mixed it well and applied that on top of the box with a palette knife using a crackled design stencil. I covered the sides of the top box too. I left the center part of the box where I did not wish to have cracks. I left it to dry naturally. It takes around 3-4 hours to dry, depending upon room temperature. Do not be in a rush to dry it. Remember, patience is the key!
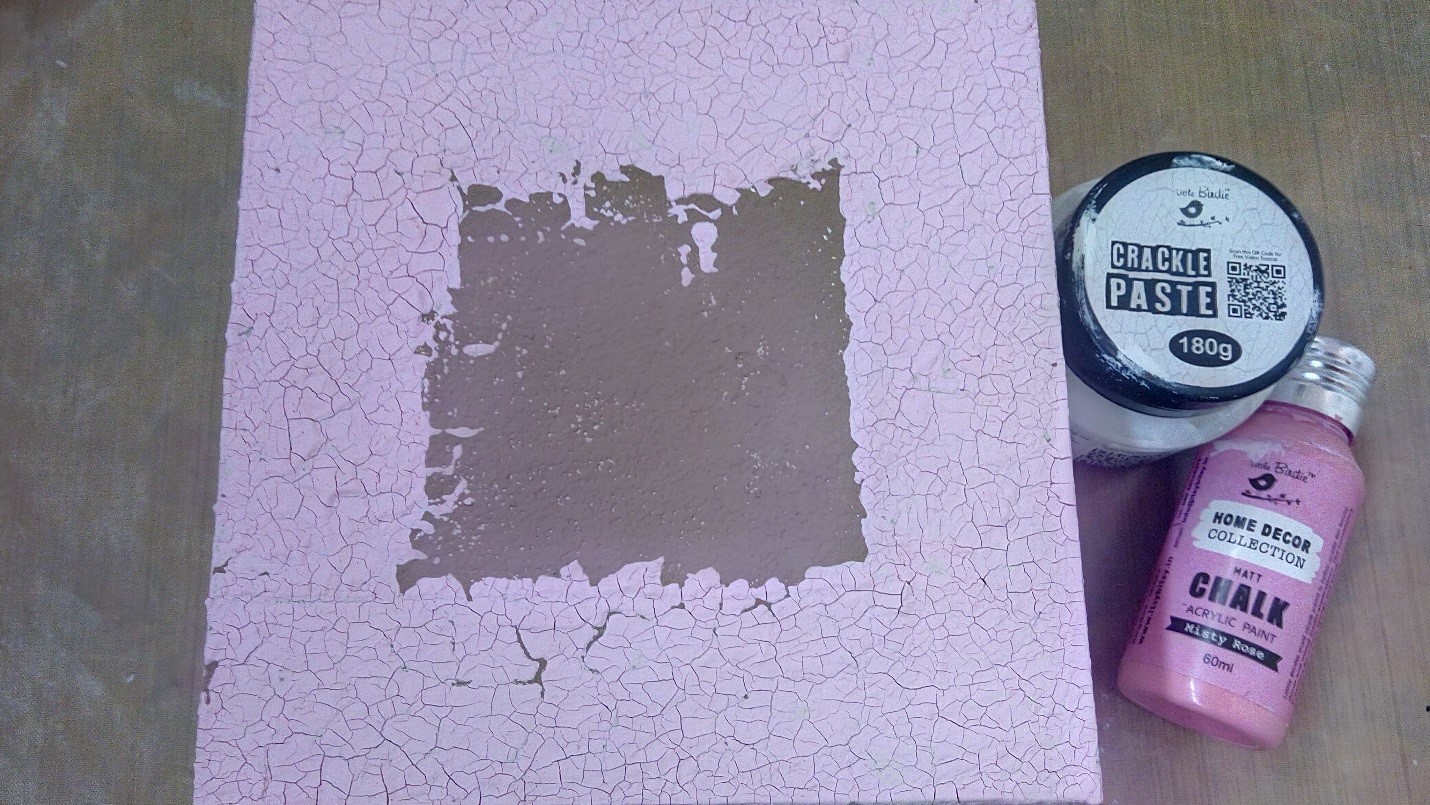
When it was dry, I was very happy to see the beautiful cracks.
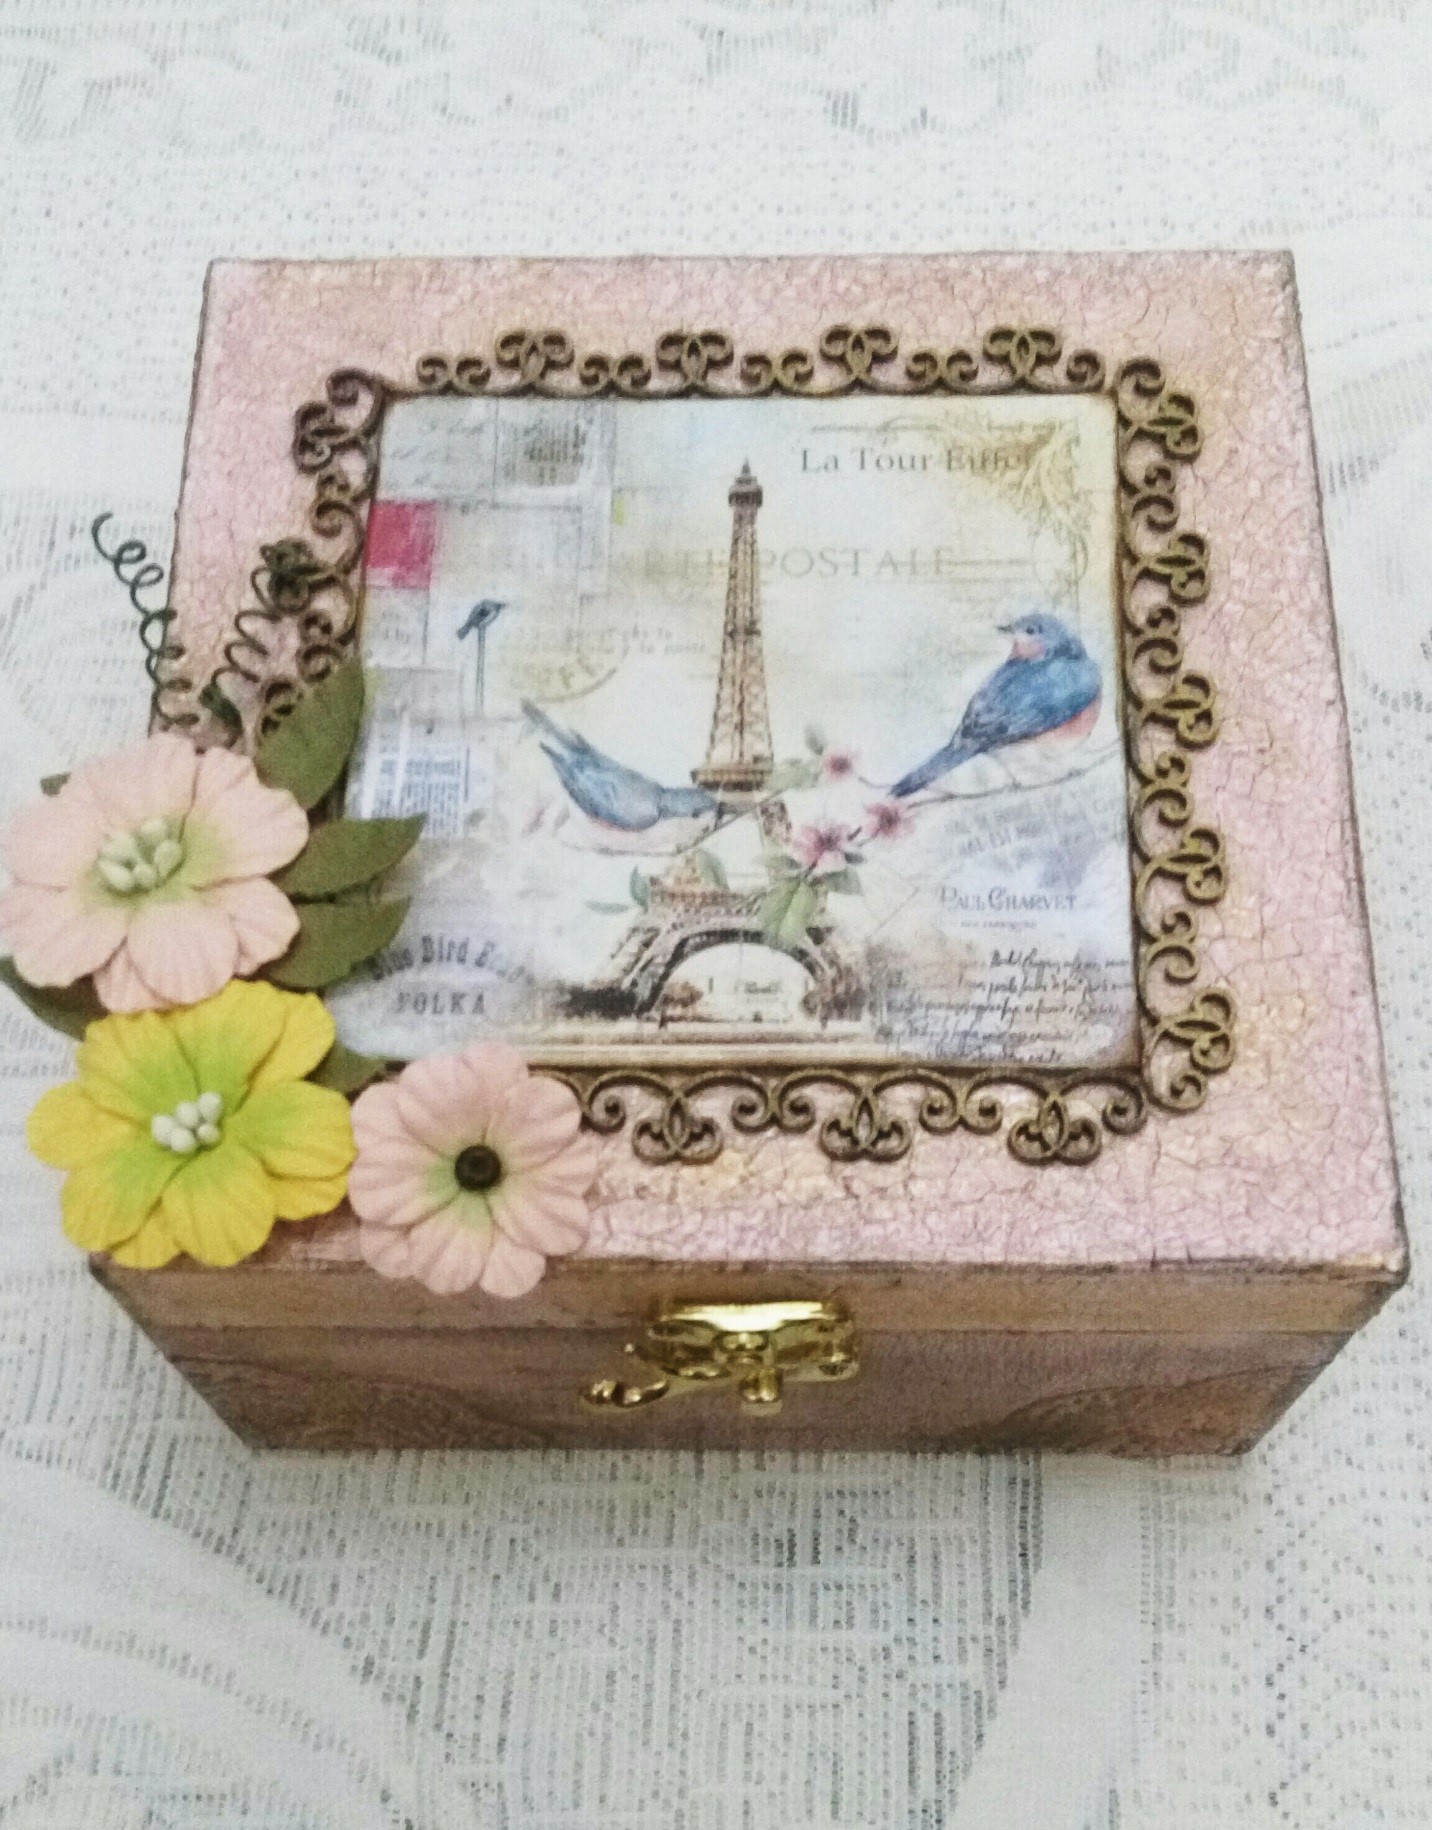
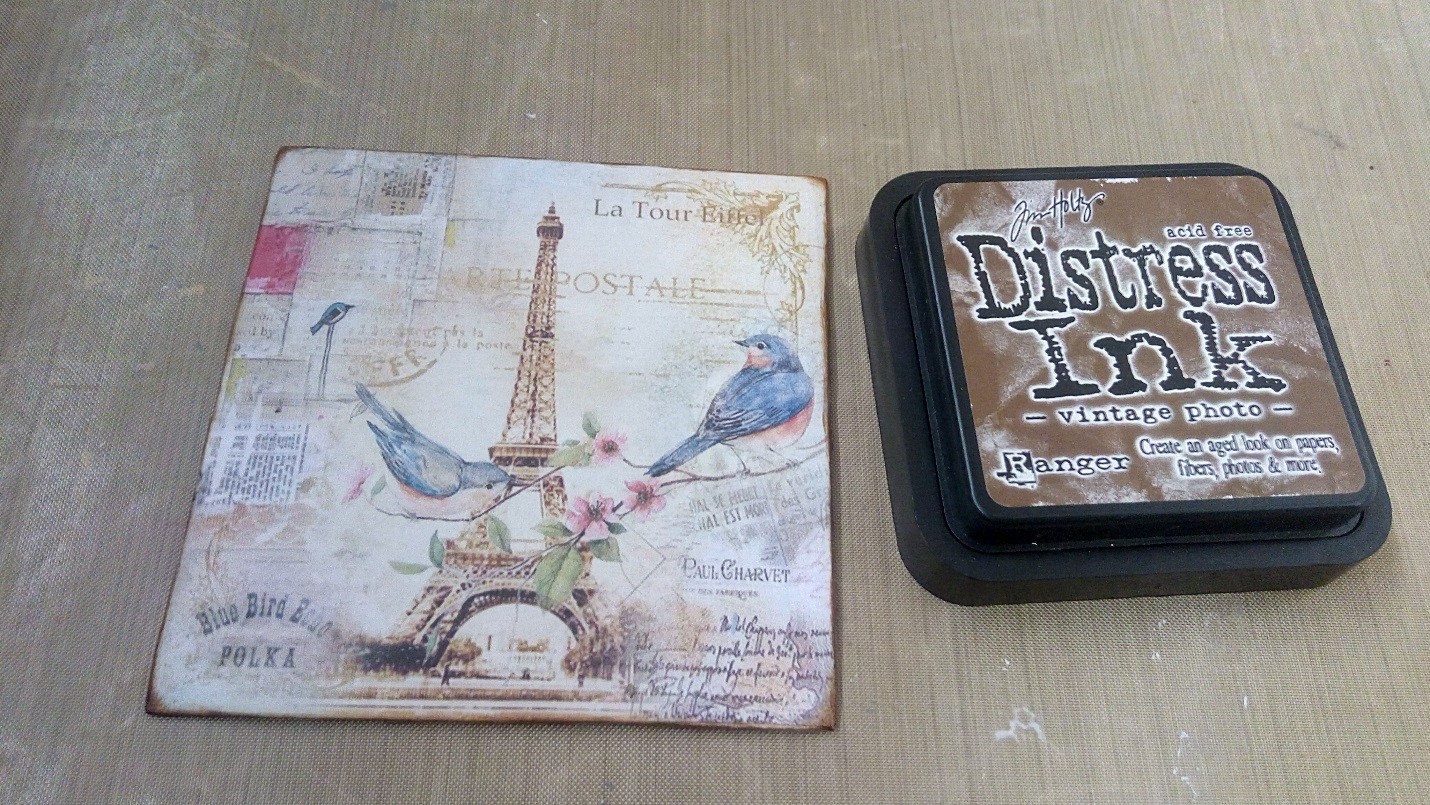
I wanted to give a little dimension to my decoupaged image so I decided to use a piece of chipboard to decoupage the image, instead of doing decoupage directly on the box. I decoupaged the image on a piece of chipboard using Little Birdie Deco Magic glue. I let it dry for a while and then distressed it with distressing ink on all the four sides of the image. I left it for a few hours because distress inks tends to react with water and it is not recommended to use decoupage glue immediately after using the distress inks.

I sealed the image with a coat of Deco Magic glue and pasted it on top of the box with the help of Little Birdie Silicon glue. At this stage I felt that more should be added to compliment the center image. I had some laser cut chipboard shapes in my stash. I covered them with gesso, then dabbed some dark brown acrylic color and then did some dry brushing with golden and bronze metallic colors to give a vintage look. I also did dry brushing with the metallic colors around the decoupaged image. I pasted the chipboard shapes around the image to give it a framed look.

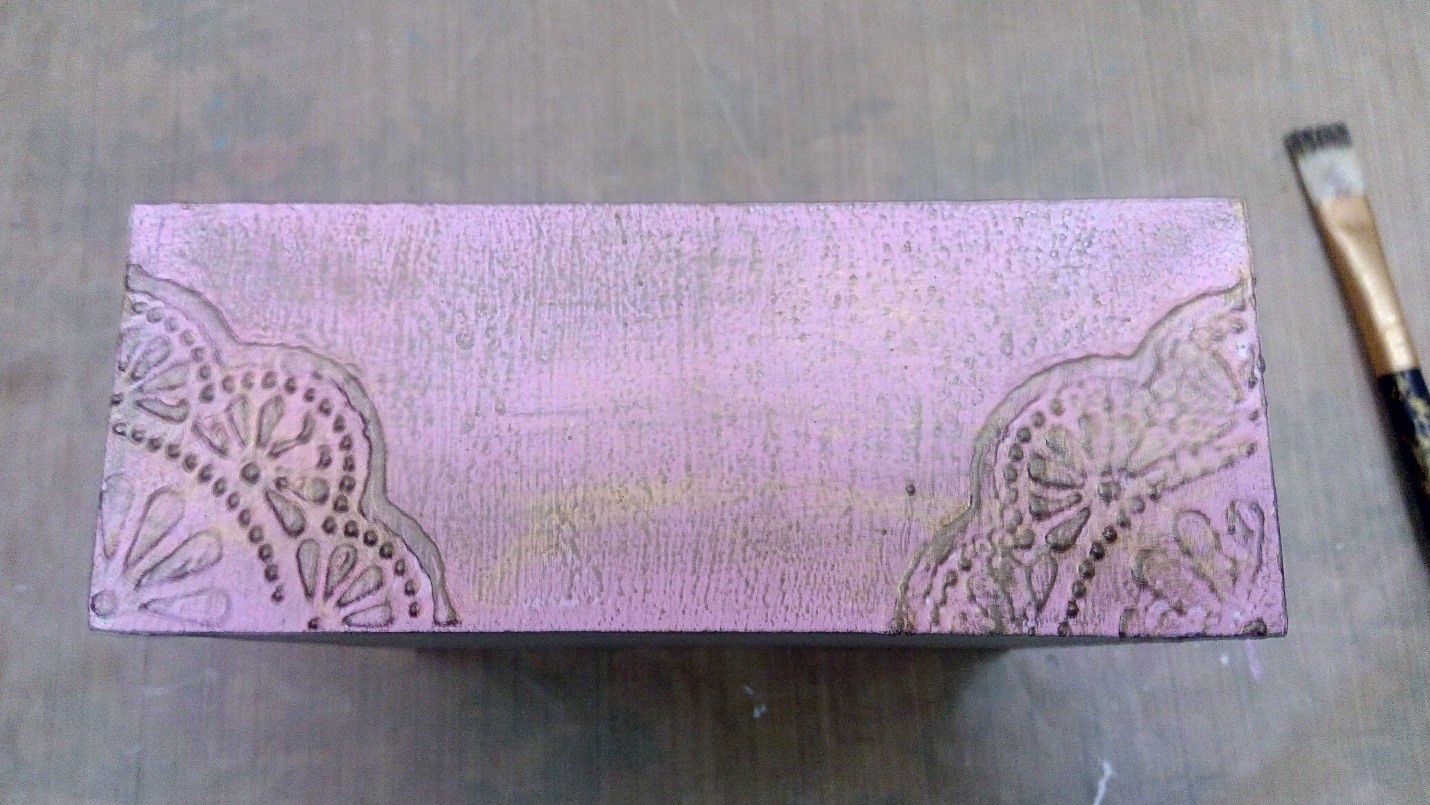
On the base of the box I decided to do some stenciling. I wanted to give an embossed look to the stenciling so I used another excellent product from Itsy Bitsy’s home brand… ‘ Little Birdie 2 in 1 Mixed Media Paste. I applied it on the corner with the help of a palette knife using a stencil. It dries very fast. When it was dry, I mixed Misty Rose chalk paint in Snow white chalk paint to get the desired color. I applied two coats all over the base, covering the stenciled portion also. I let it dry and then did some dry brushing with golden and bronze metallic colors. I left it to dry and finally sealed the whole box with Little Birdie Decor Varnish. I screwed back all the hardware pieces.

On top of the box I added some beautiful Little Birdie handmade flowers. I used silicon glue to paste the flowers.
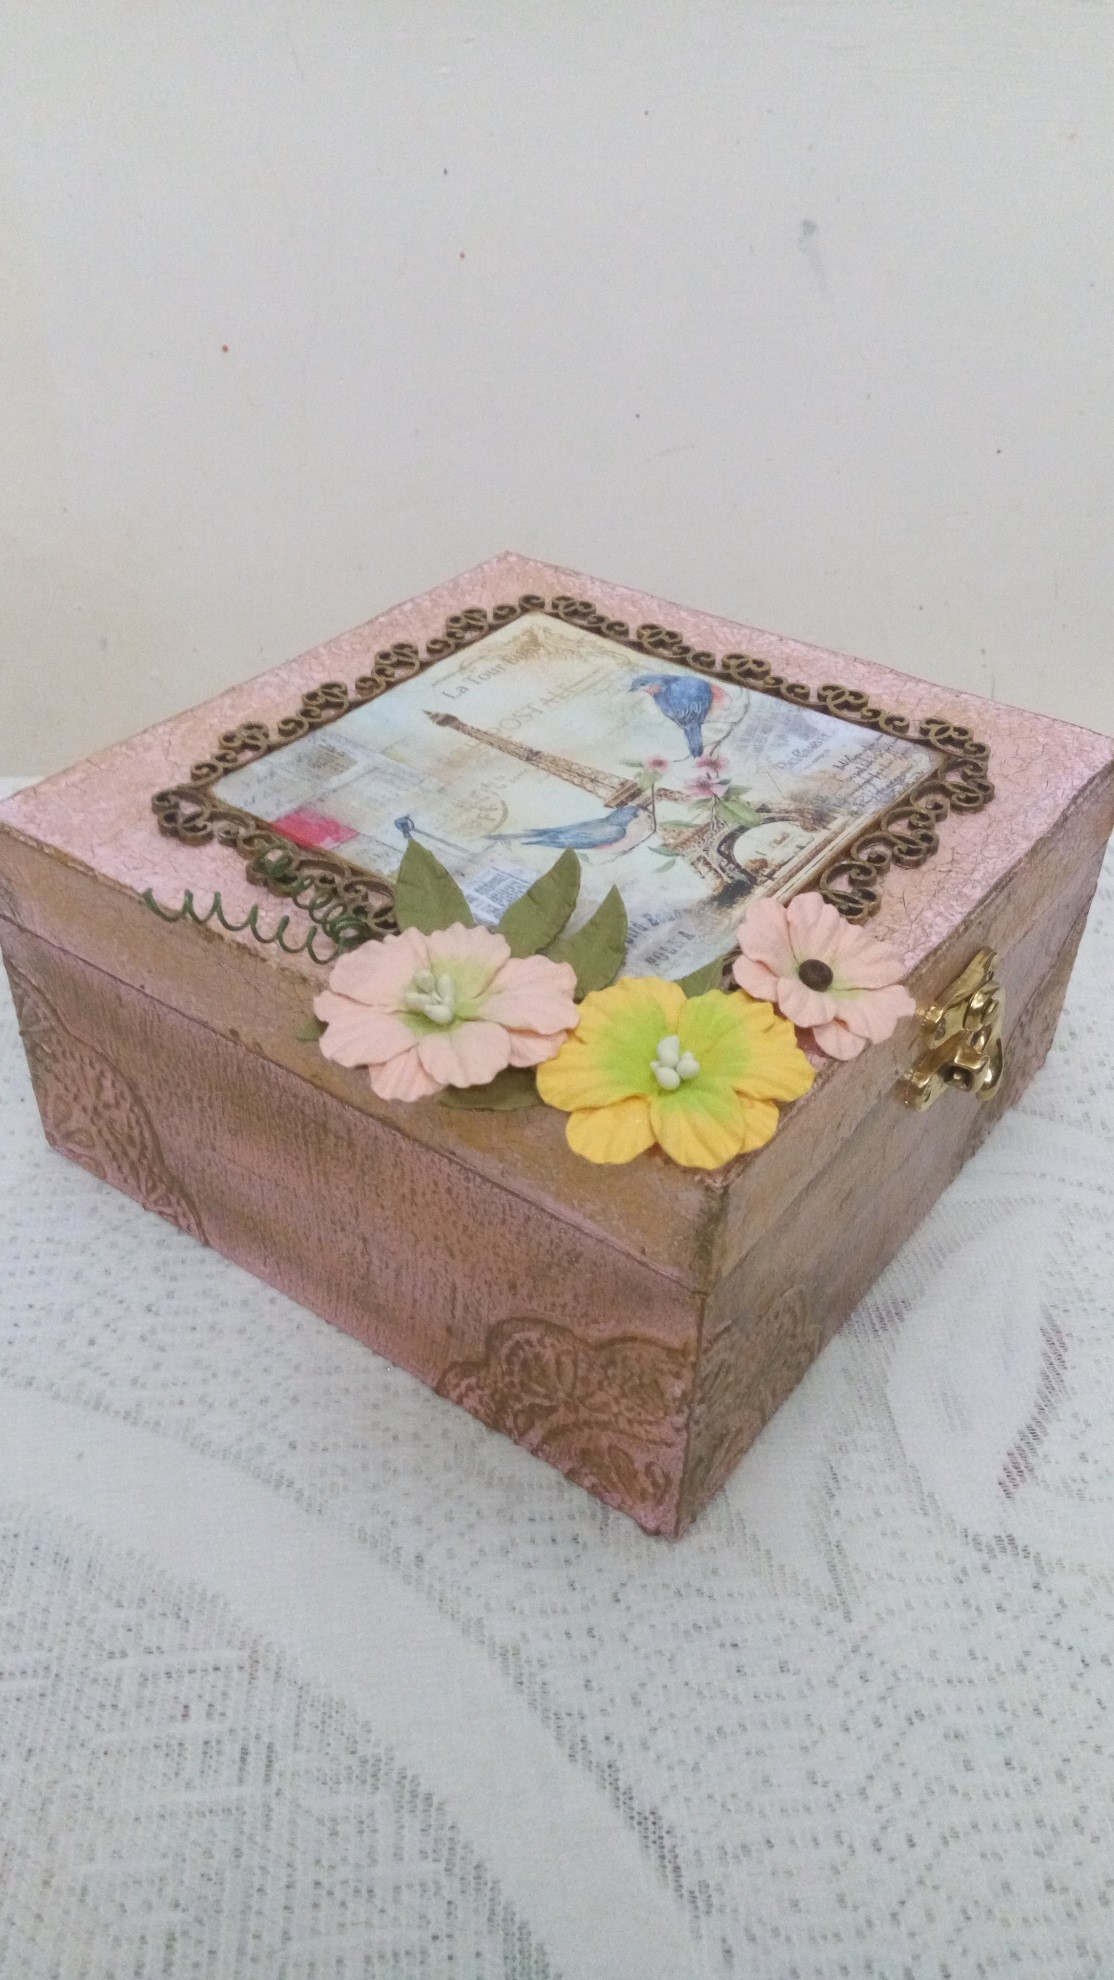

My beautiful vintage gift box is ready. I hope you all liked it.
Thanks for stopping by
Vidhu Thareja