About Color Splash – These are easy to use on paper, fabric, burlap, laces, ribbons, primed canvas, cheesecloth and any other gessoed porous surfaces. They can be used directly, no need to add or mix any medium and yes their shade can be lighten by misting with water. Easy to clean from your craft table or messy hands and quick to dry.
How are they different from Alcohol Splash?
Both the products are unique & different, it depends on the type of effect & project that one is making. Color Splash can be directly used by spraying them on the surface, they are great for paper crafting and can be even used with the paint brush to colour paper. No blending solution is required to use them. While Alcohol Splash when sprays add a vintage metallic hue to your projects due to the shiny and sparkling pigments present in the liquid. That’s why you need to shake the bottle well before using on the projects and they take slightly longer to dry as compared to Color Splash. But they blend really well to create unique effects on projects.
Here is my first project– An Antique Mixed Media Box

Procedure – I started with a sturdy cardboard box & the following products, from Itsy Bitsy store:
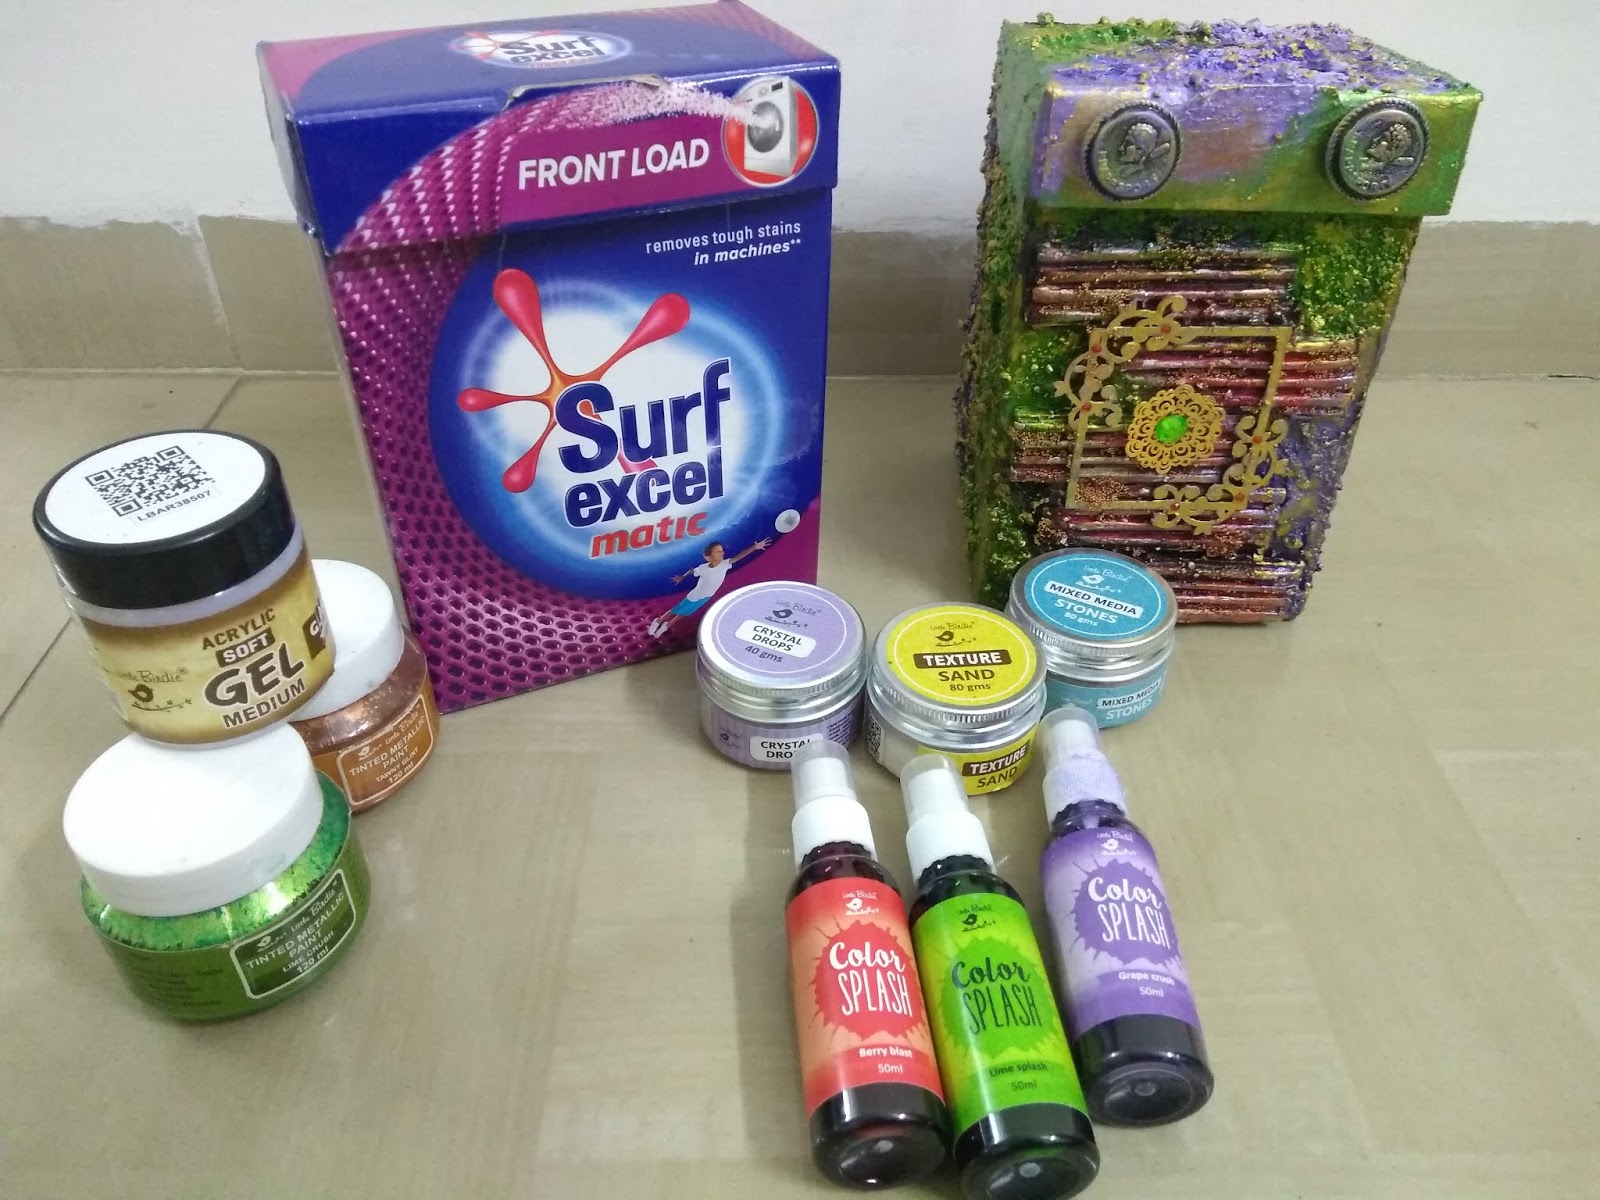
First I mixed Little Birdie Crystal Drops, Texture Sand, Mixed Media Stones (2 tsp each) with 2 tbsp of white gesso. You can increase or decrease the quantity as per your requirement. Apply it all over the box using a flat paint brush or a palette knife. In the front of the box I have added few strips of corrugated sheets too.


Now the interesting part… after the box is dry rub gold metallic paint (Golden Glaze shade) all over using your finger moving gently just to highlight the textures.


Next, I used a script stencil & Texture Paste to add some design to the cardstock and distressed the edges with a scissor. Rubbed distress Ink- ‘Gathered Twigs’ all around the edges.

Gathered the embellishments & arranged them to get the desired look. Lastly glued everything on the base.
I also sprayed some Berry Blast Color Splash over a piece of burlap. Coloured the chipboard in black and added some highlights of red ink (using stamp pad & sponge) to the flowers.


Took a white cardstock & sprayed Color Splash – Lime Splash & Grape Crush.


So that was all for today! I hope you liked the projects and it has inspired you to create something unique of your own. Do leave your love and share your queries if any. Would love to see what you create and how you got inspired.
Love and Hugs,
Priyanka