Hello Dear arty-crafty friends,
This is DT member Divya here with a new project.
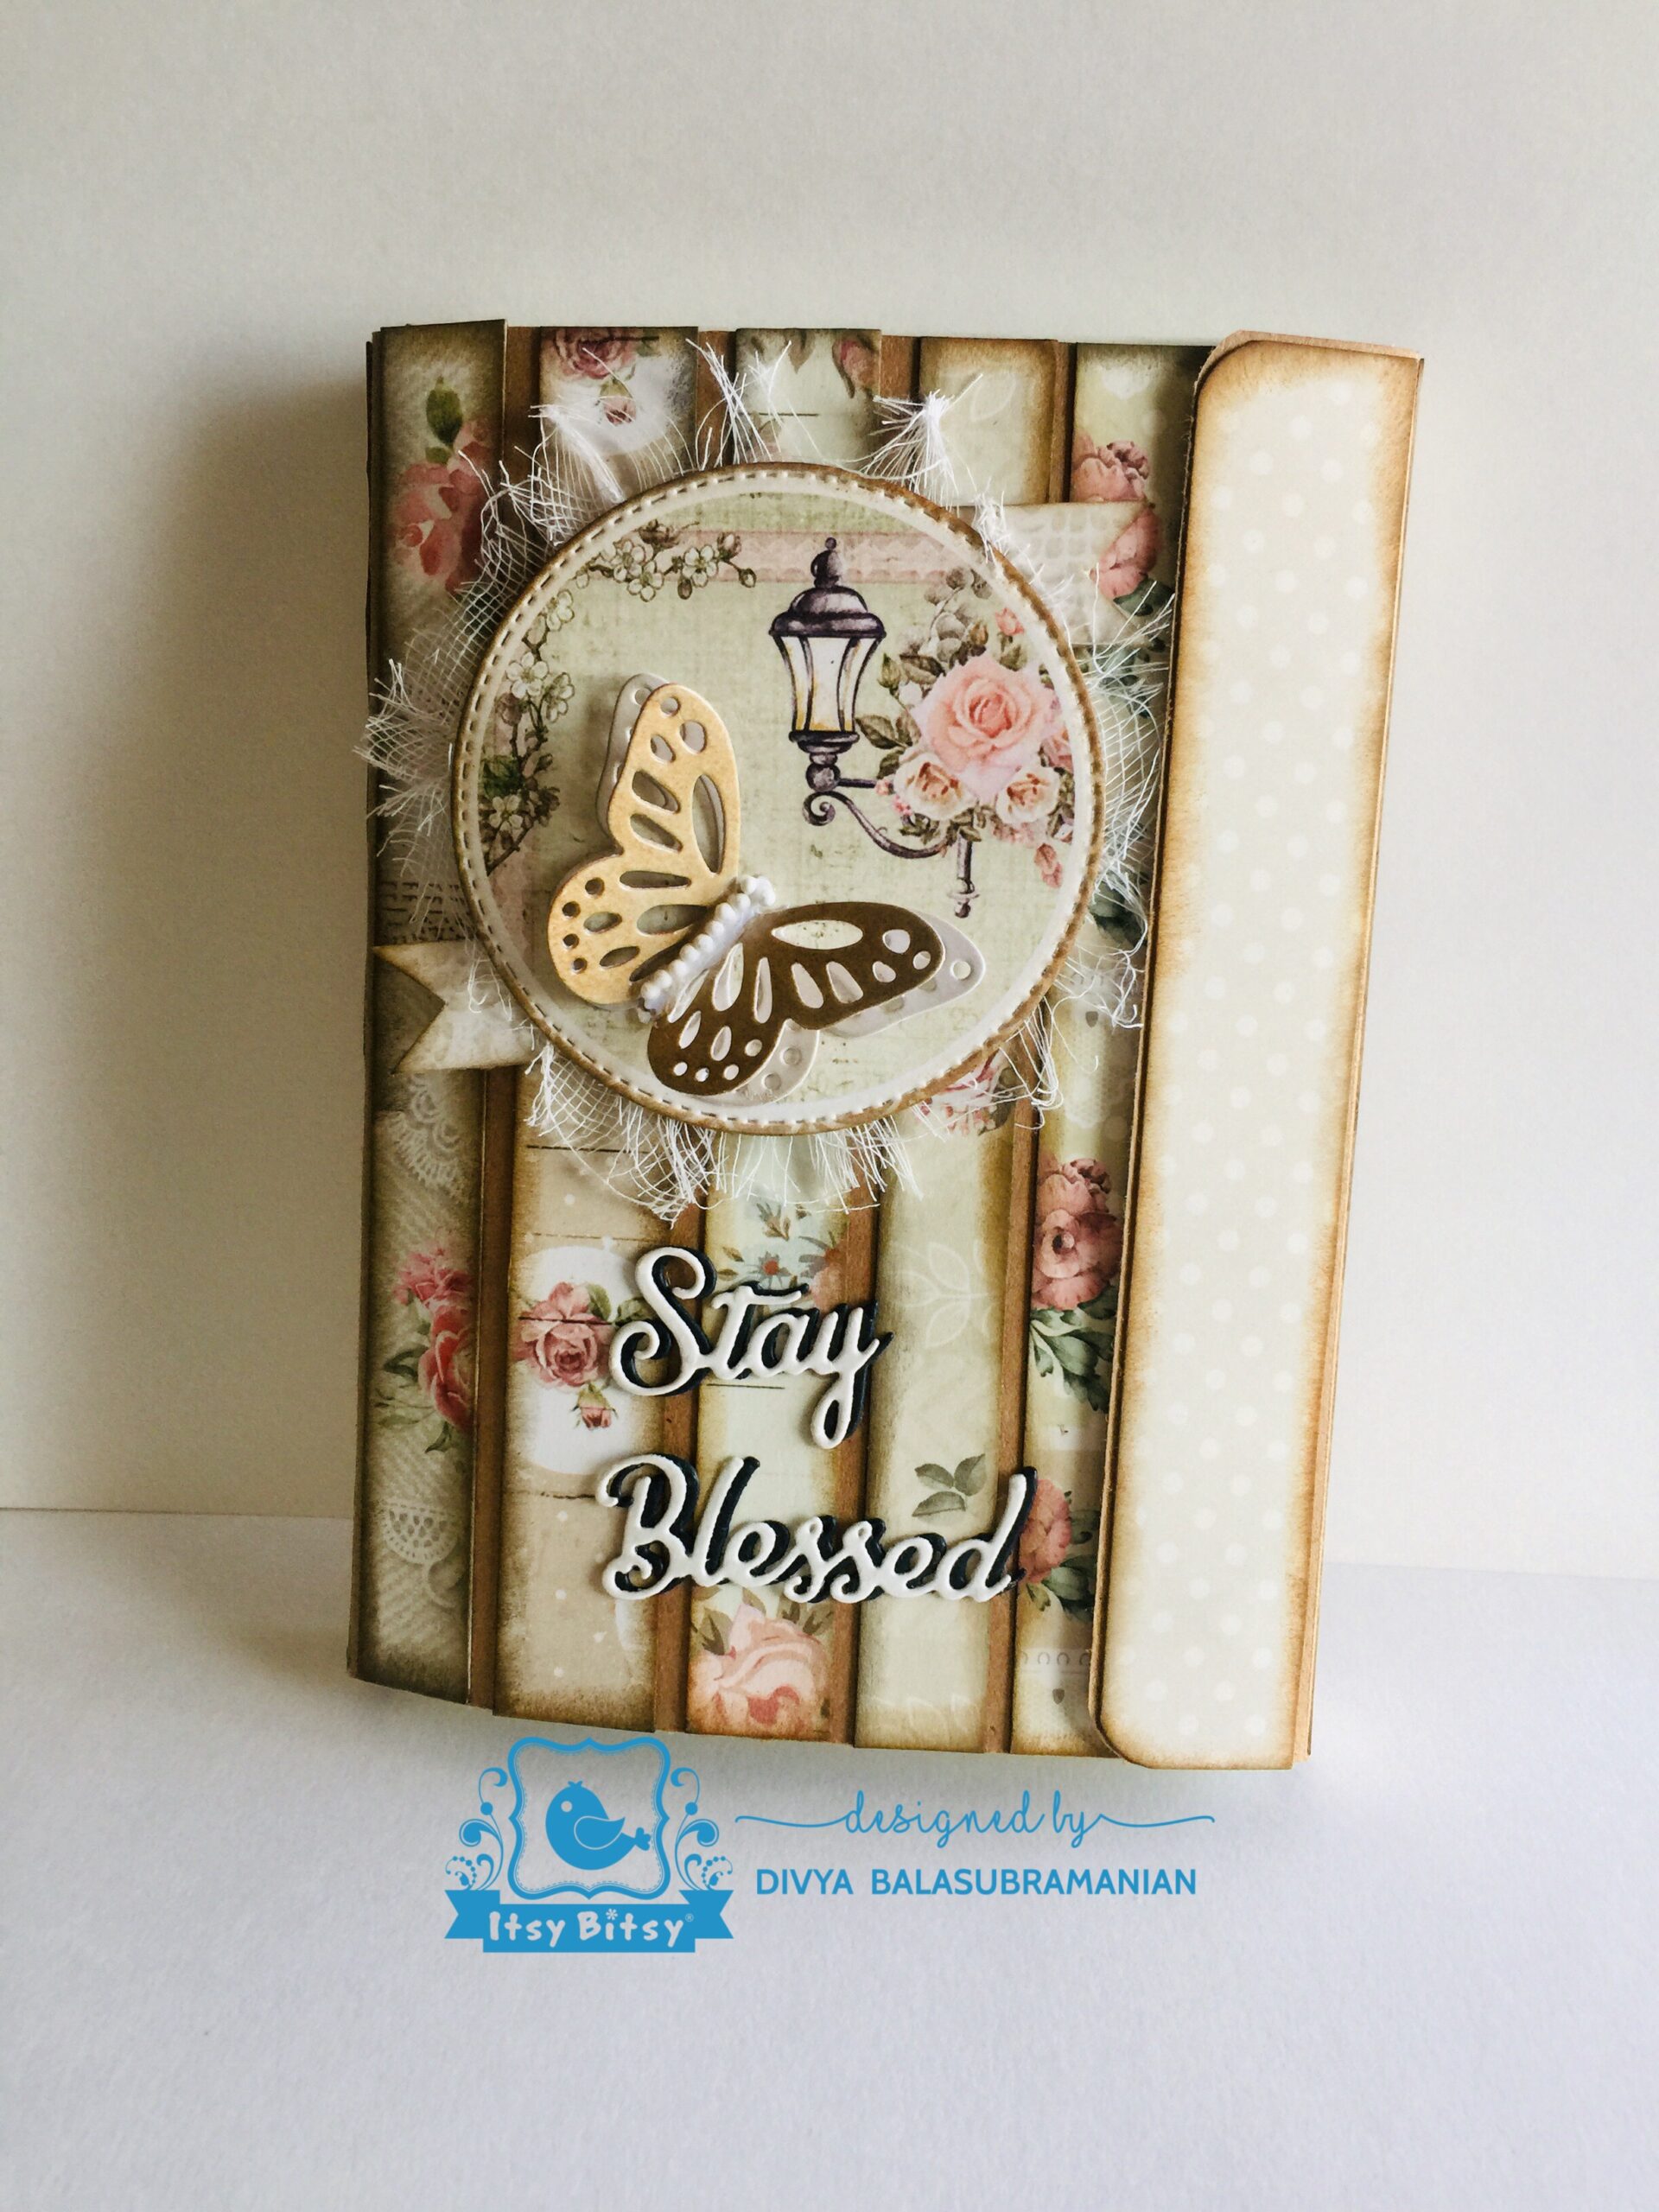
In this project I have made shadow box frames with the beautiful Little Birdie “Shabby Chic Bouquet” paper pack and have shown you 4 different types of cards . I have shared the process in detailed step by step . You can make them for any occasion, here I have designed them specially for a wedding and similar events. I hope you will enjoy making this. So let get started.

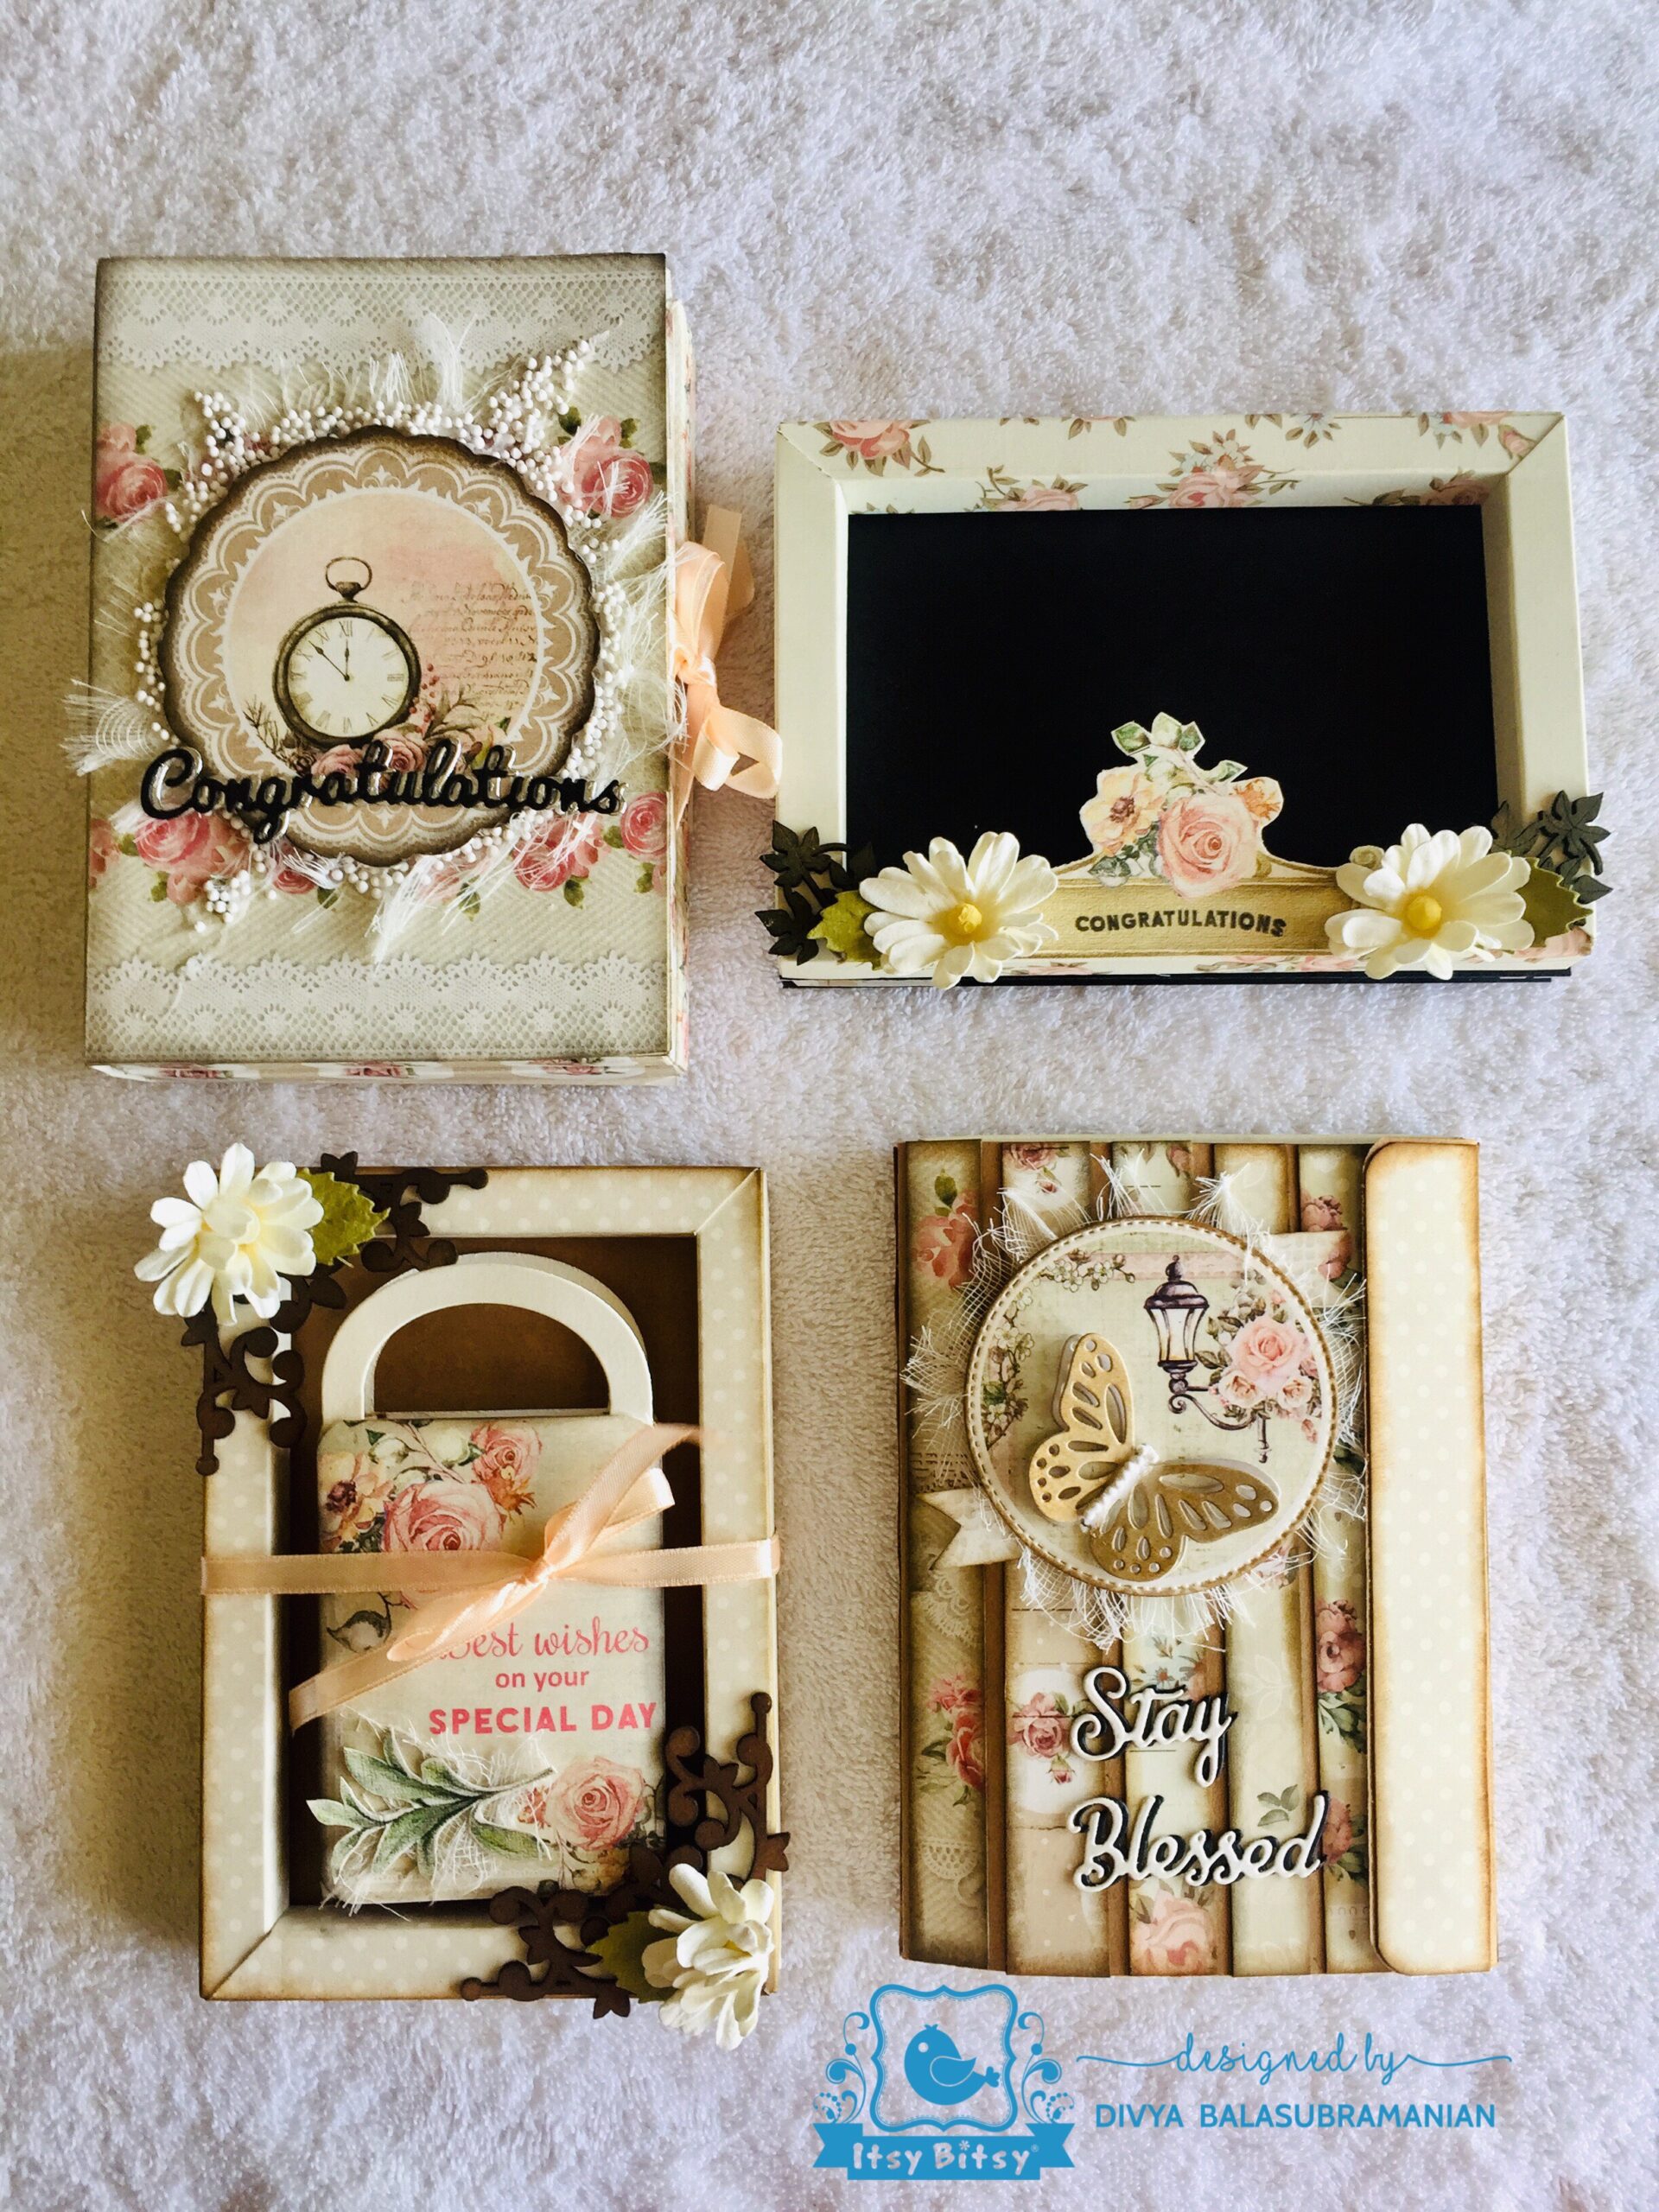
These are the 4 types of shadow box cards for any occasion .
CARD NO.1
I am starting with the first card, where you can insert 2 photographs. Firstly, I have shown you how to make a shadow box in the image below. I have also made some shadow box frames in my previous project where you can find a detailed procedure. Sharing the link of previous project – https://www.blog.itsybitsy.in/shadow-box-collage/
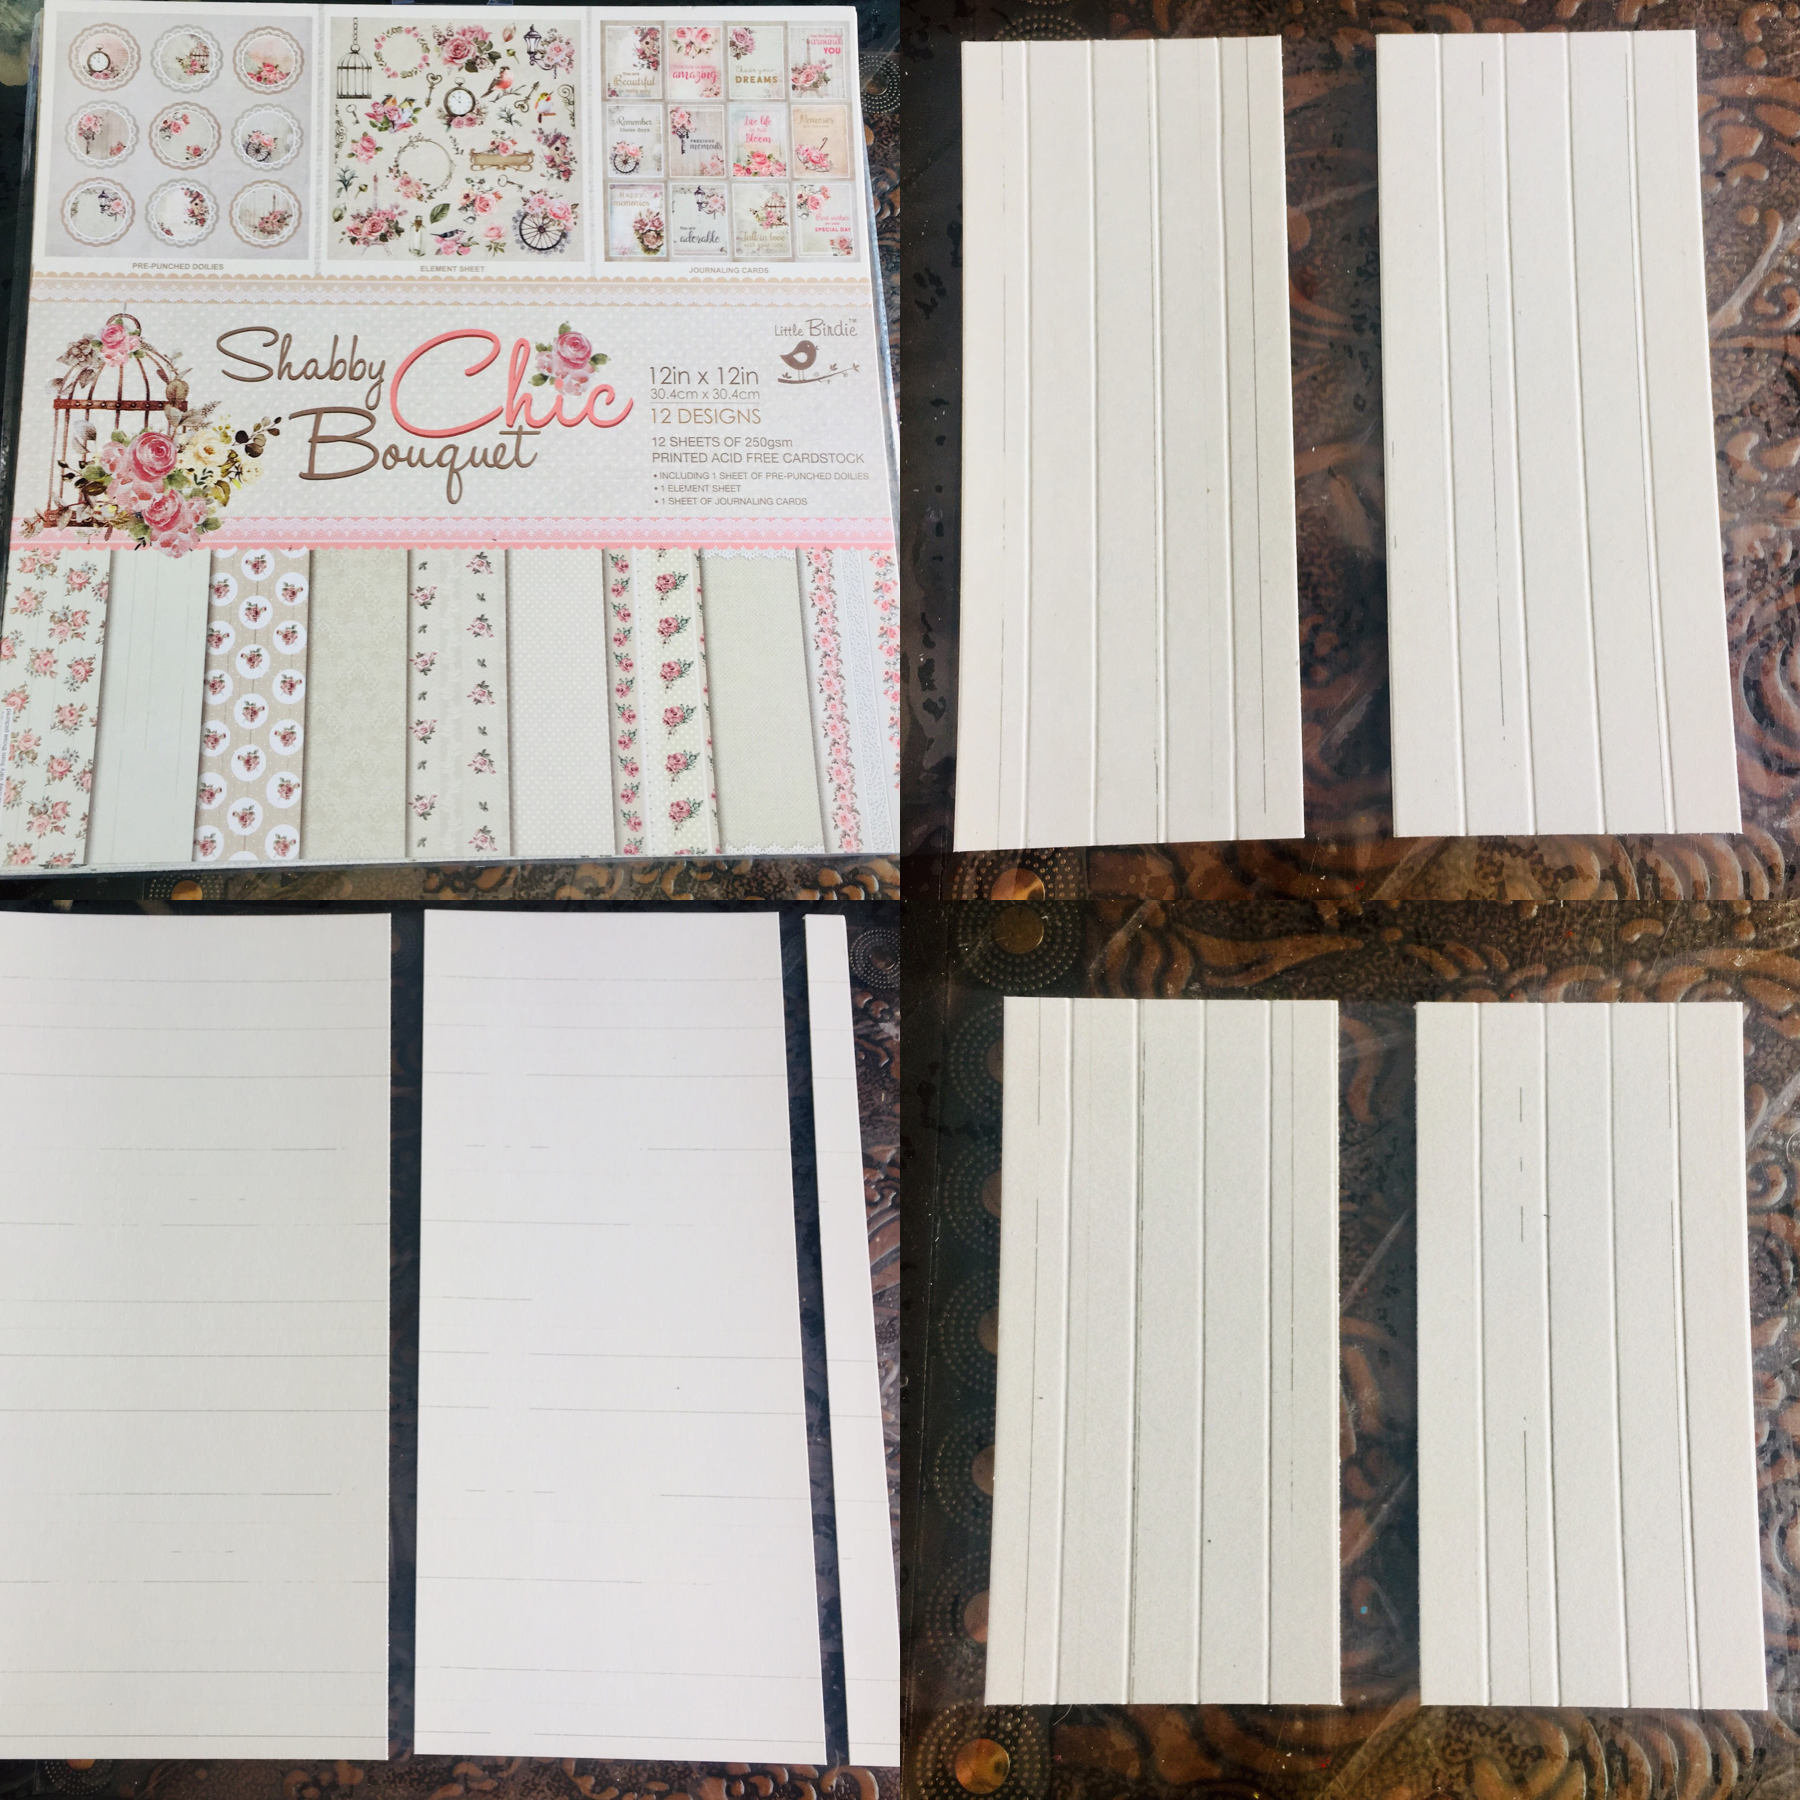
Choose any paper from your favorite paper pack and cut them in 15.5 cm and 13.5 cm. Keep aside the remaining strips.
It’s very easy to cut them with a paper trimmer. Do the same for all four sheets. Now take 15.5 cm piece and keep it horizontal and score a line after every 1/2 inch.
Make ten scoring lines. Then trim the extra sheet and reserve it for later use. Now trim the scored part into half i.e. cut in 2 1/2 inch. So you get two pieces like this as shown in the picture. Now in the left over sheet repeat the same procedure. You can make 2 shadow frames out of 1 pattern paper. Now take the other piece which is 13.5 cm in width and repeat the step no. 2 . After making the horizontal score lines keep the 13.5 cm piece as shown in the picture and score 1/2 inch from both the edges. And again score at 1 inch till second line.

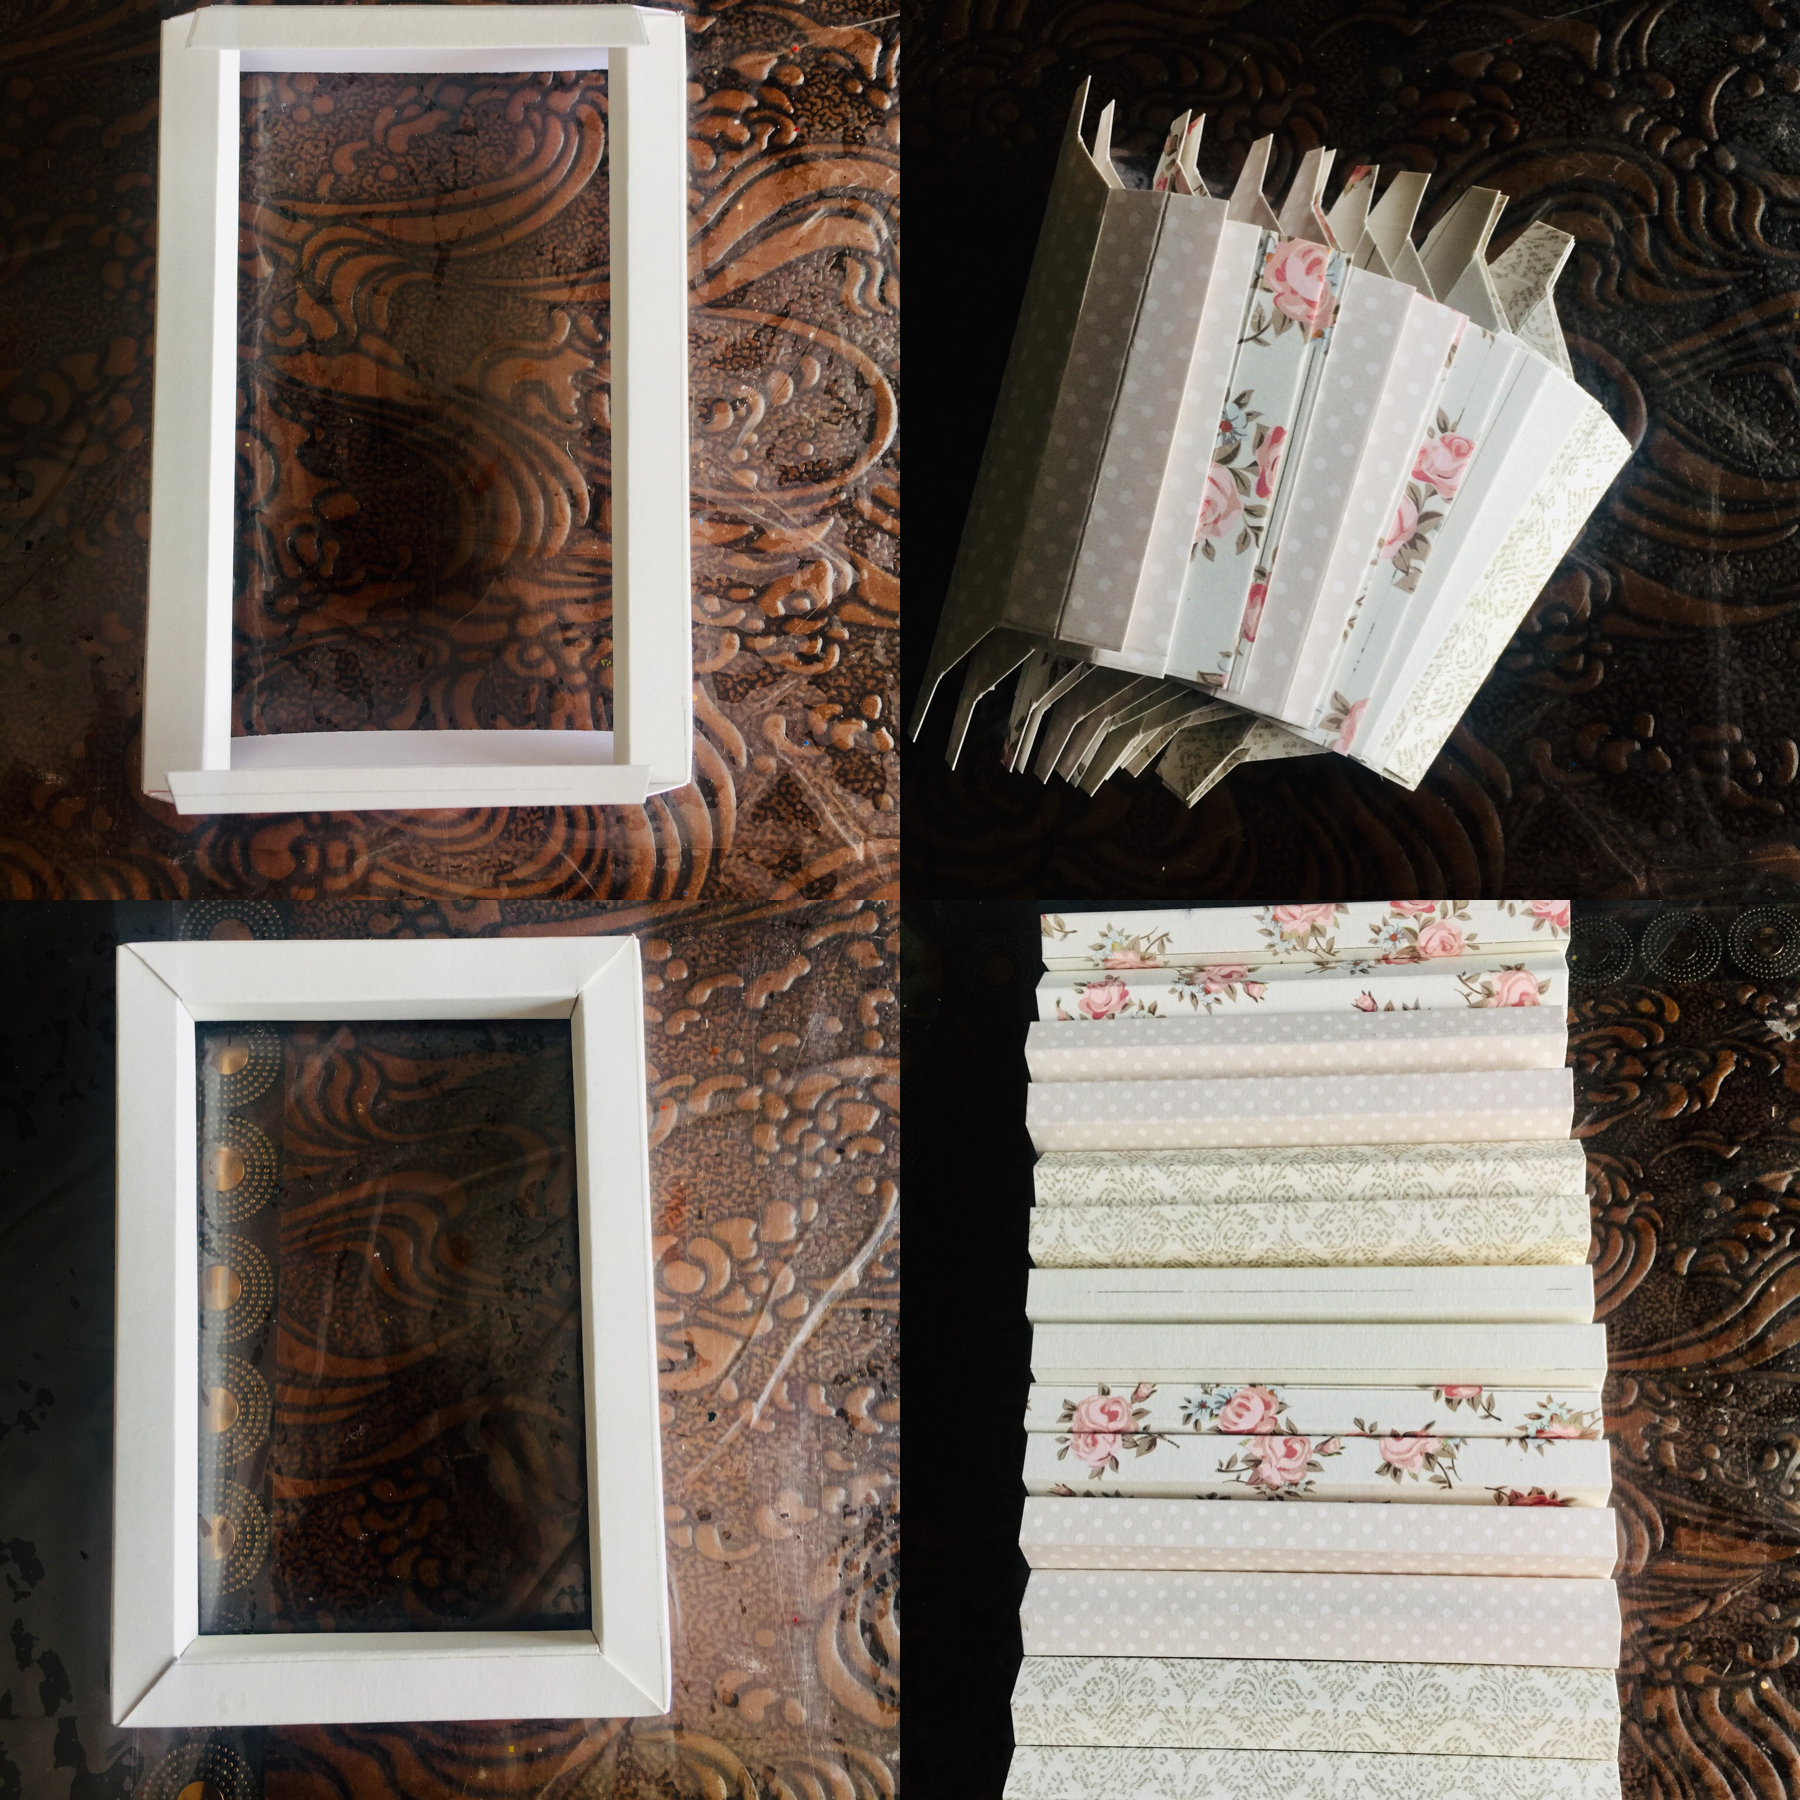
Next, burnish the scored lines and when you fold all the lines it will look something like this. After scoring it will look something like this. Now follow the pencil lines as shown in the picture as we need to cut that portion. Now we have 4 pieces like this, from which two are of 15.5 cm and the other two is 13.5 cm.

In this step I have shown how to arrange all the 4 pieces and stick them. In the last picture I have folded two pieces and stuck the 4th and the 1st one. So here you can see a rectangle in the image and later on just fold it on the scored line and stick it as shown in the images. This is how you shadow frame will look like.
I have repeated all the above steps to make 4 more frames. Measurements used to make this frame is take for 6’/4′ photograph. Once your shadow box frame is ready its very easy to make these cards. Now for the first card I have taken 16 cm / 25.5 cm cream cardstock .
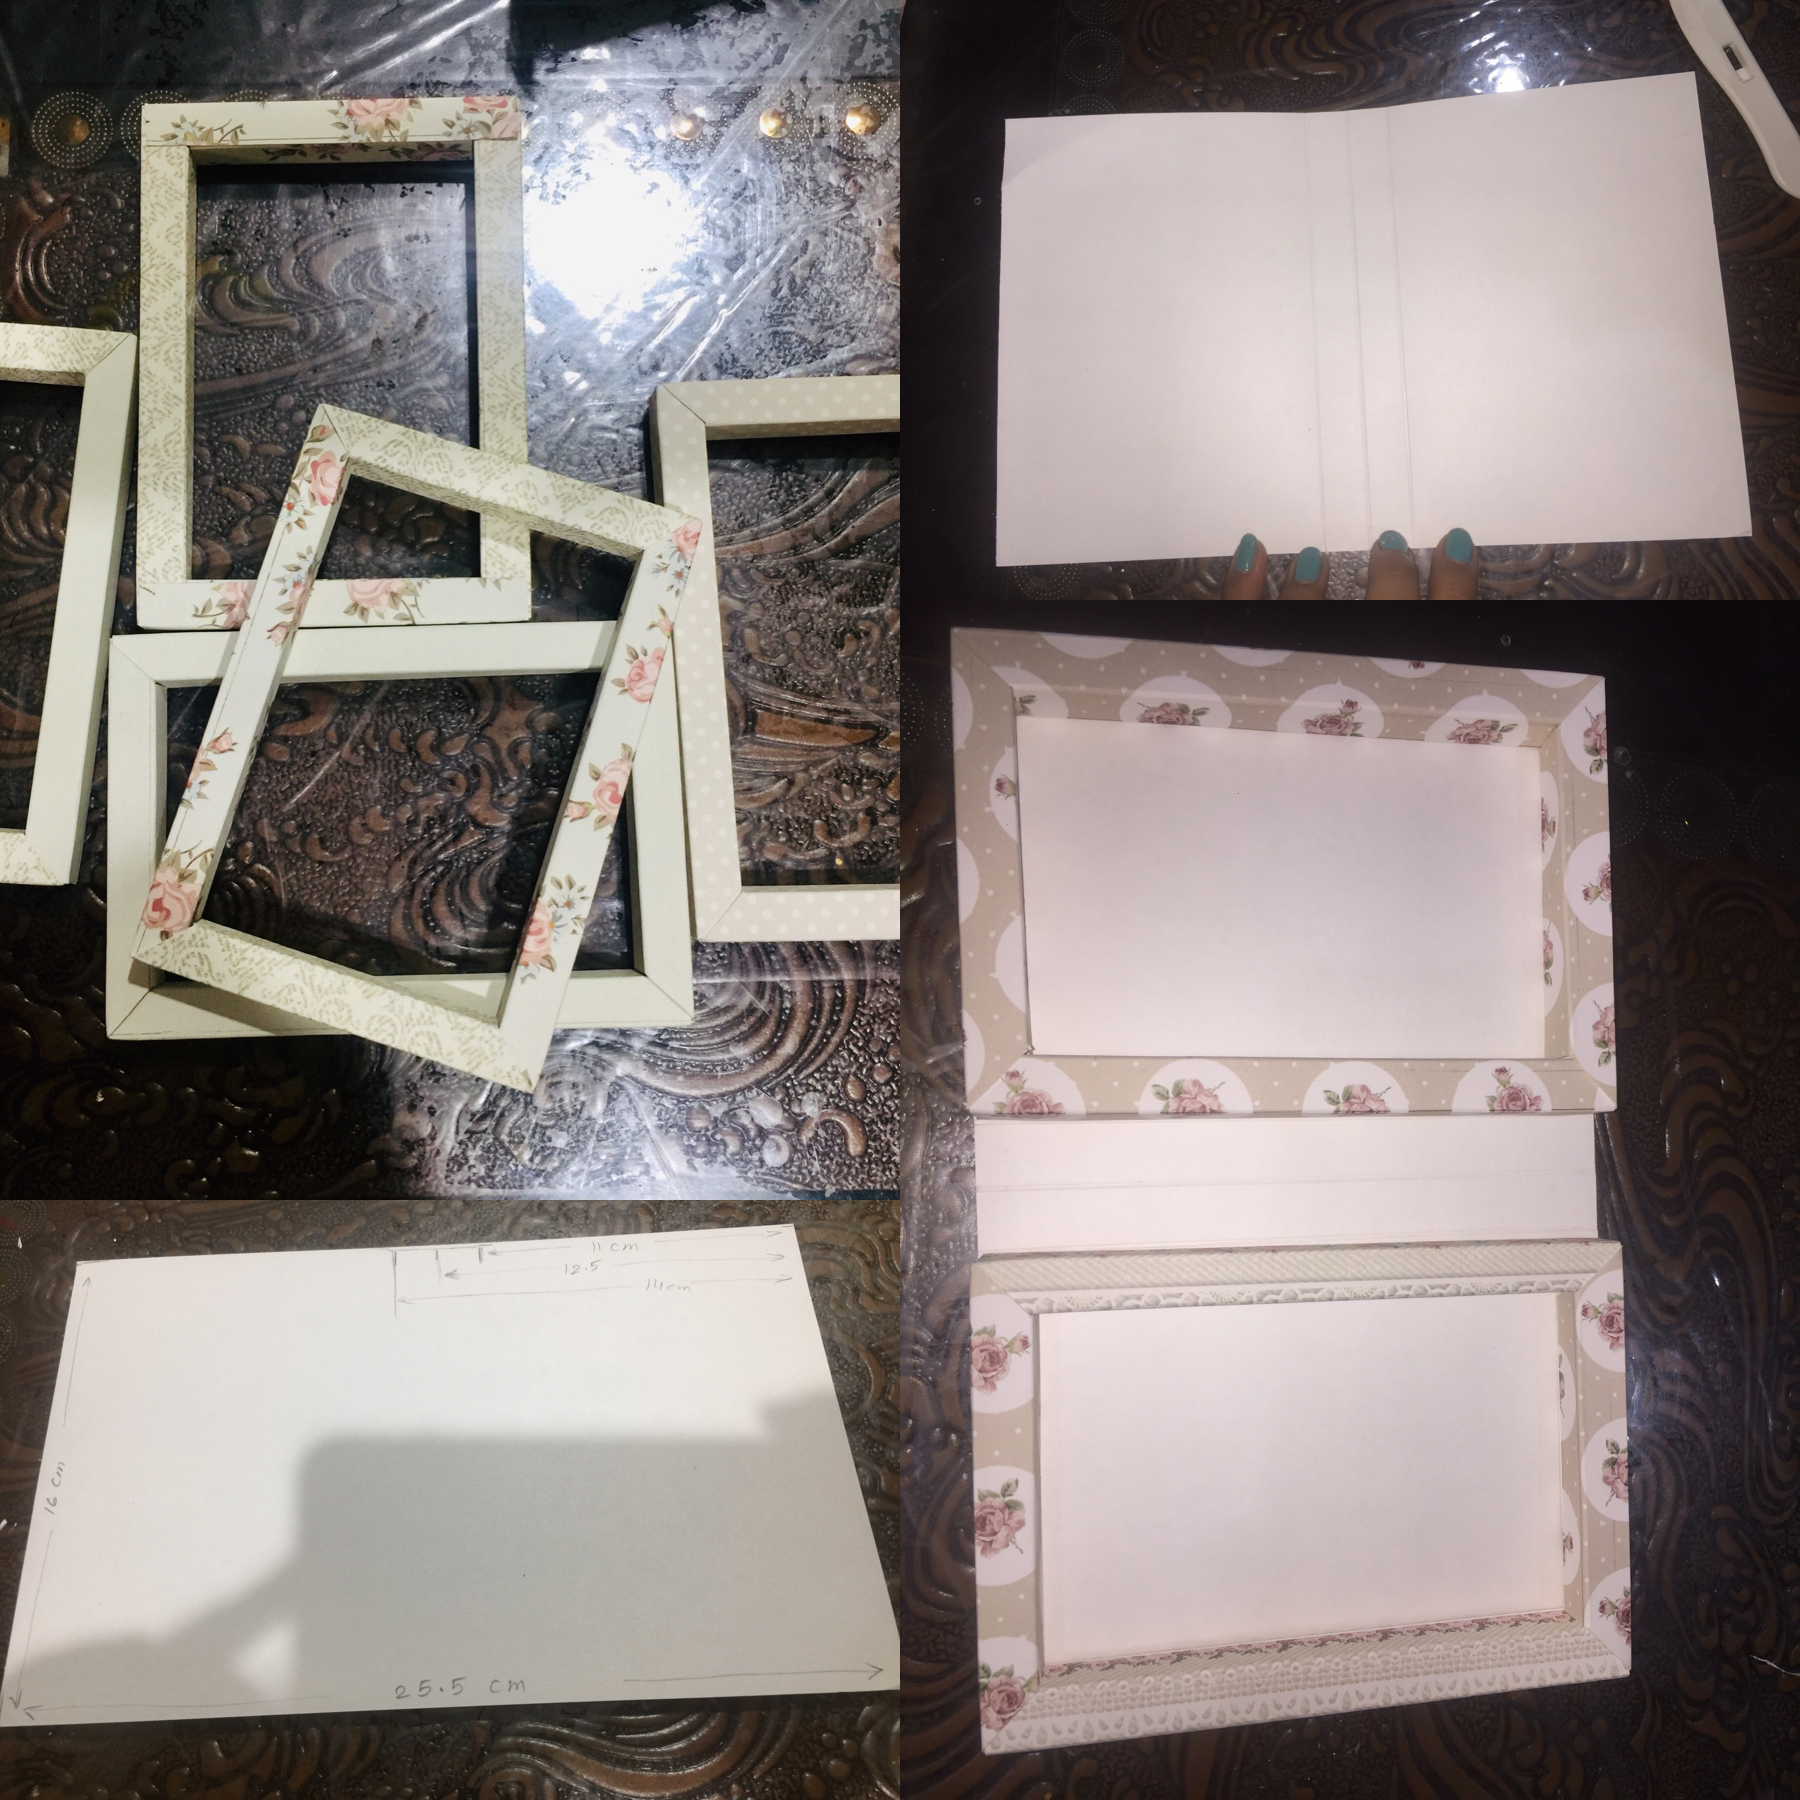
Make a score line after 11cm and then on 12.5cm and then on 14cm. Burnish the scored lines and place 2 shadow frames as shown.
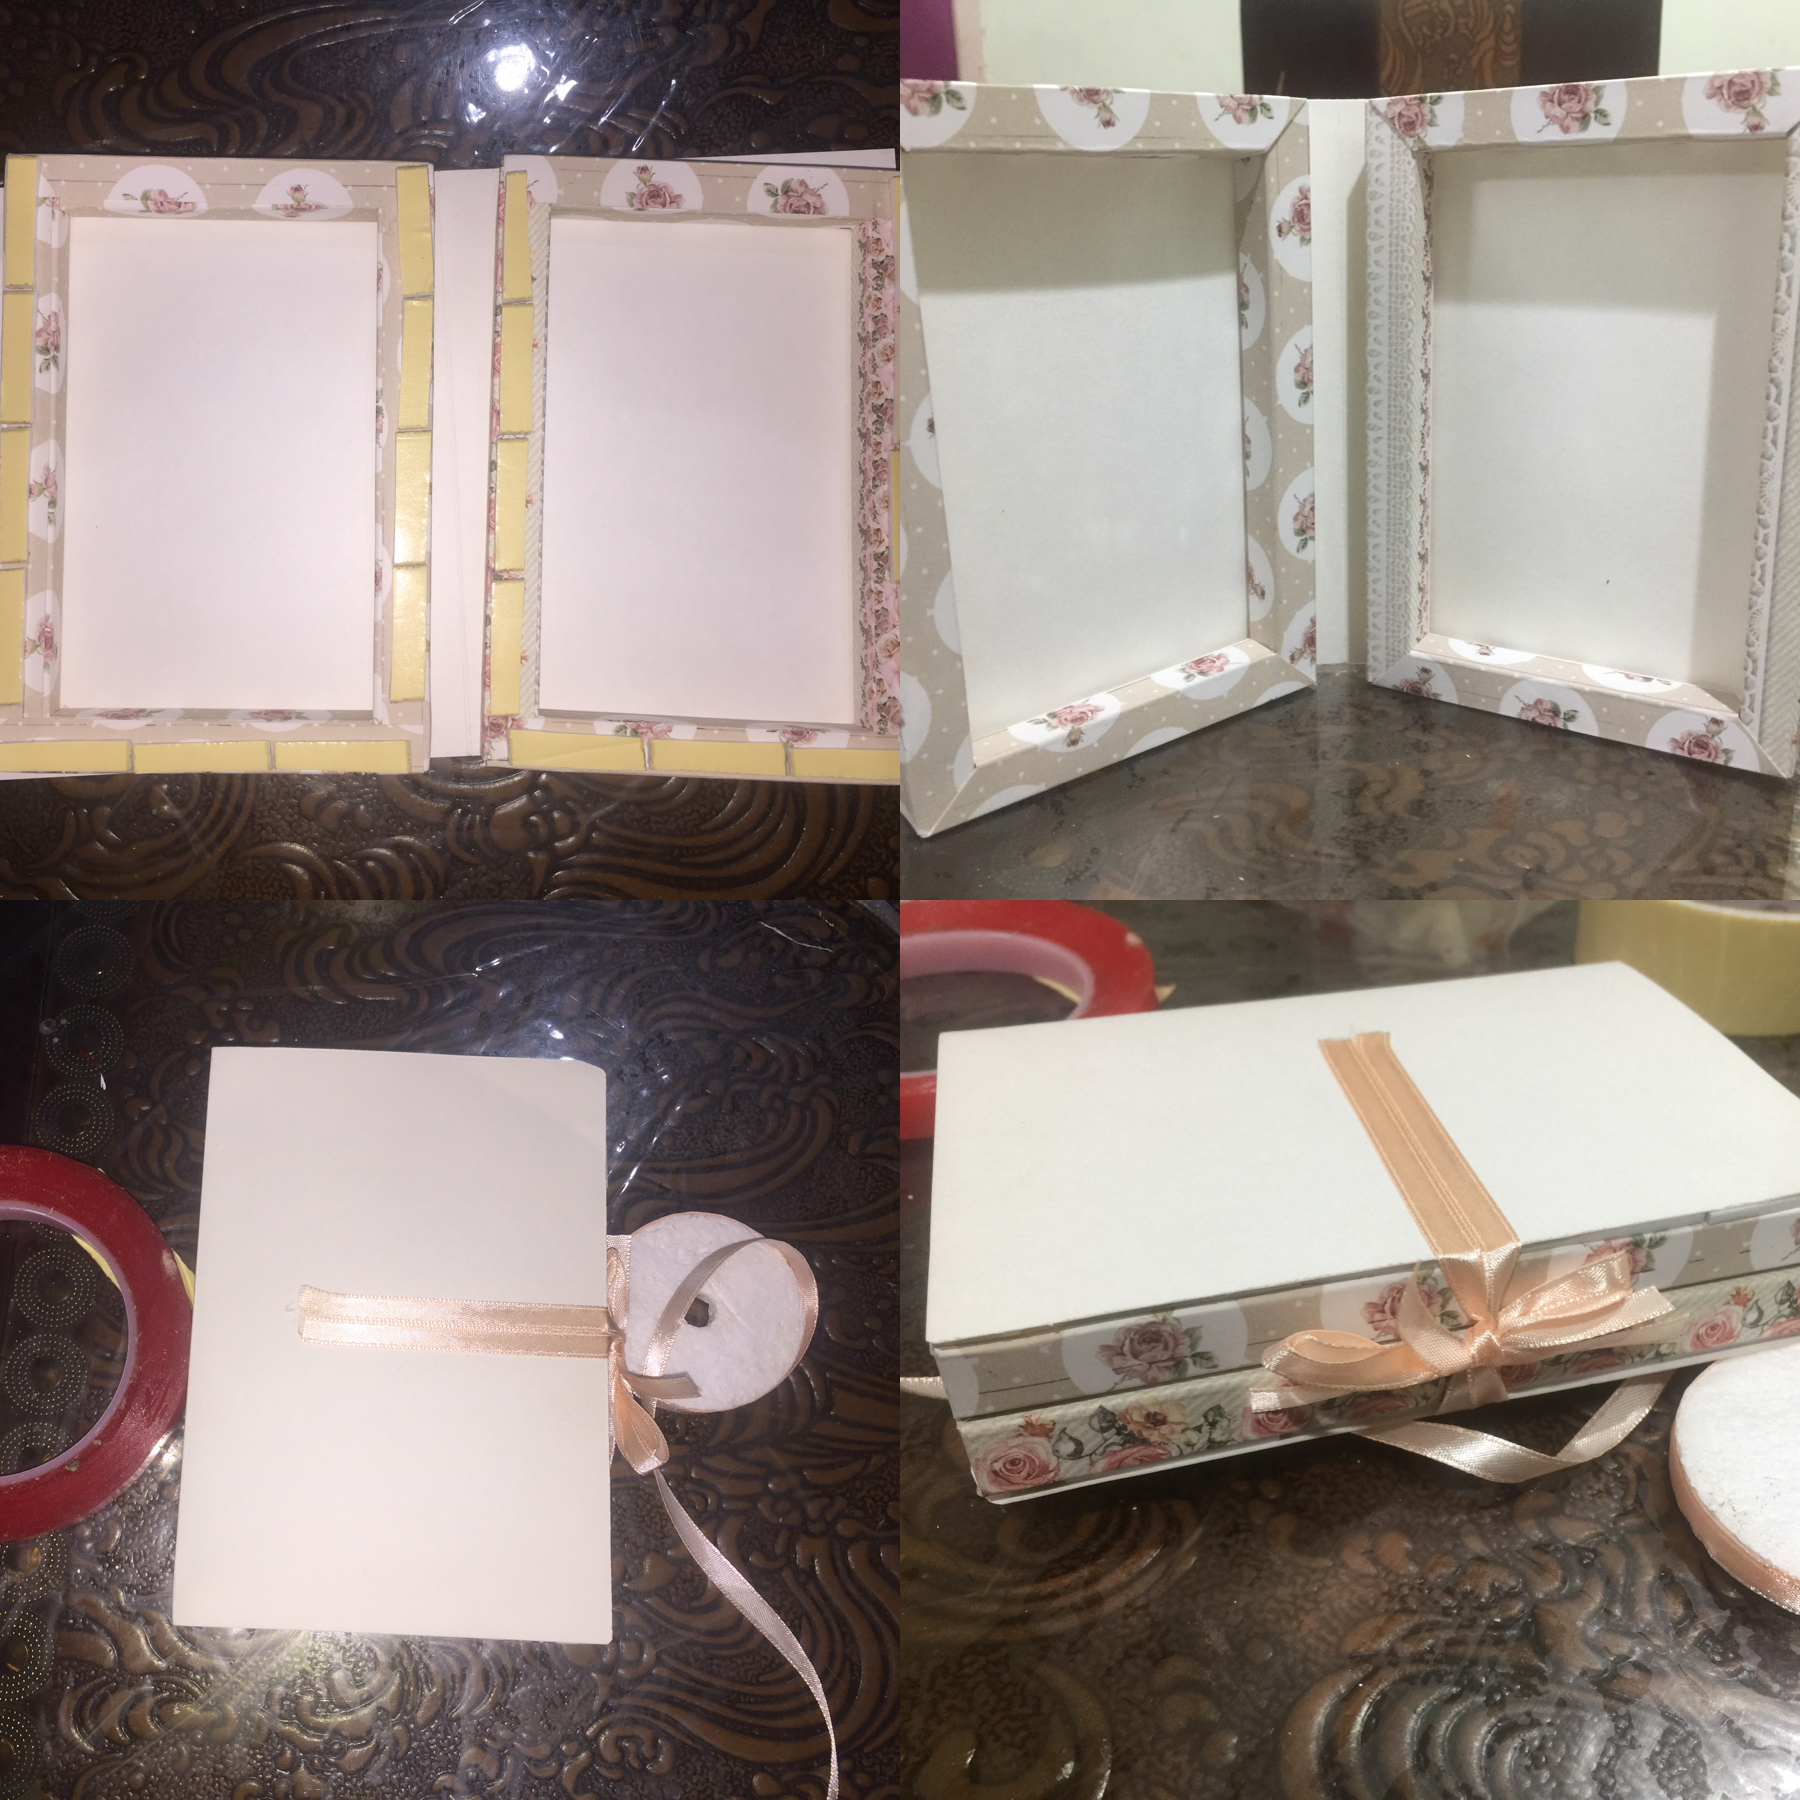
Cover the 3 sides of the frame with double sided foam tape as shown in the picture. One of the sides will be open so that you can slid in the photograph. Now adhere both the frames in their respective places. Now it looks something like this when kept open like a photo frame stand. When you close it it will look like a book. Take any satin ribbon or lace of your choice and attach it on the outer area as shown in the picture with a double sided tacky tape.

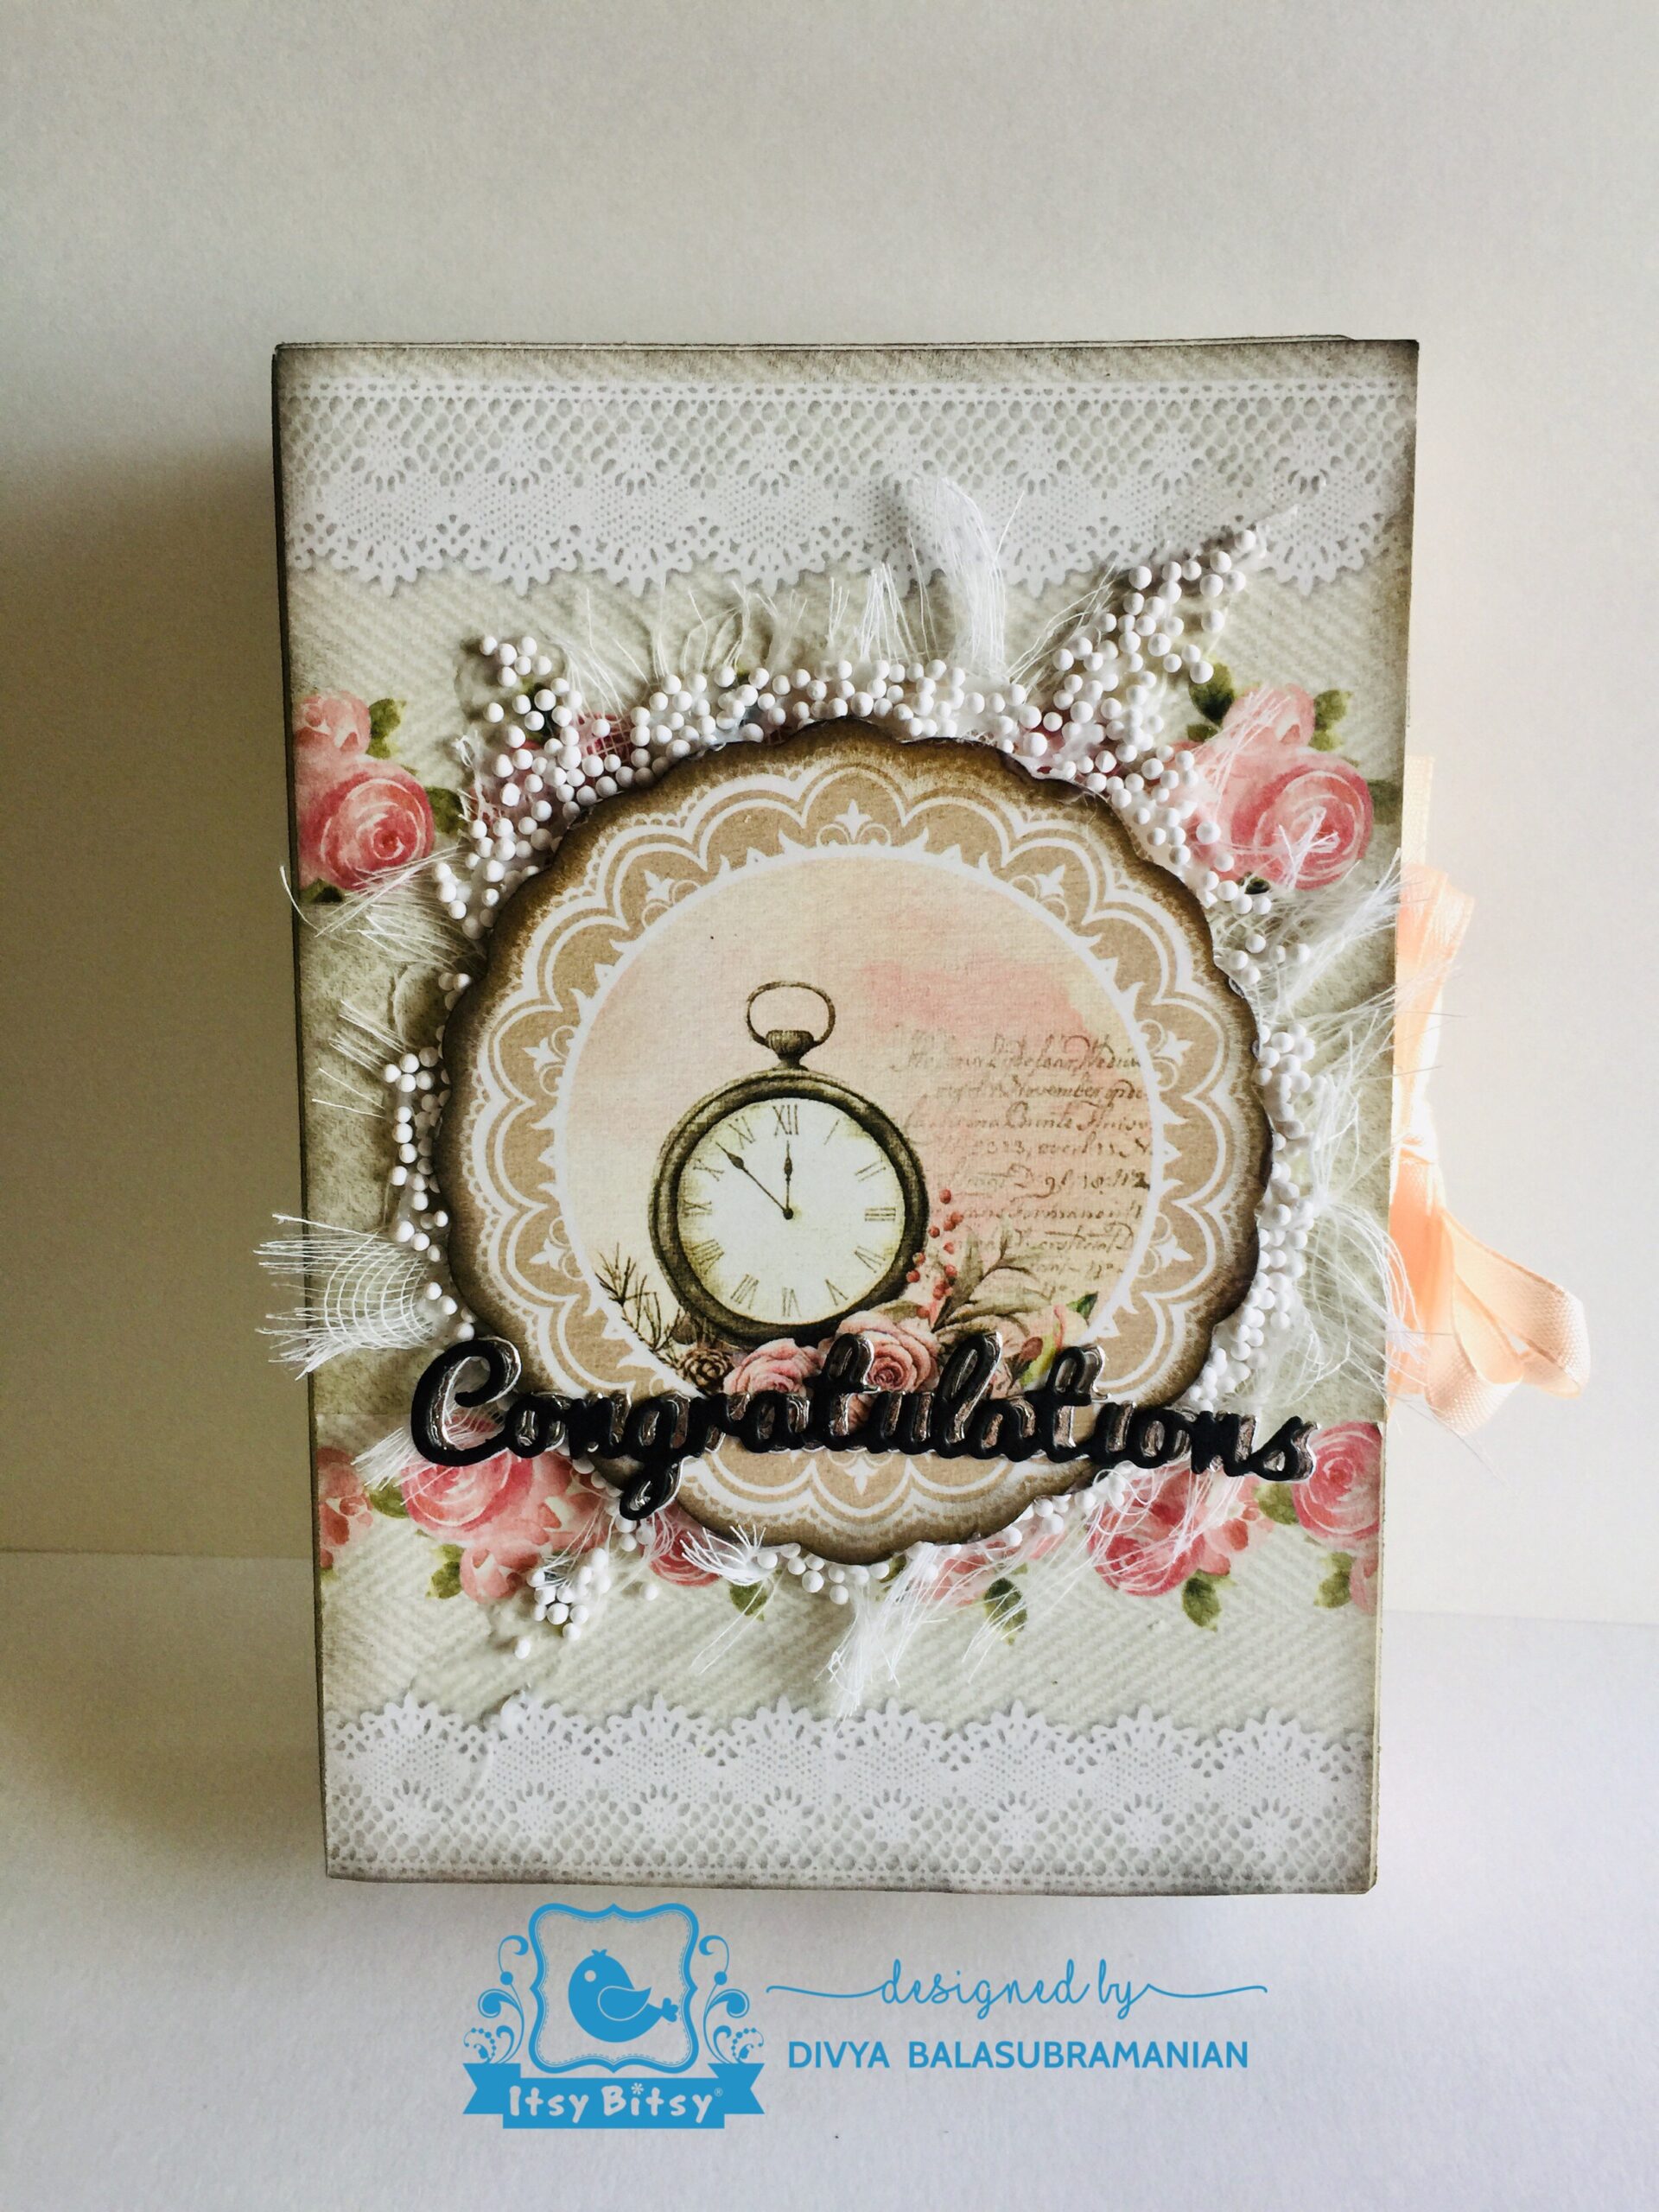
Here, I have used some leftover pieces of the same paper pack and made the cover page. Now I have take the element sheet which is included in the paper pack and fussy cut some of the elements. I have also take a pre cut dolly here to decorate my cover page.
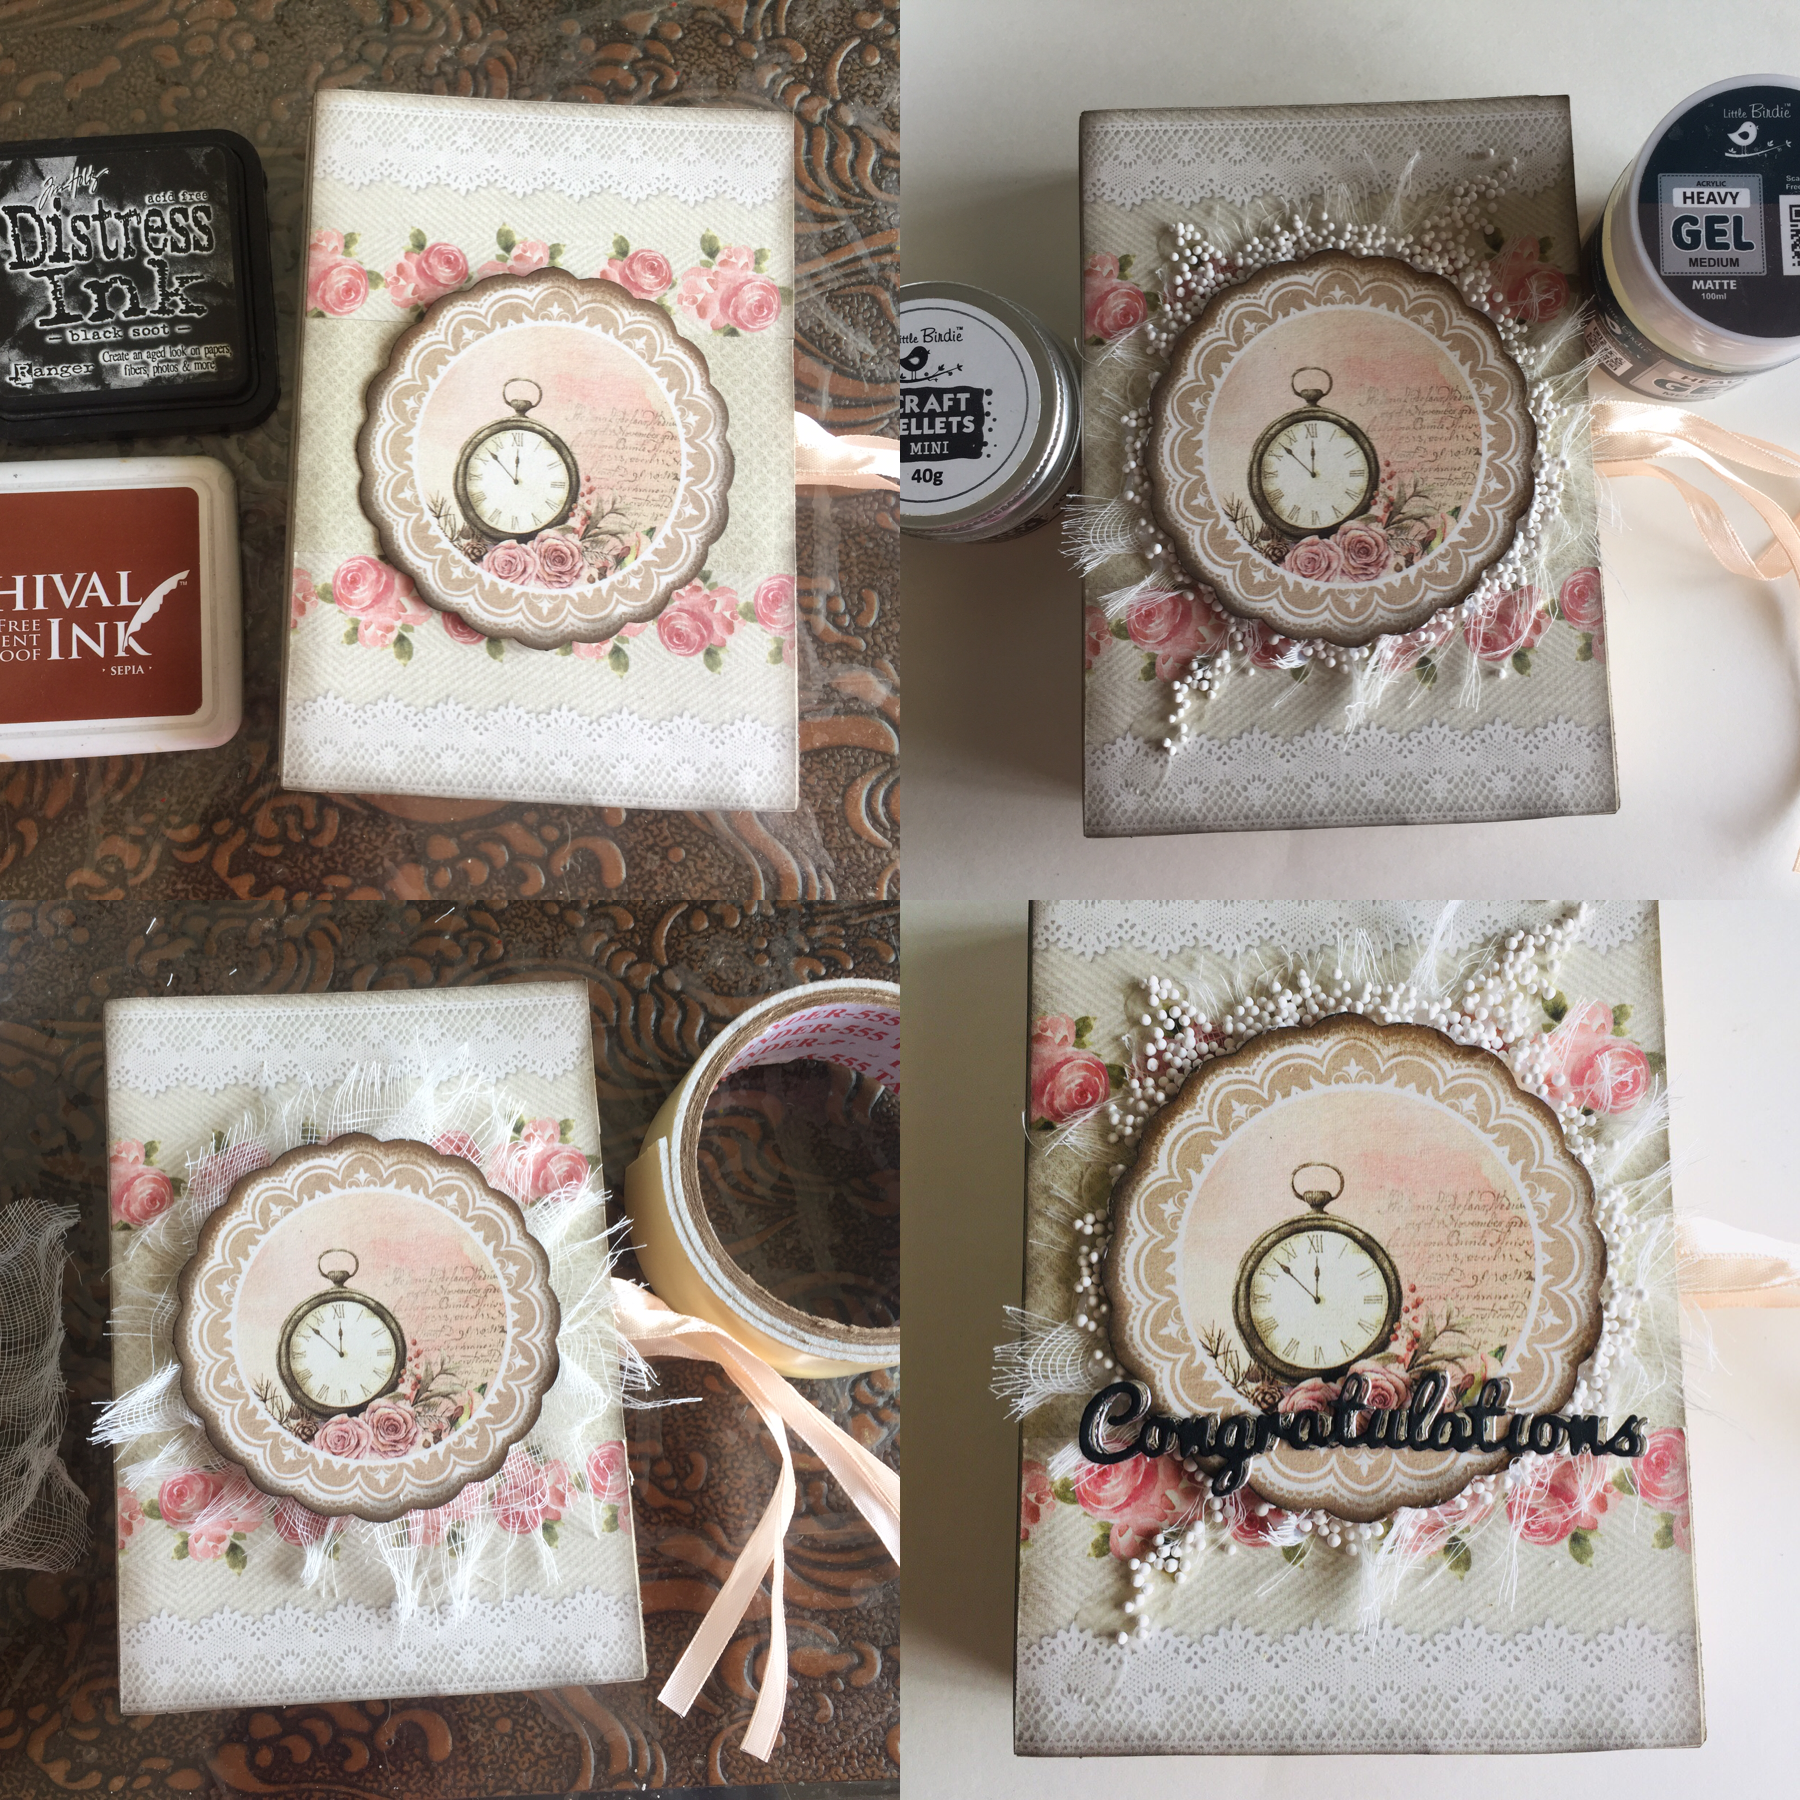
I have distress the doily with ink pads and used a bandage cloth and attached it around the doily. Then with the help of double sided foam tape adhere the dolly on cover page. Now to make it more interesting I have used heavy gel around the doily and just add some craft pallets to it. Now your card is ready , according to the occasion you can add sentiments to it.
CARD NO.2
To make this simple elegant card I have taken a beige color card stock which measures 16cm / 27.5 cm. Now score the 1st line in 11cm then 2nd line – 12.5, 3rd line -23.5 cm , 4th line – 25 cm.

As shown in the picture . And burnish the scored lines and place 1 frame as shown . Now attach the frame with double sided foam tape on 3 sides of the frame. Then take a cream card stock measuring 12 inches in length and the height is same as the journal card which is included in paper pack. Now divide the cardstock in 4 equal parts and make a zig-zag folding. And choice any 3 journal cards as per your choice and stick them to the card stock.
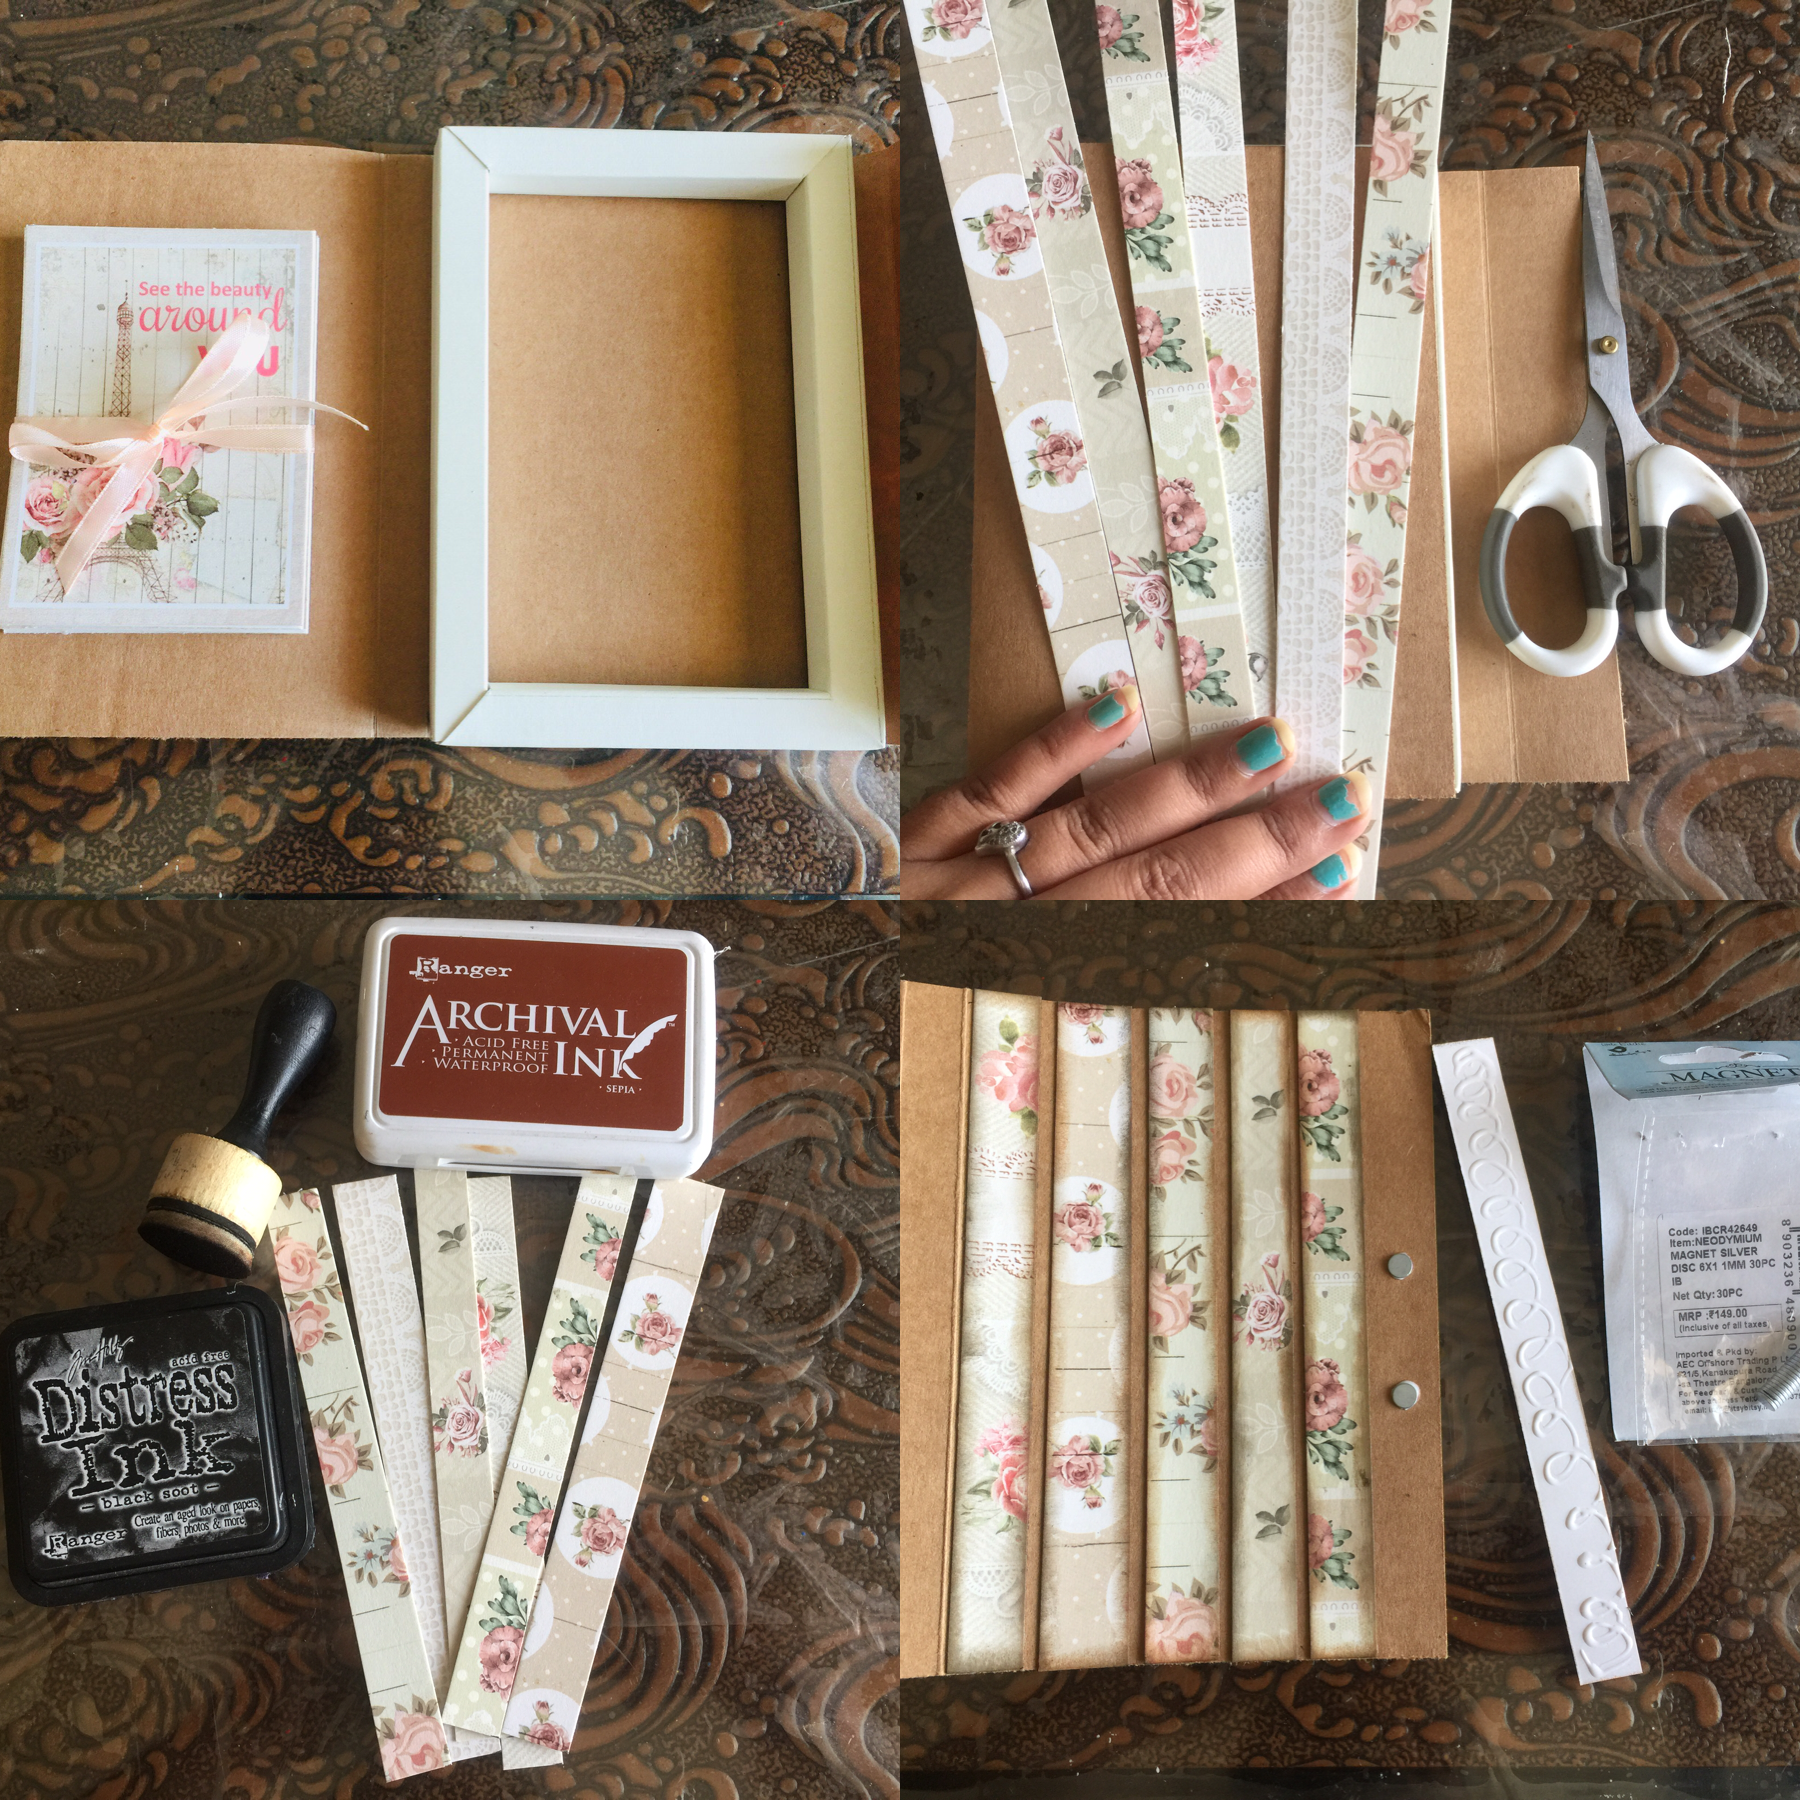
Now attach some ribbon to the zig-zag folder and fix it on the other side of the card in such a way that when you close it , it comes inside the frame. Now to decorate the cover page I have taken some leftover stripes from same paper pack which measures around 1.5 cm / 16 cm. And distress it from all the sides and stick them to the cover page by leaving 2 mm gaps in between each strip. Then before sticking the last strip attach 2 or 3 nano-magnets to it , to give a magnetic closure.
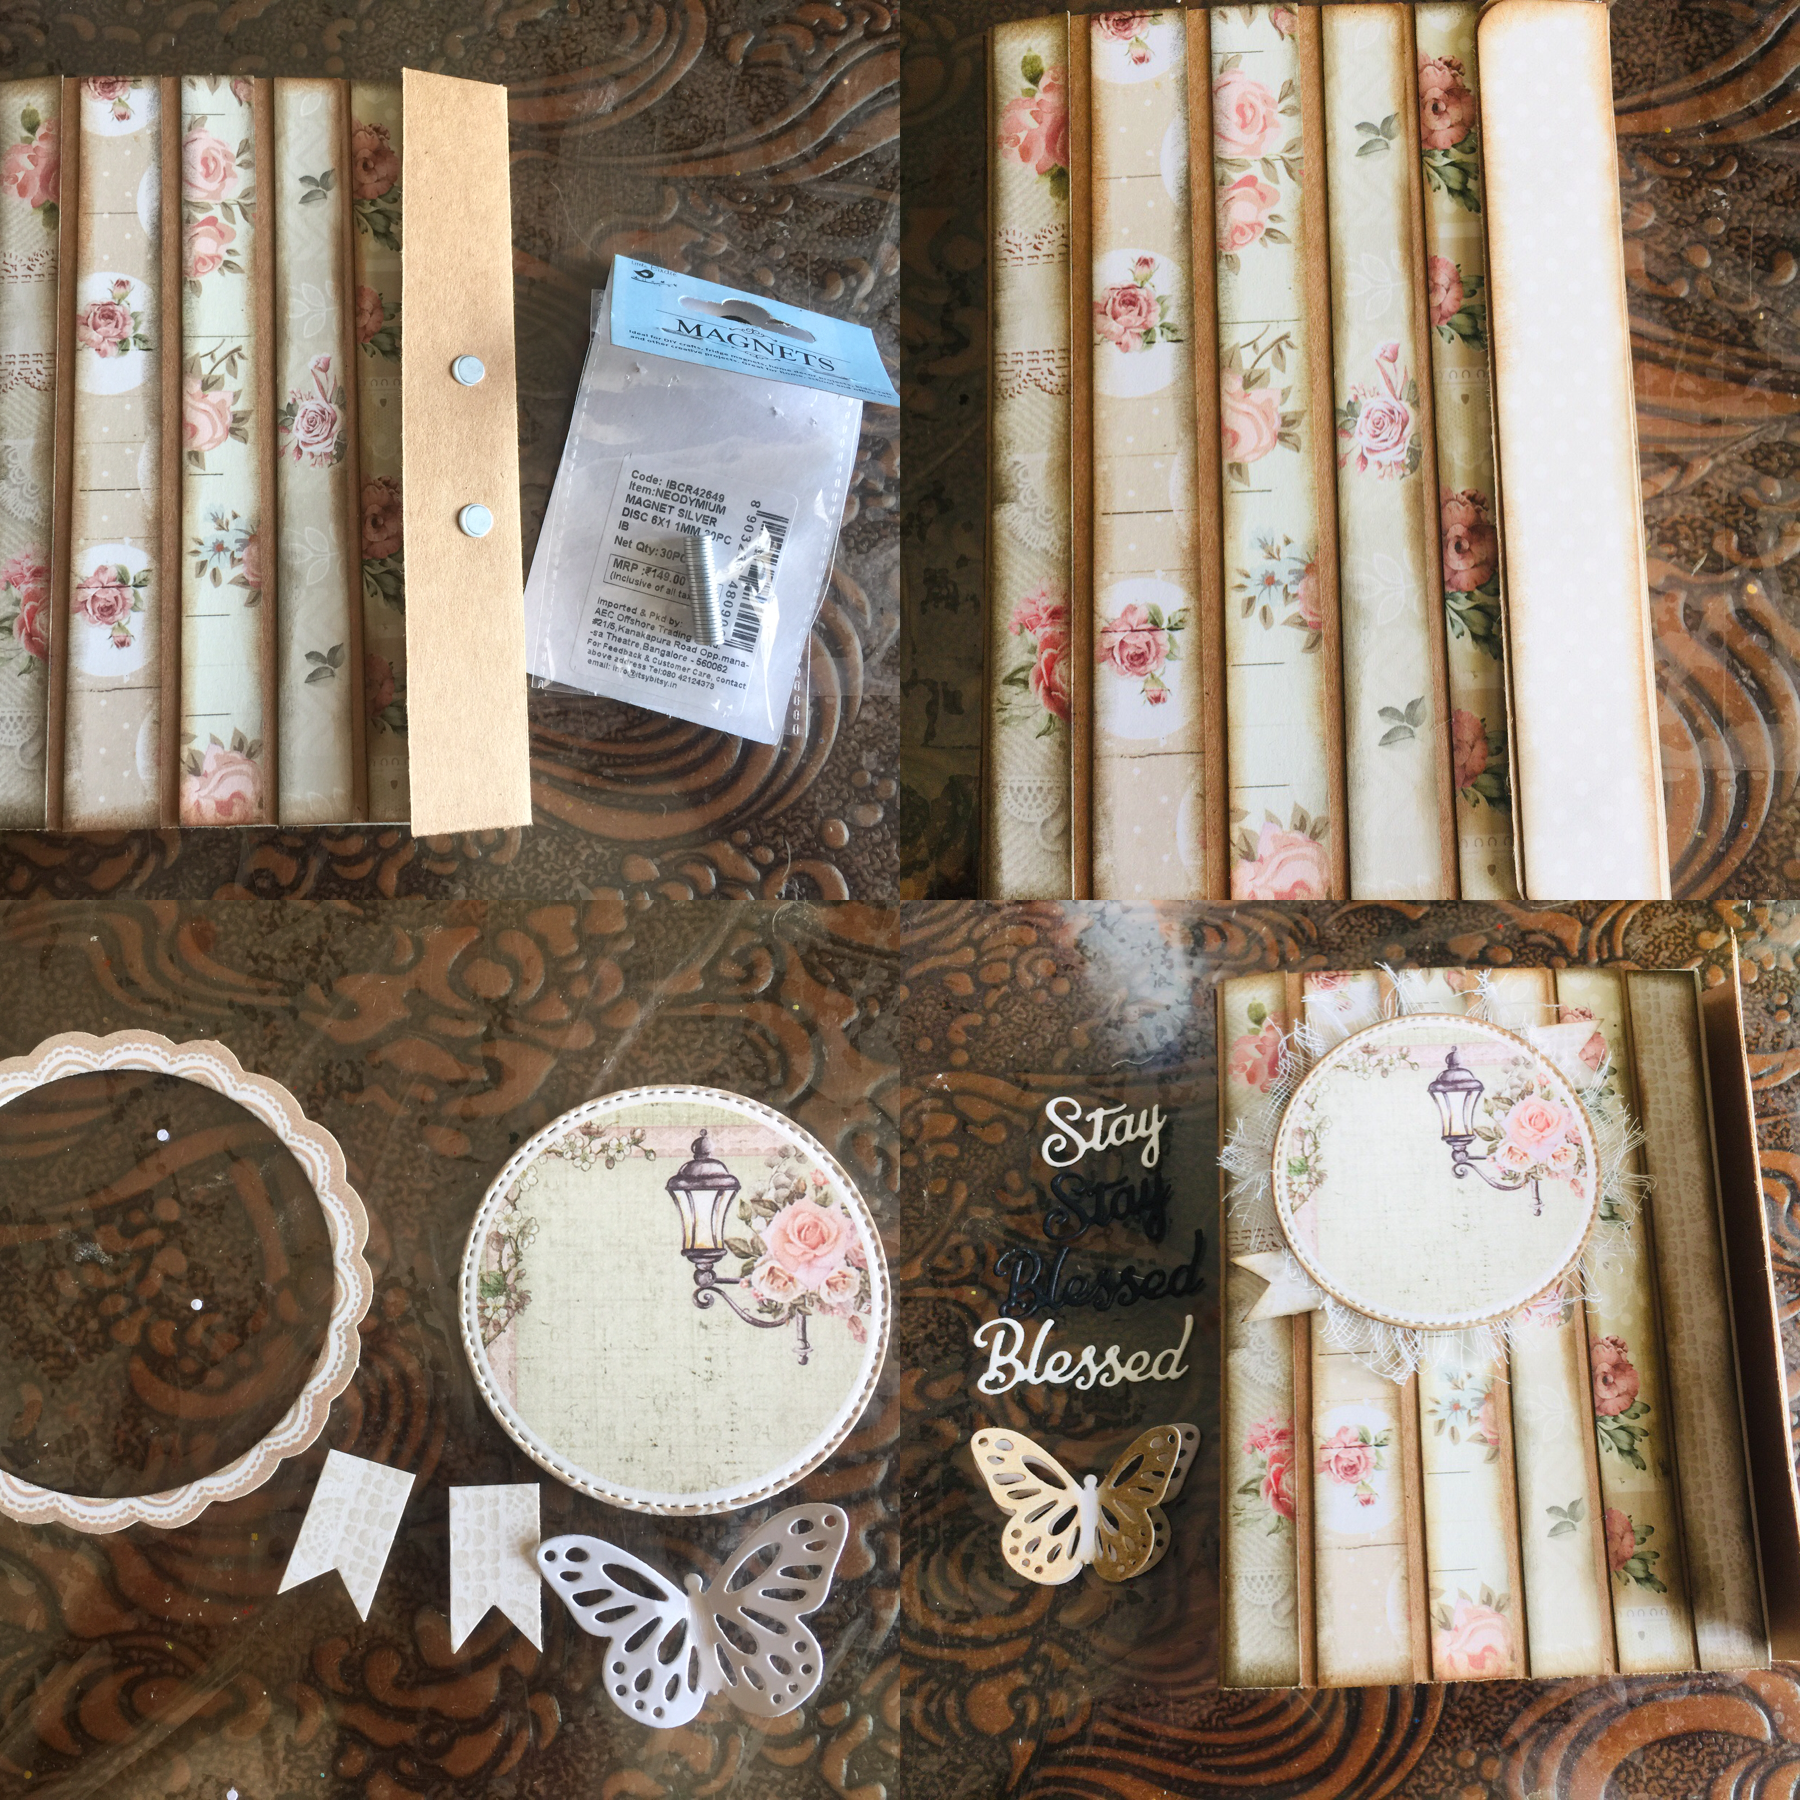
Now attach 2 or 3 Nano magnets to the 2.5 cm flap and cover it with a strip of pattern paper. Now to decorate the cover page I have taken pre-punched doily, a butterfly die cut, small pieces of pattern paper and a sentiment die cut. Now arrange them as shown in the picture and your second card is also ready.
CARD NO. 3

This one is simplest of all , here I have taken a black cardstock measuring 16 cm / 22 cm. Now score a line in the center 11 cm, and fold it like a regular card .

Now here I have made a horizontal shadow box frame so accordingly all the decorations and attachments will be horizontal. So fix the frame to the card from three sides with double sided foam tape. Then after opening the card to the left side of the card I have attached a journal card and two punched strips . Then to the right side of the card I have made a pocket sleeve inside which I have inserted an money envelope with a belt attached to it.
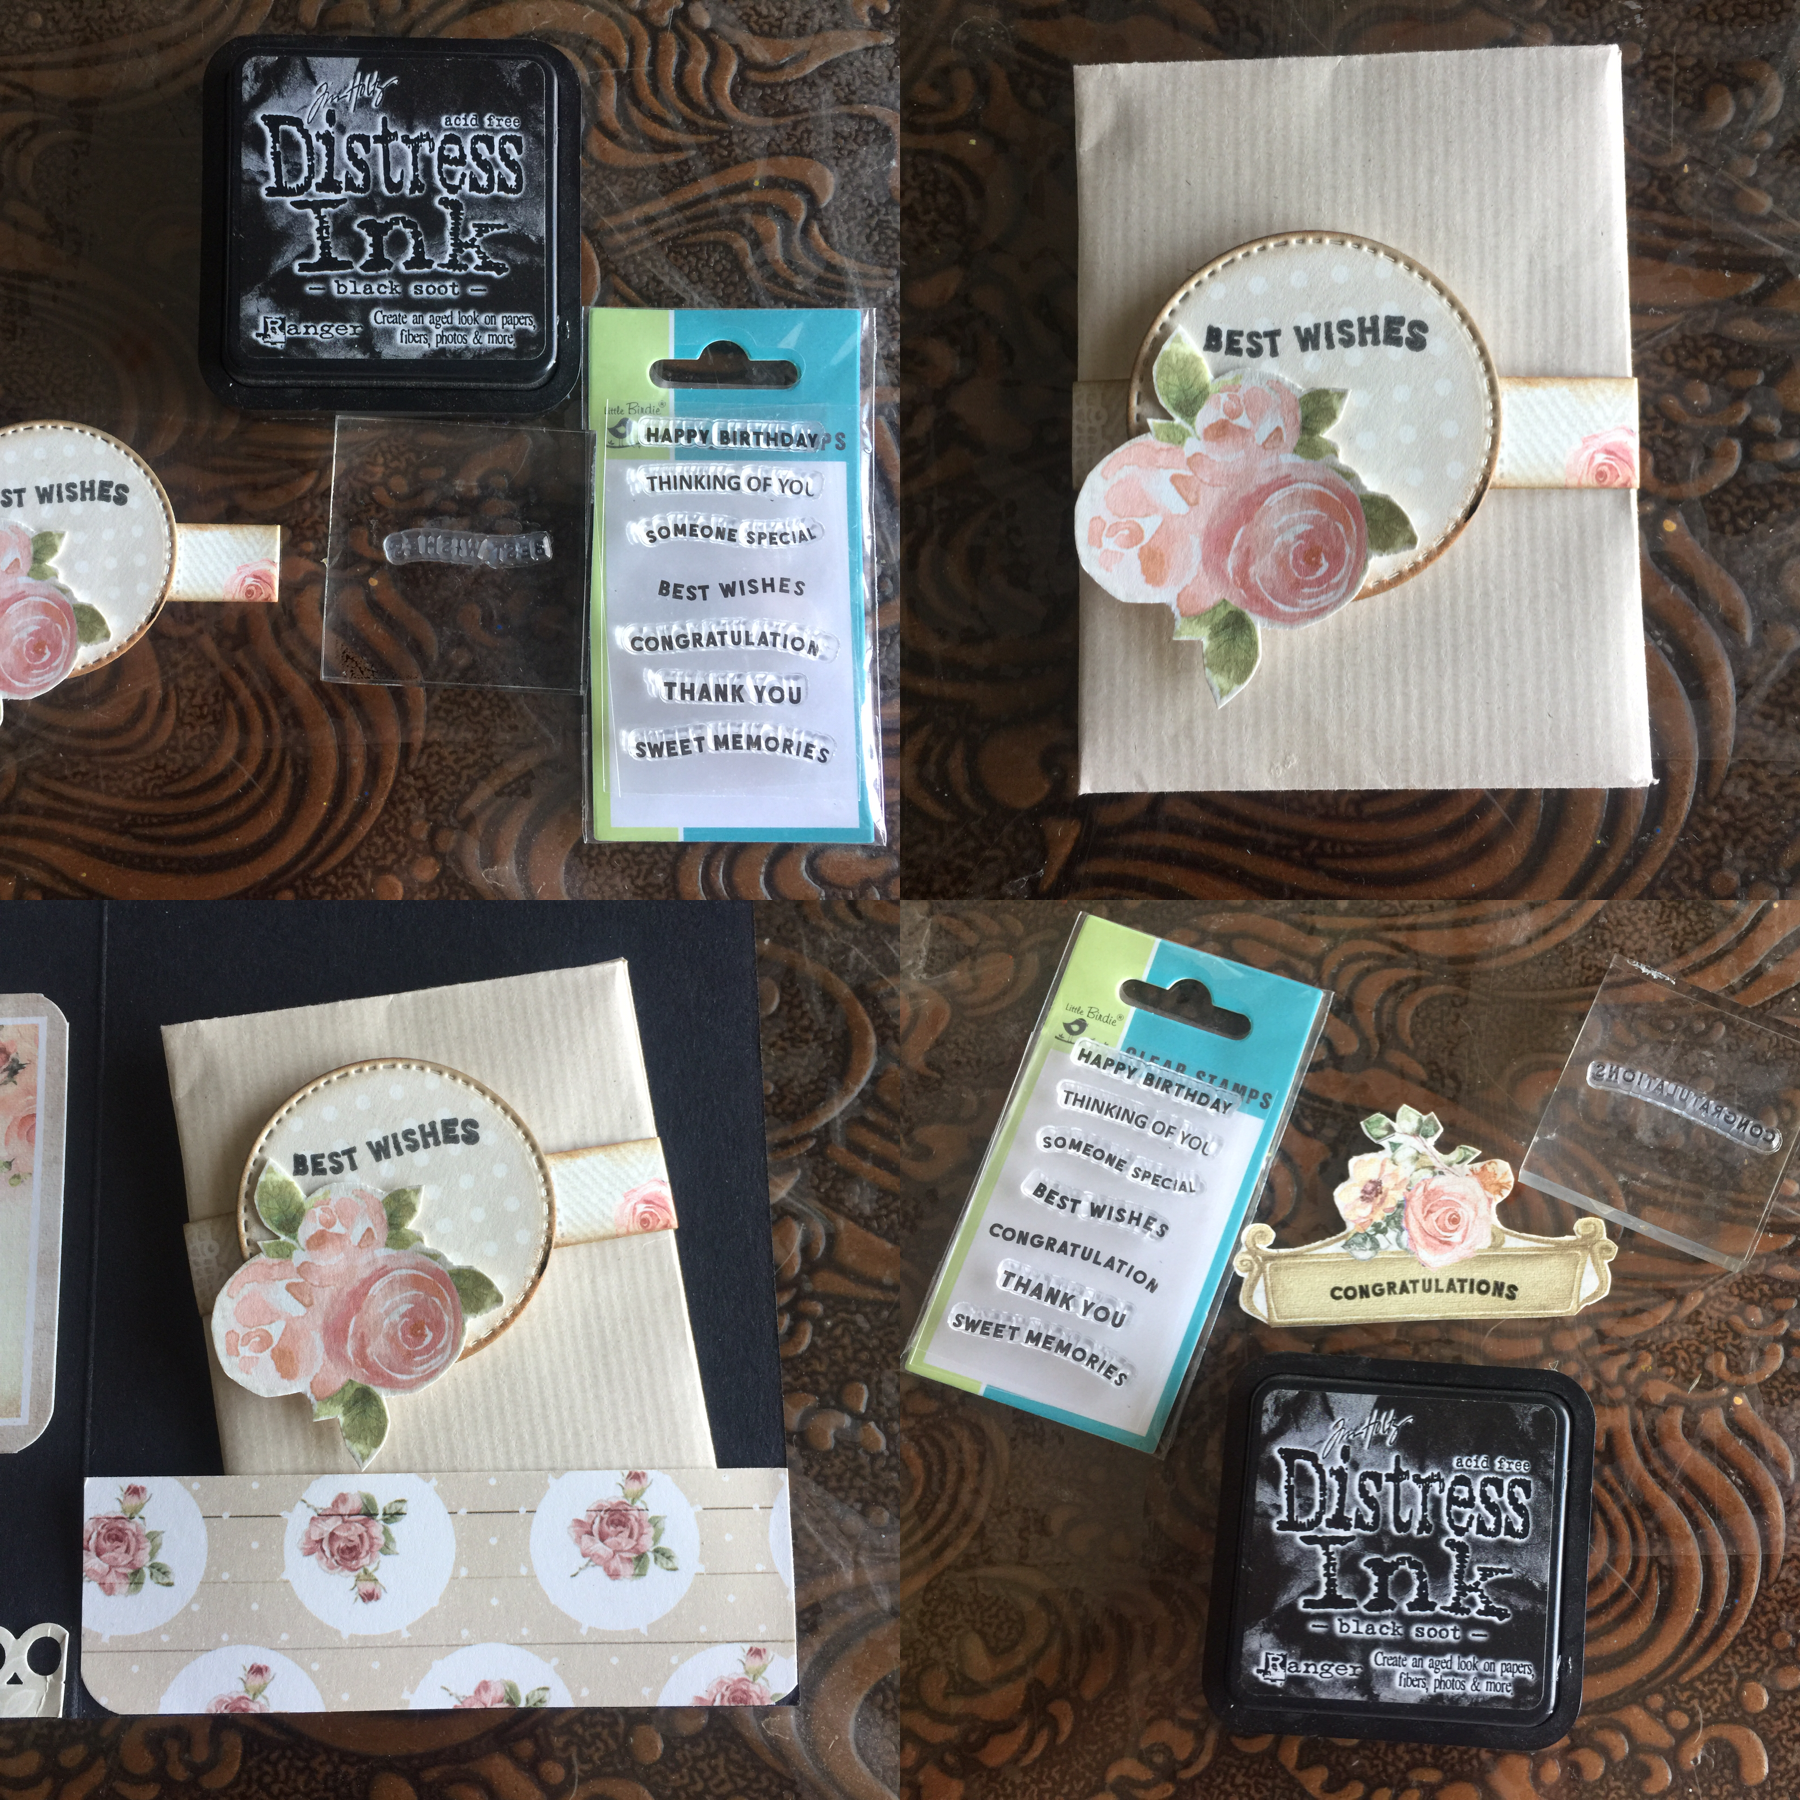
Here on the belt I have used ‘Best Wishes’ clear stamp and fussy cut some elements from same paper pack and used ‘Congratulations’ clear stamp.
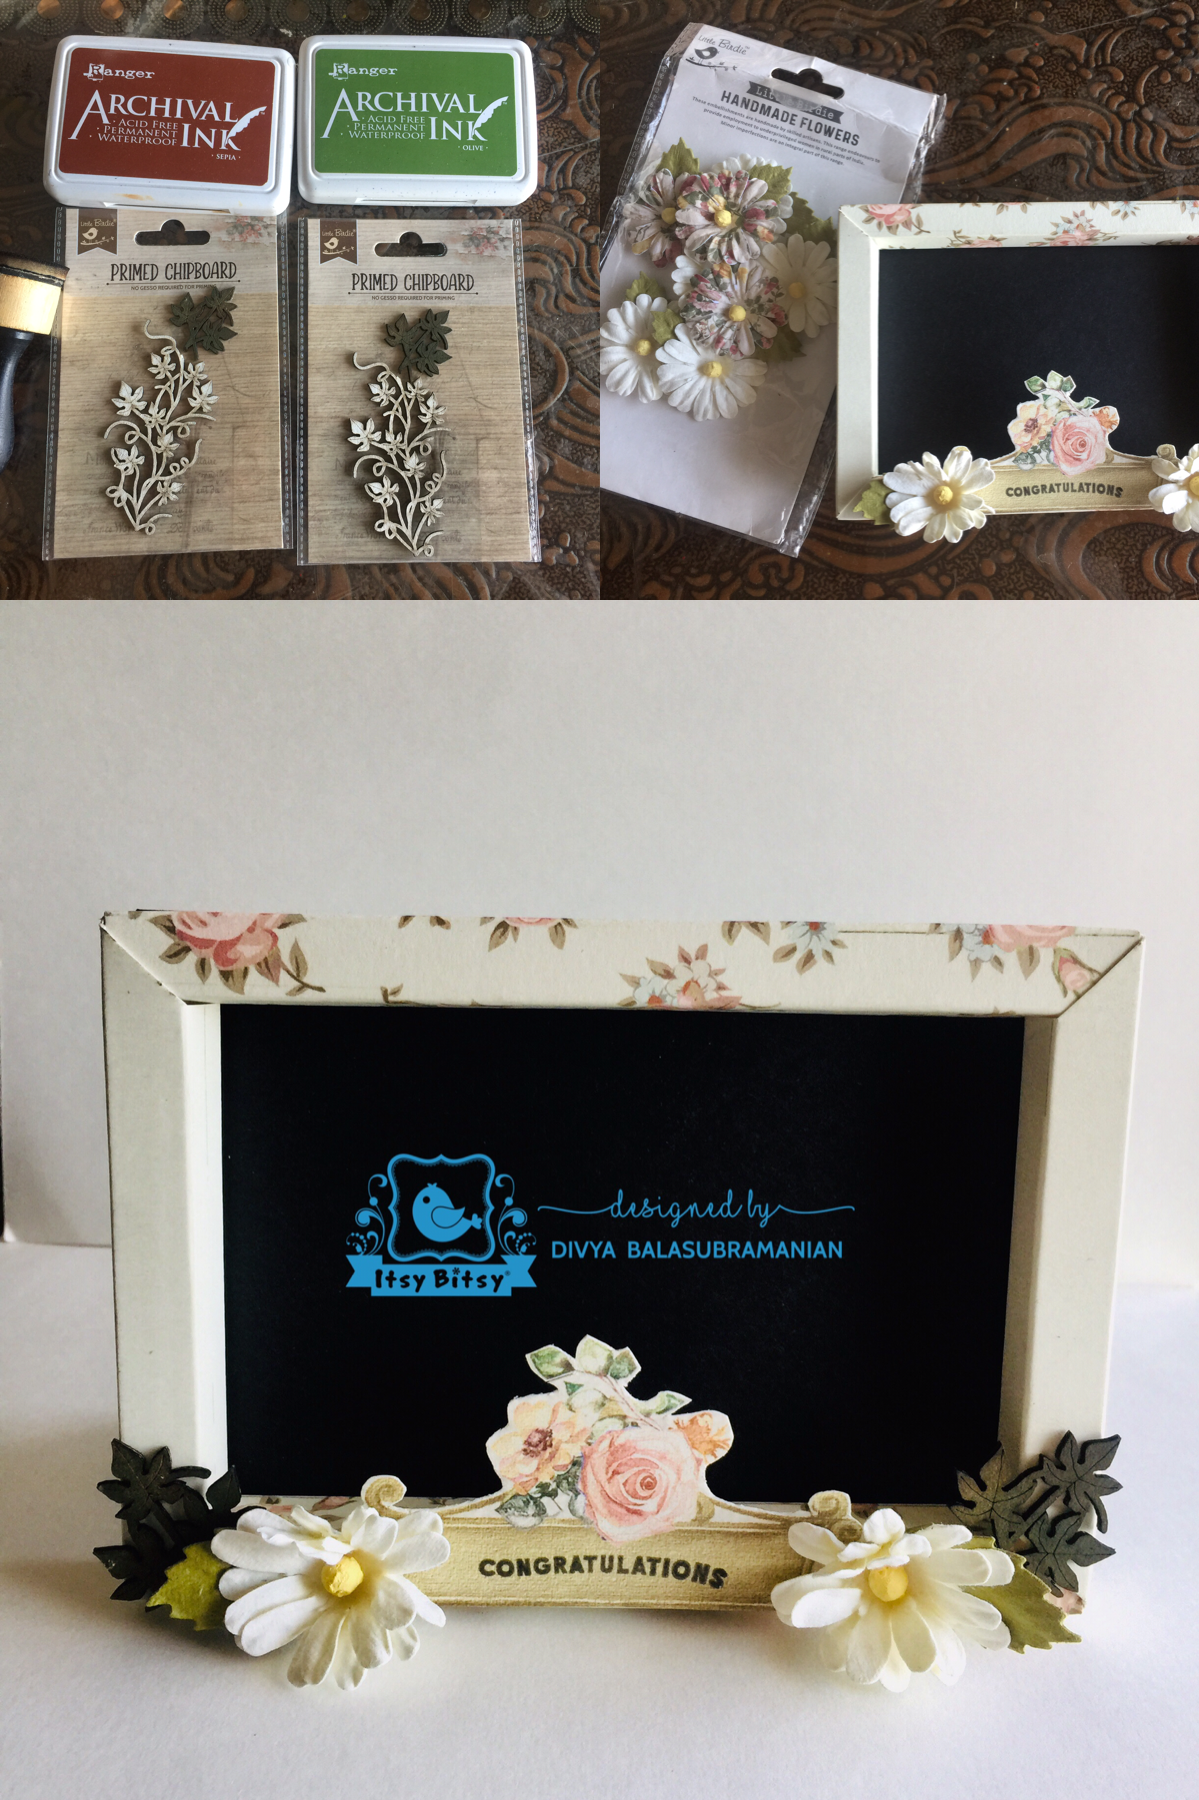
Lastly, I have used some hand made flowers from little Birdie and small piece of primed chipboard which i have colored with ink pads. Adhere all of them as shown and your 3rd card is also ready.
CARD NO. 4
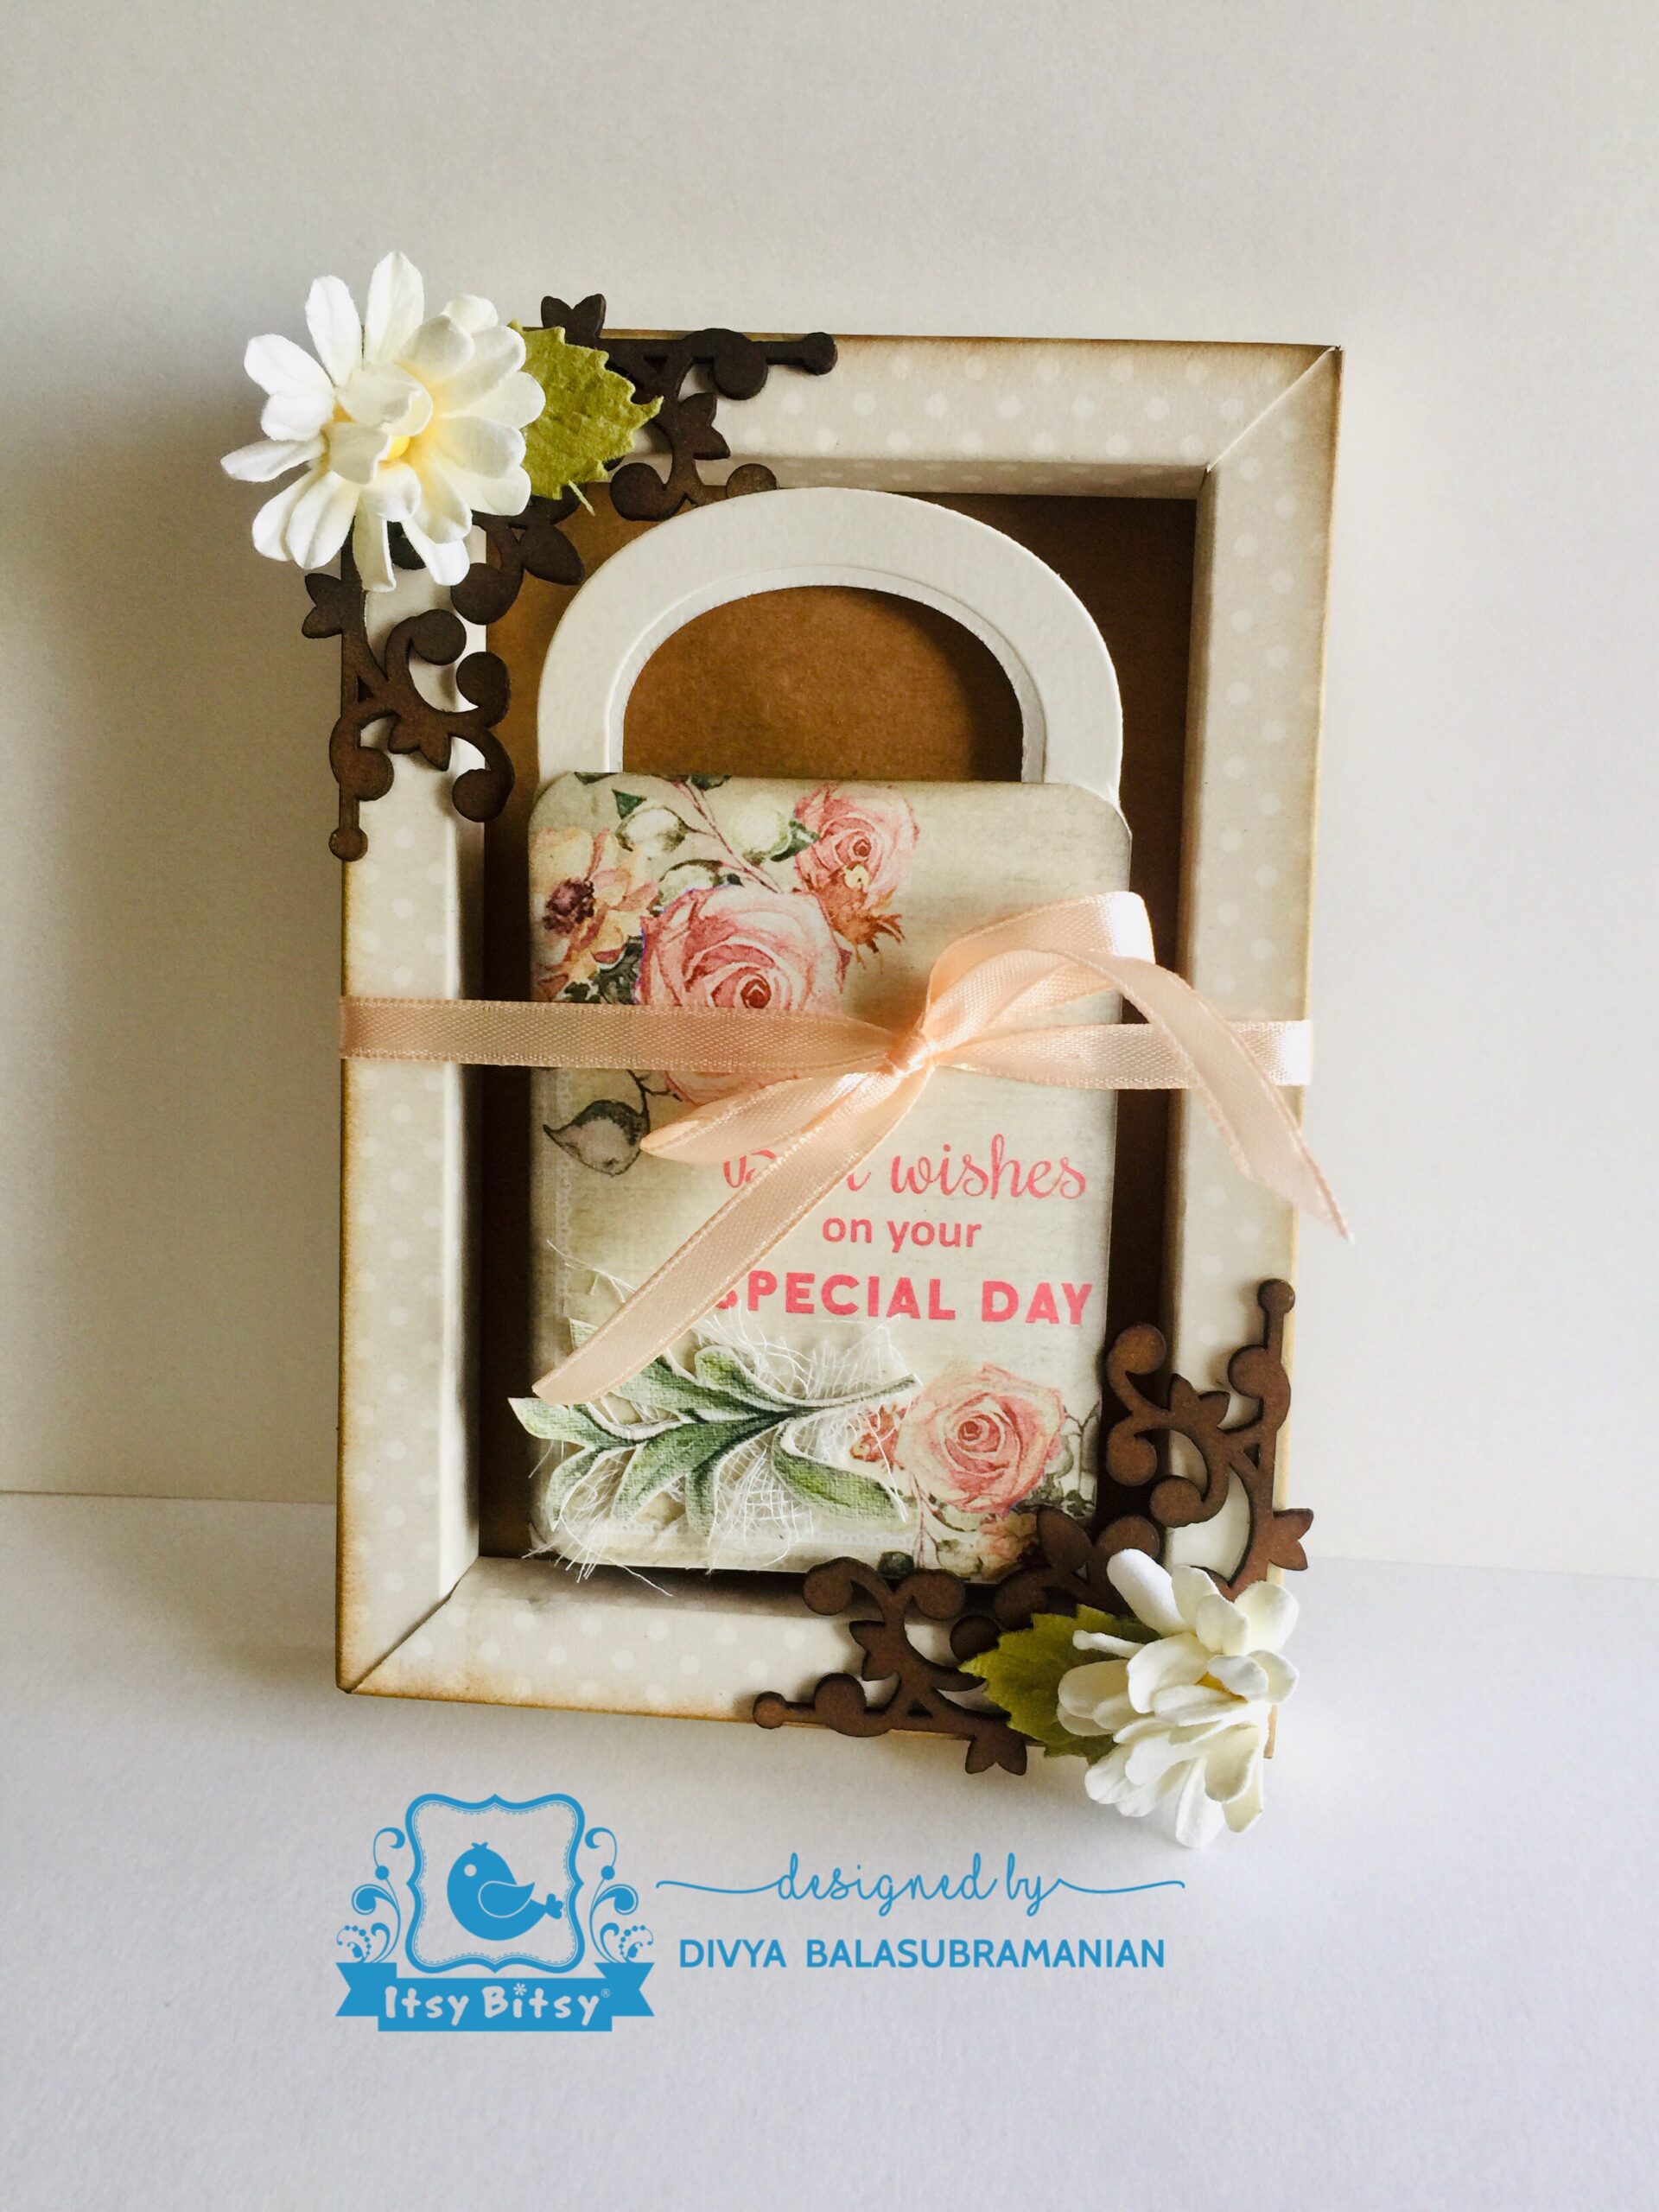
This is a photo frame card with a money envelop inside the cute bag. This bag can be removed later and the frame can be used for photo. To make this I have taken a beige card stock measuring 11cm/ 16 cm and attached the shadow box frame to it by adhering double sided foam tape on 3 sides.

Then I have taken a piece of cream cardstock and die cut it in bag shape. This bag fits inside my frame easily. Then take any one journaling card and cut it in curved shape from all the 4 sides.
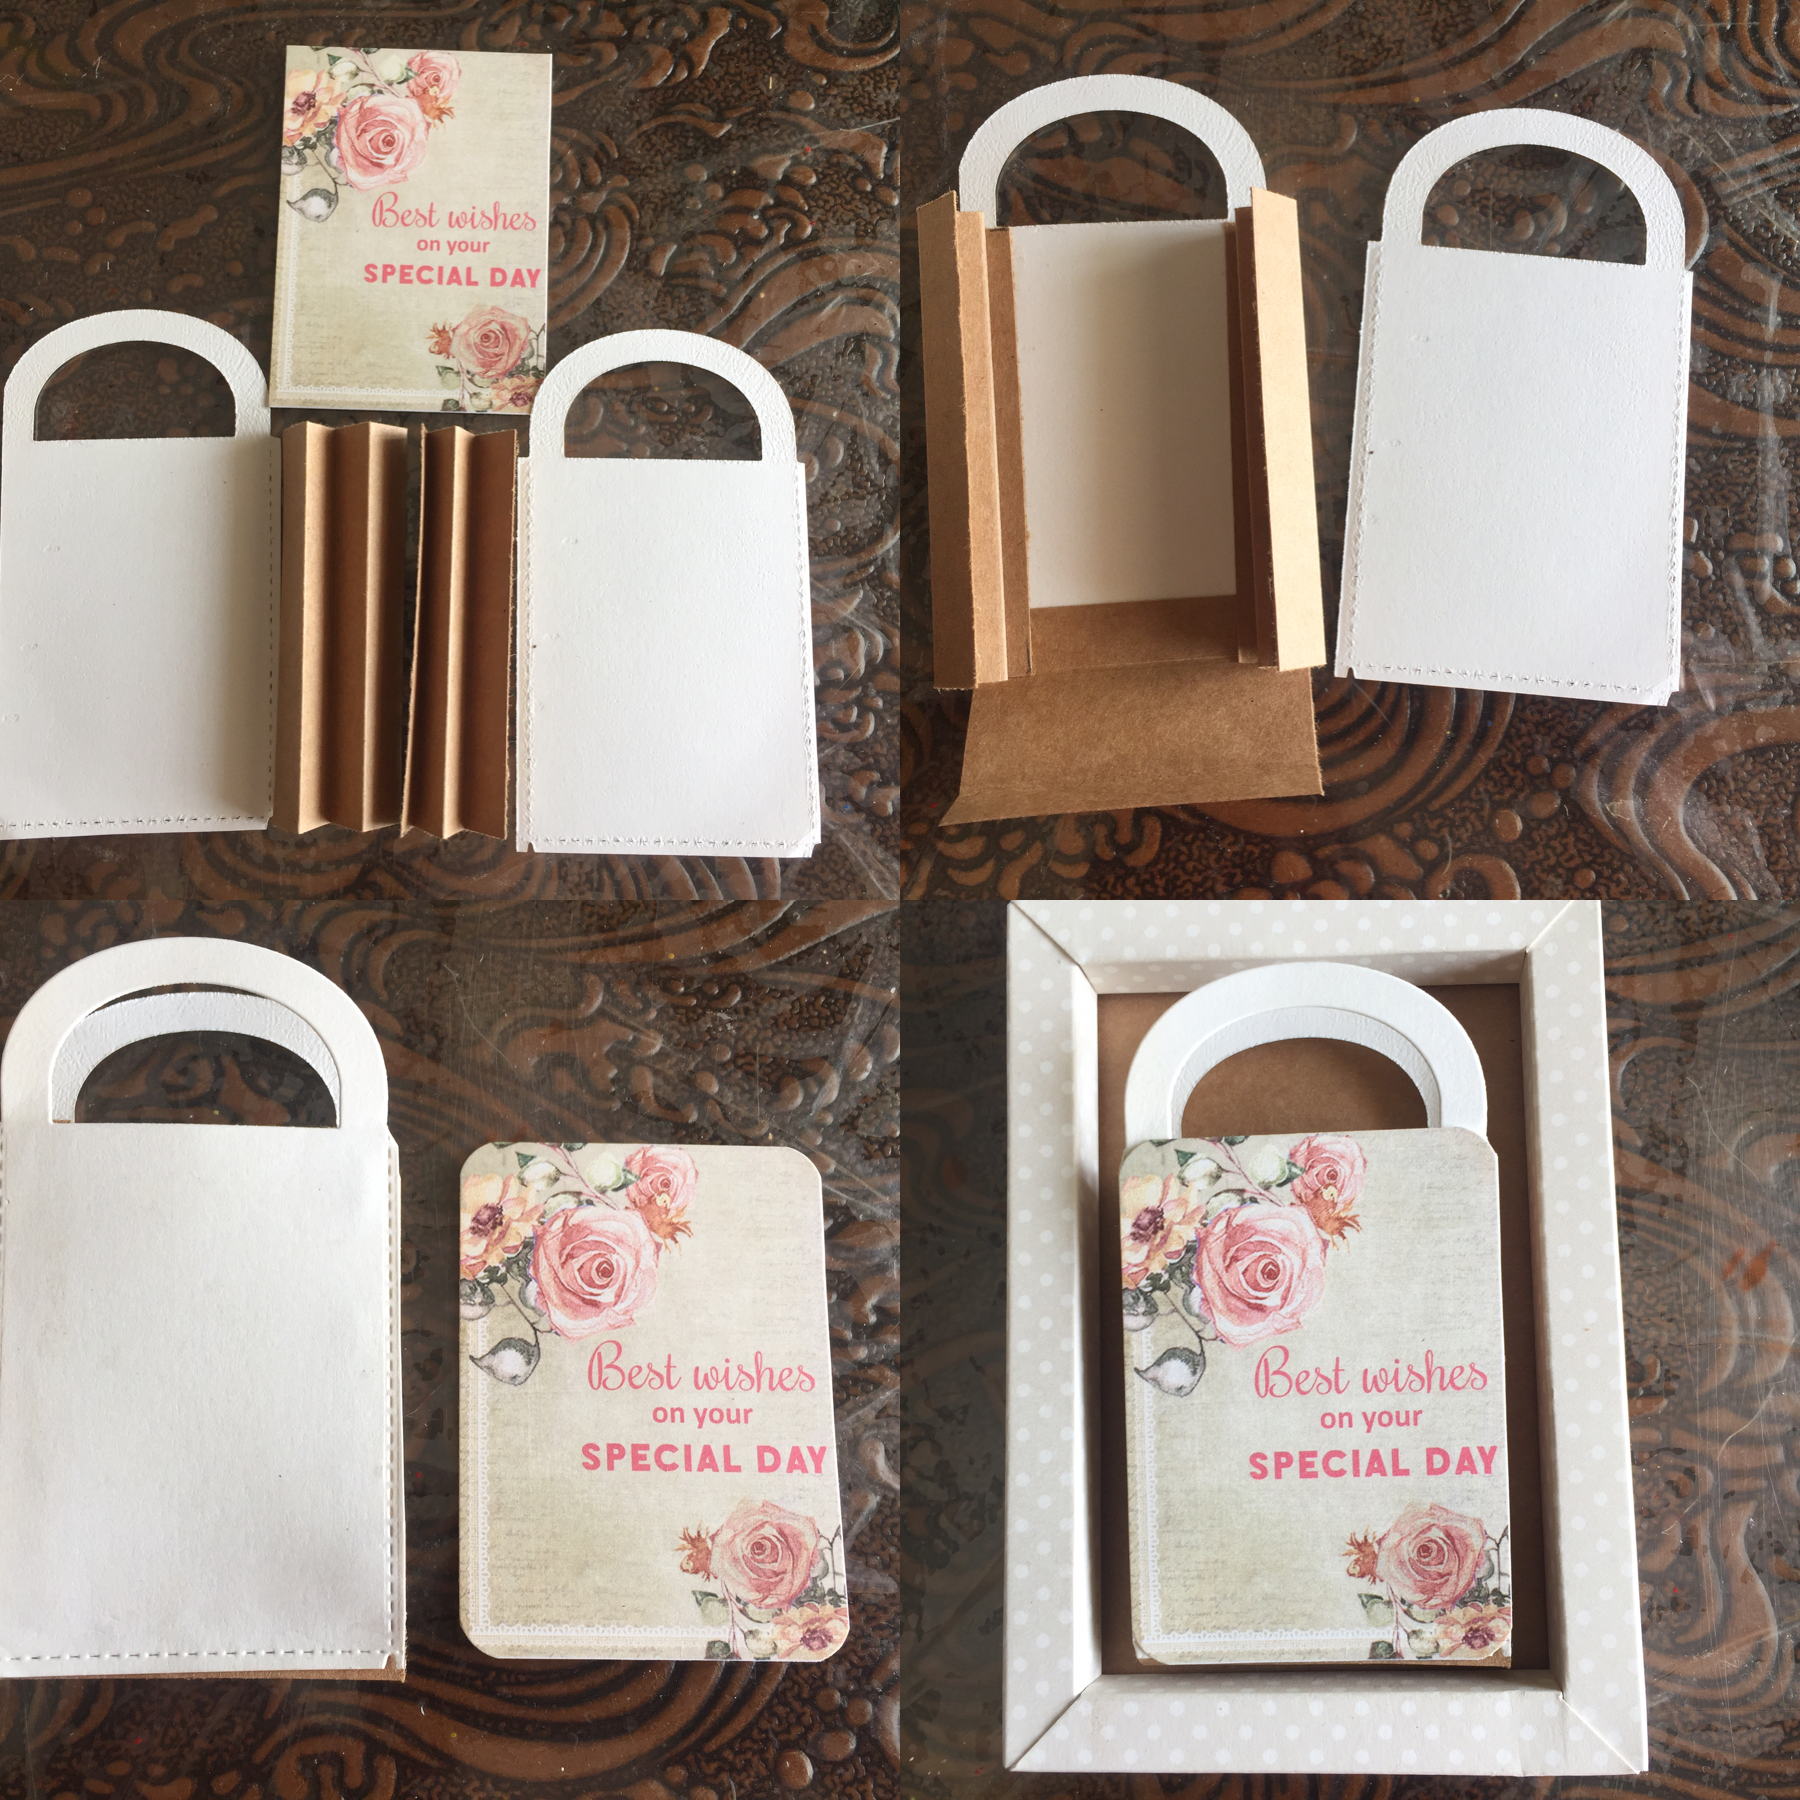
Then take another piece of card stock were the height should me same as journaling card and width should be 2 inches were in score it after every half inch and make a zig-zag folding. Now make another piece of 2 inches and repeat the process. Now stick both the pieces on the sides of bag as shown in the picture and then stick the other piece of bag on it. Basically it will look like an accordion bag. Now stick the journaling card in the front side of the bag and at the back side attach some double sided foam tape and stick it to the frame.

To decorate the frame, I am using a corner primed chipboard. I have inked it with brown colour to give it a contrast look. Then I have used some handmade flowers in the corners to make it look more attractive.

Take any regular money envelop and fold it and put it inside the bag. To make the bag look more interesting I have added a leaf element to it. Lastly I have given it a satin ribbon closure. And this is how our 4th card is also ready.
I have also made a video to shown how the card works exactly and for you better understanding. Hope you will enjoy watching this.
All the materials used in the above projects are listed below :

Little Birdie Printed Cardstock Pack 12" x 12", 12 Sheets, 250gsm – Shabby Chic Bouquet
Double-Sided Tacky Tape – 10mm

Little Birdie Thin Cut Dies – Butterfly Medley
Tim Holtz Distress Ink Pad – Black soot, 3" X 3", 1pc

Ranger Archival Ink Pad – Sepia, 1pc
Heavy Duty Double Sided Foam Tape – Black 1.5inch

Little Birdie Primed Chipboard- Classic Vine
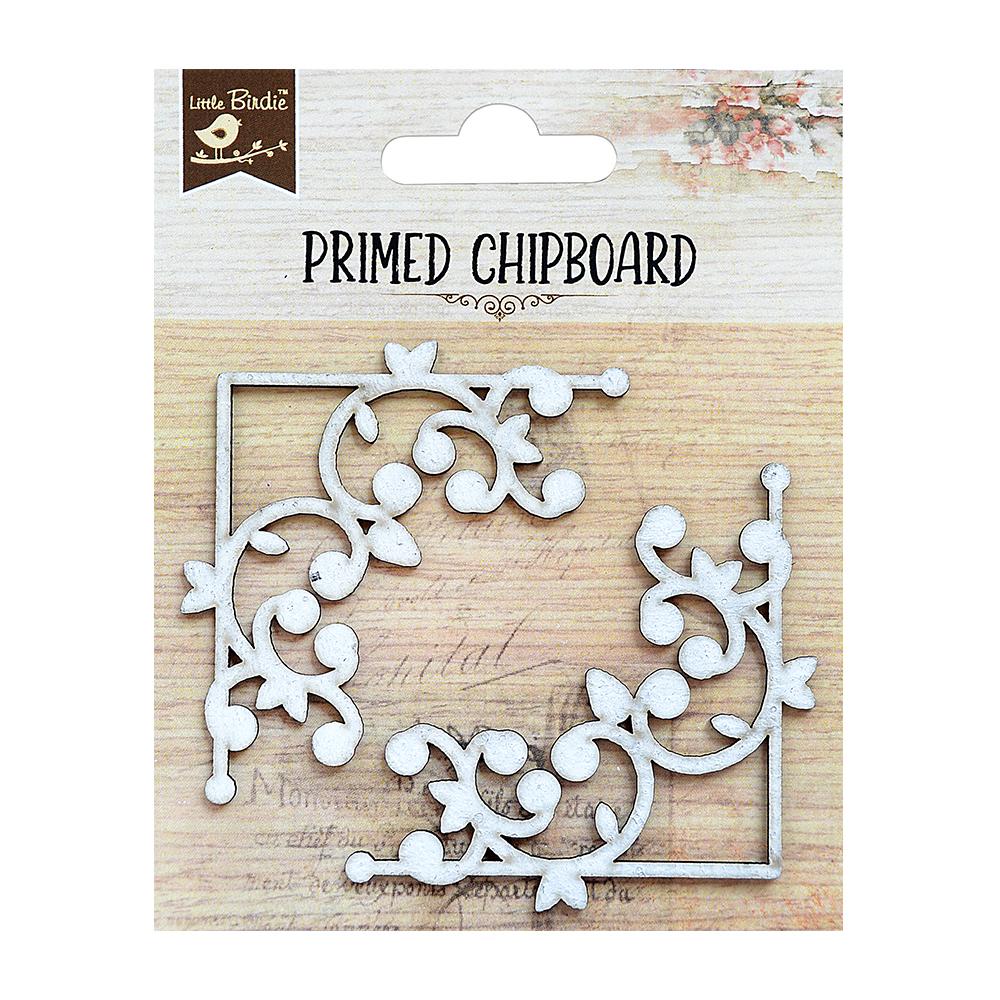
Little Birdie Primed Chipboard- Swirly Floral Corners, 1 Set
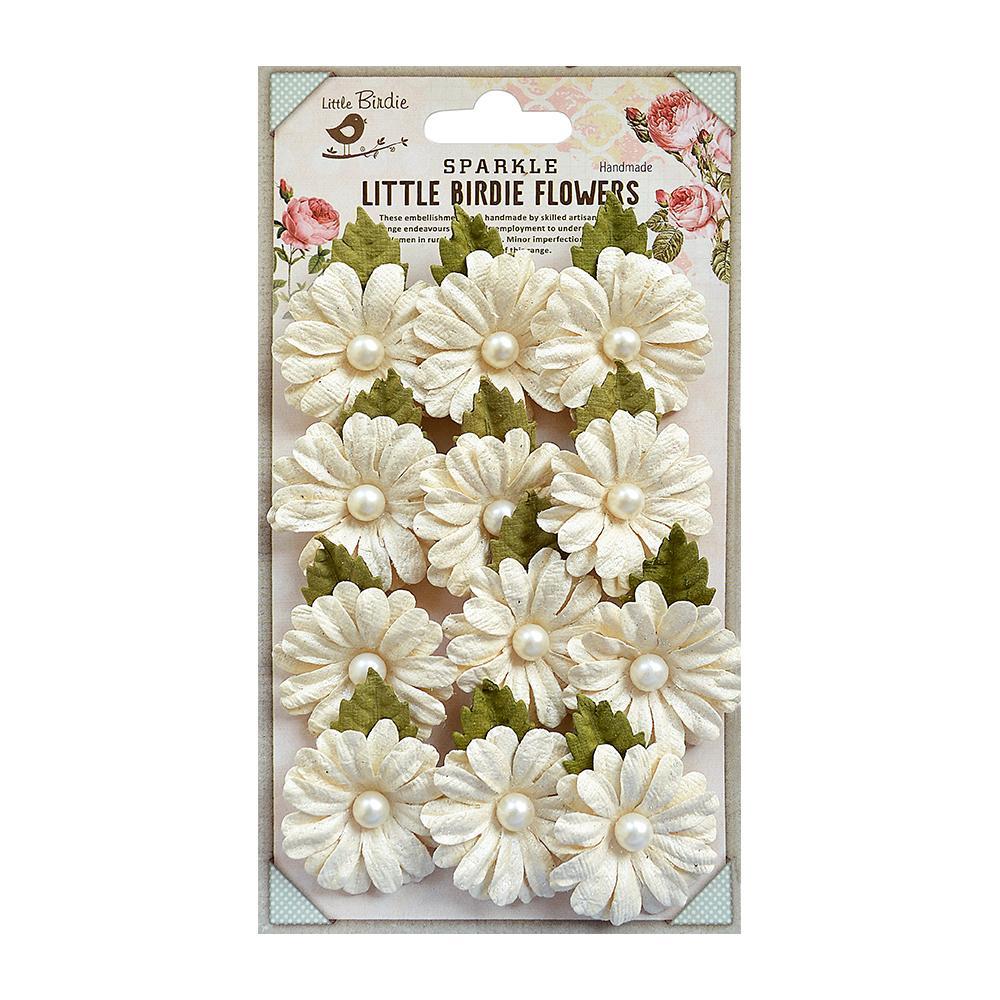
Little Birdie Handmade Flower Valerie – Ivory, 12pcs

Little Birdie Clear Stamps – Sweet Memories, 2" X 3", 7Pc