Hello Everyone,
Vidhu Thareja here. I hope all of you are having a great crafty time. First of all, I would like to thank Rashmi Harish ma’am and Anitha Mallesh for giving me this opportunity to create a new project using one of the it’s home brand’s most well-loved products…. Little Birdie Deco Magic, decoupage glue.
Why do I like it so much? The answer is easy…..It gives an excellent coverage and finish. I can say that it is a must have product for decoupage lovers. Deco Magic can be used on any surfaces and it is just perfect for projects like reverse decoupage on glass plates. As the name suggests, we can create a magic on our decoupage projects by using this magical glue. So I have decided to do reverse decoupage on glass plate and along with that I have used one more wonderful product from the same brand…Little Birdie 2 Step Crackle Medium.
Here is a step wise picture tutorial to explain the process of a beautiful home decor piece.
So, let’s begin….
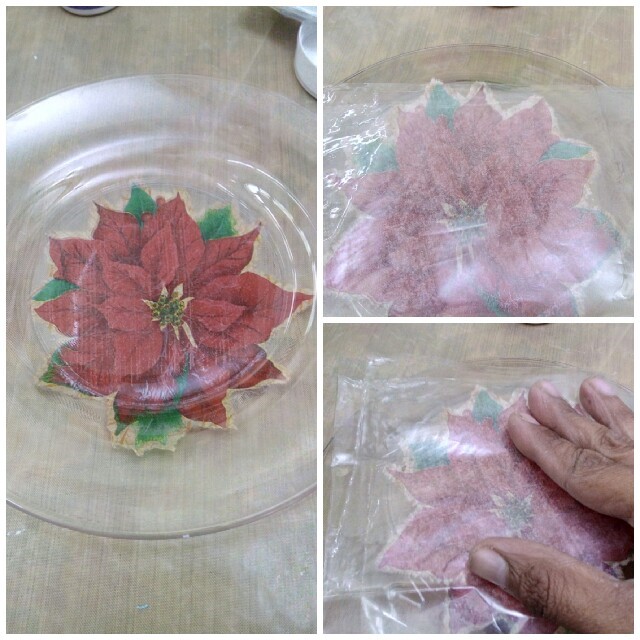
I took a 7” glass plate and cleaned it with rubbing alcohol available at any local pharmacy shops to make it dust free and finger impression free. As all of you must be aware that for decoupage we need a clean surface.

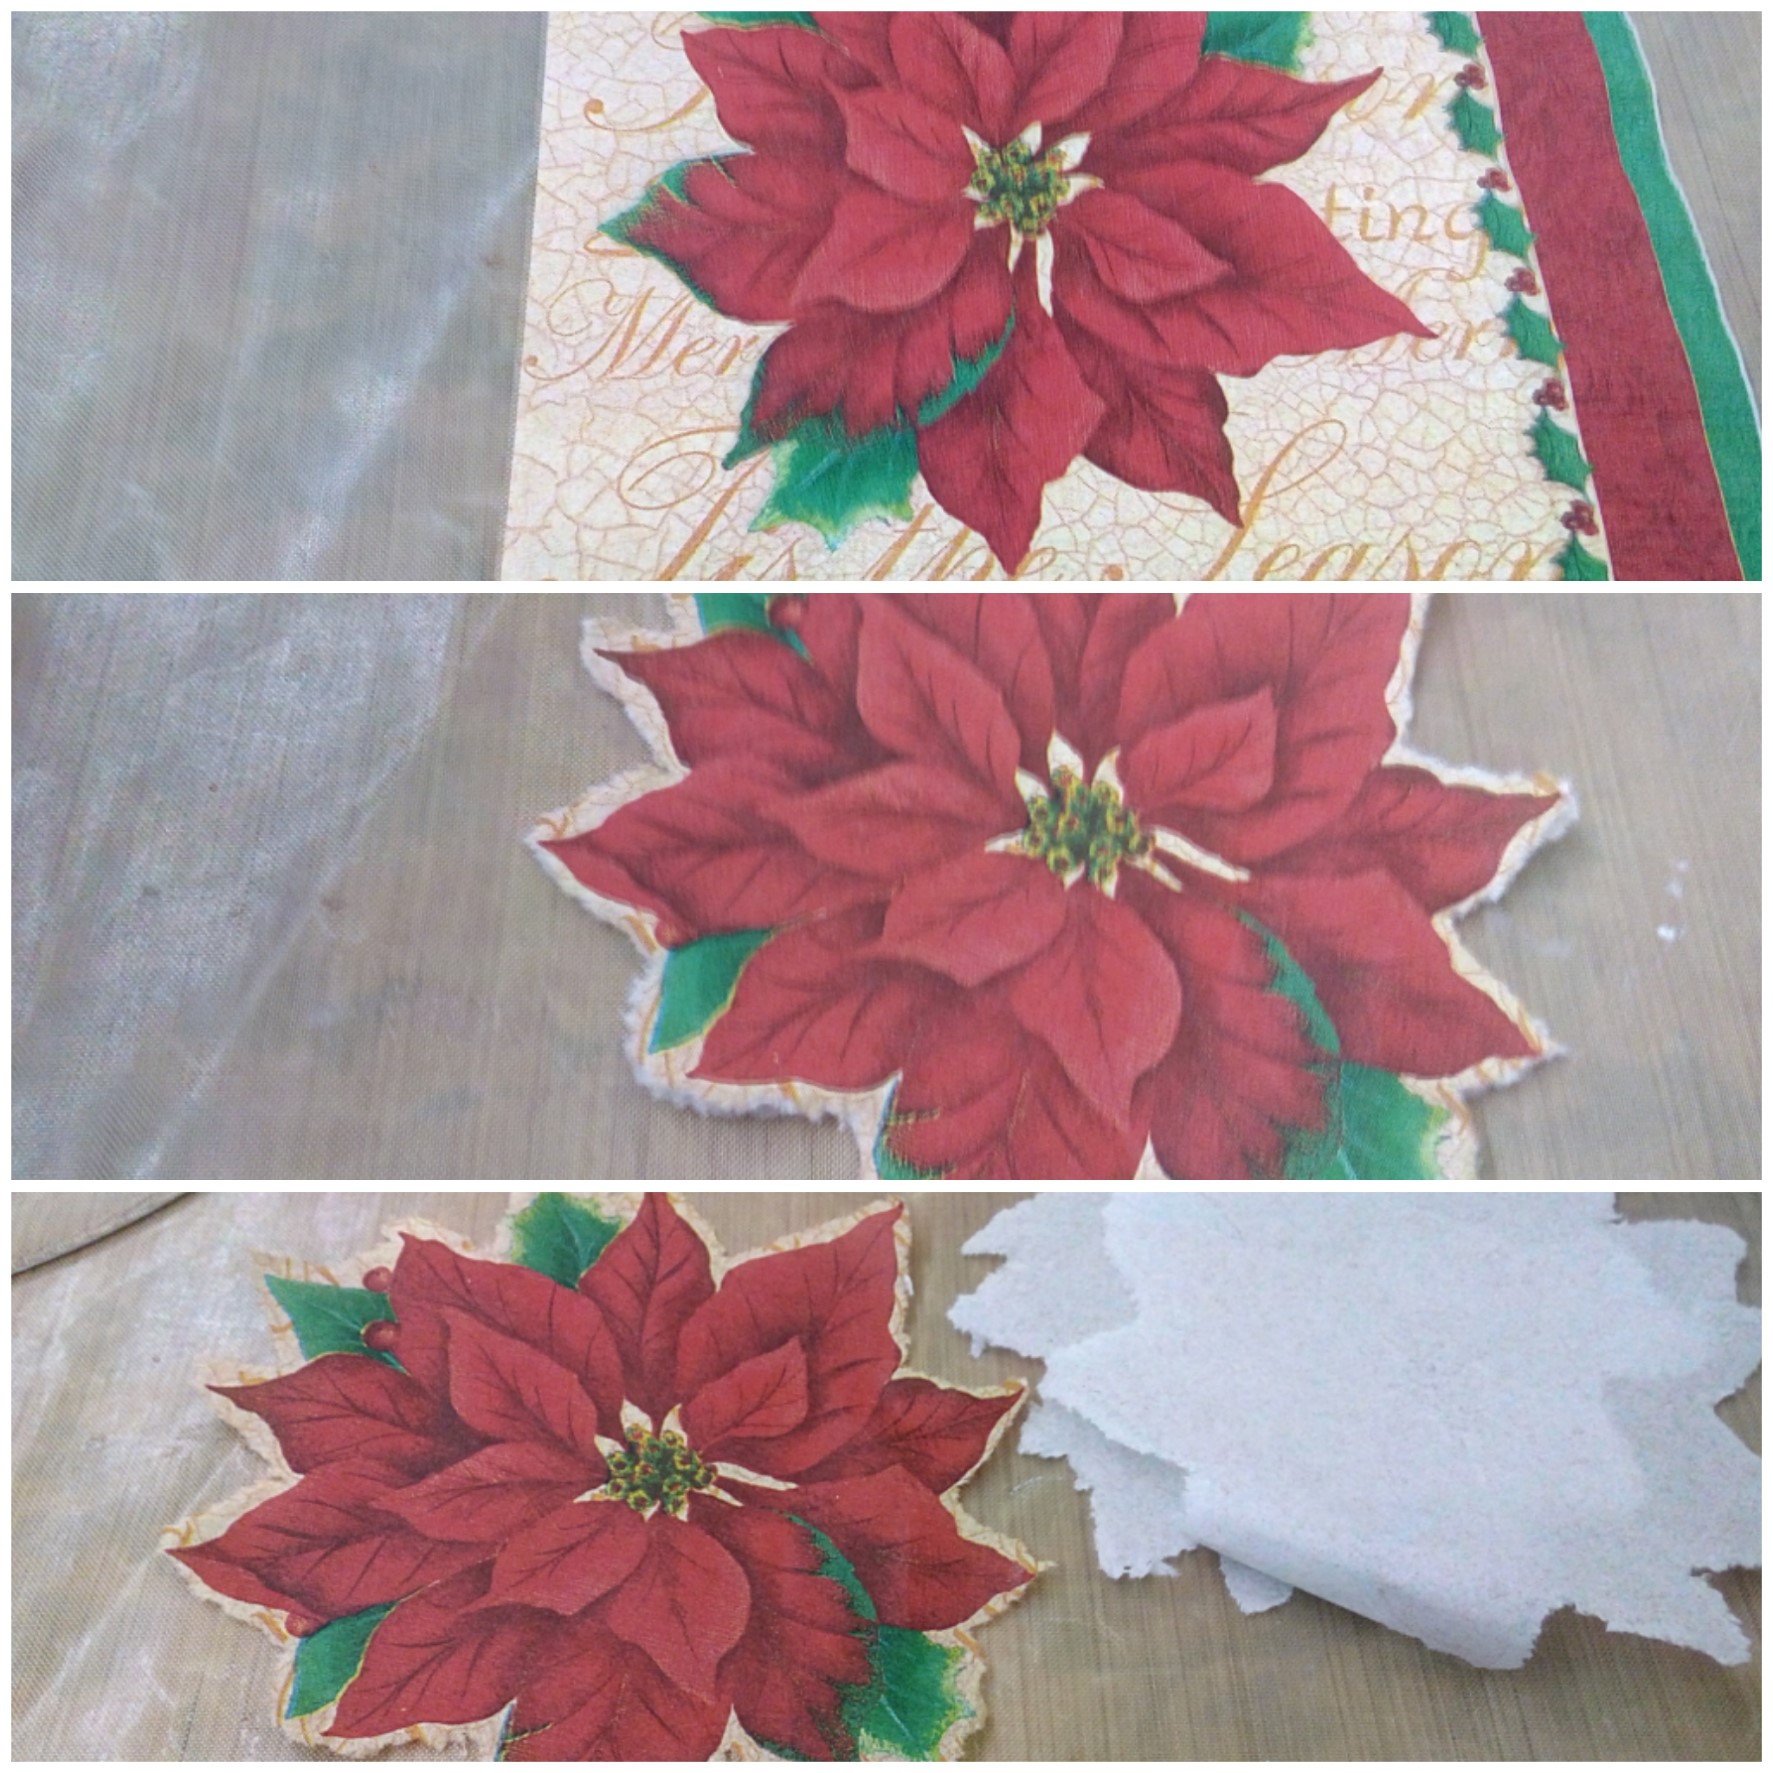
For this project I have selected a beautiful and bright tissue from my stash, which I had bought from the store sometime back. I decided to use only part of the image from the napkin so took out the portion of the image, using wet brush technique. This tissue is three ply, I separated printed layers from the rest of the two layers.
Then I placed the image, faced down to see the placement of image on the plate. To avoid any wrinkles or air bubbles, I applied glue on a small portion of the plate and then adhered the tissue over that portion, by holding the tissue on one side and covered the whole surface like this. Always apply minimum glue to avoid any air bubble but enough for the image to stick! Now I placed a plastic sheet over the image and pressed it from the center to the outward direction to remove air-bubbles, if any.
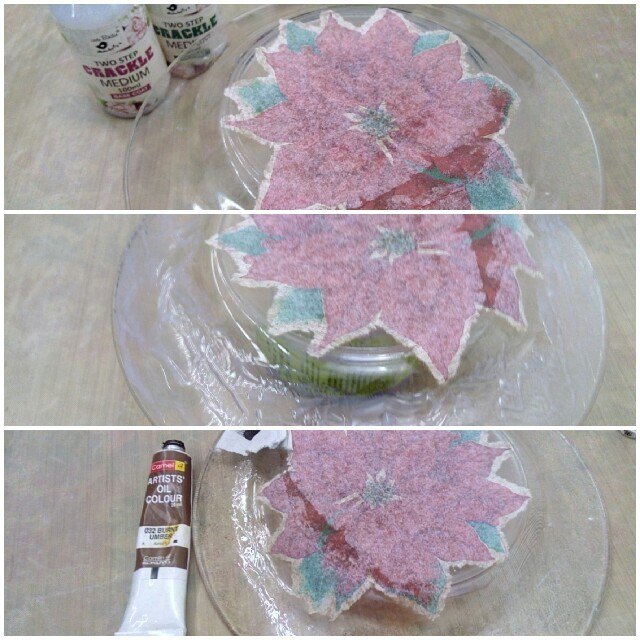
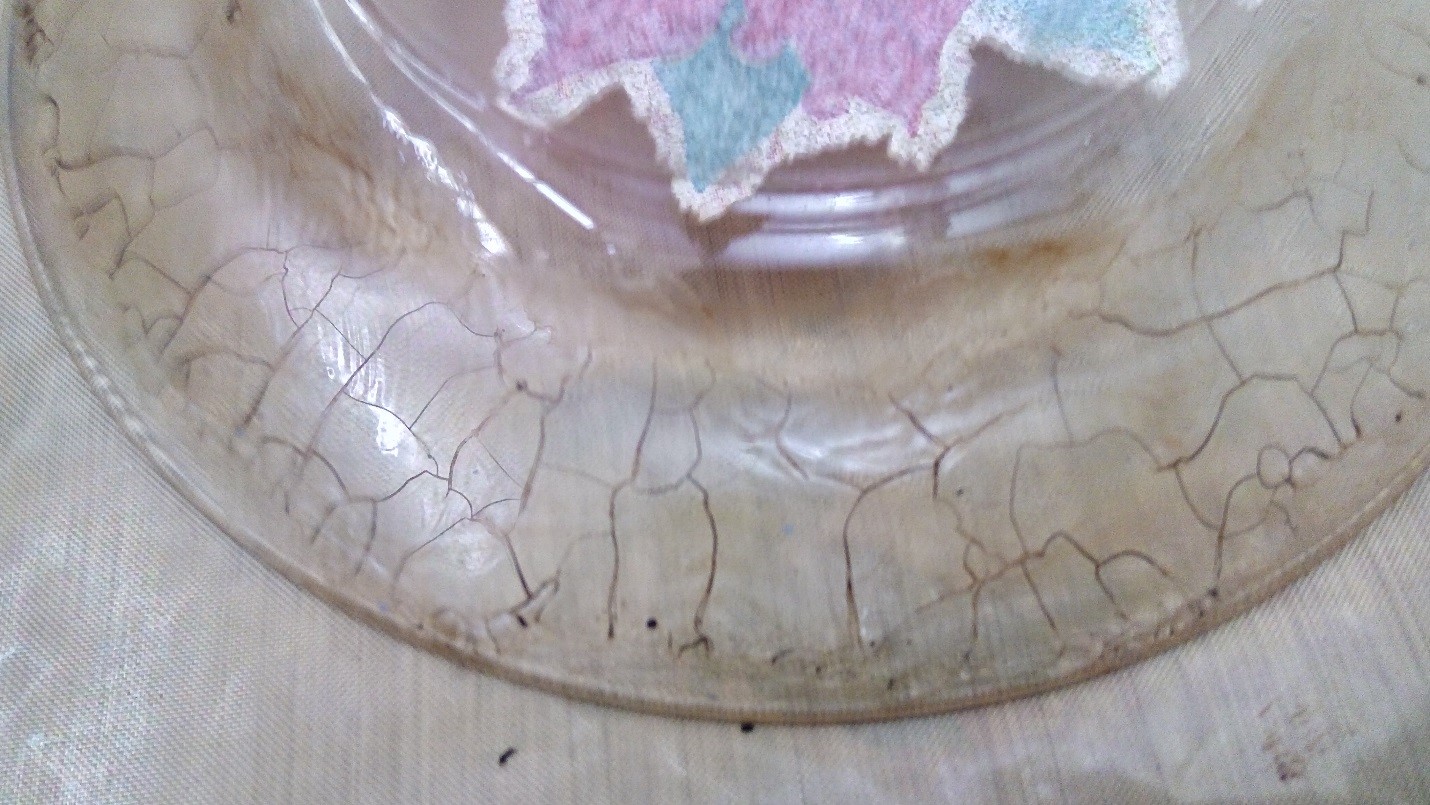
I left it to dry for some time. Now it was the turn to apply the 2 step Crackle Medium. Here I would like to mention that application of this medium is totally different on MDF and reverse side of glass. On MDF, we first do the decoupage, then apply base coat of Cackle Medium. We let it dry and then apply top coat of the crackle medium and when it dried, we highlight the cracks with the help of oil or acrylic paints. But in reverse side of the plate, steps are totally opposite of that. So have a look…..
Little Birdie 2 step Crackle Medium comes in a set of two bottles, a base coat and a top coat.
First I applied the base coat of the 2 step Crackle Medium with the help of a synthetic brush and let it dry naturally. It takes a few hours to dry completely. Do not use heat tool or hair dryer to speed up the drying process. When it was dry, I applied top coat of the Crackle Medium. I left it to dry overnight. It should be completely dry before you move to your next step.
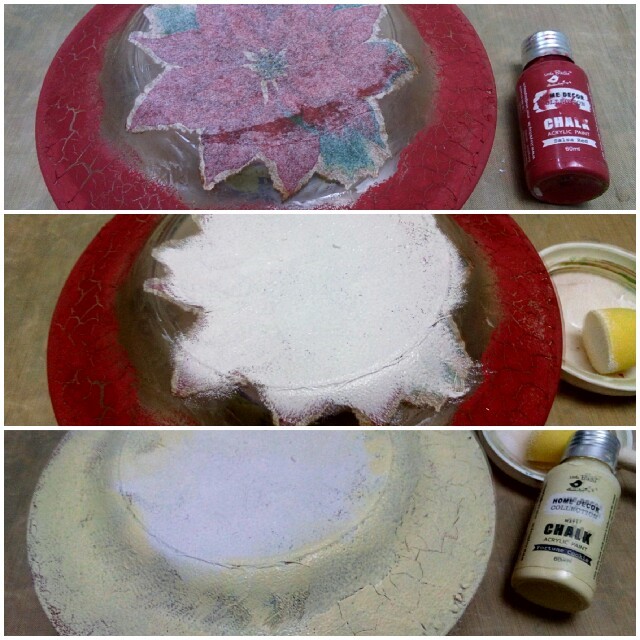
Here I have sealed the image with deco magic glue. Always apply both the mediums of Crackle Medium in the same direction. Formation of cracks depend on thickness of the top coat of the Crackle Medium. Then I took Burnt Umber shade of oil color and took out some oil color on a piece of fabric and rubbed it over the cracks and immediately wiped the oil color with another piece of cloth. I cover the whole surface like this, highlighting all the cracks. Cracks started to become more visible.
I have selected two beautiful shades of Little Birdie Chalk Paints- Salsa Red and Fortune Cookie, in combination to match my projects. Here, first we need to apply the dark color . So I applied Salsa Red chalk paint with the help of a sponge dauber, covering the highlighted cracks. I let it dry. I have applied white chalk paint on the image. Now I took Fortune Cookie shade of chalk paint and start covering the area around the image and all over the Salsa Red chalk paint. I have used light shade of chalk paint on top of the dark shade because we need to blend the tissue with the colors to give a uniform finish.
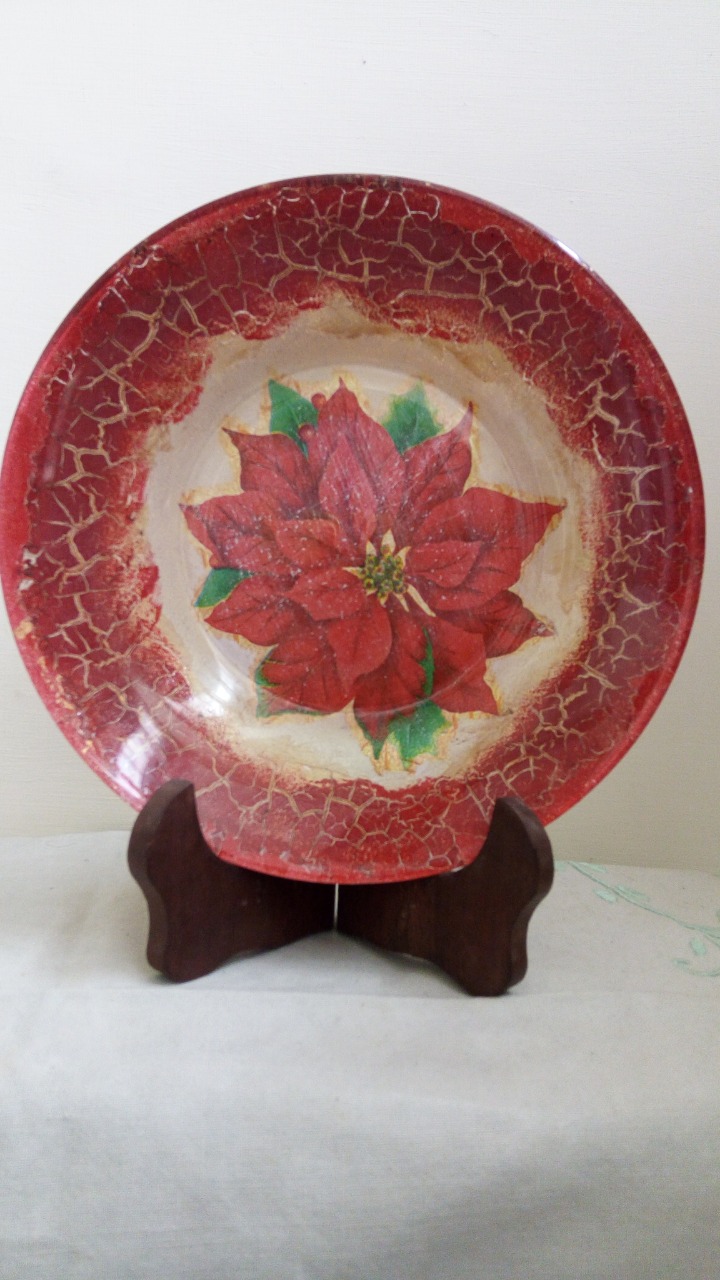
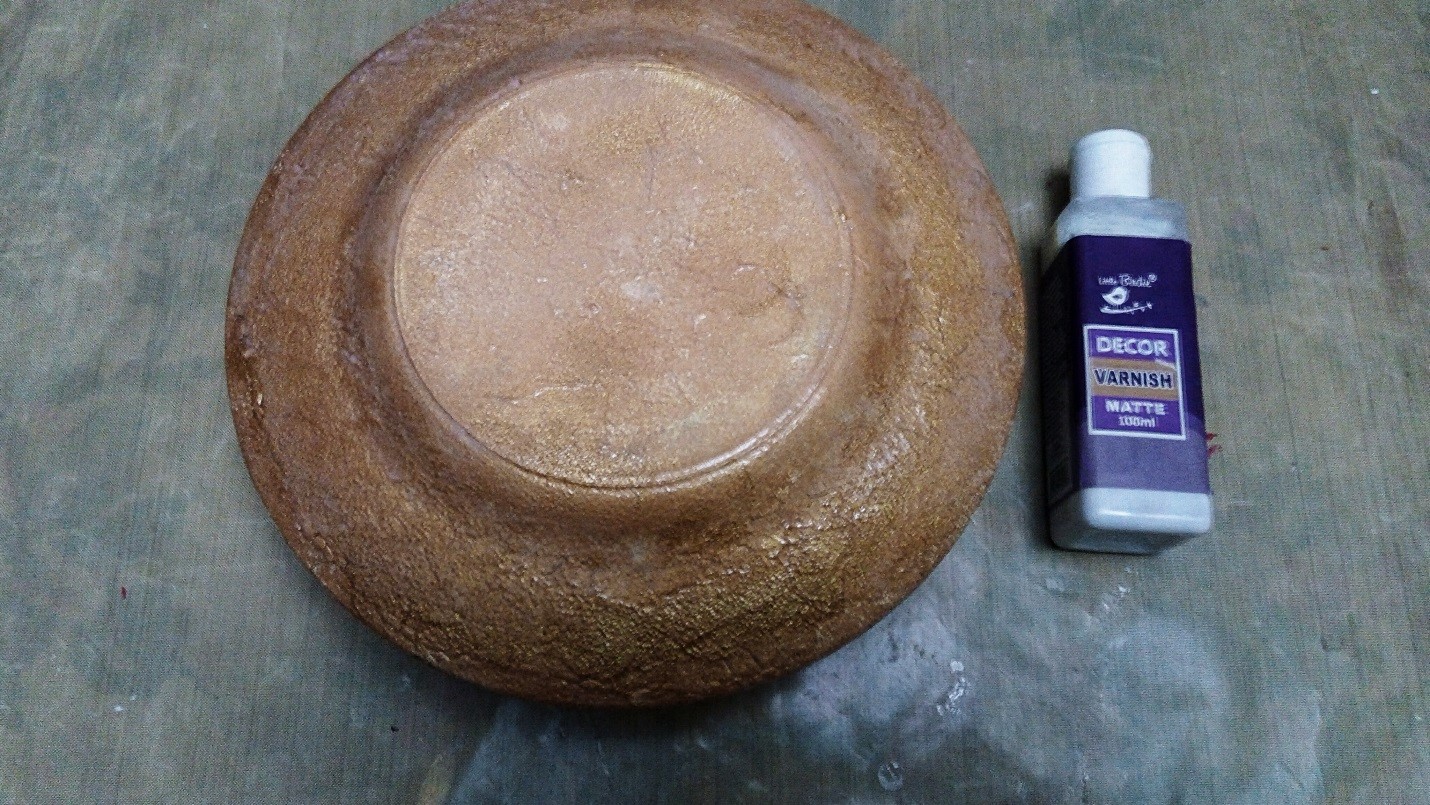
I wanted to see a single color on the rear side, so I painted the back with Gold Bronze color to give it a uniform finish. Now it is time to seal the color. I have used Little Birdie Decor Varnish – matte. Apply multiple coats, say 3-4 coats to make your project long lasting. Our beautiful home decor piece is ready.

Thanks
Vidhu
Well explained
Such brilliant work !
Loved the colors….thnks for sharing..
Awesome project and very well explained
Beautiful tutorial
Awesome project…Hugs
Beautiful plate