Hello My Creative Buddies!
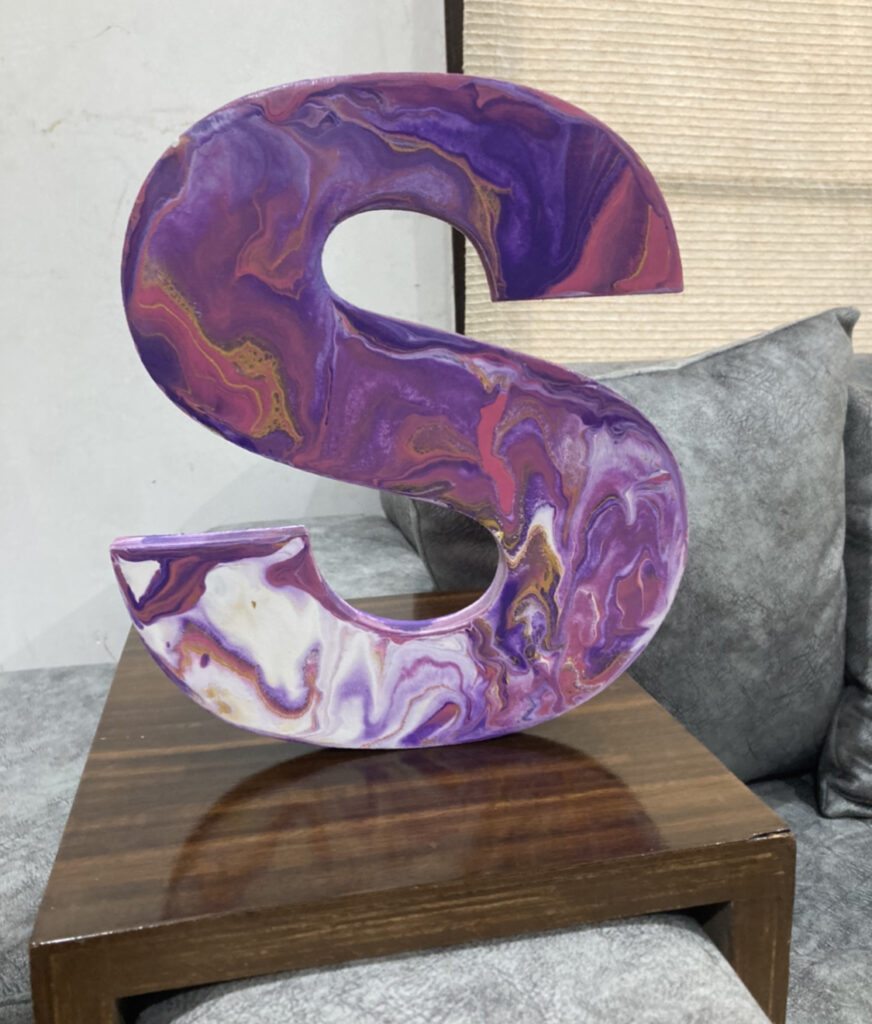
I am pretty sure all of us are busy with our studies preparing for our exams, starting a new college semester . How about a little decorative piece for our study table? Yes, You heard me right. Today I will tell you how to paint an alphabet which can be easily placed on a study table and decorates the corner perfectly.
I arranged my letter from a local wooden shop and asked them to cut it according to my preferences. You can also use Itsy Bitsy’s paper mache letters as it is of a perfect size.
So let’s get started
Step 1
Choose your colours
I decided to go with pastels since they are very trending.
I used :
- velvet orchid
- pink tango
- pearl white
Step 2
Add pouring medium to the colours in the ratio 2:1 (paint:pouring medium)
Step 3
Place the letter over a cup to avoid spoiling the surface below .
Step 4
Pour all the colours in a single cup
Step 5
Pour the paint on the letter and start spreading it in all the directions
Step 6
Make sure you finish it’s edges and the backside using any paint with a flat brush .
ANDDDDD IT’S READY!!!!
Tip:
Do wear your gloves and apron while doing it.
Materials used
Paints
Little Birdie Acrylic Pouring Paint set – 6pcs, 60ml Each, Vibrant
White paint
Little Birdie Acrylic Pouring Paint, 60ml – Pearl White
Letter
Little Birdie Paper Mache Alphabet S – 5x 7.7x 1.14 inch
Pouring Medium:
Little Birdie Paint Pouring Medium- 240 ml
THANK YOU!