Hello everyone!
Swarna here! I am back with another creation made with Little Birdie’s newly launched ‘Element Sheets’.
Let’s get started with the tutorial.
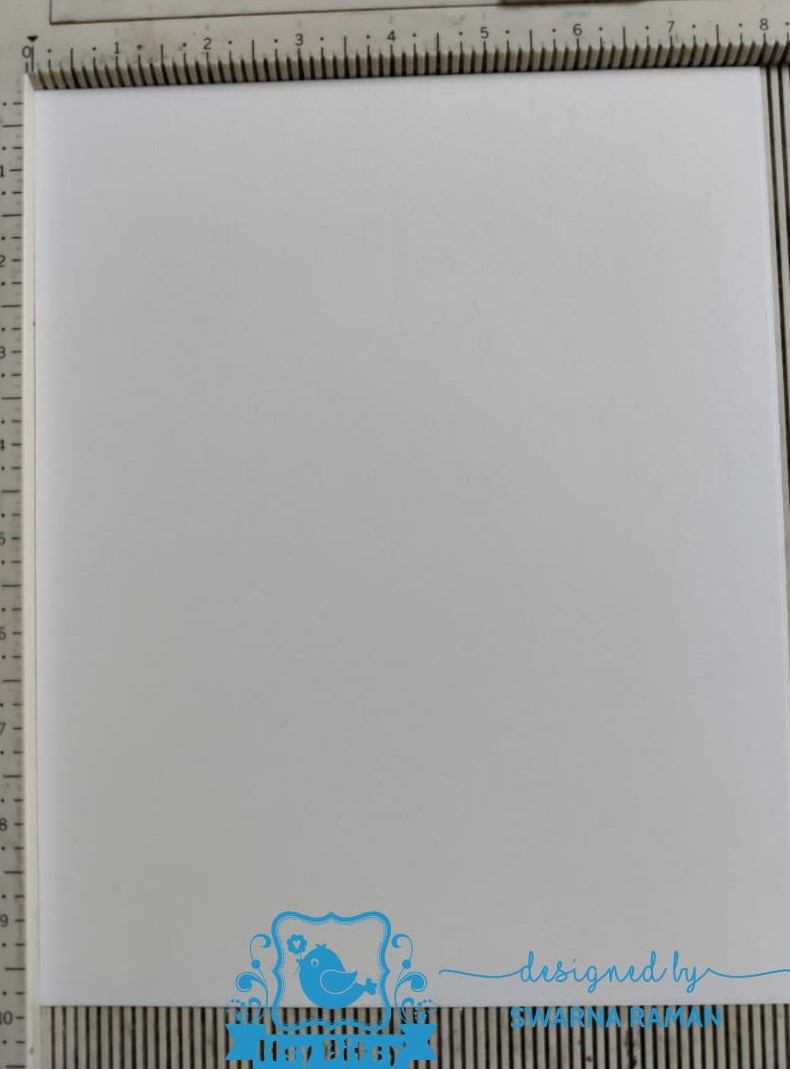
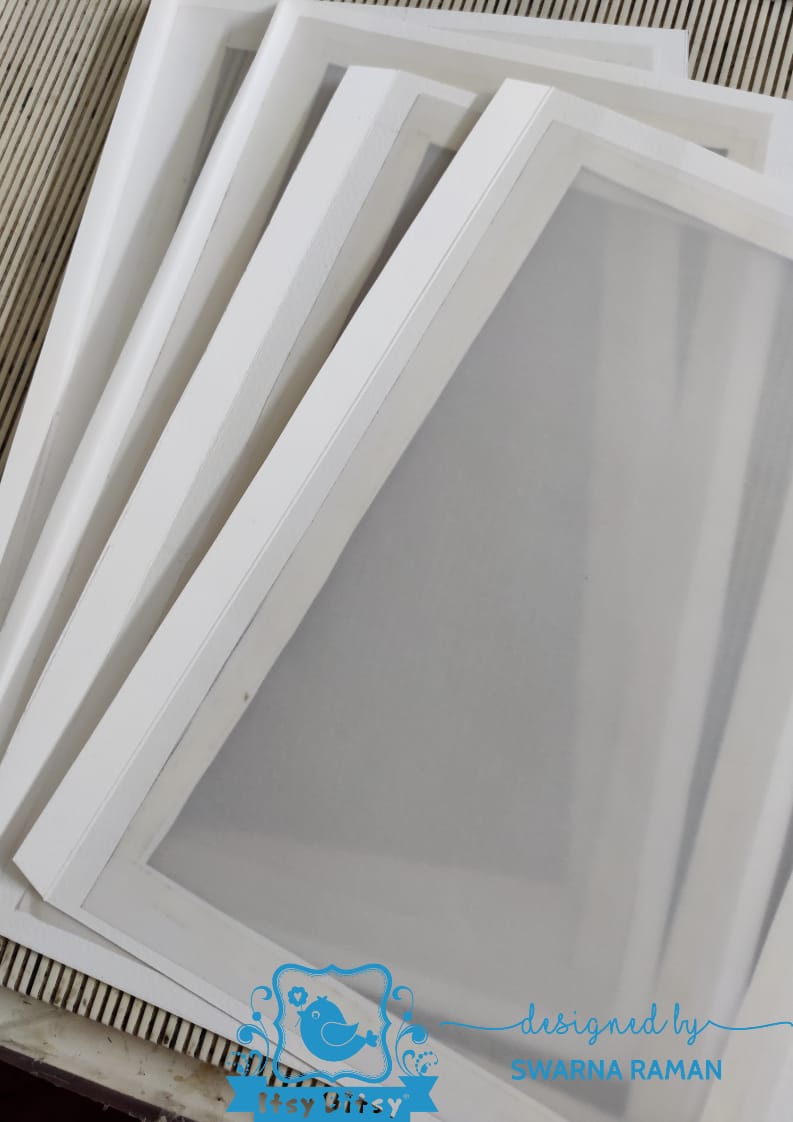
I have used Textured Cardstock from the store. Its 270 gsm, which is thick enough to make the base sturdy.
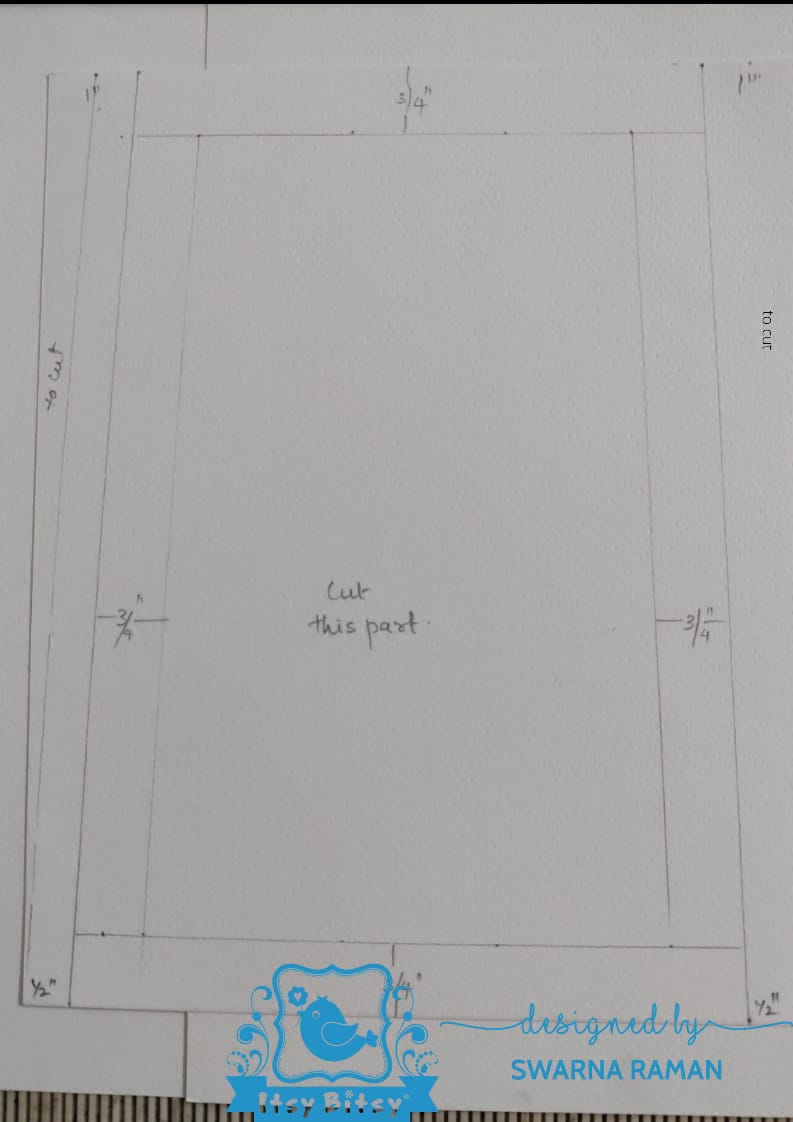
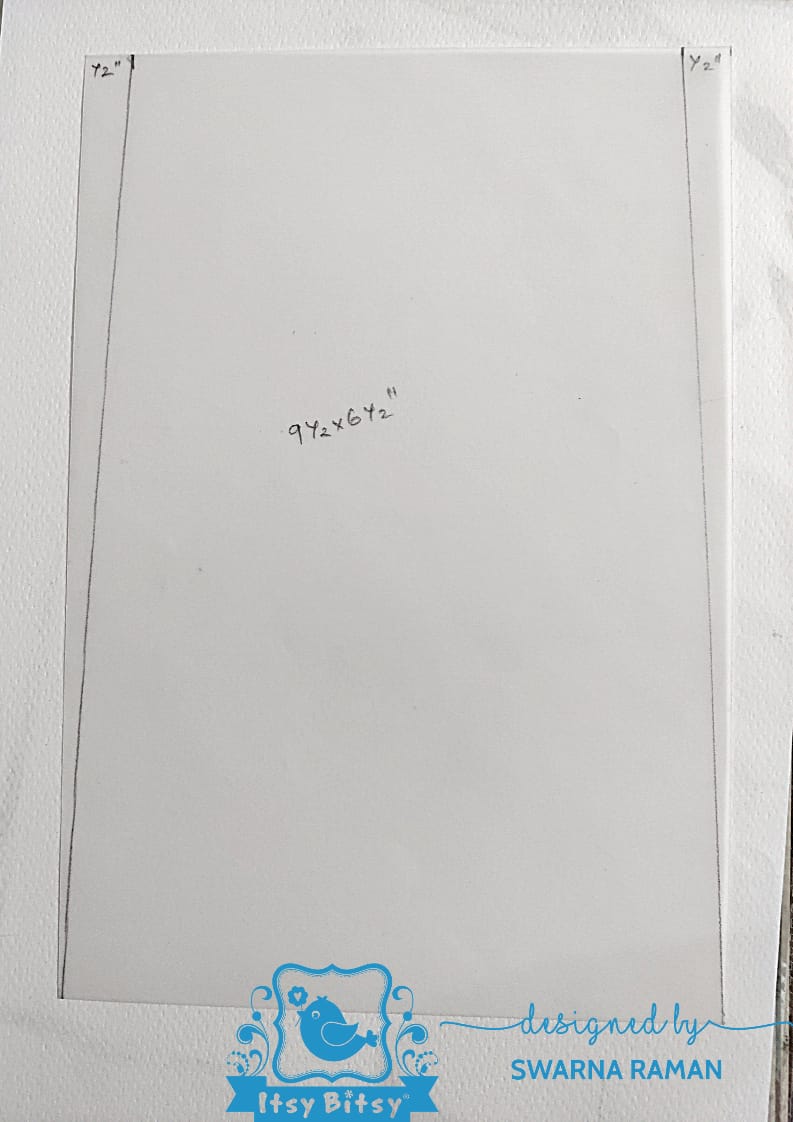
For the base, we require 4 cardstocks of size 10 by 8 inches. Mark the measurements accordingly as mentioned as in the picture above.
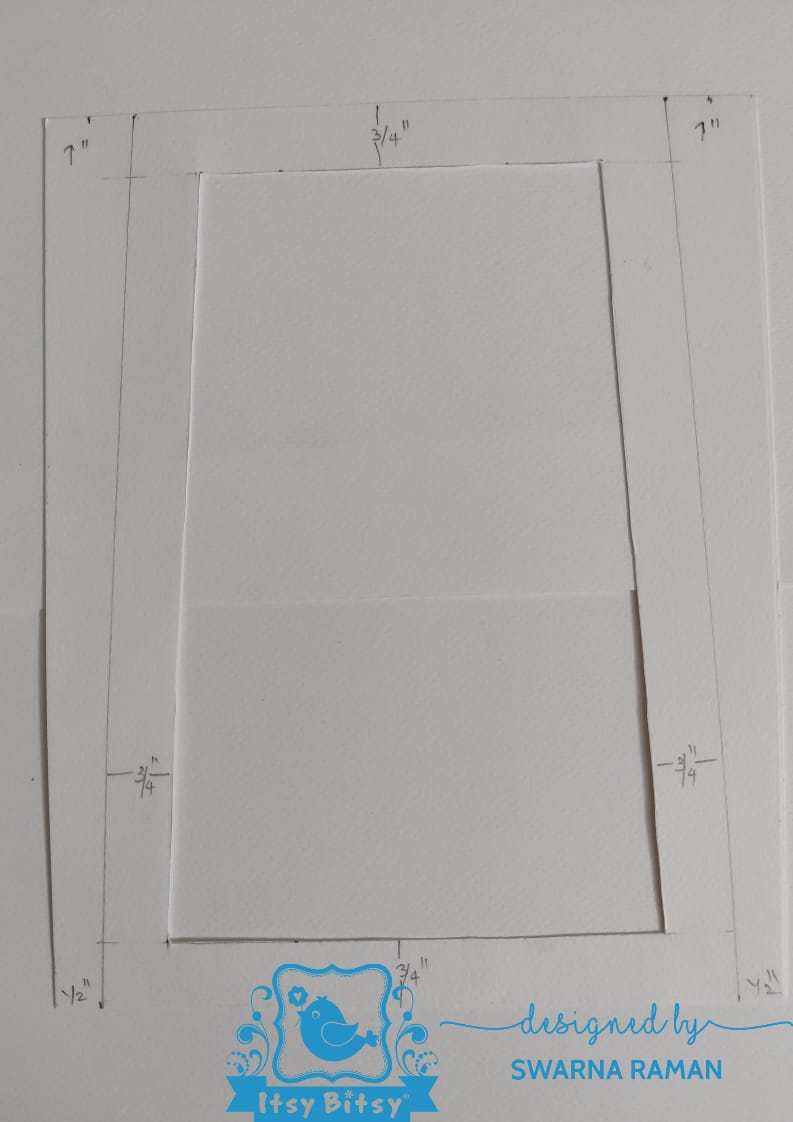
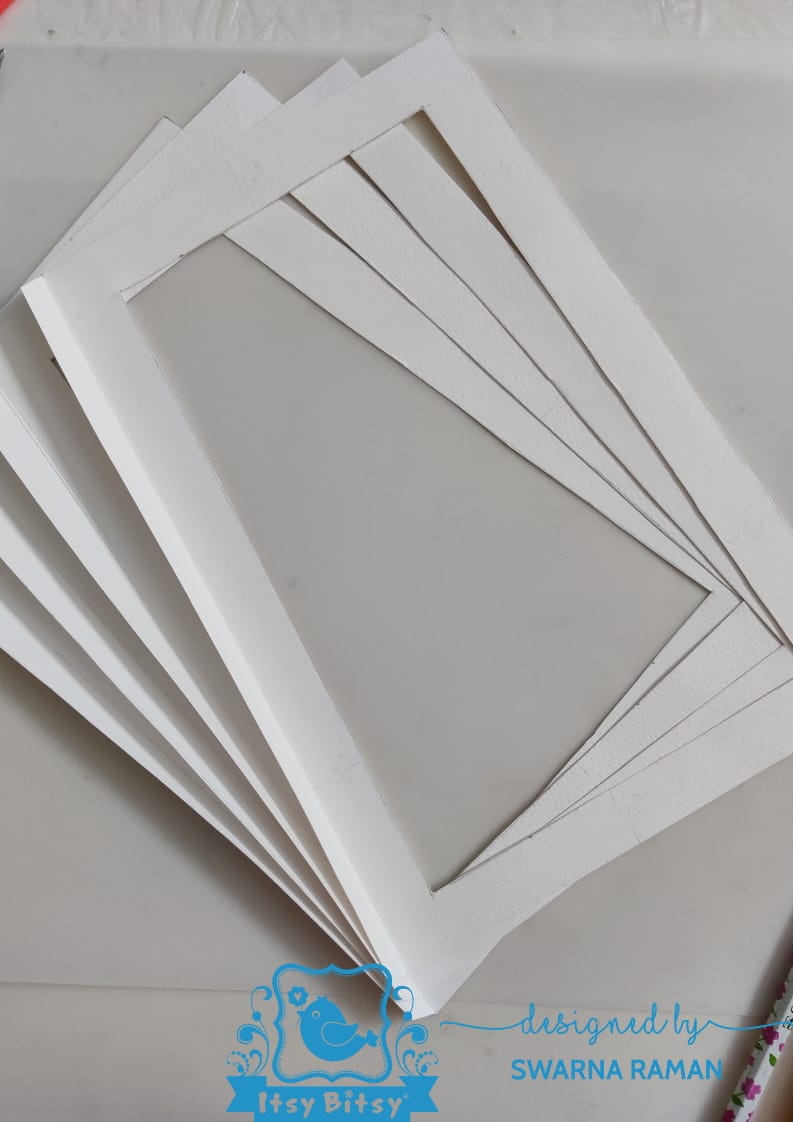
Cut the portions which are marked ” to cut ” and fold the left end flap. Repeat the same for the remaining three frame bases.
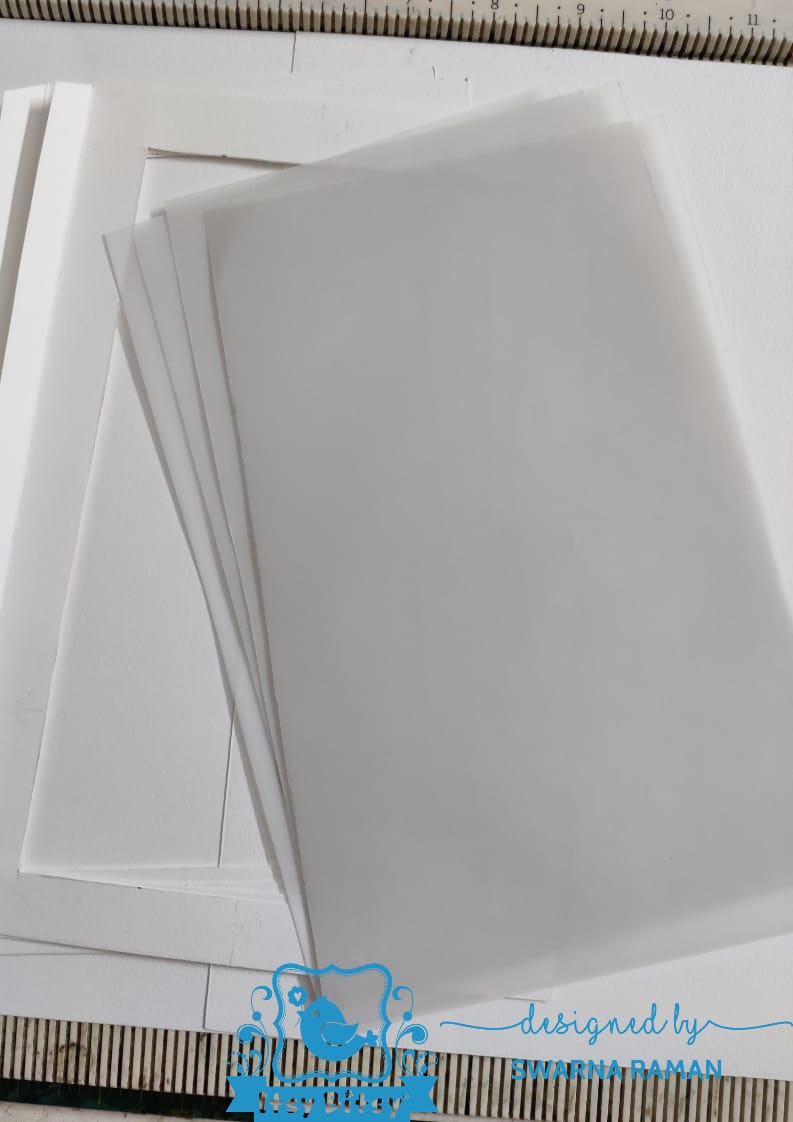
Take Vellum sheets in the size 9 1/2 by 6 1/2 inches and mark the measurements and cut accordingly. We require four such sheets.
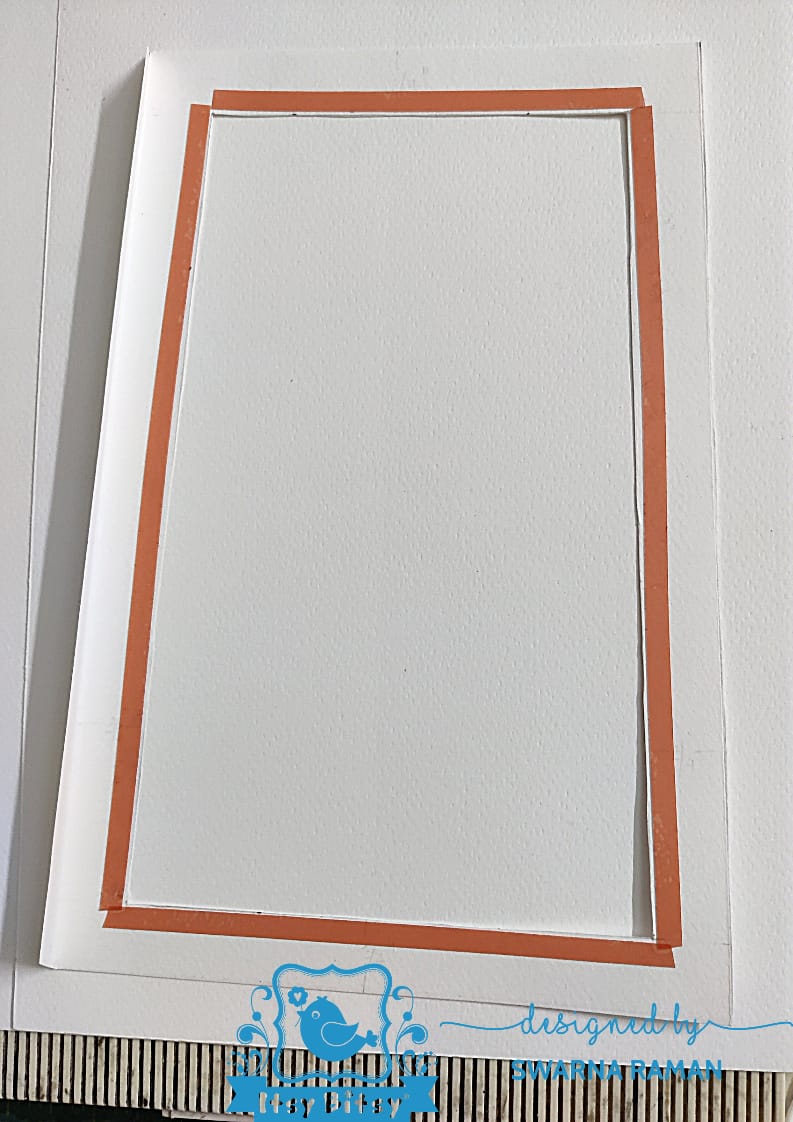
Add tacky tape on all edges of the inner frame border. Attach the vellum sheets to the cardstock frame base shown as in picture.
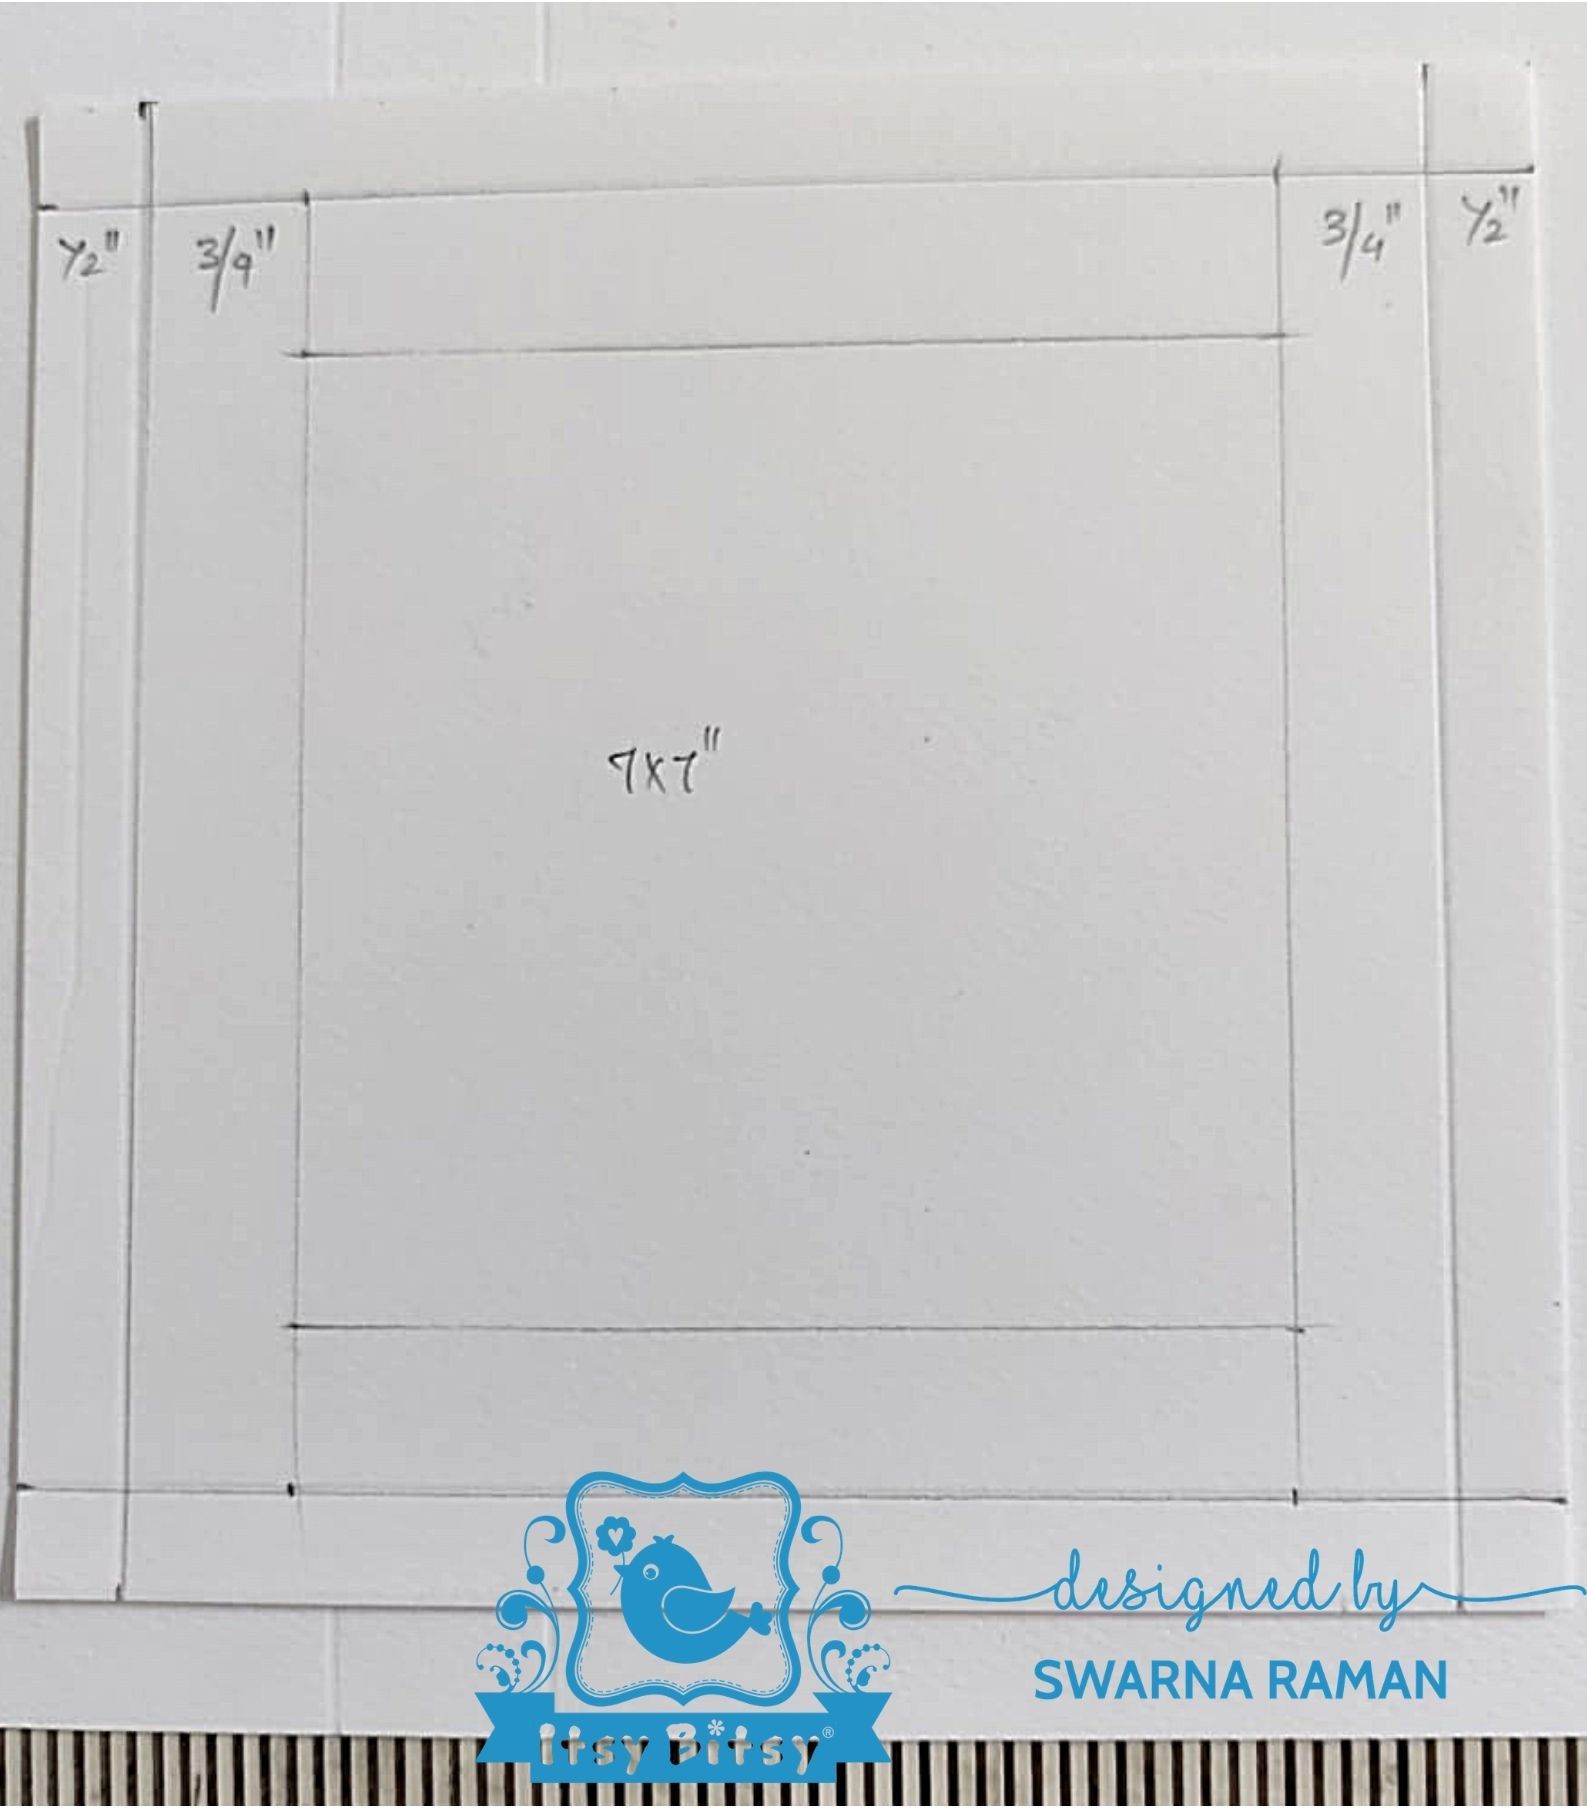

Now, lets create the top portion of the lantern. Take 7 by 7 inches cardstock and mark the measurements accordingly as in picture. Cut and fold the desired portions. Add tacky tapes on all the edges.

Next , we need to attach the frames to the top portion of the lantern. Attach in a manner that the edges are not clearly visible to create a neat and finished look.
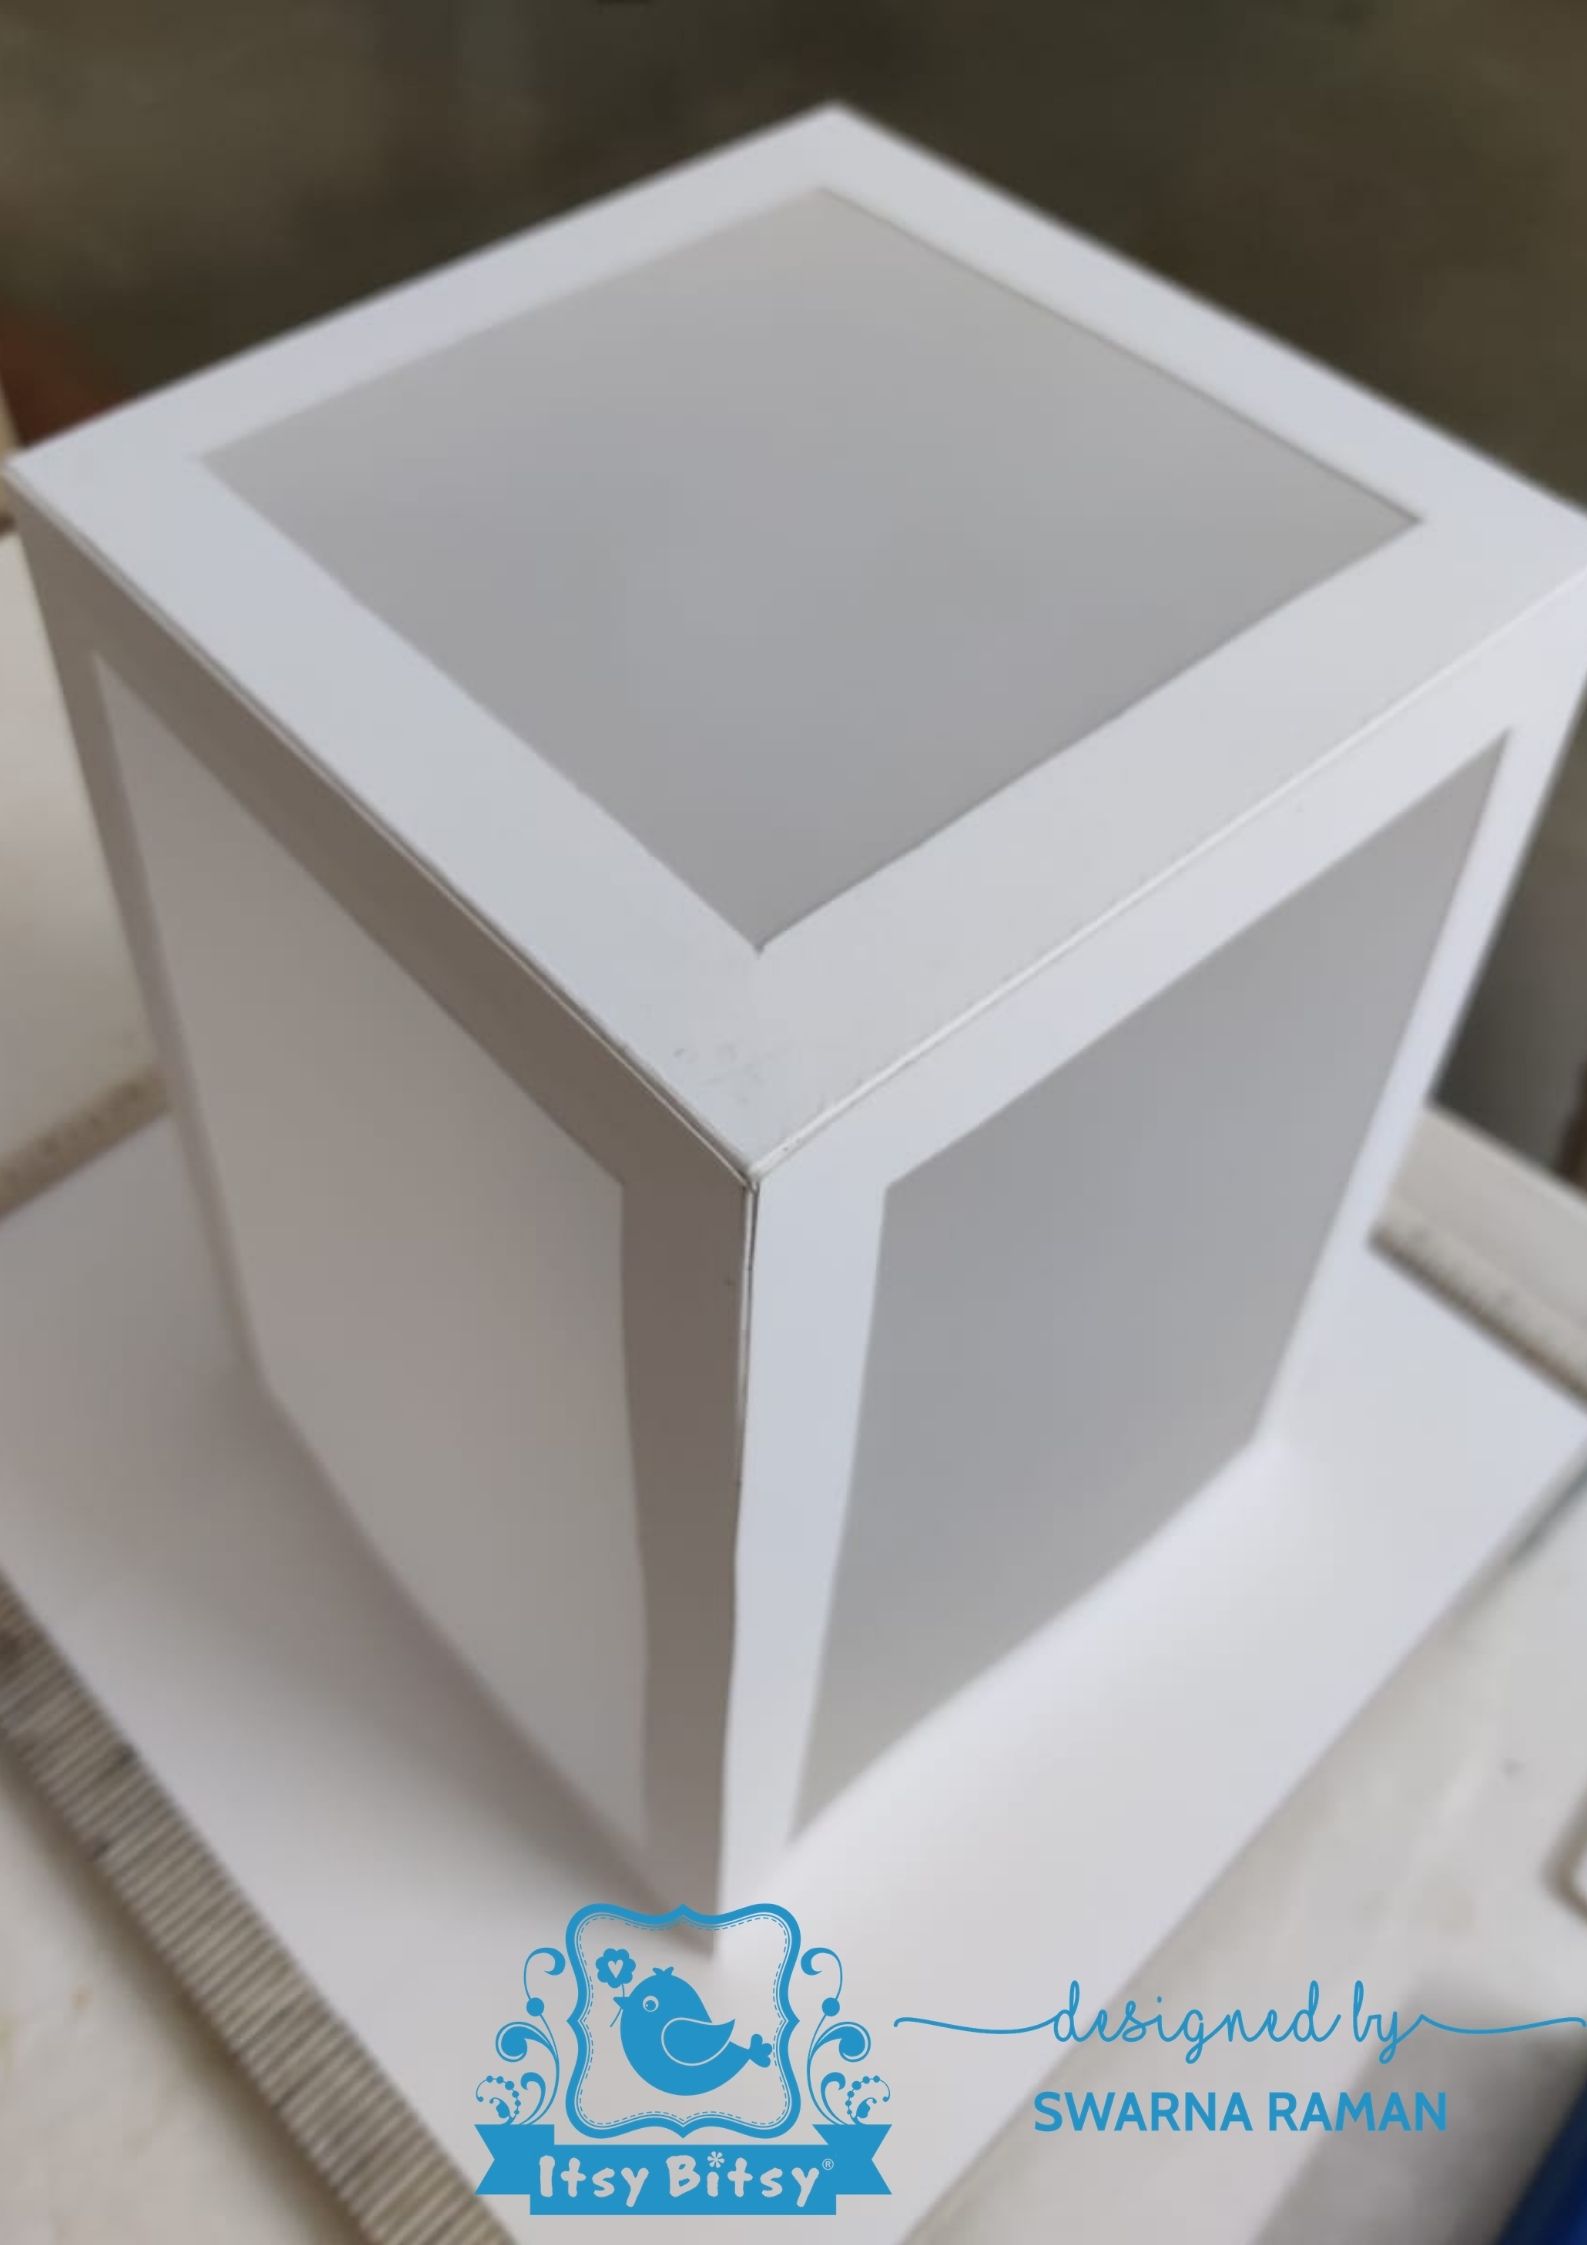
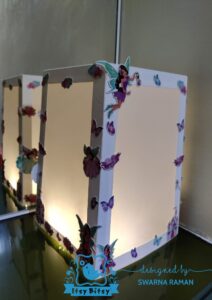
Here it is ! The lantern base is ready. You can customize the same in any size.
Now, its my most favorite part in crafting. Yes! Fussy cutting!.
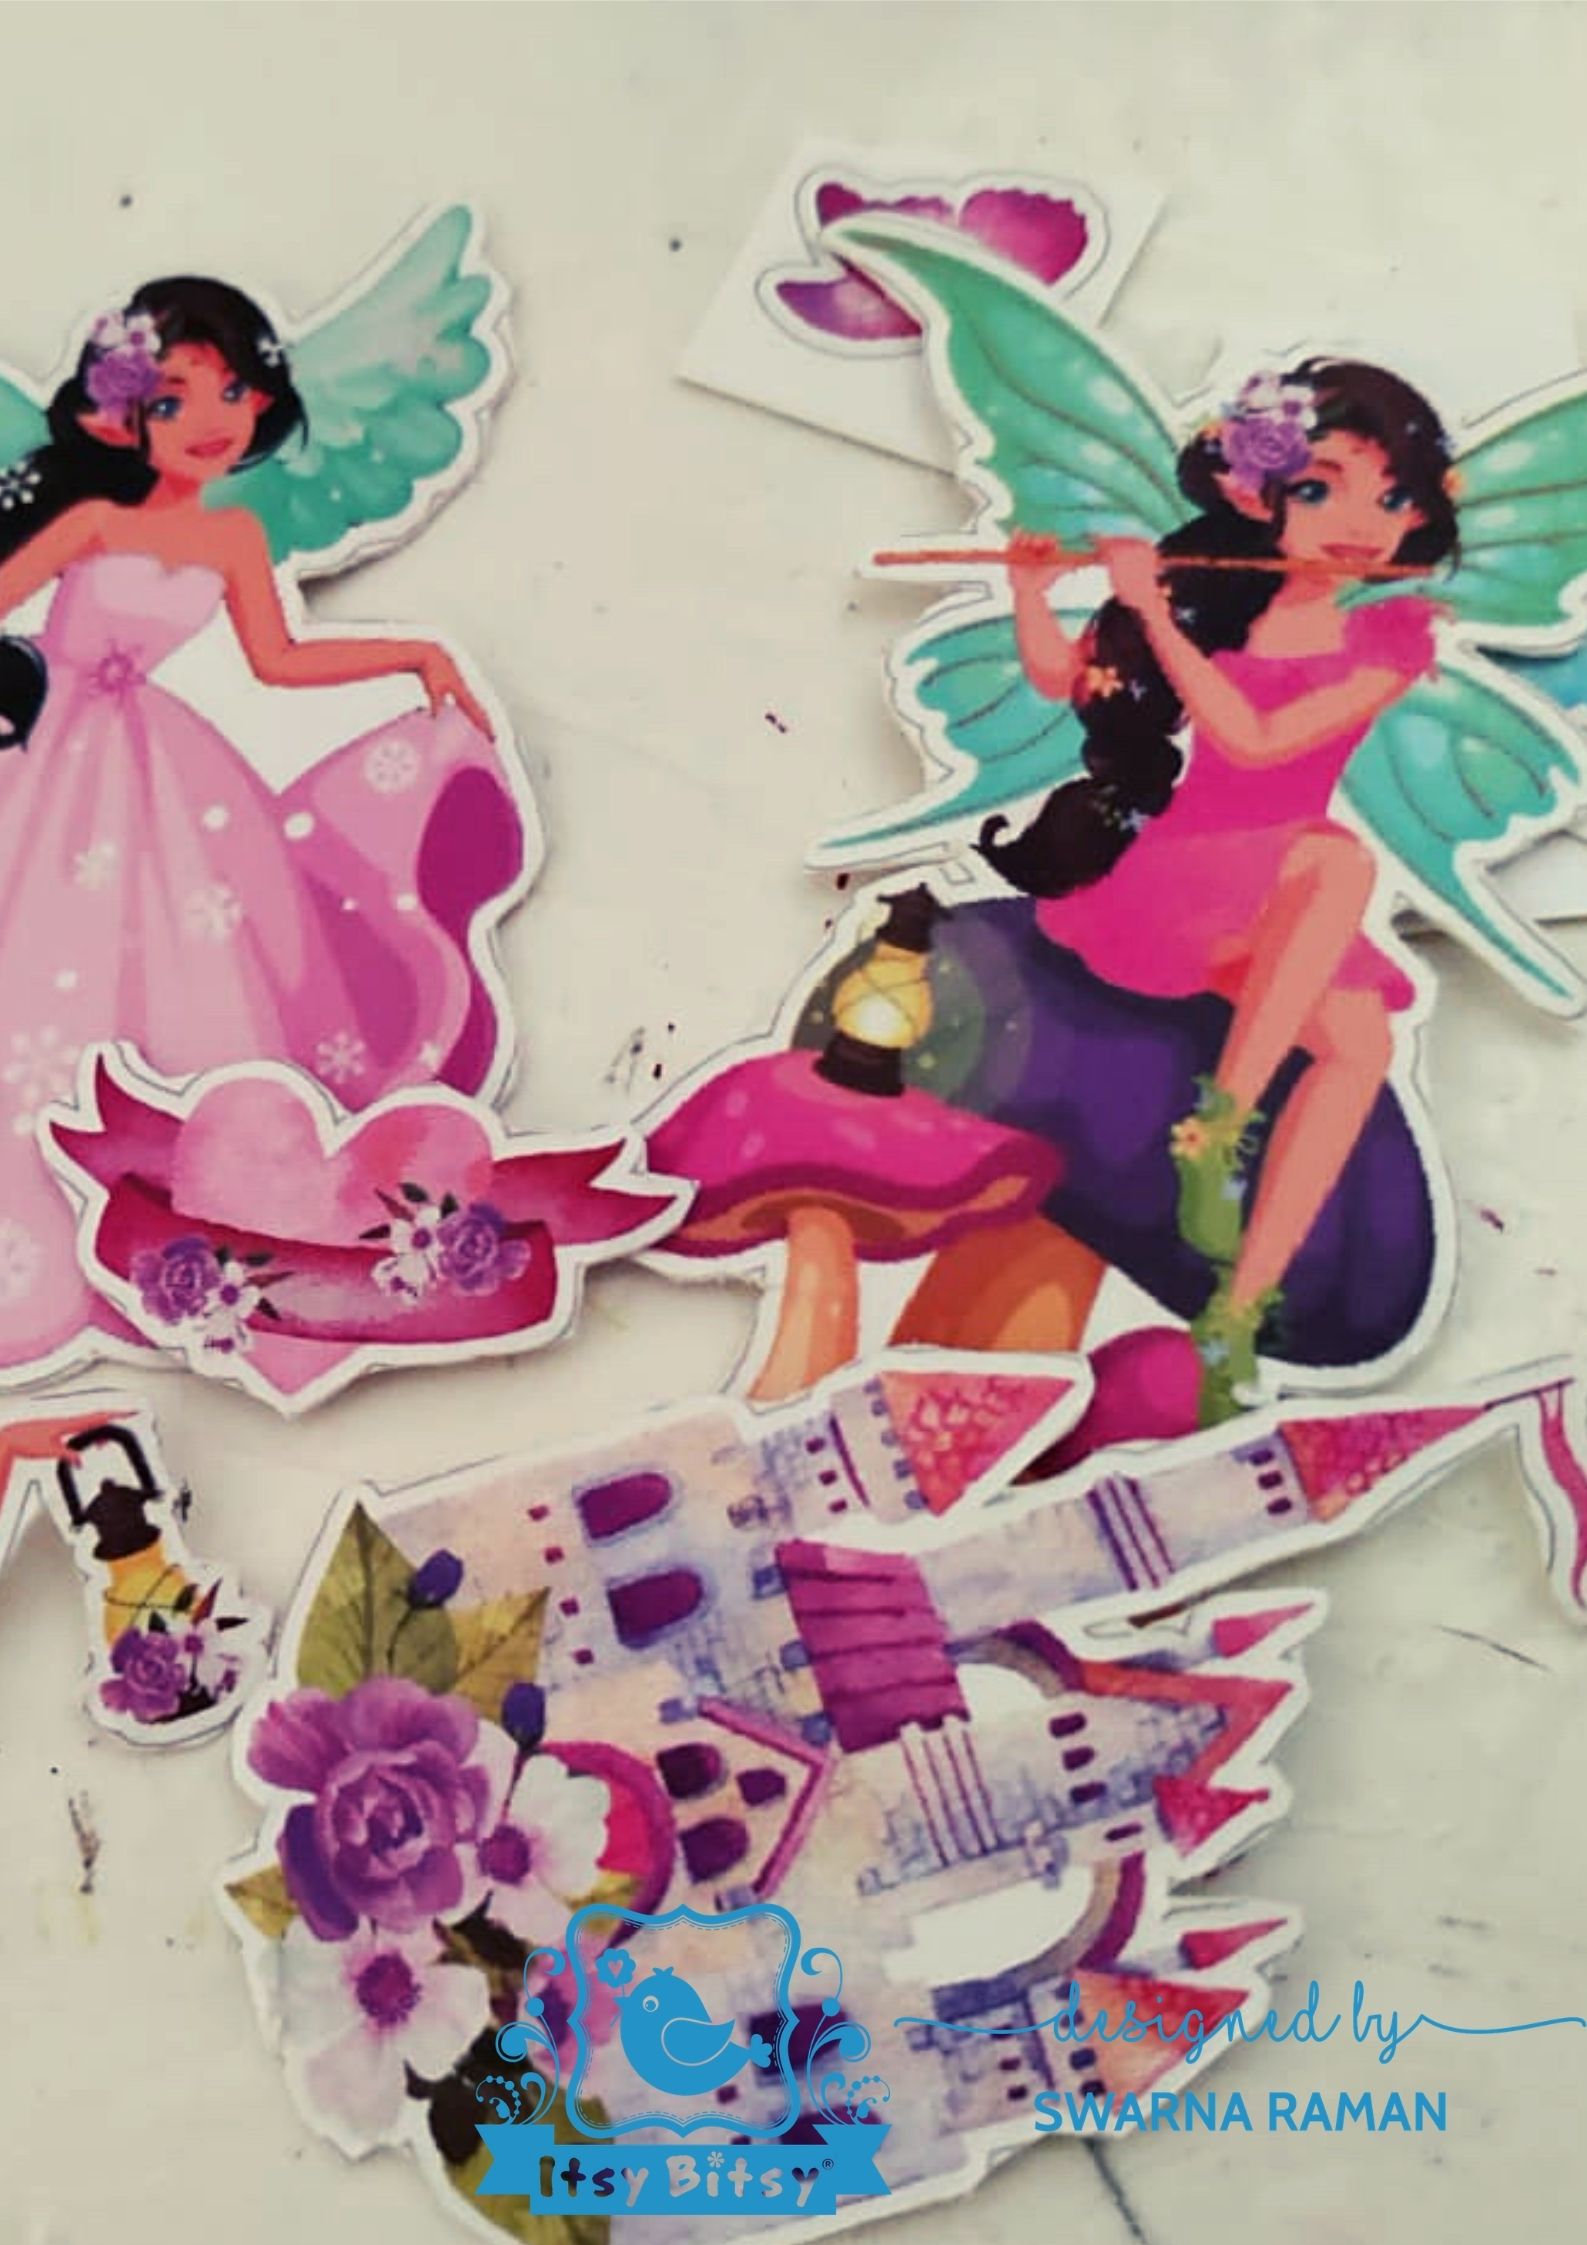
Fussy cutting is made easy with Itsy-Bitsy Element sheet. These sheets are 250 gsm in thickness with crisp and clear images. They have provided a thin black guideline around each image which helps to cut it separately in an easy manner. I have chosen – Fairy Land element sheet from the collection.
Using Scrapbooking glue from the store, stick the images to the lantern.
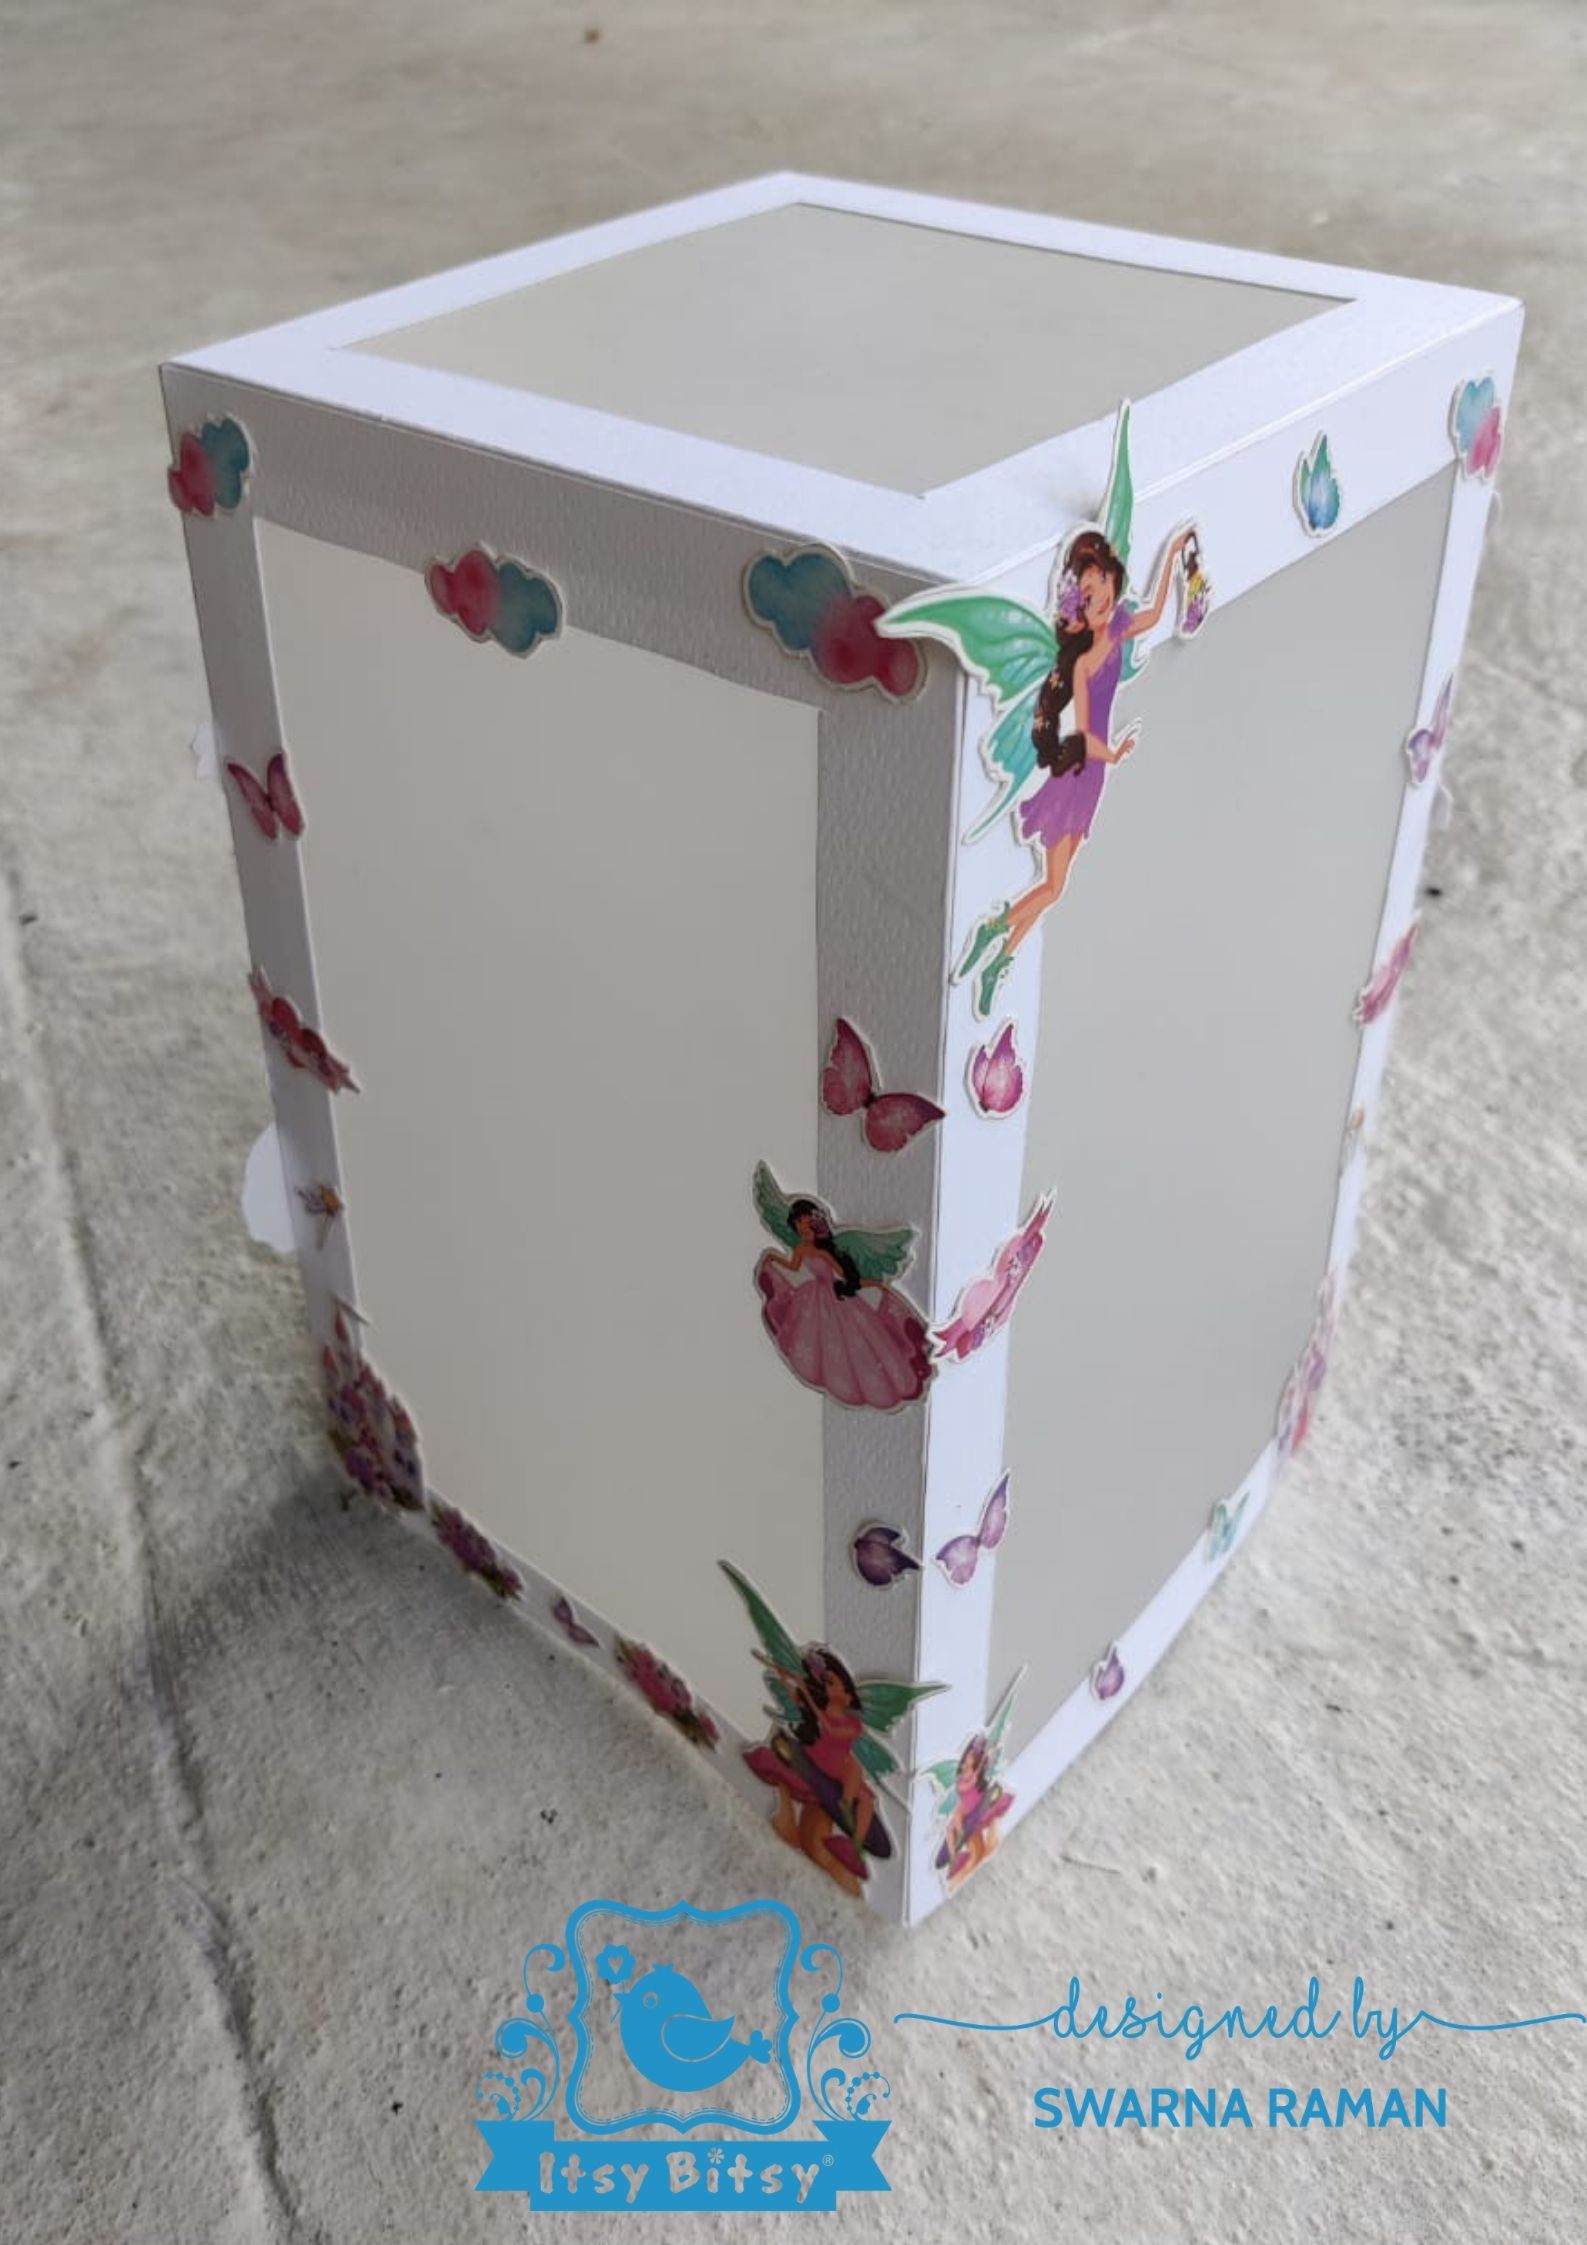

Tada! Lantern is ready.
I have used fairy lights inside to light the lantern. It’s a wonderful decoration for the kids room. You can also make such handmade lanterns for festivals and special occasions.
Hope you all liked my work. See you soon.
Don’t forget to participate in this month’s Blog Challenge.
https://www.blog.itsybitsy.in/window-photo-frame-decorated-with-printed-elements/
Thanks for stopping by!
Swarna.