Hello friends. I hope you all are doing great. DT member Vidhu Thareja back on the blog with another inspirational project.
Wall clock is not only a necessity but a style statement for your decor too. We all like to have beautiful and unique clocks. This time I have designed a wall clock which is very easy to make. All we need is some awesome craft supplies from Itsy Bitsy. So let’s start the project.
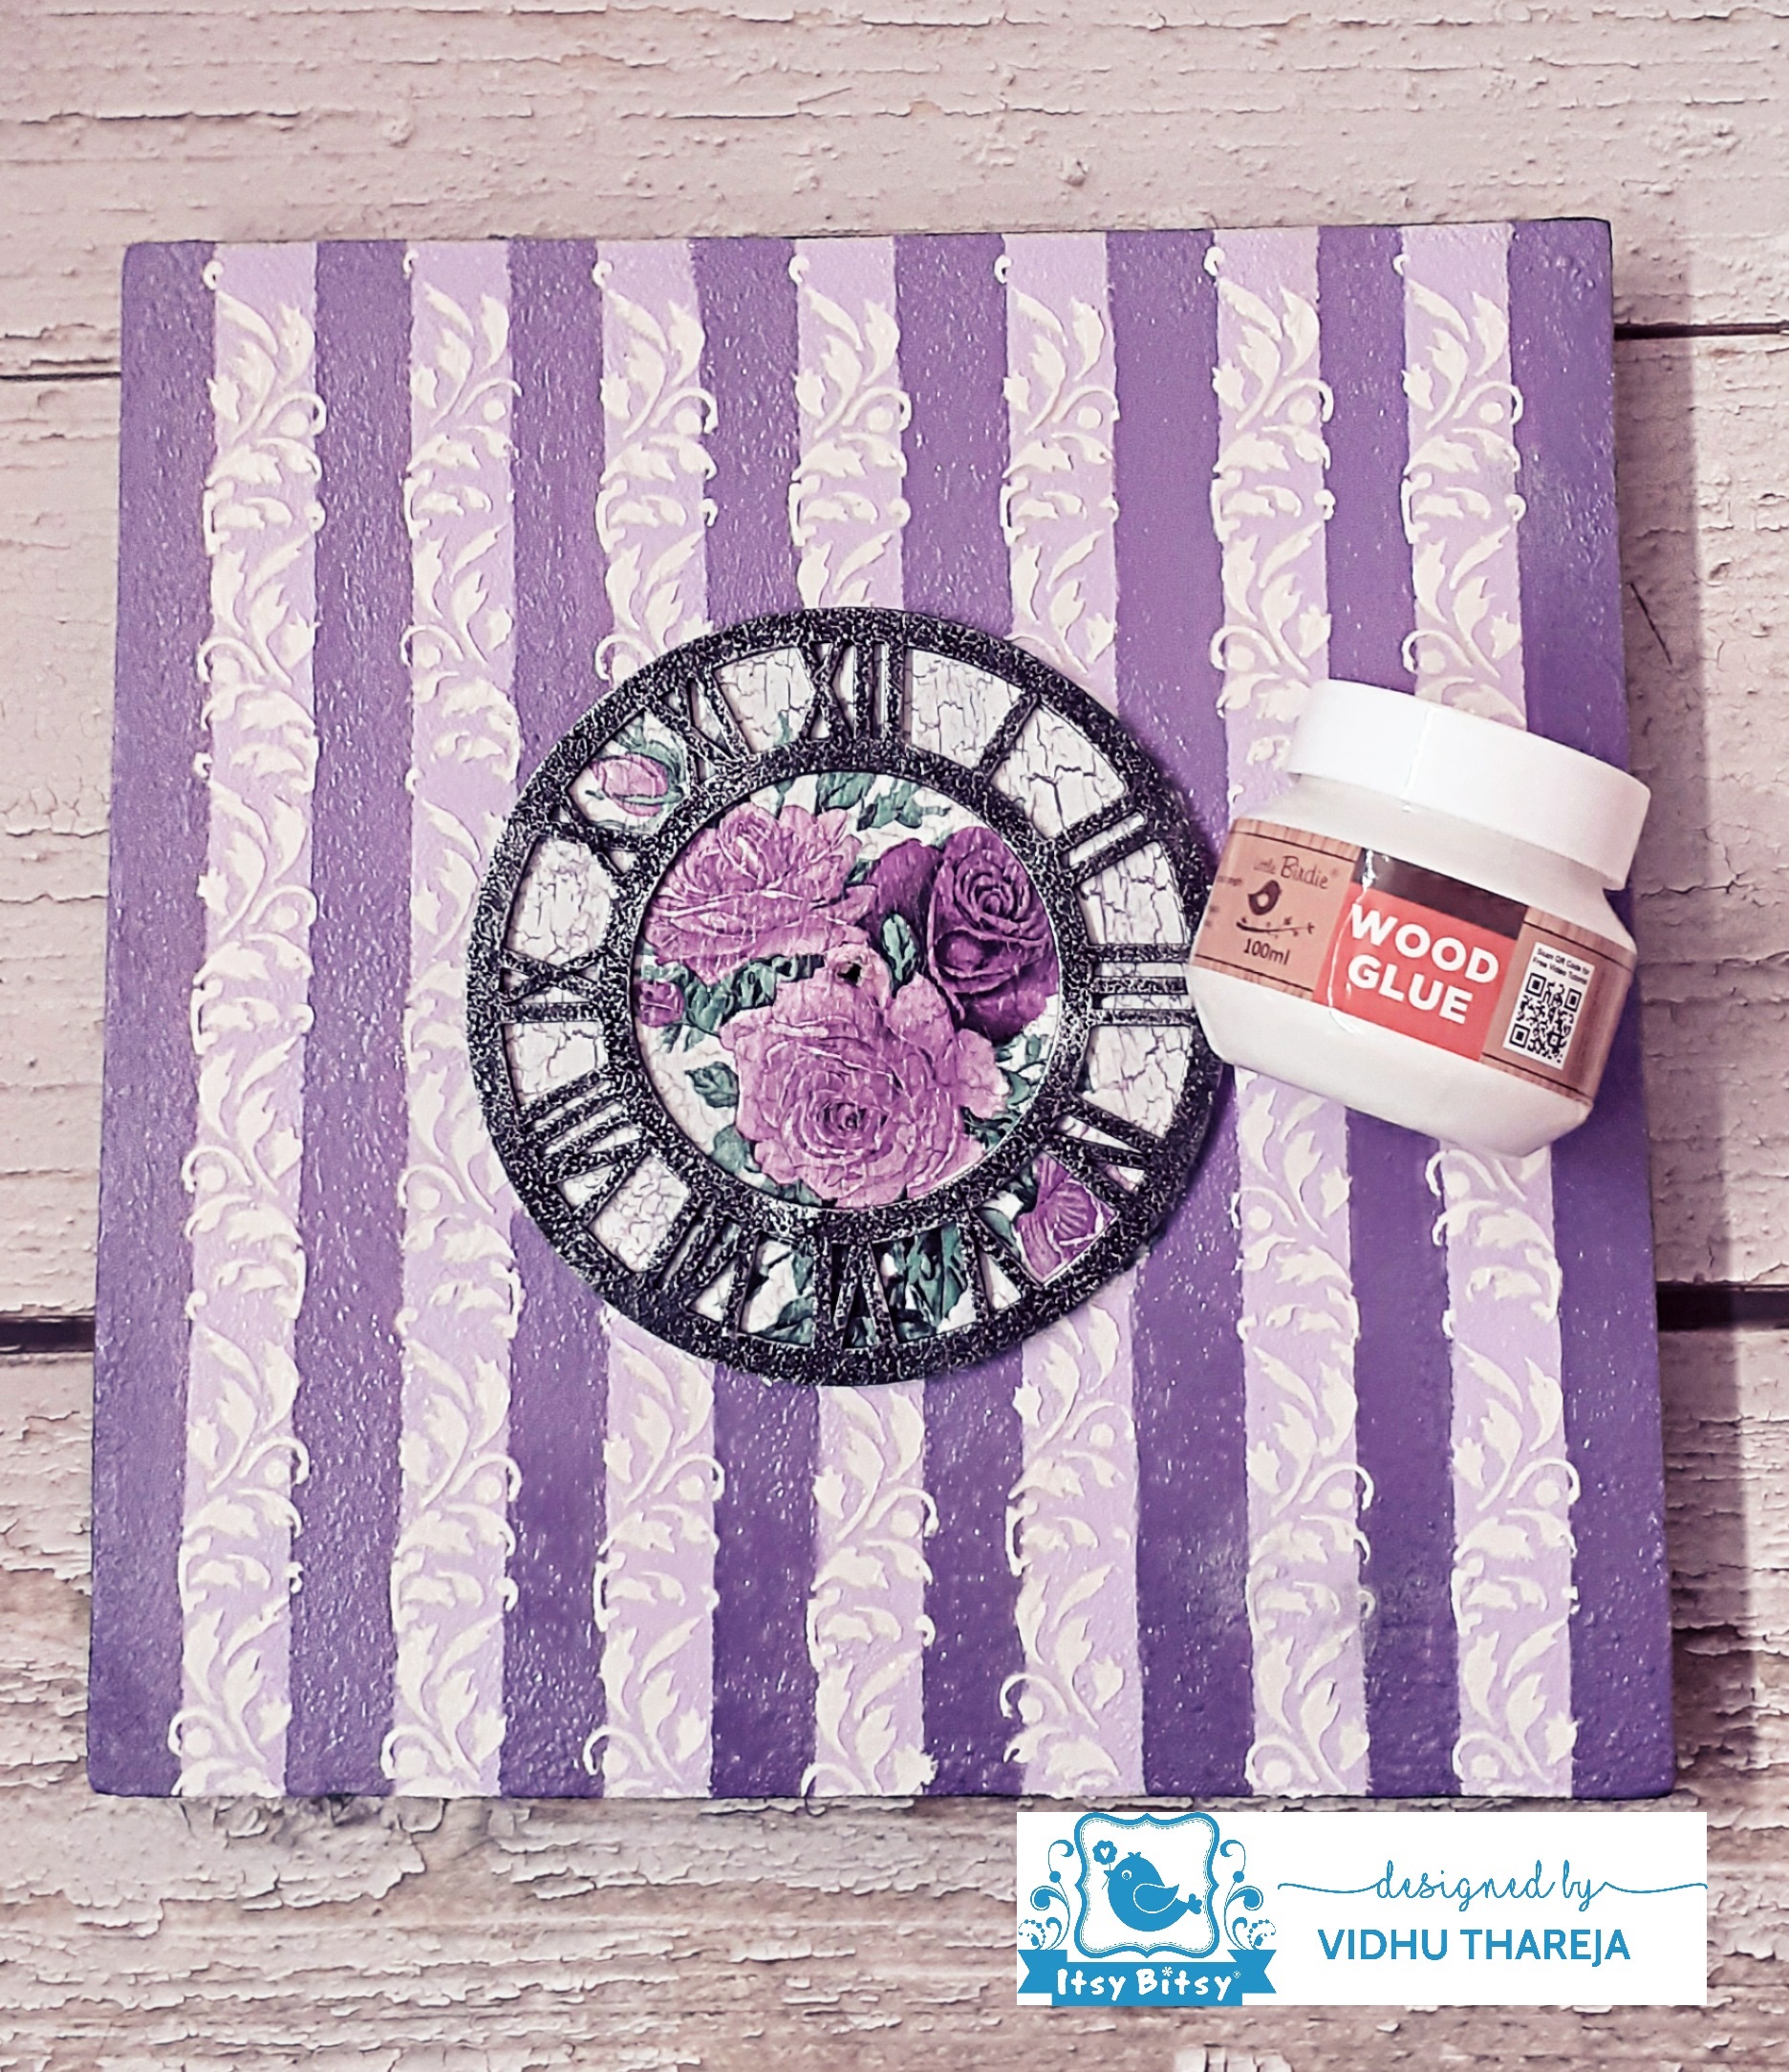
I had a square MDF clock base measuring 10*10 inches. I had started making it but the results did not turn up to be as I expected. So, I thought of giving it a makeover. I started with sanding the surface. For that, I used Little Birdie Craft sanding block. This is an amazing product and a must have for any crafter. It makes sanding so easy. It is washable and reusable. When I was done with sanding, I applied 2 coats of Little Birdie Acrylic White Gesso leaving enough drying time between each coat.

Itsy Bitsy has recently introduced MDF clock dial in different sizes. I decided to use 5″ size for my project. I like the smoothness and finishing of the product.

I applied white gesso on the clock dial with the help of sponge. I cut a round piece from a chipboard sheet according to the size of clock dial and applied gesso on it. 
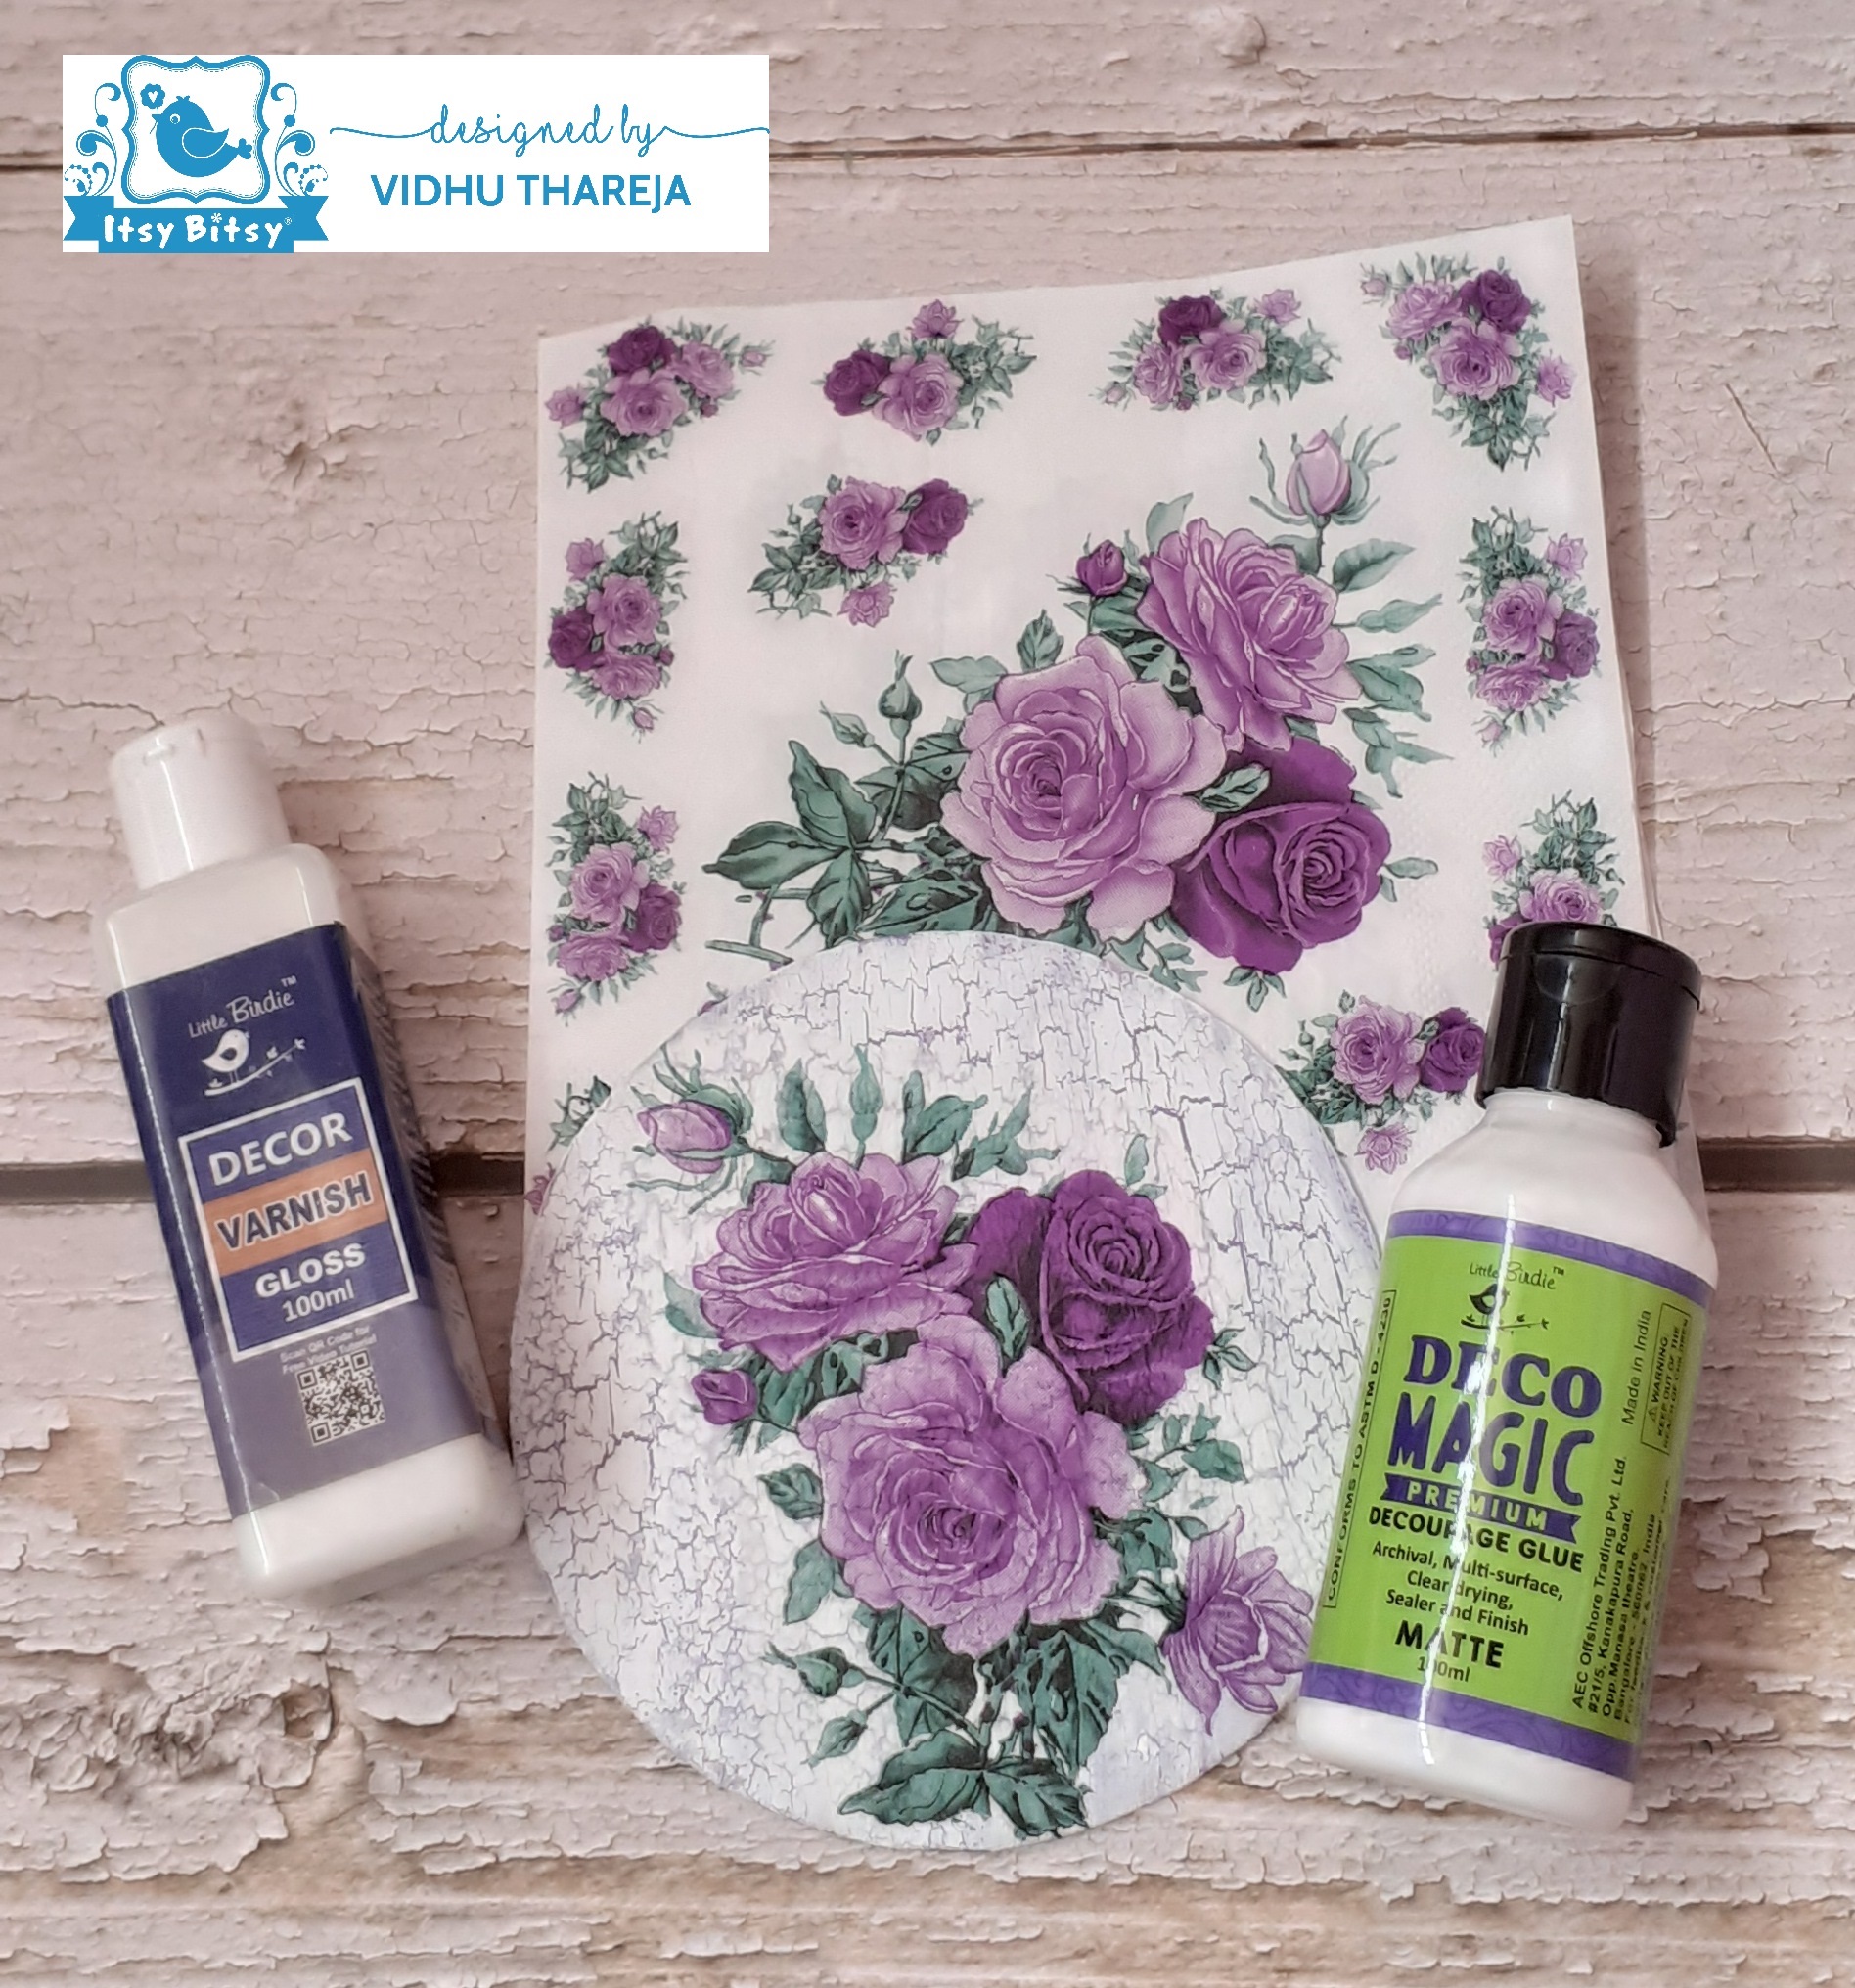
On this round chipboard piece I planned to do decoupage but I wanted to add some interest also. First, I applied Little Birdie Chalk Paint – Lavender Blush and let it dry. After that I applied 1 Step Crackle Medium using the dabbing method. I left it to dry naturally. Then I applied Chalk Paint – Snow.

I had a pretty decoupage napkin in my stash which I had bought from the store. I removed the image using the wet brush technique and adhered it in the center using Little Birdie Deco Magic Glue. I left it to dry and then sealed it with the same glue. Then I applied 1 coat of Little Birdie Decor Varnish – Gloss.
Now it is time to work on my base. Here I have used masking technique. First I gave 2 coats of Little Birdie Chalk Paint – Wisteria Mist and left it to dry.
 Then, I divided the base equally using masking tape and gave a top coat of Lavender Blush Chalk Paint. When the top coat was dry, I remove the masking tape.
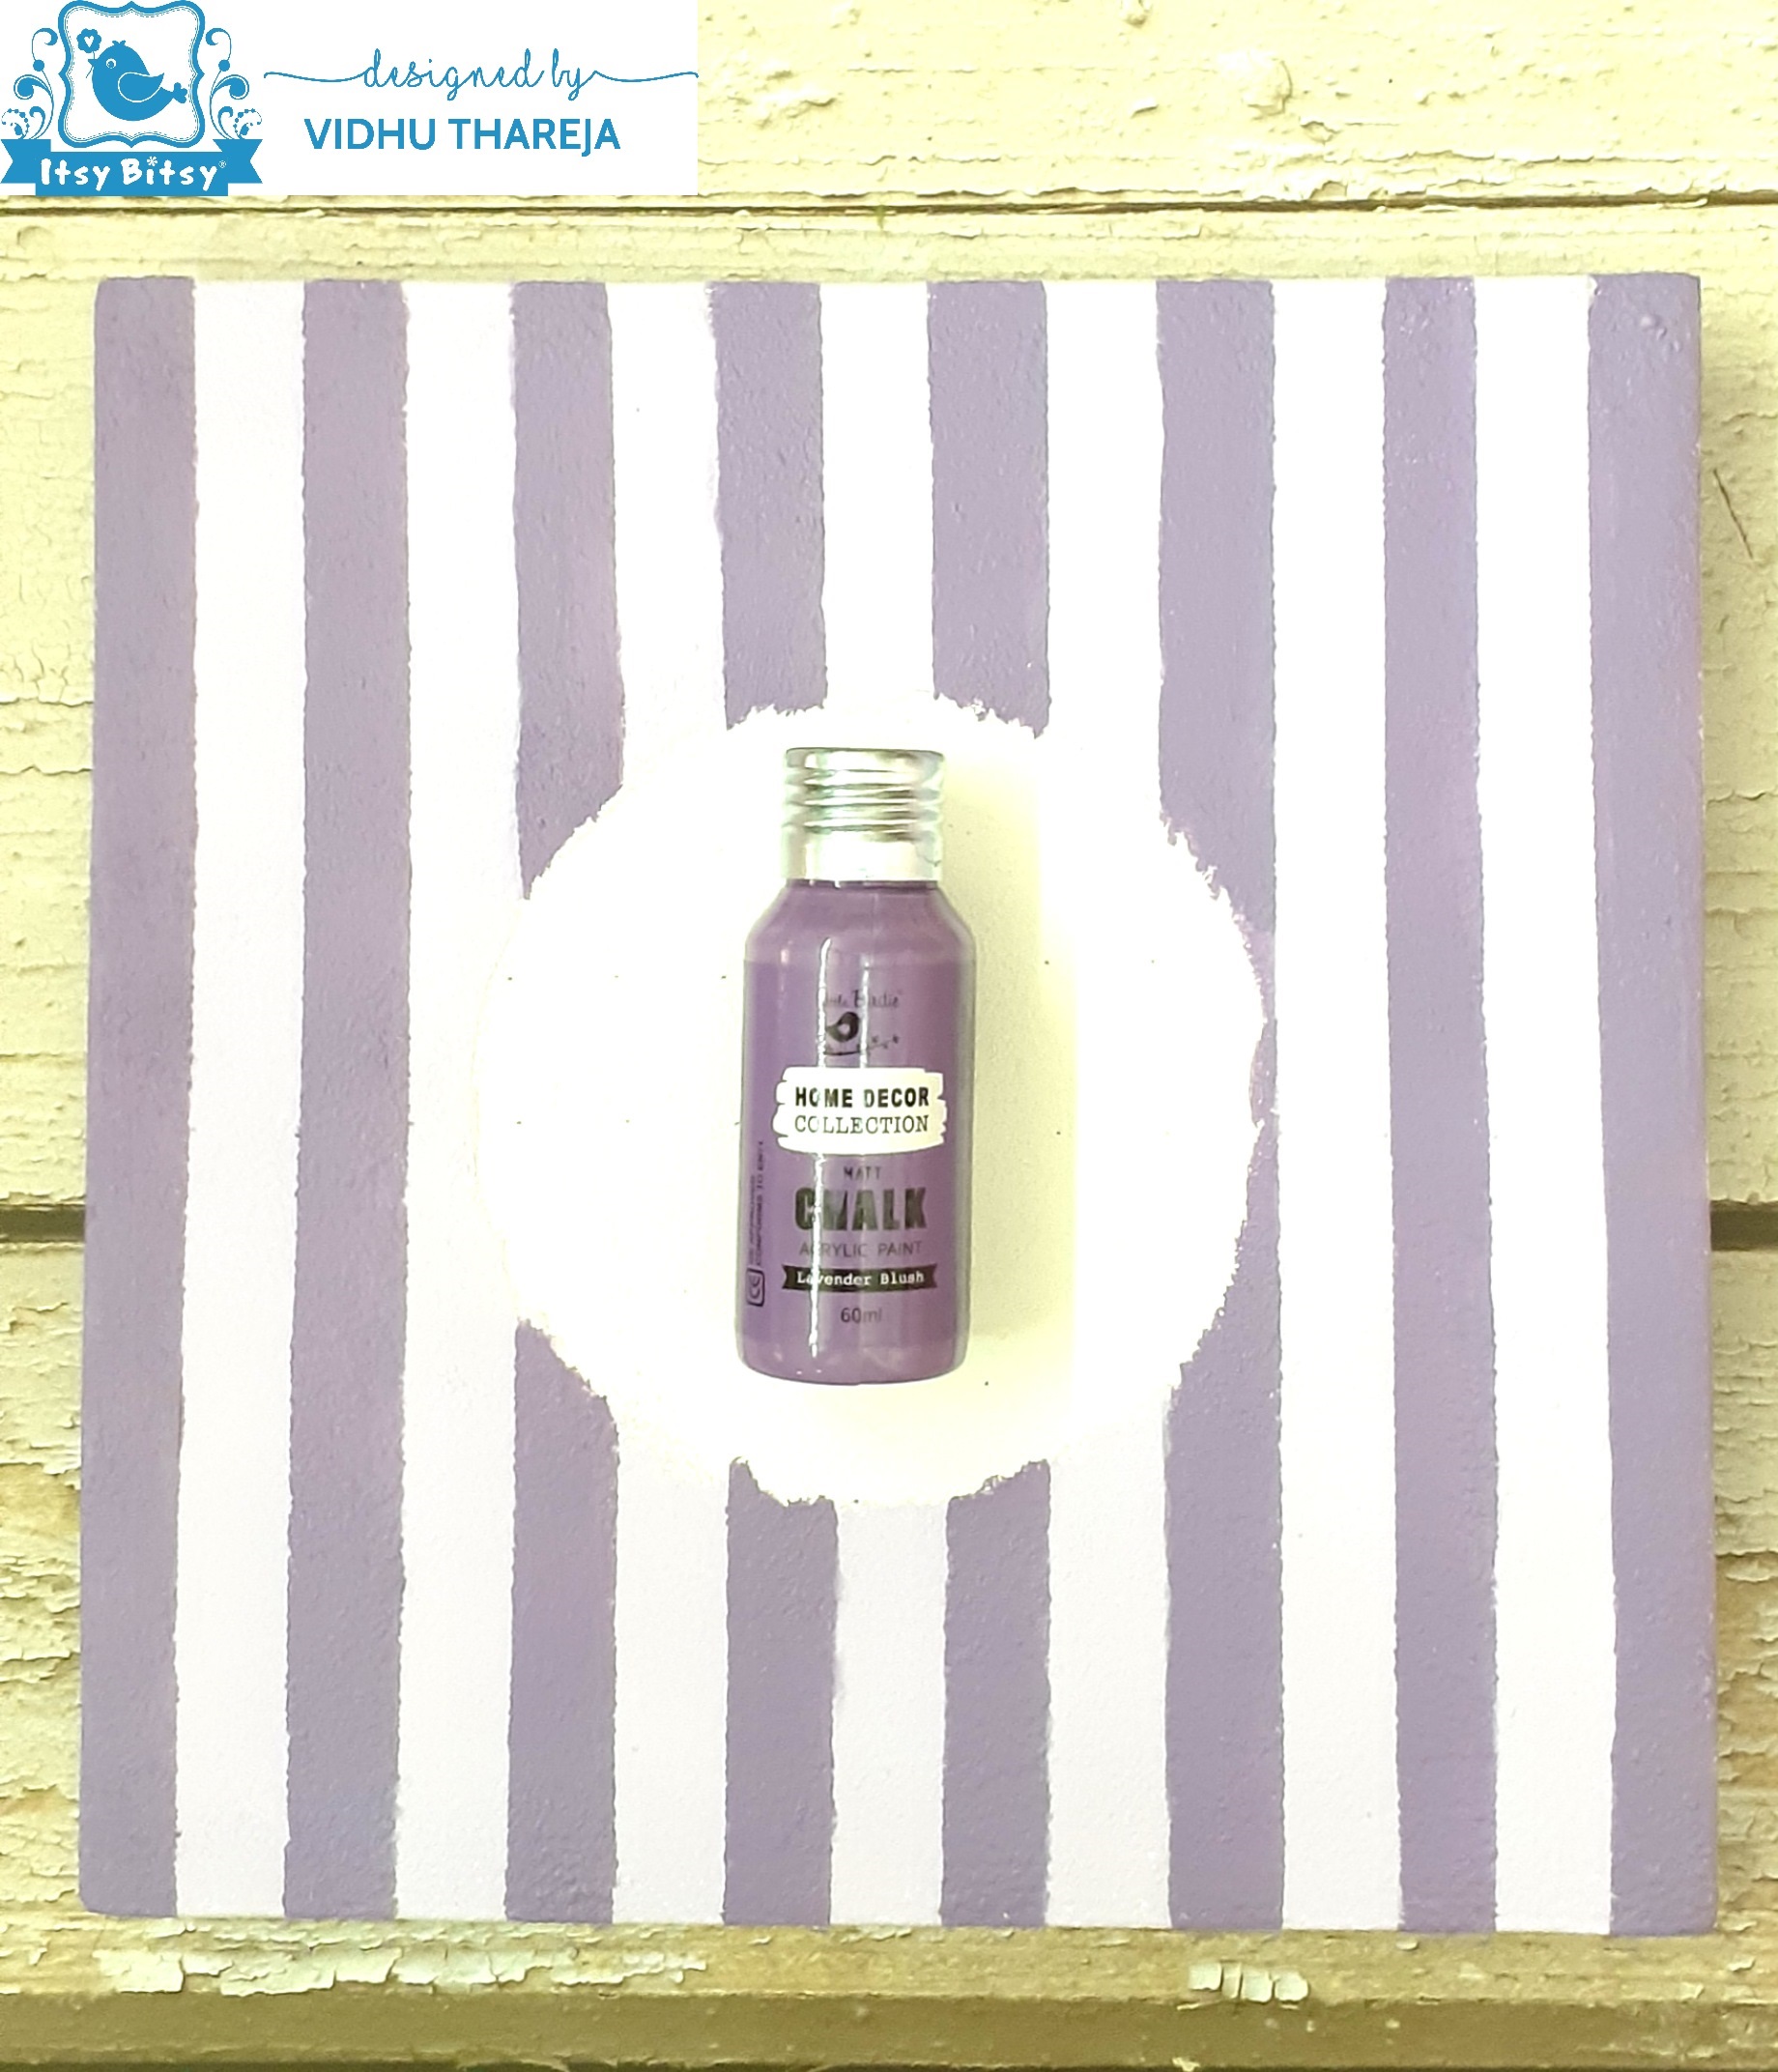
I wanted to add some more interest so I decided to do some stenciling. For that I have used one of my favourite products, Little Birdie 2in1 Mixed Media Paste – White. I selected a 4*4 inch Little Birdie Stencil ‘Garden Vine’ from my stash. I applied the mixed media paste through stencil with the help of a palette knife and left it to dry. Always clean your stencil immediately after every use.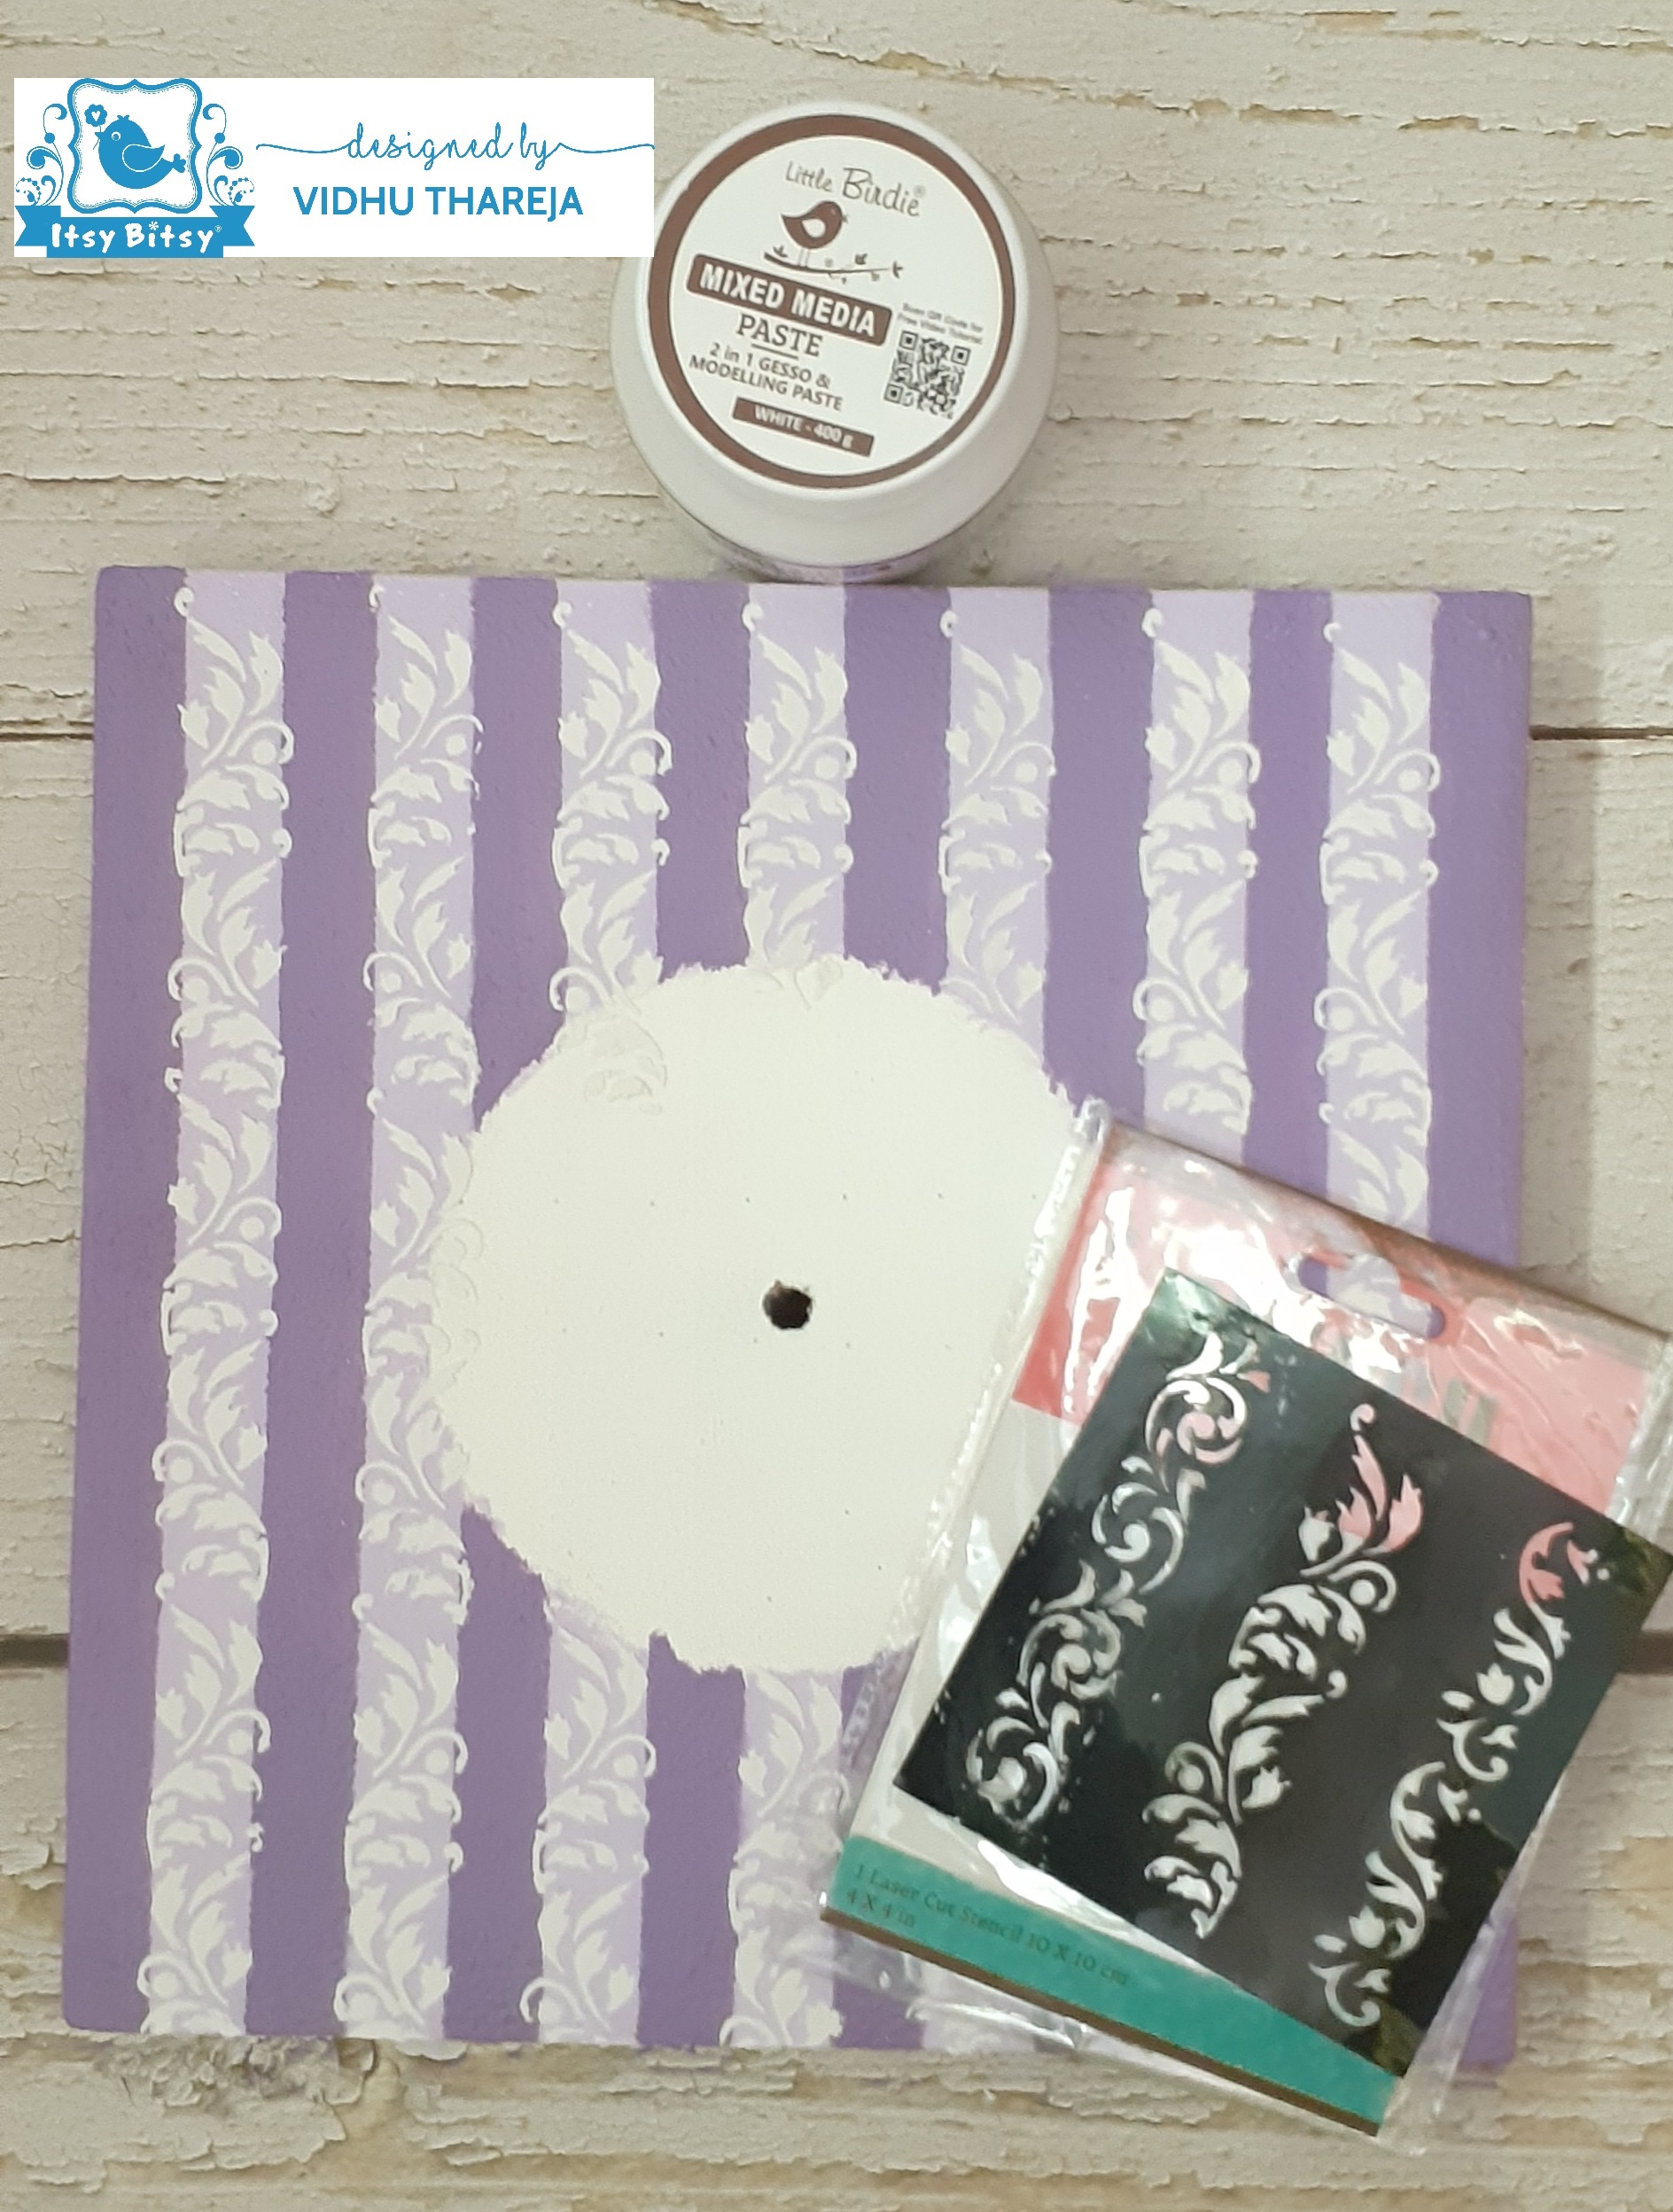 I applied multi-surface paint ‘Black Pearl’ on the clock dial using sponge and then rubbed a Little Birdie Metallic Wax -Silver Glitz to tone down the black colour. I painted the four sides of the clock base with multi-surface paint – Ivy Garden.
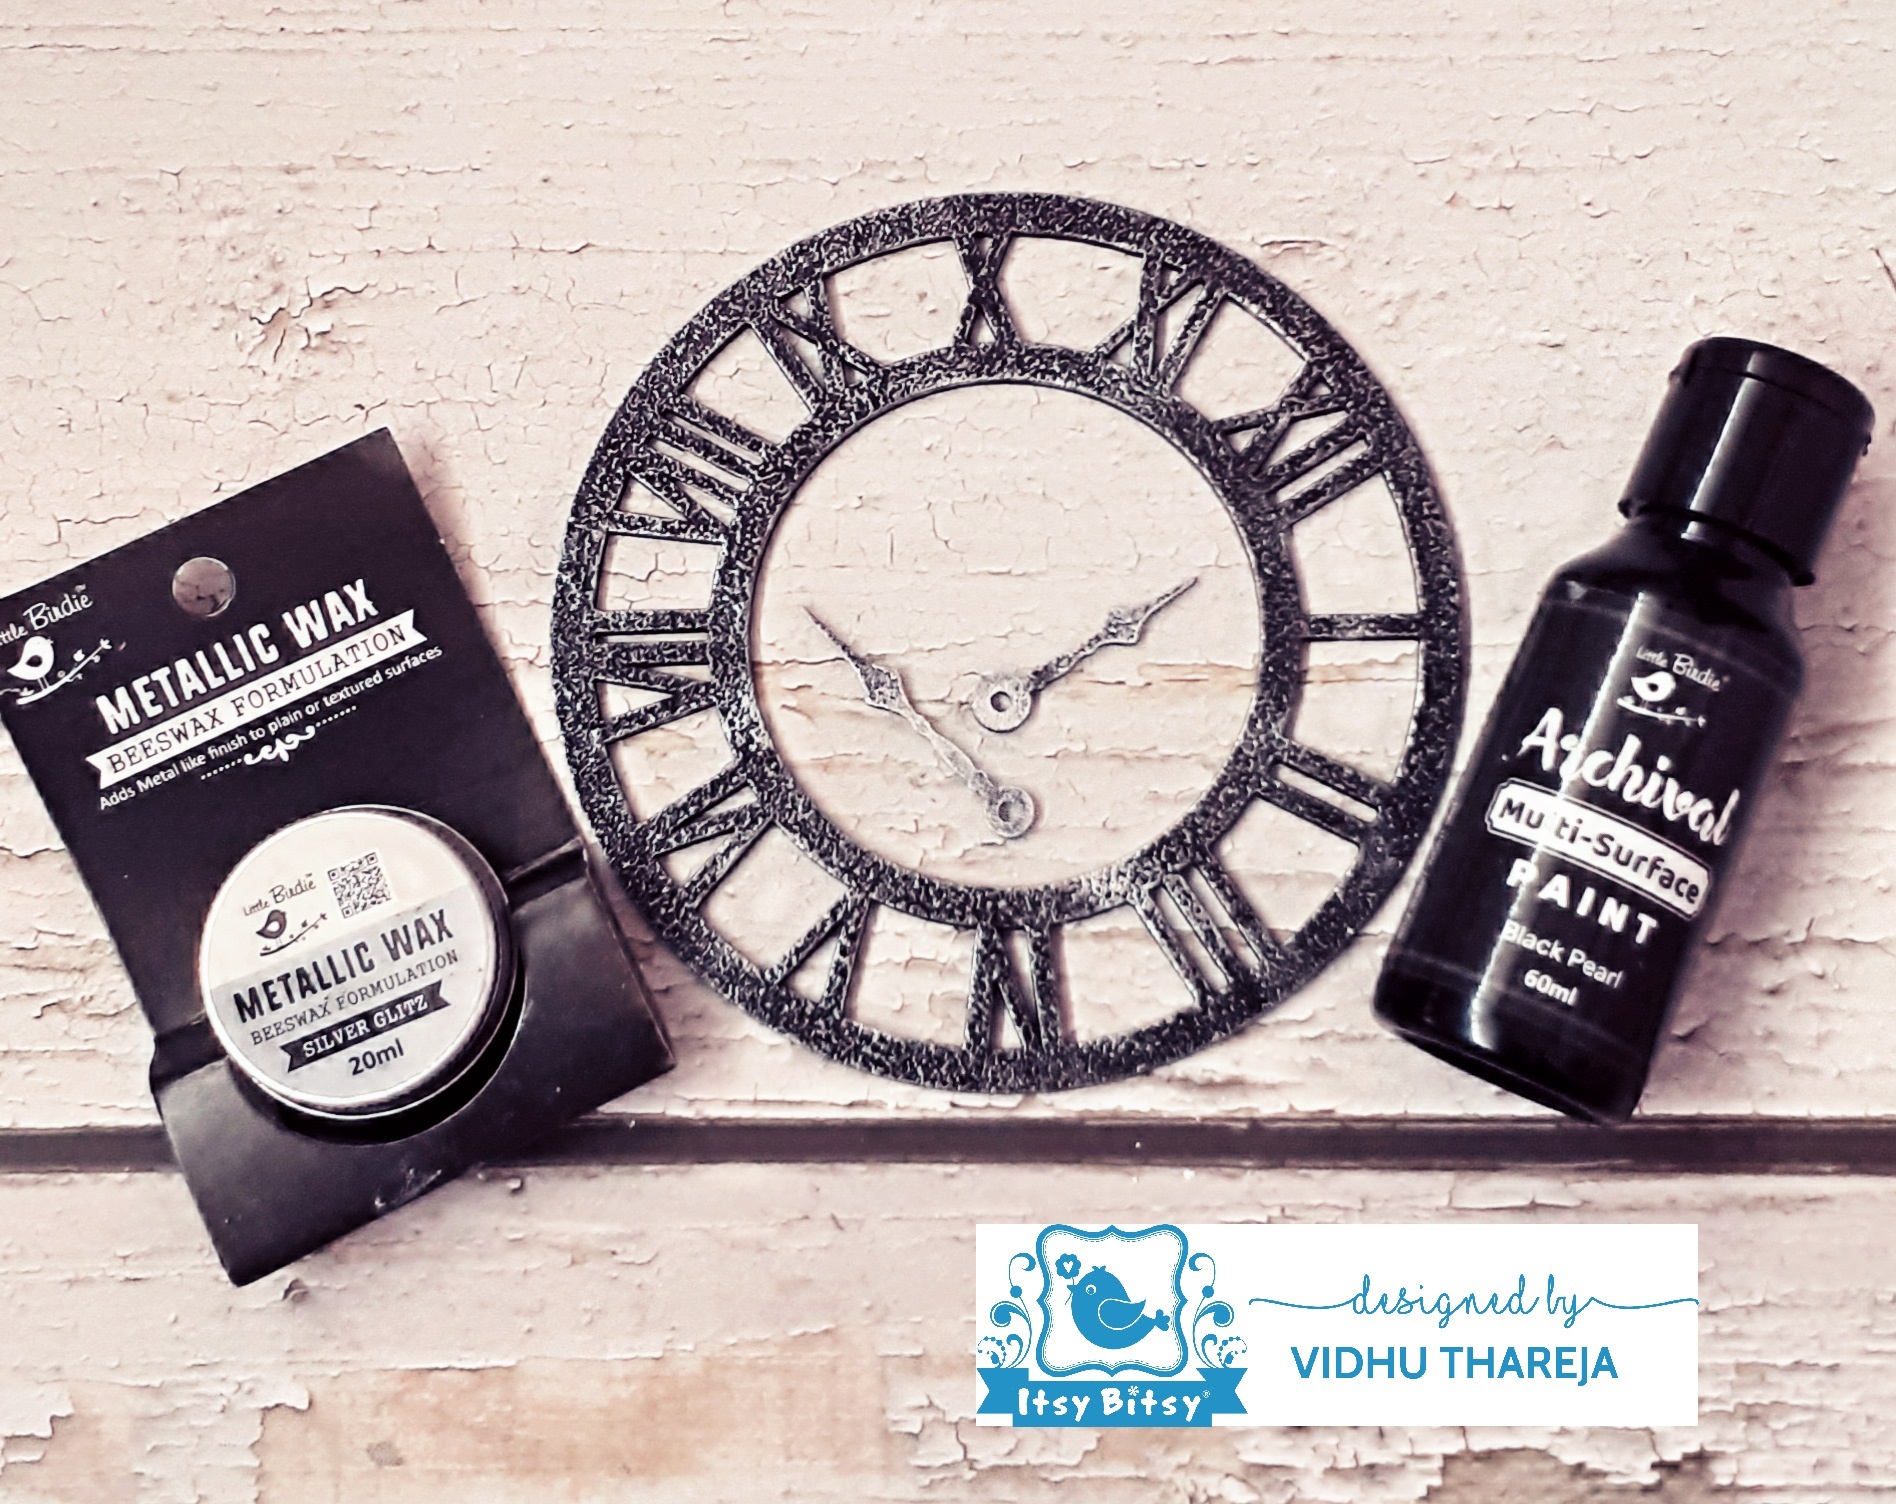
Finally, I pasted the decoupaged chipboard and clock dial using Little Birdie Wood Glue and fixed the clock hands.
A beautiful wall clock is ready to adorn the wall. 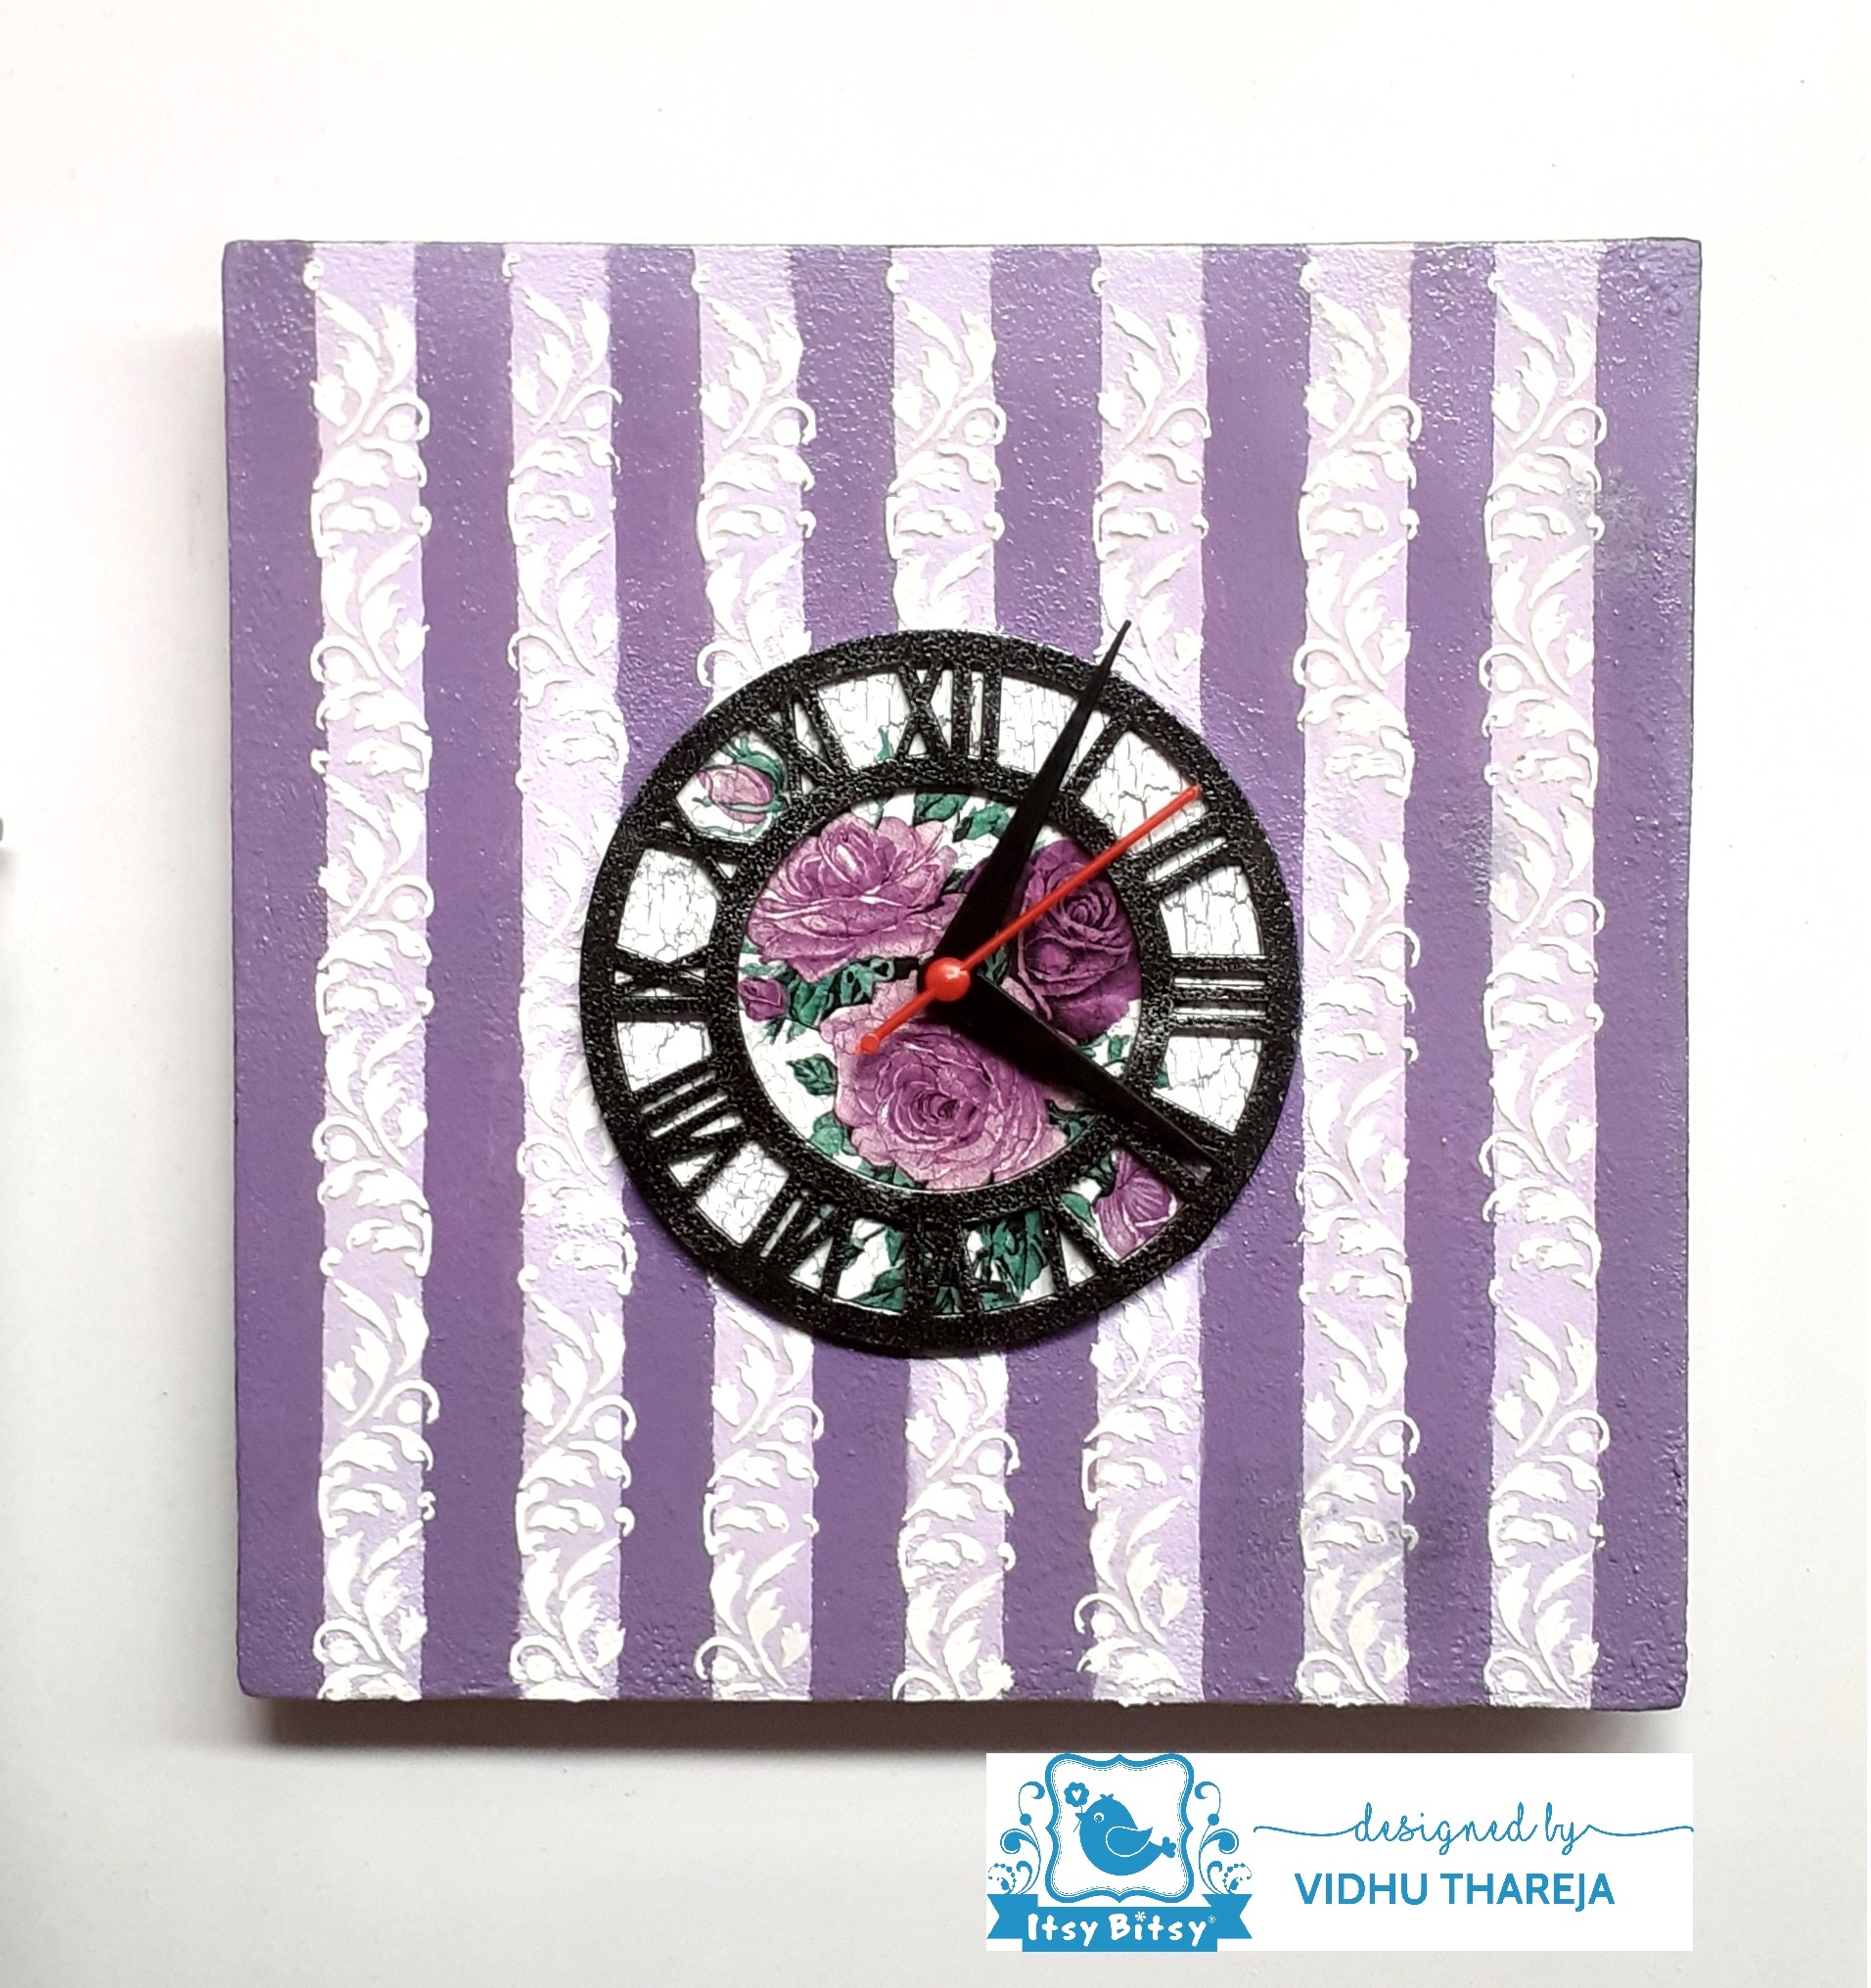
I hope you find my project interesting and inspirational also.
I am excited to inform you that all these products come with a unique QR code!
Point your mobile phone at the QR code on the product & scan them to take you directly to our YouTube links where you can see how each of these products are used! Check out all our new products for QR codes in the future ( this will be either on the label or on cap of the bottle).
Use code VIDHU5 to buy any product at www.itsybitsy.in and get 5% discount on your total bill.
Till next time we meet, stay Safe. Happy Crafting!
Vidhu Thareja
List of materials: