Hi everyone, Kripa here!
Thank you so much for taking the time to read this post. Today I will be making a very simple resin coaster with Little Birdie Gilding Flakes. Let’s get started…
Step 1: I have taken a 4inch MDF coaster as the base. First I primed the base with Gesso. Since I am using black and white resin pigments, I will prime the base with half of white gesso and the other half with black gesso. Allow the gesso to fully dry before pouring resin on it. Once the gesso dried, I prepared the base. I taped the edges of the coaster with masking tape to make sure that the resin does not drip down to the back of the coaster.


Step 2: For the 4 inch coaster I have taken around 16grams of resin and 8grams of hardener. I mixed the resin and hardener really well for at least 3 minutes until both combined well. Then I allowed the resin to rest for 5 minutes so that the air bubbles can rise to the top. Little Birdie Resin has a very good auto bubble release system. So after 5-10min most of the bubbles disappeared.
Please wear Nitrile gloves or rubber gloves, a respirator and work in a well ventilated area when you work with resin.

Step 3: Next, I divided the resin into 2 cups. I mixed white opaque pigment into one and black opaque pigment into the other. Mix the pigments into the resin nicely until they are well combined. You do not want any residue of the pigment to be left out.

Step 4: Once the colors were nicely mixed in the resin, I poured it over the coaster in the respective painted parts. White resin over the white part of the coaster and black mixed resin over the black painted part of the coaster. After pouring the resin it is important to get rid of the air bubbles. I am using a torch lighter for this. It gives a very sharp flame which will get rid of the air bubbles easily. Be very careful while using it. Always keep it away from you and use it at a height. Once the air bubbles were gone I covered the coaster with a plastic container leaving a little gap at the end for any fumes to escape so that no dust particles settle on the resin. I allowed the resin to cure or harden for 24 hours.


Step 5: After 24 hours once the resin was fully cured I stuck masking tape on either sides leaving little gap in the middle for the gilding part. This will give a neat line for the gold flakes. Using a paintbrush I brushed a little Mont Marte Leafing Size glue in the middle. Don’t use too much of the glue else it will take a long time to dry. Then I allowed the glue to turn clear. This took about 15 minutes or so.

Step 6: Once the glue was clear I gently placed Little Birdie gold gilding flakes in the middle. I pressed it gently so that the flakes adhered to the coaster. Then using a stencil brush I brushed off the excess fold flakes.


Step 7: Once I removed all the excess gold flakes I slowly removed both the masking tapes. Finally, I mixed resin and hardener, mixed it well and allowed the air bubbles to release. After 10 minutes or so I poured it over the coaster. Using a torch lighter I got rid of the air bubbles. This will be the top coat or the final coat of the coaster. I allowed the resin to cure/harden for 24 hours.


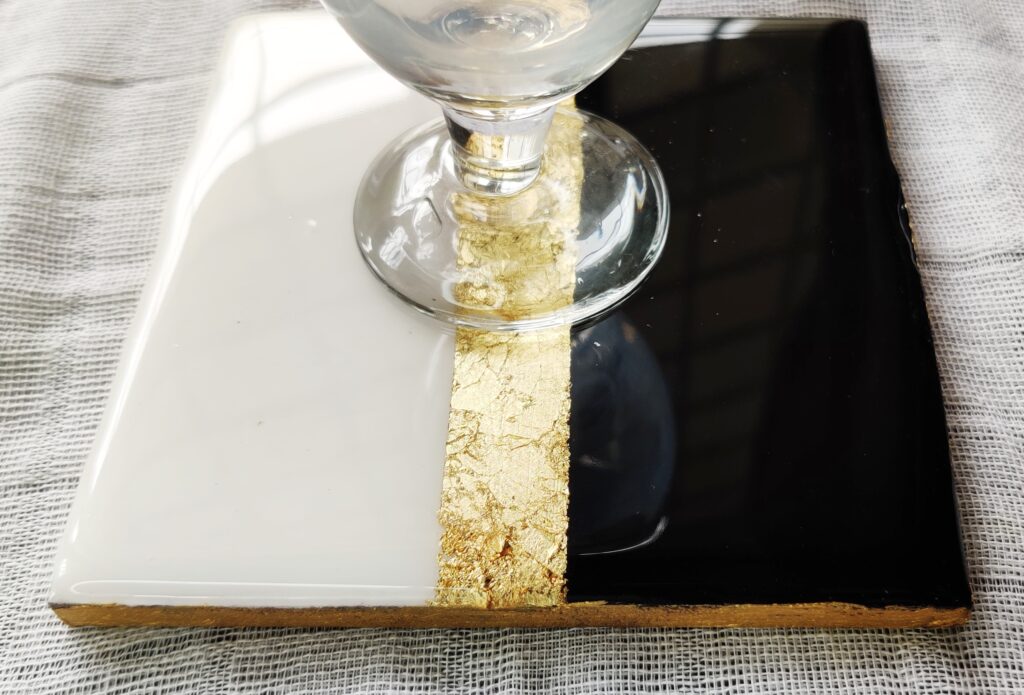
Step 8: After 24 hours once the resin was cured fully the coaster was ready. As you can see the tapes on the edges of the coaster have made sure that there are no resin drips behind the coaster. I removed the masking tapes and the painted the edges with gold tinted metallic paint. Lastly I put a thin coat of décor varnish over the gold paint.


Check out the gloss and shine the resin gives. You can make this with any opaque colour. The store has a variety of opaque colours that you can choose from.

Hope you all enjoyed this blog post. It is very easy to make. Do give it a try and tag us. The list of all the materials I have used is mentioned below. Use the Code KRIPA5795 for extra discount
Thank you so much. I will see you soon in the next one.


It’s really a nice and useful piece of info. I’m glad that you shared this useful information with us.
Please keep us informed like this. Thank you for
sharing.