A warm hello to my all arty-crafty friends!
I hope you all are having a great time making things of your choice. DT member Vidhu Thareja back on the blog today with another inspirational project designed using Little Birdie ‘Element Sheets’.
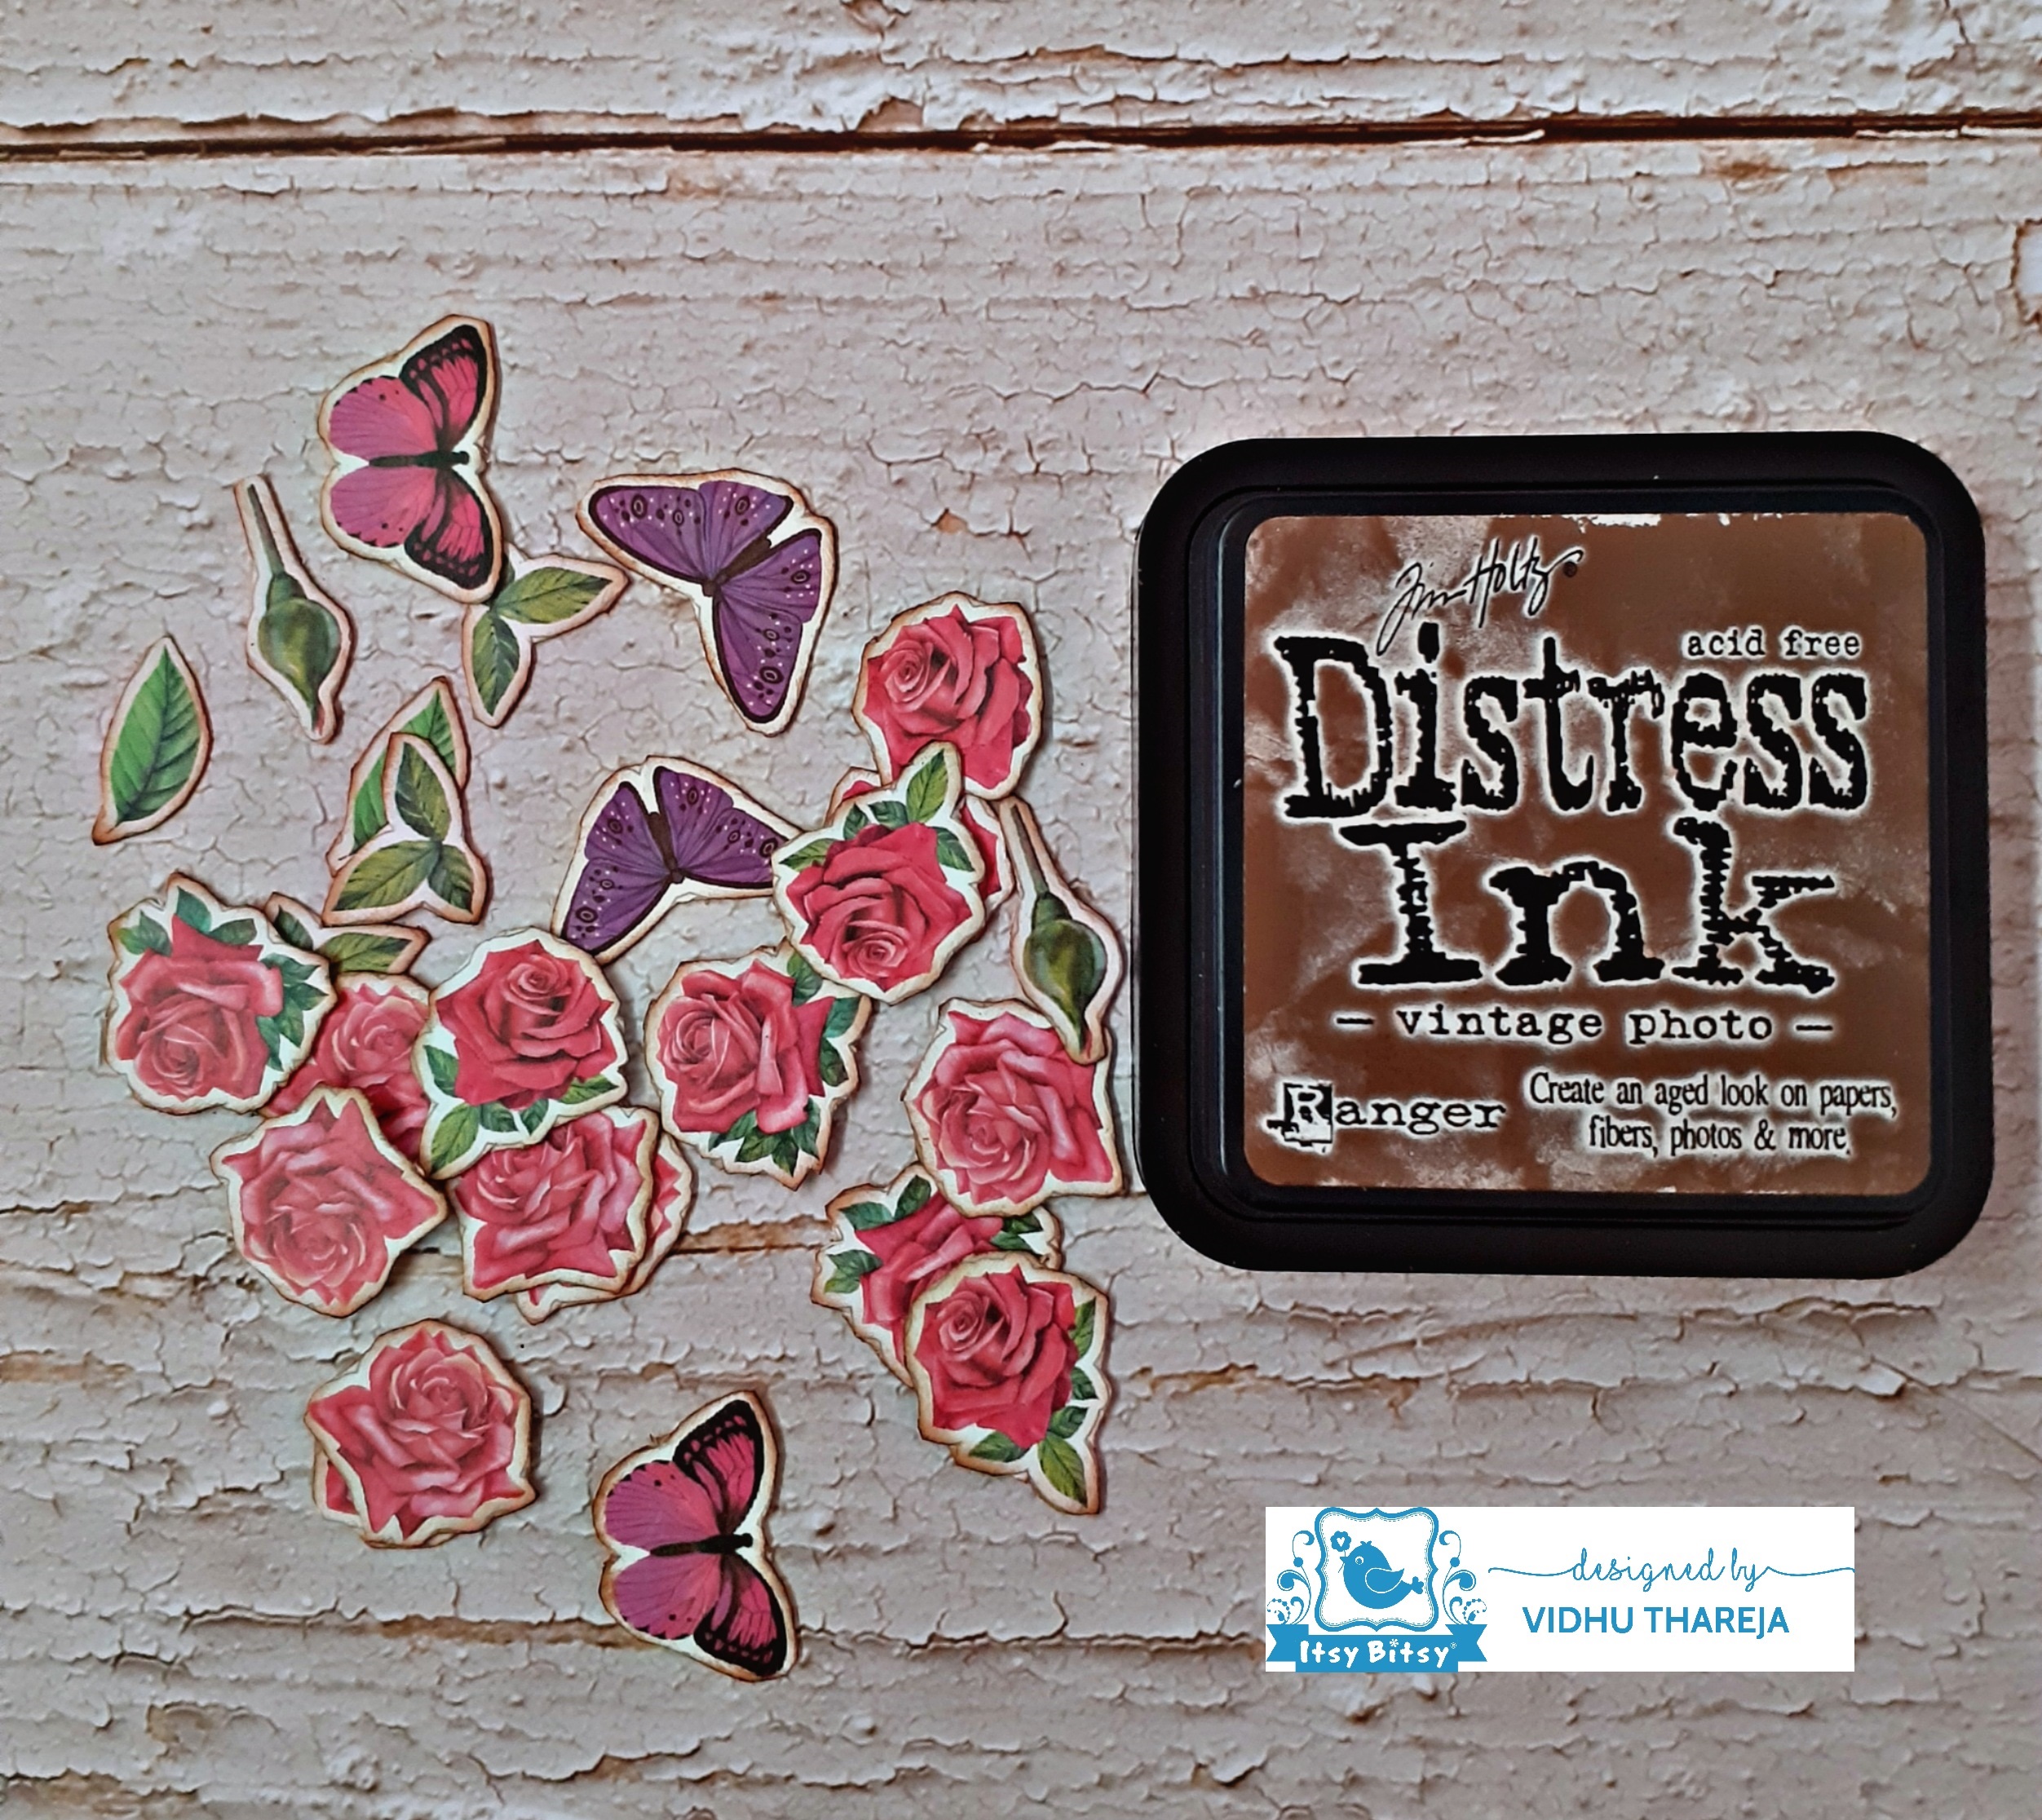
You all must be aware that the ongoing Blog Challenge # 32 is all about ‘Anything goes with Little Birdie Element Sheets’. I have designed an interesting decoupaged project and used some elements from these beautiful sheets as decorative elements. So without wasting any more time let’s start the tutorial. But, first have a look at my project….
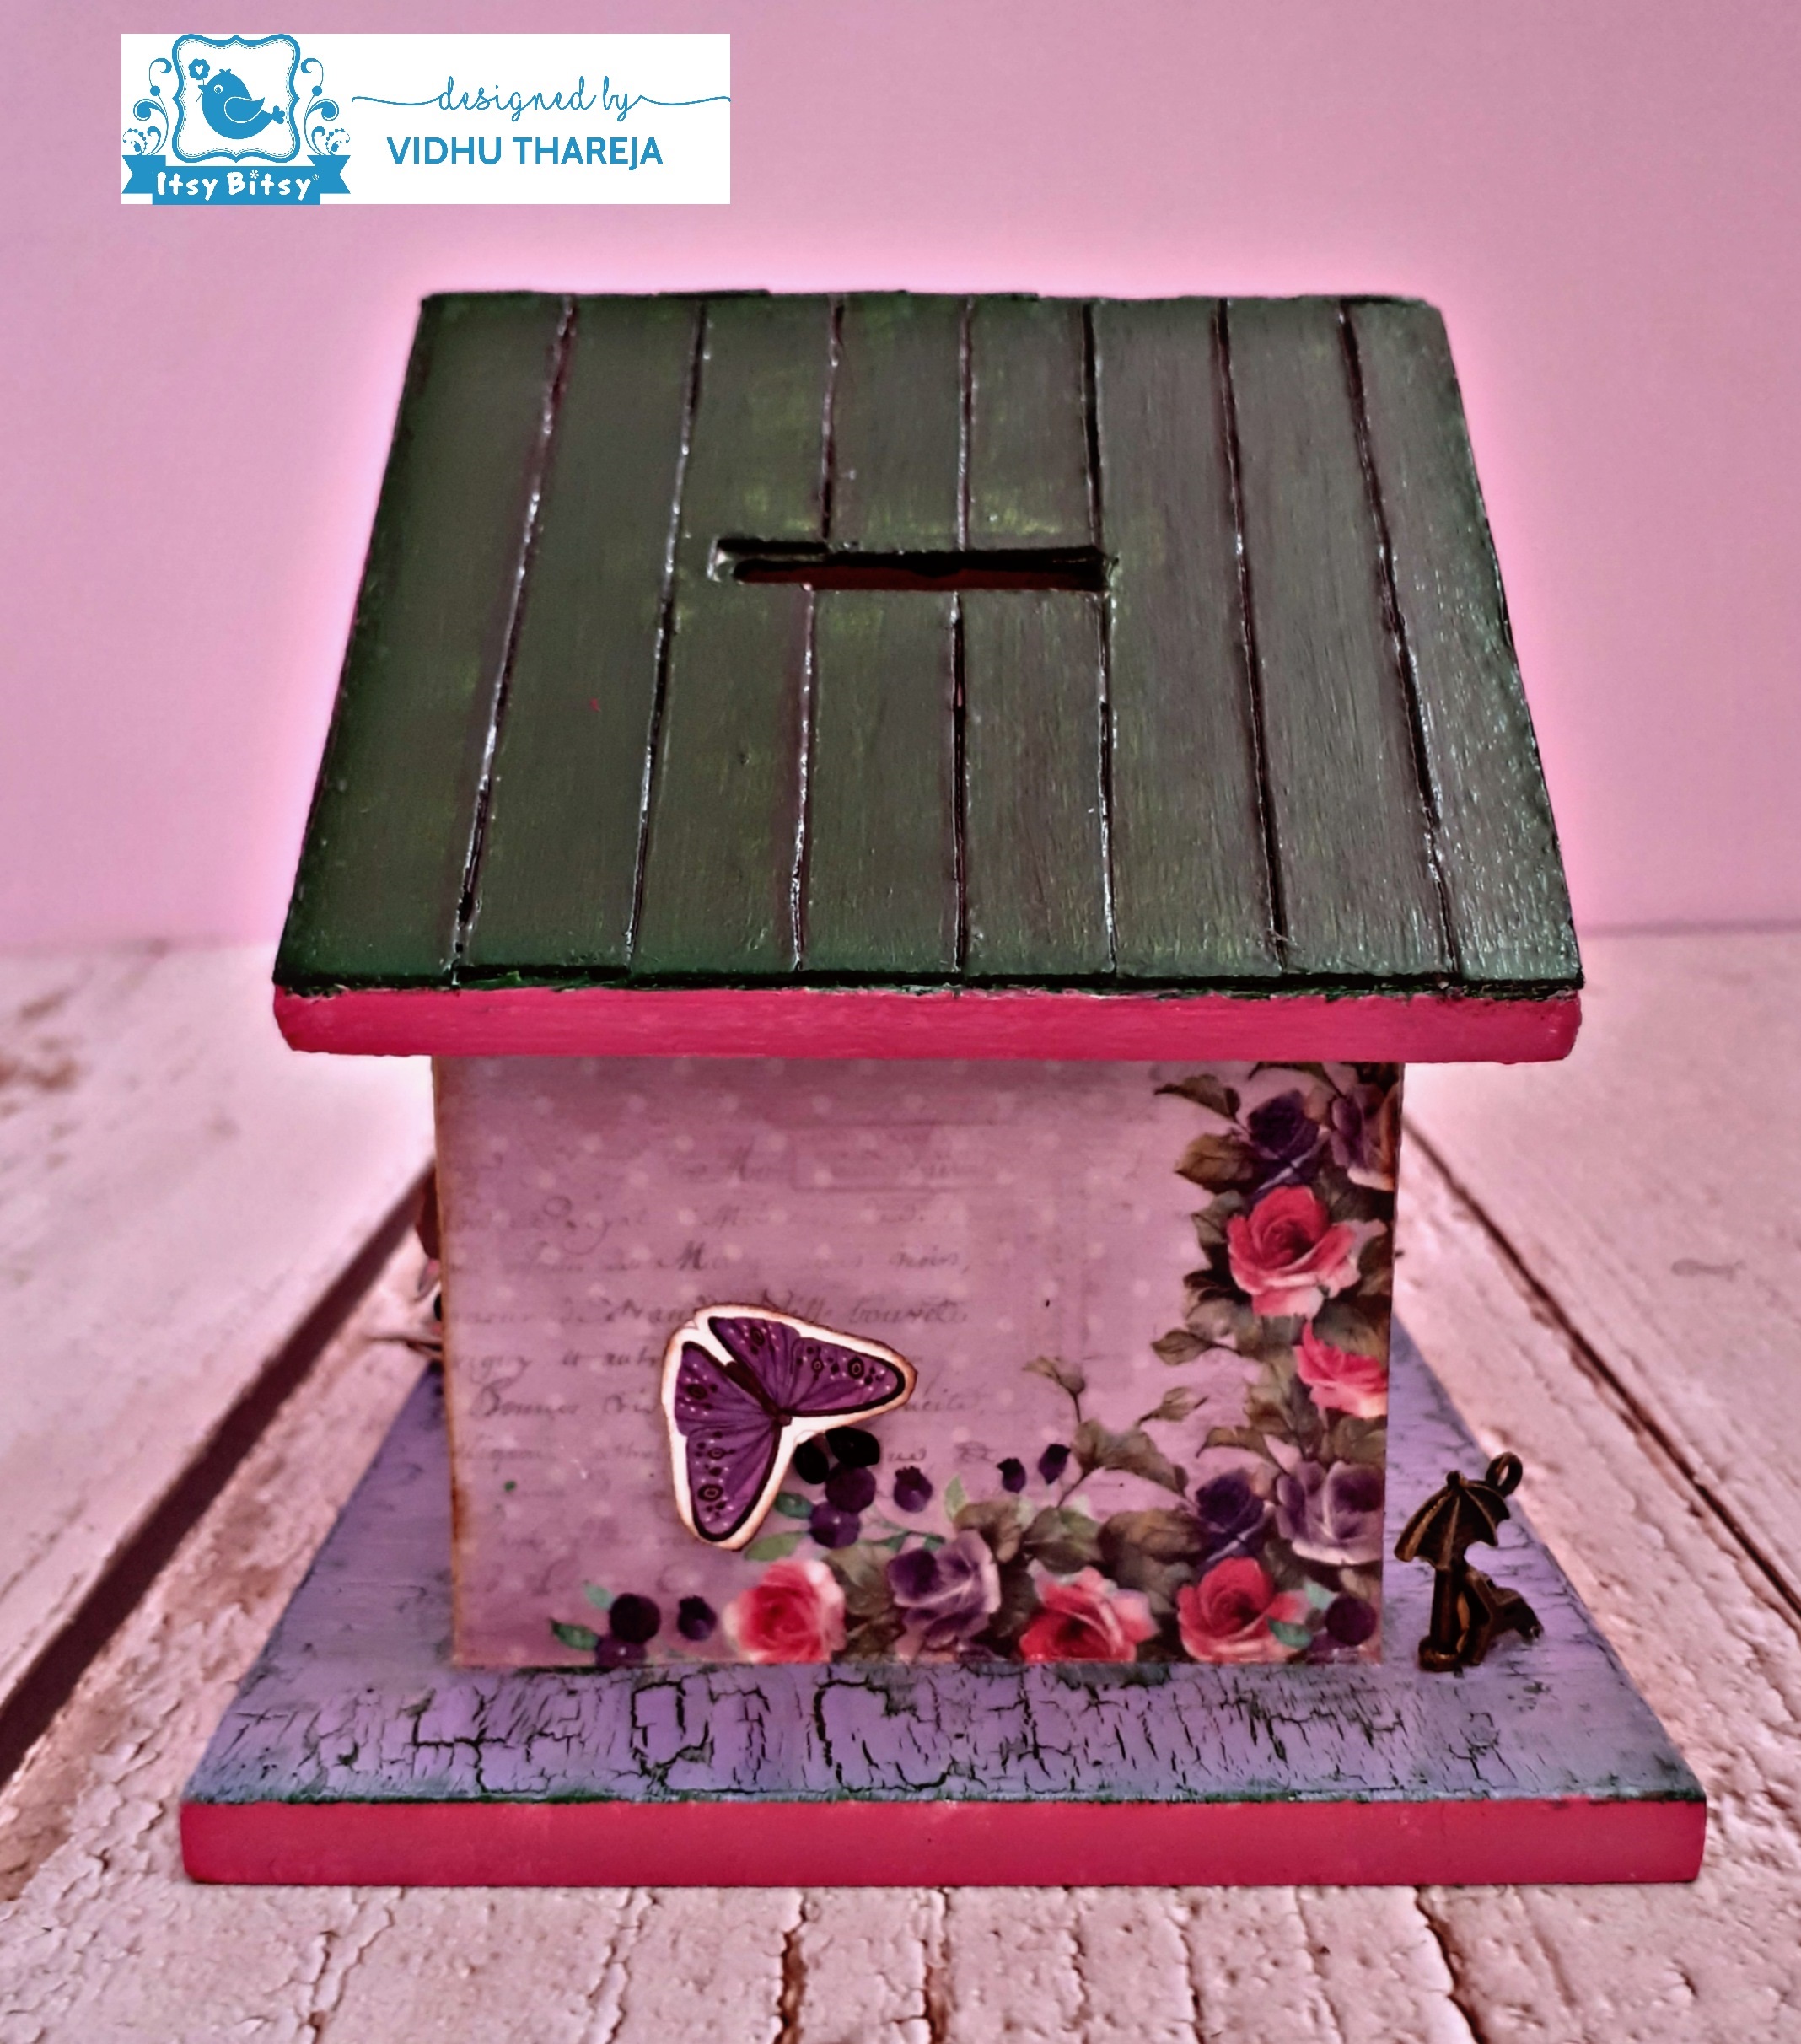
I had a cute MDF house shaped piggy bank in my stash. I always enjoy designing and creating something for the little ones.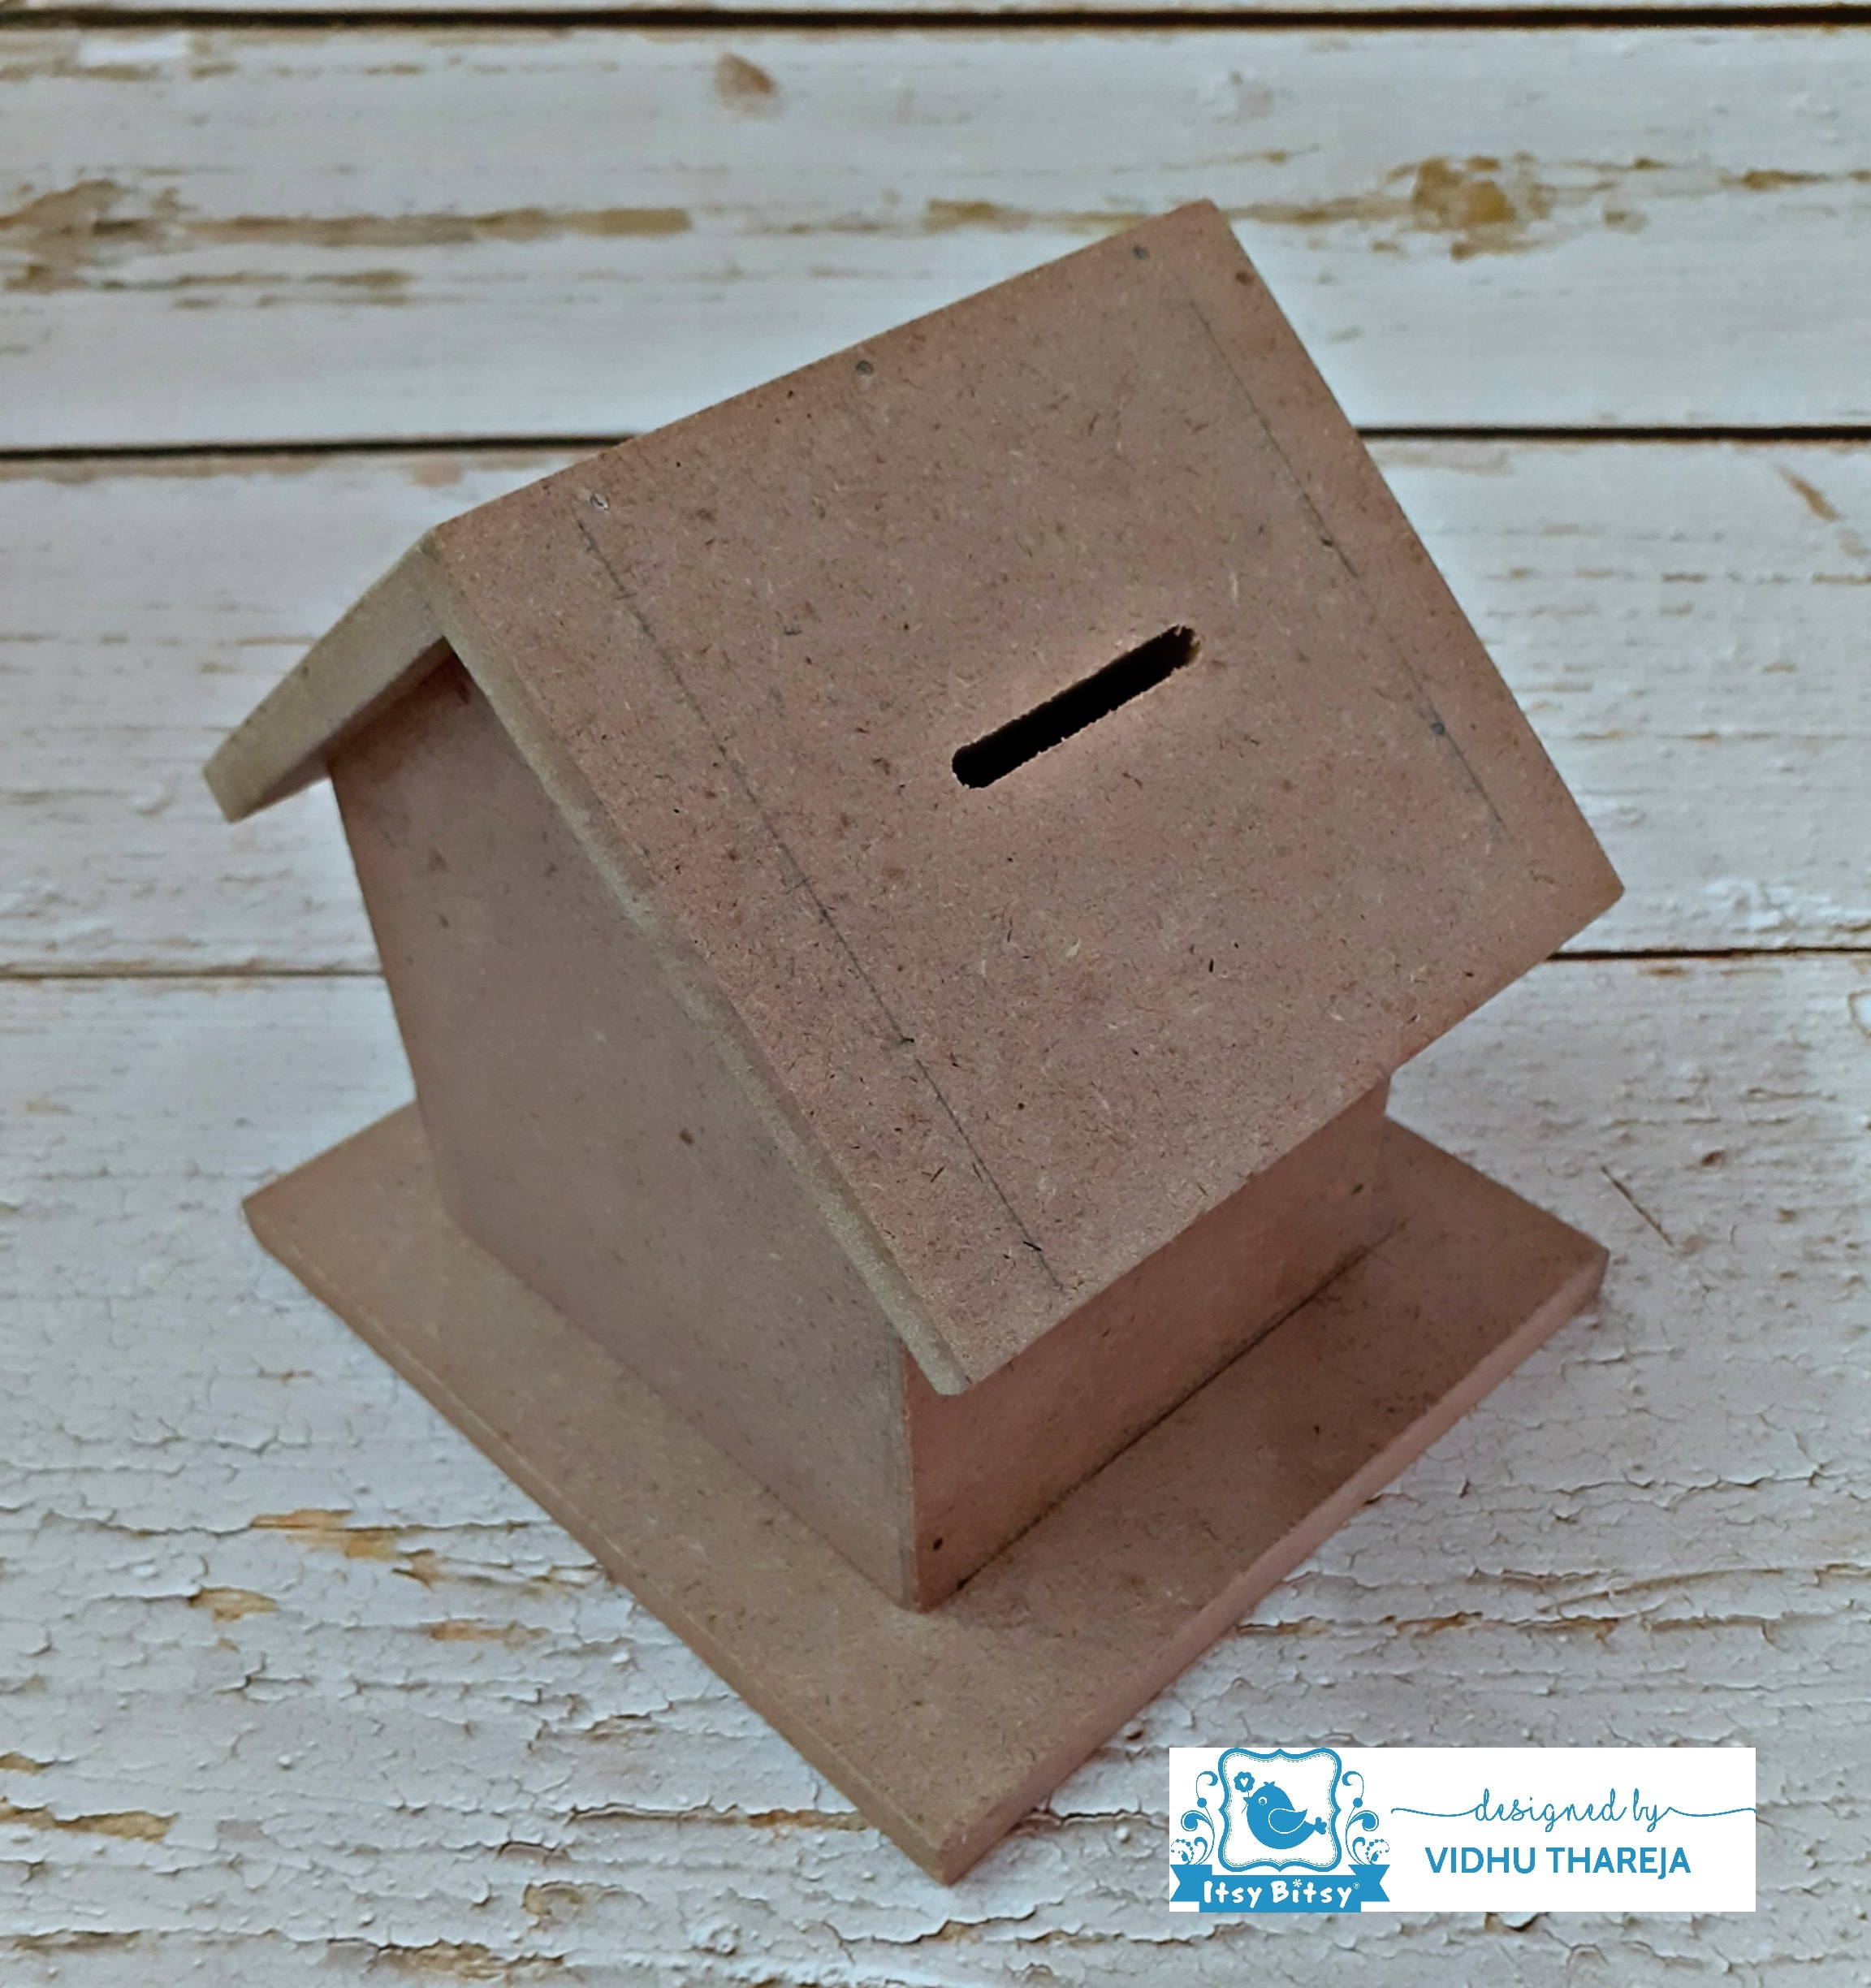
I started with removing the door and sanding the surface using a medium density sand paper. I cleaned the surface and primed the base using Little Birdie acrylic white gesso. I applied 2 coats, leaving enough drying time between each coat. I prefer to use a brush for application of gesso, as sponge absorbs a lot of gesso. Use a sponge if you want to create a textured effect. 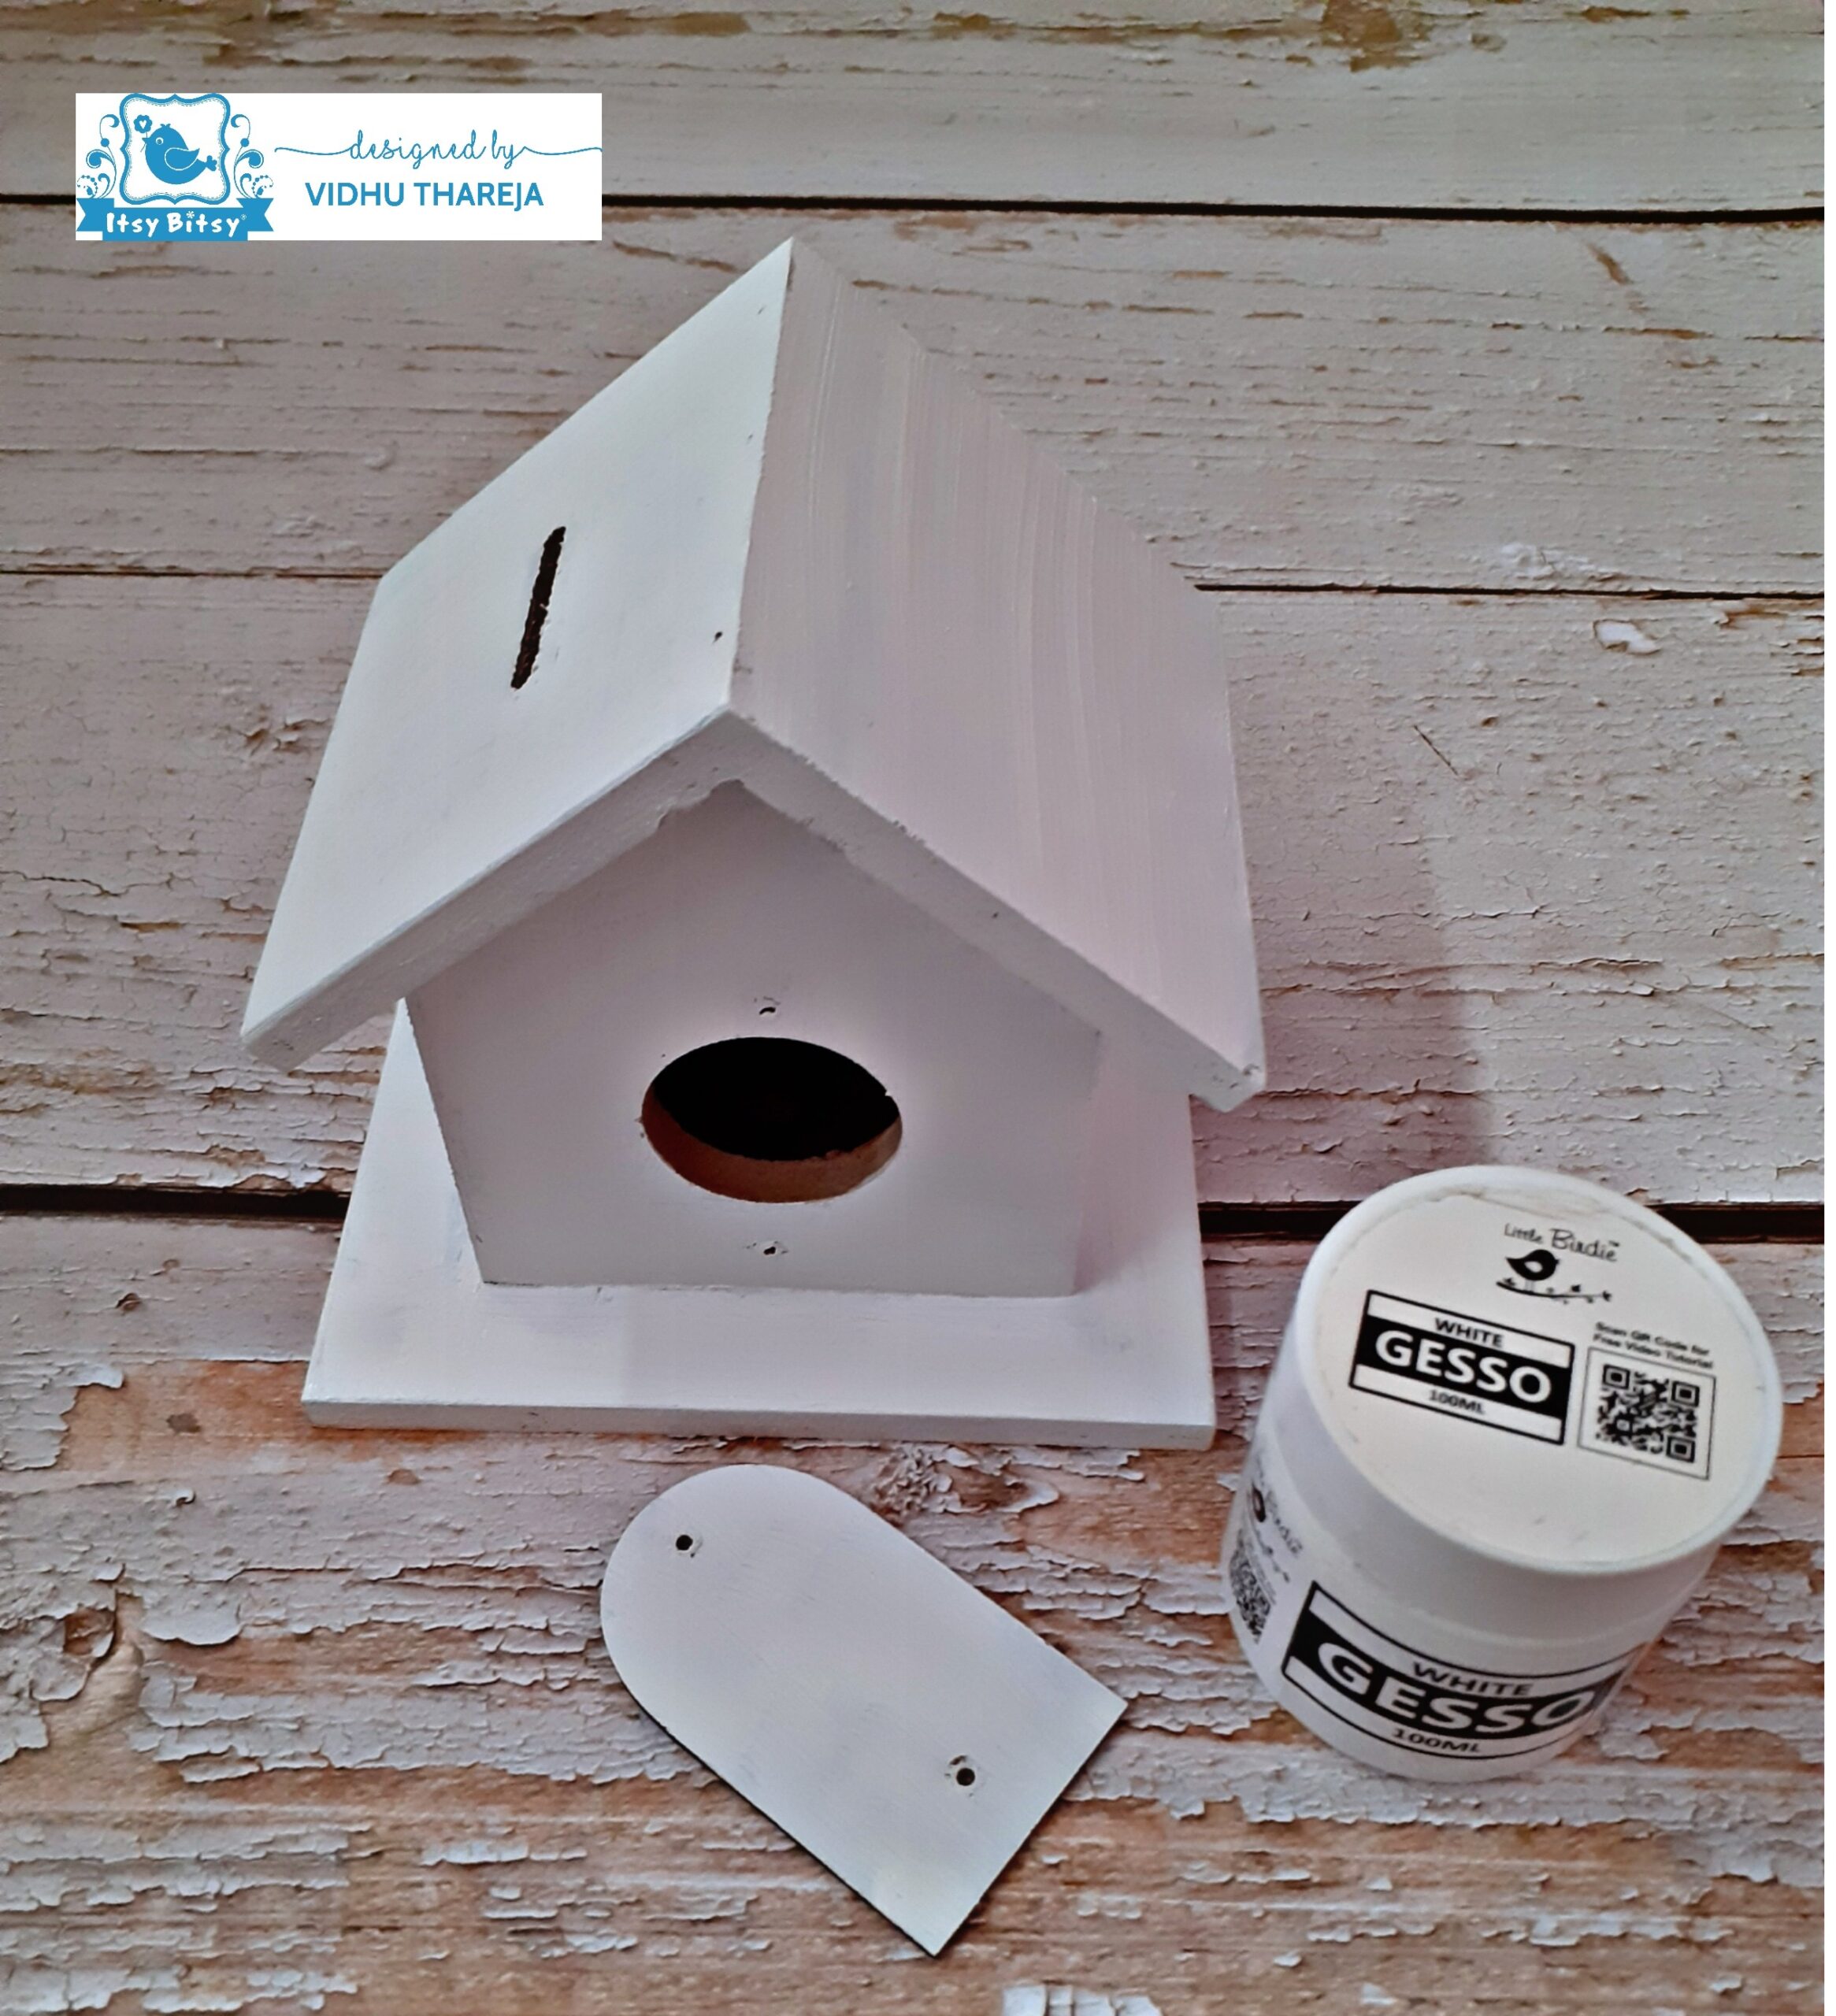
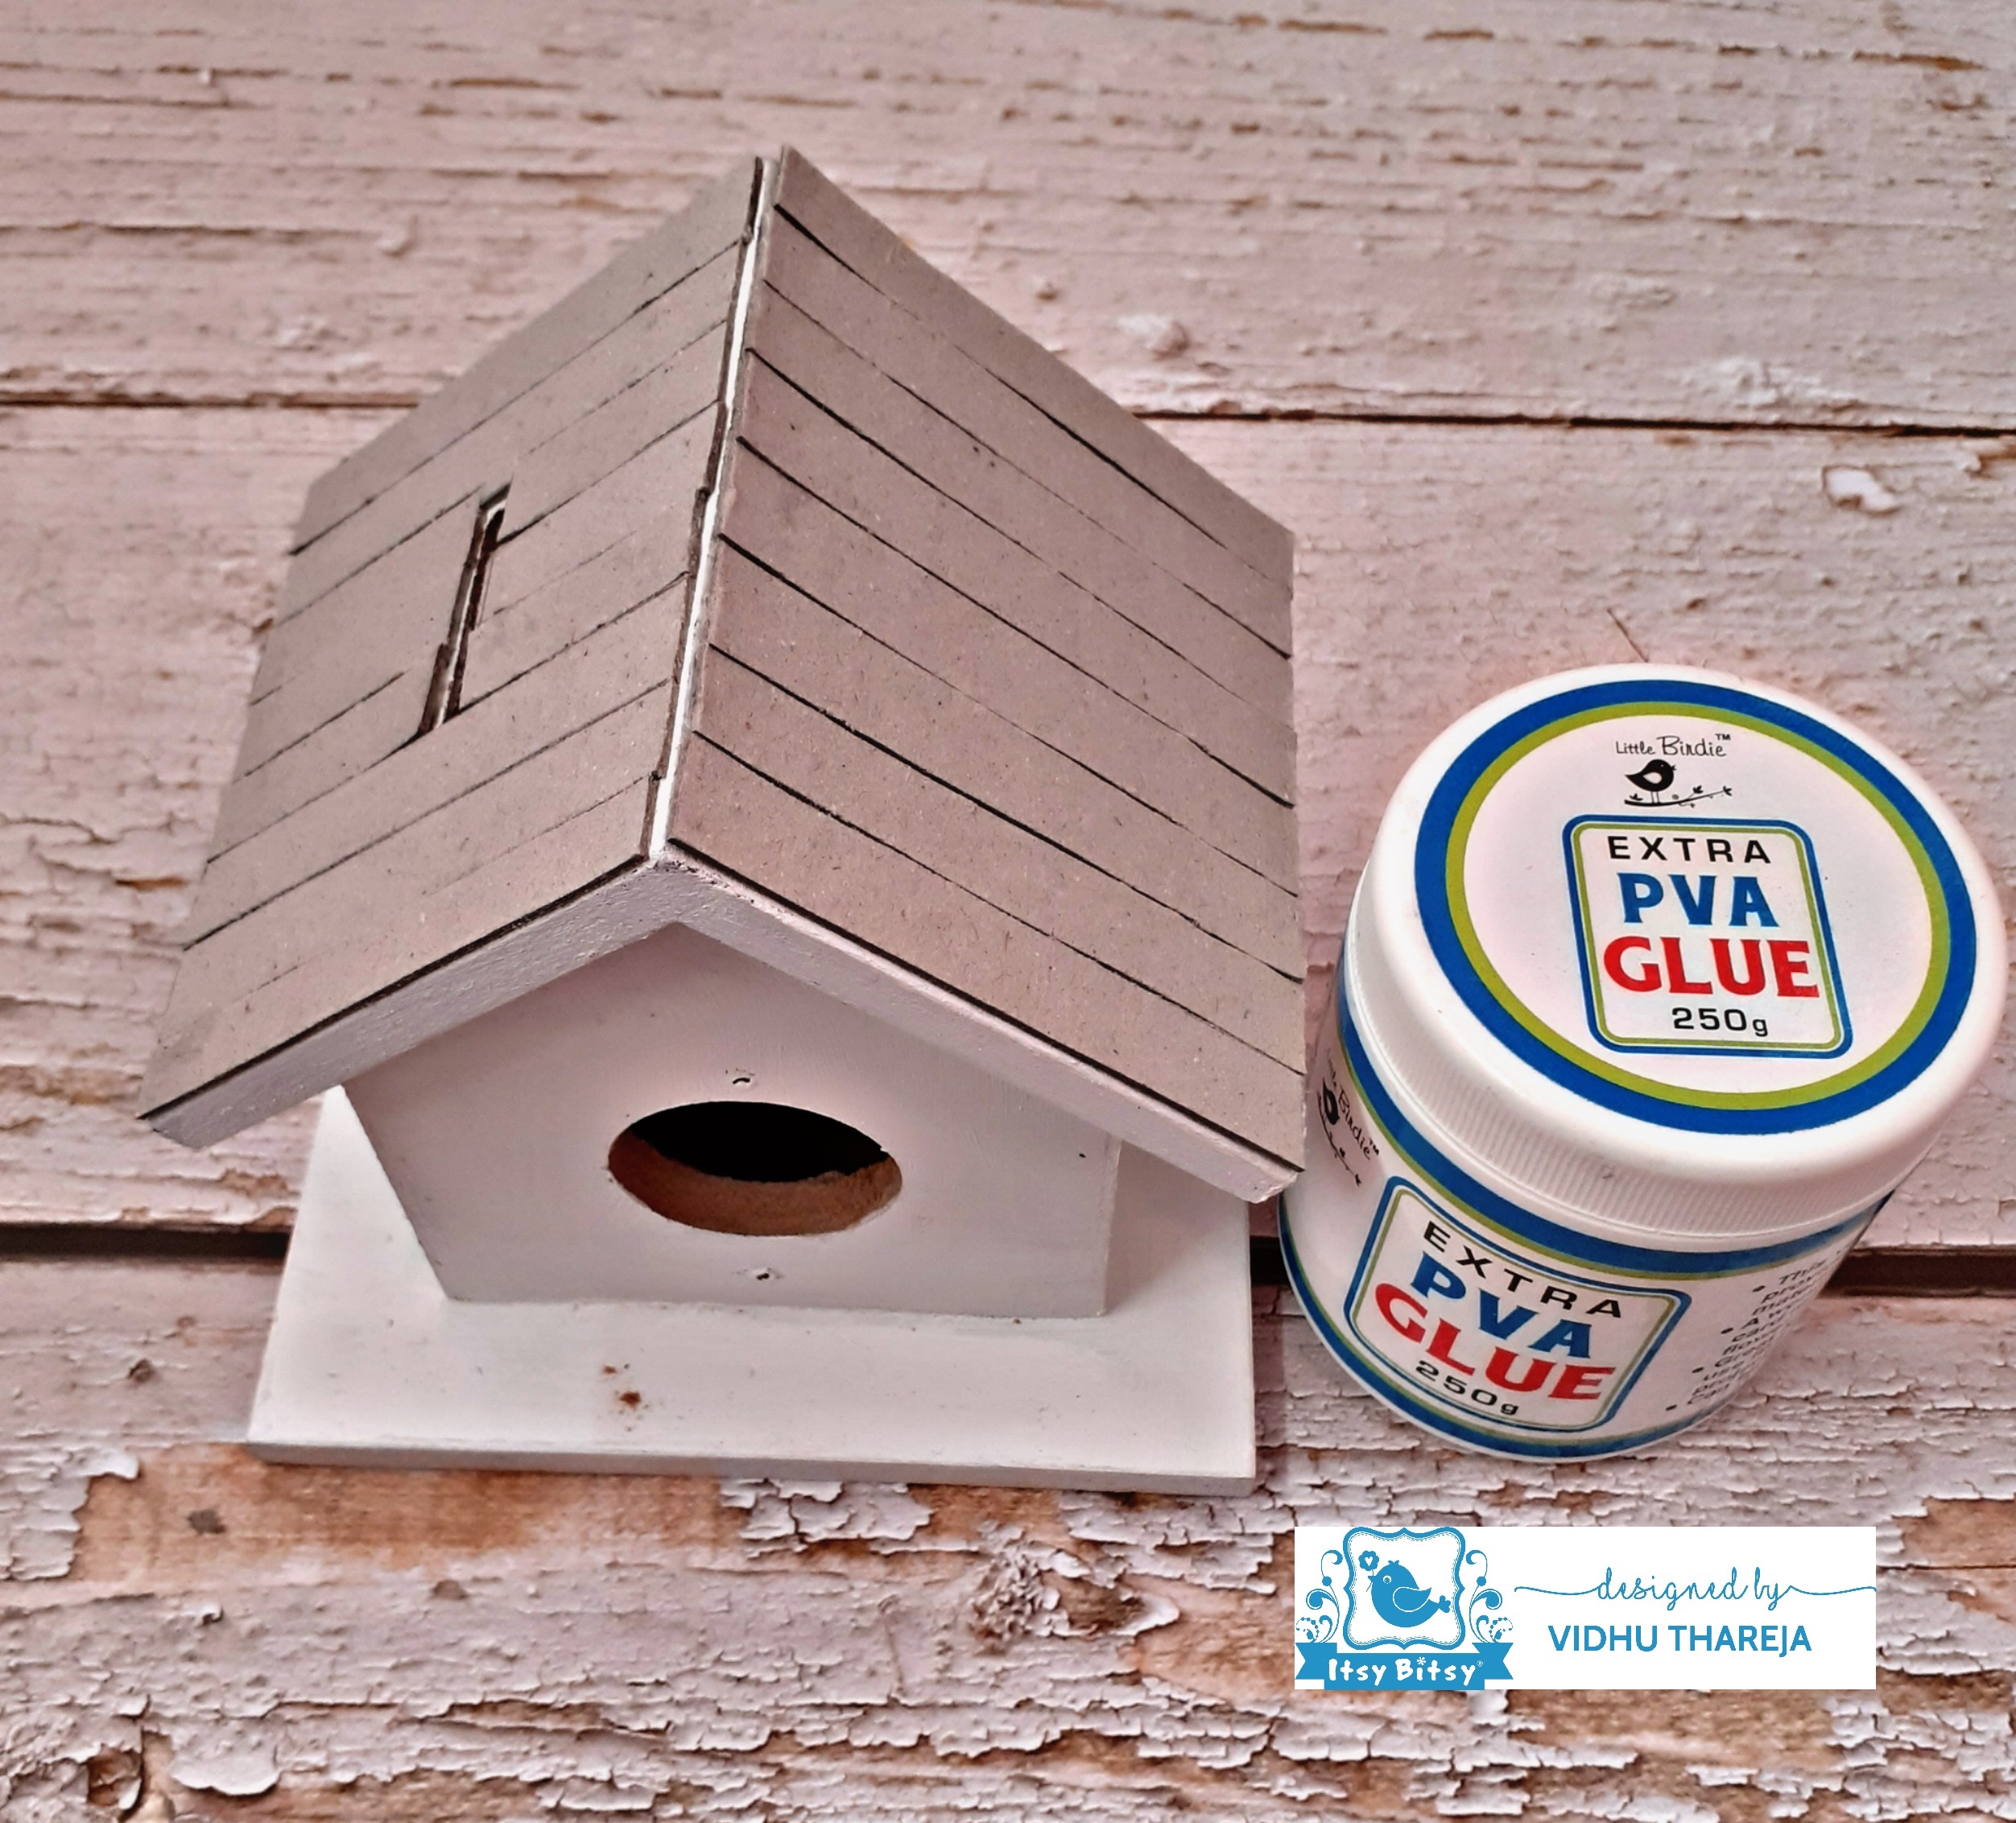
I wanted to add some interest on the roof. I cut some strips from a chipboard sheet that were equal in measurement. I pasted them using Little Birdie Extra PVA Glue. You can use gel medium also. It takes some time to dry so I left it to dry and then applied Little Birdie Acrylic White Gesso on the pasted chipboard pieces.
Now it is time to select paper for this project. I had Little Birdie Paper Pack – Birds & Berries in my stash, which is my favourite paper pack and available in 6*6 and 12*12 inch sizes. Printed on 250 GSM card stock, it gives flawless finish to decoupage projects. I have used one of the design from the 6*6 inch paper pack. 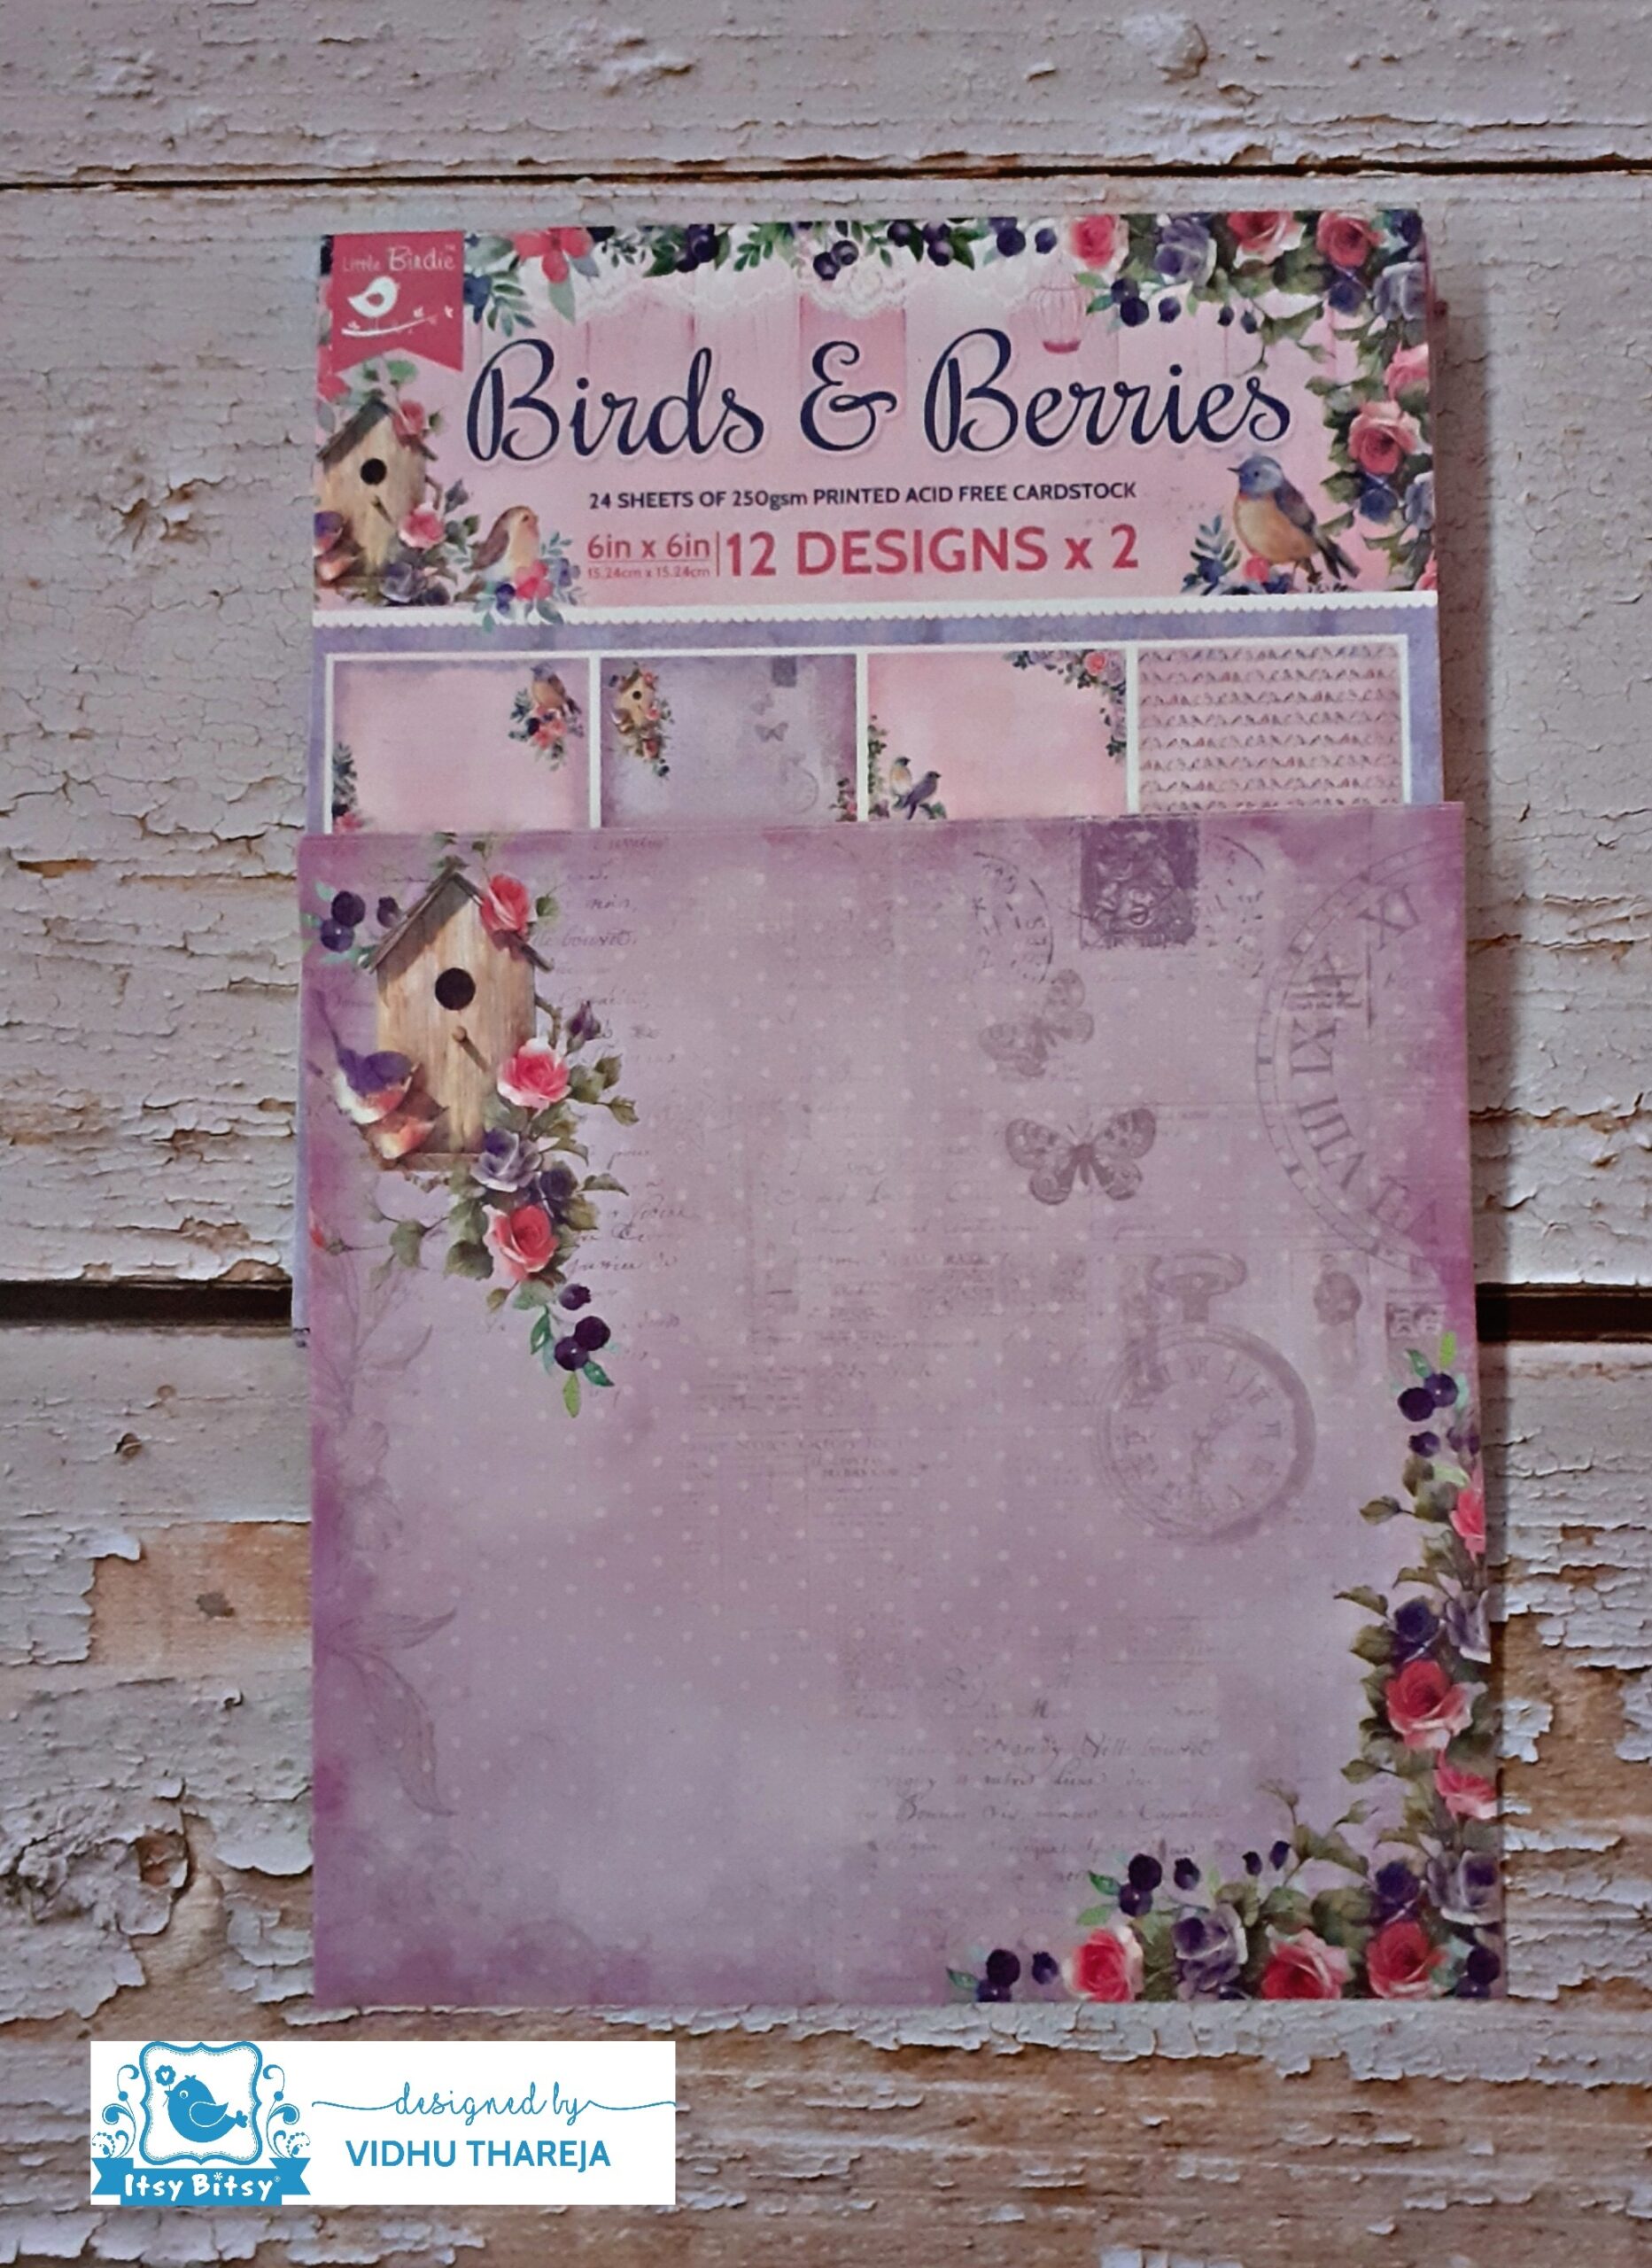 I cut the paper according to the size of base but before adhering, I have coloured the rest of the base. On the roof and the platform and on the one wall of the house I have applied 2 coats of Little Birdie Chalk Paint – Wild Moss. On the sides of the roof, inner side of the roof, and on the platform I have applied 2 coats of Little Birdie Chalk Paint – Bubble Gum. I left it to dry.
  On one wall, around the door and on the platform I wanted to add some interest so I decided to give it a crackle effect. Here I have used Little Birdie 1 step crackle medium. I have applied crackle medium with a synthetic brush using the dabbing method and left it to dry naturally. It takes a few hours to dry.
Tip: Always remember that crackle medium cracks the colour. In 1 step crackle effect use 2 contrasting colours. First apply any dark colour and then apply crackle medium using dabbing method. To highlight the cracks apply contrasting light color. Keep direction of brush the same, while applying the colours and the crackle medium. Outcome of crackle medium depends on the application and thickness of the medium. So, if you want big cracks then apply a thick coat. Do not use a heat tool to speed up the drying. Let it dry naturally, on its own. Drying time depends on the room temperature and the weather. 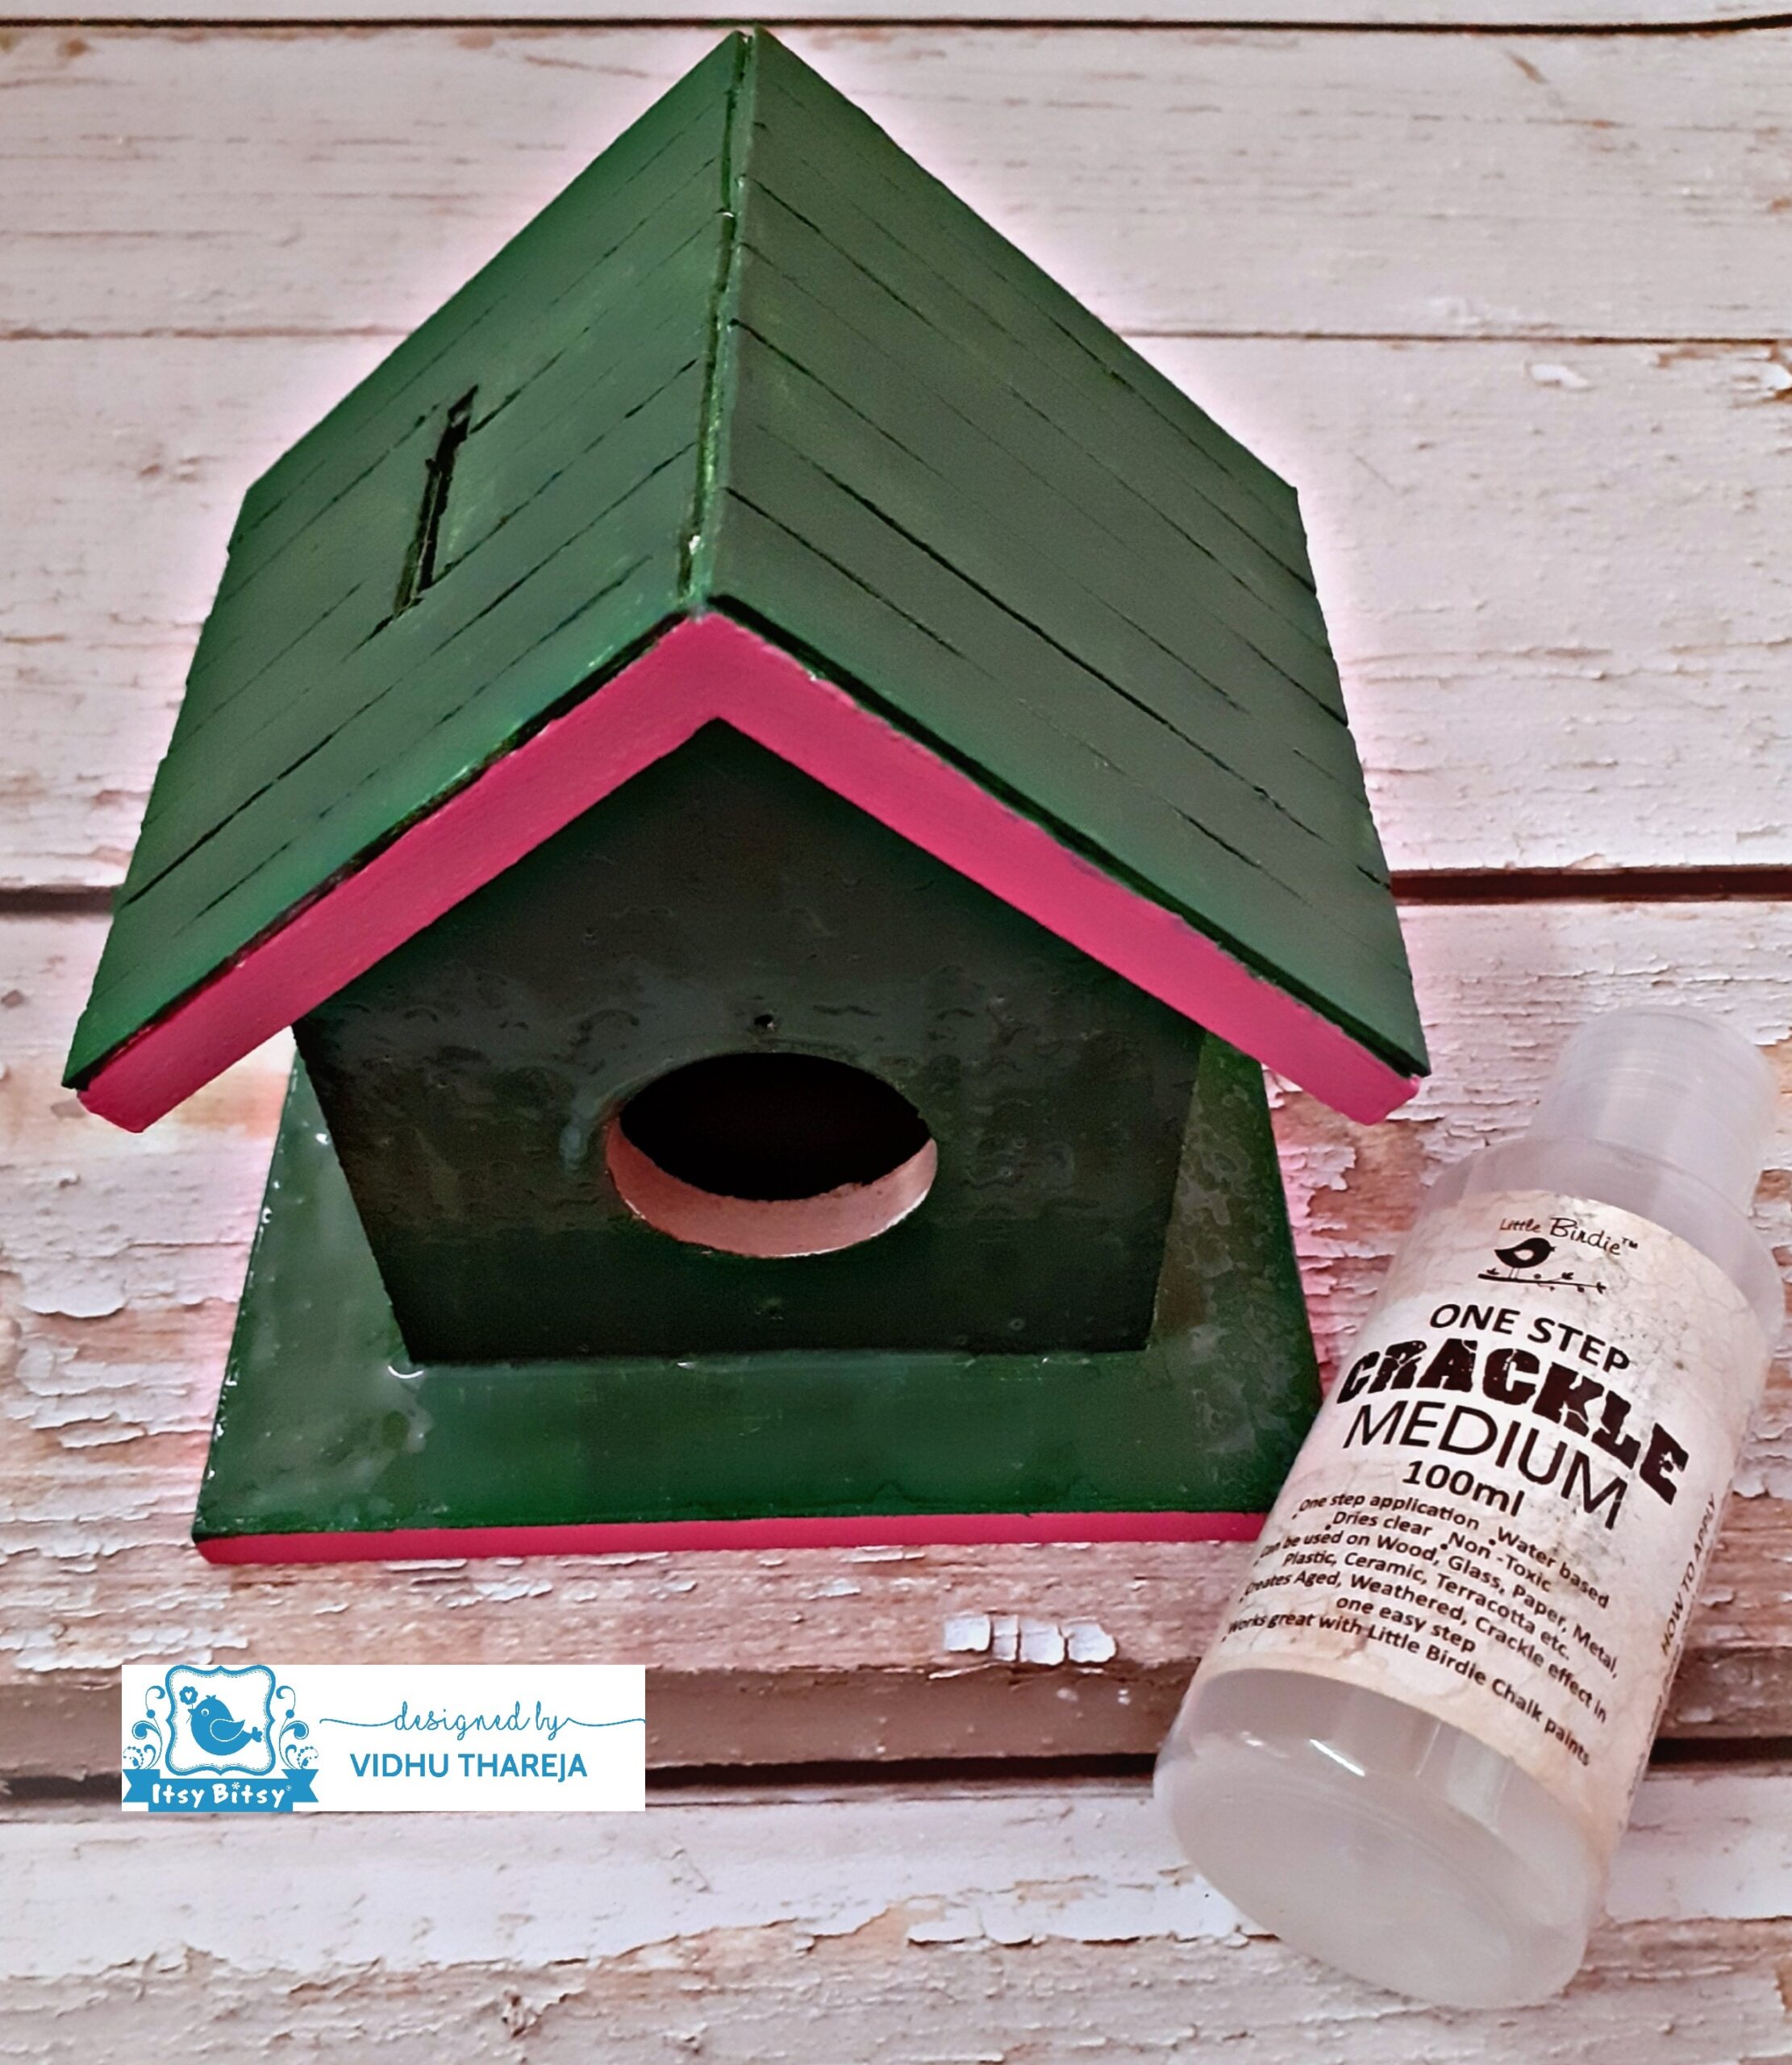
Crackle medium dries clear. When it was dry, I applied Little Birdie Chalk Paint – Wisteria Mist. Do not over-stroked the color because that will suppress the cracks. As soon as the chalk paint starts drying, beautiful cracks start showing up.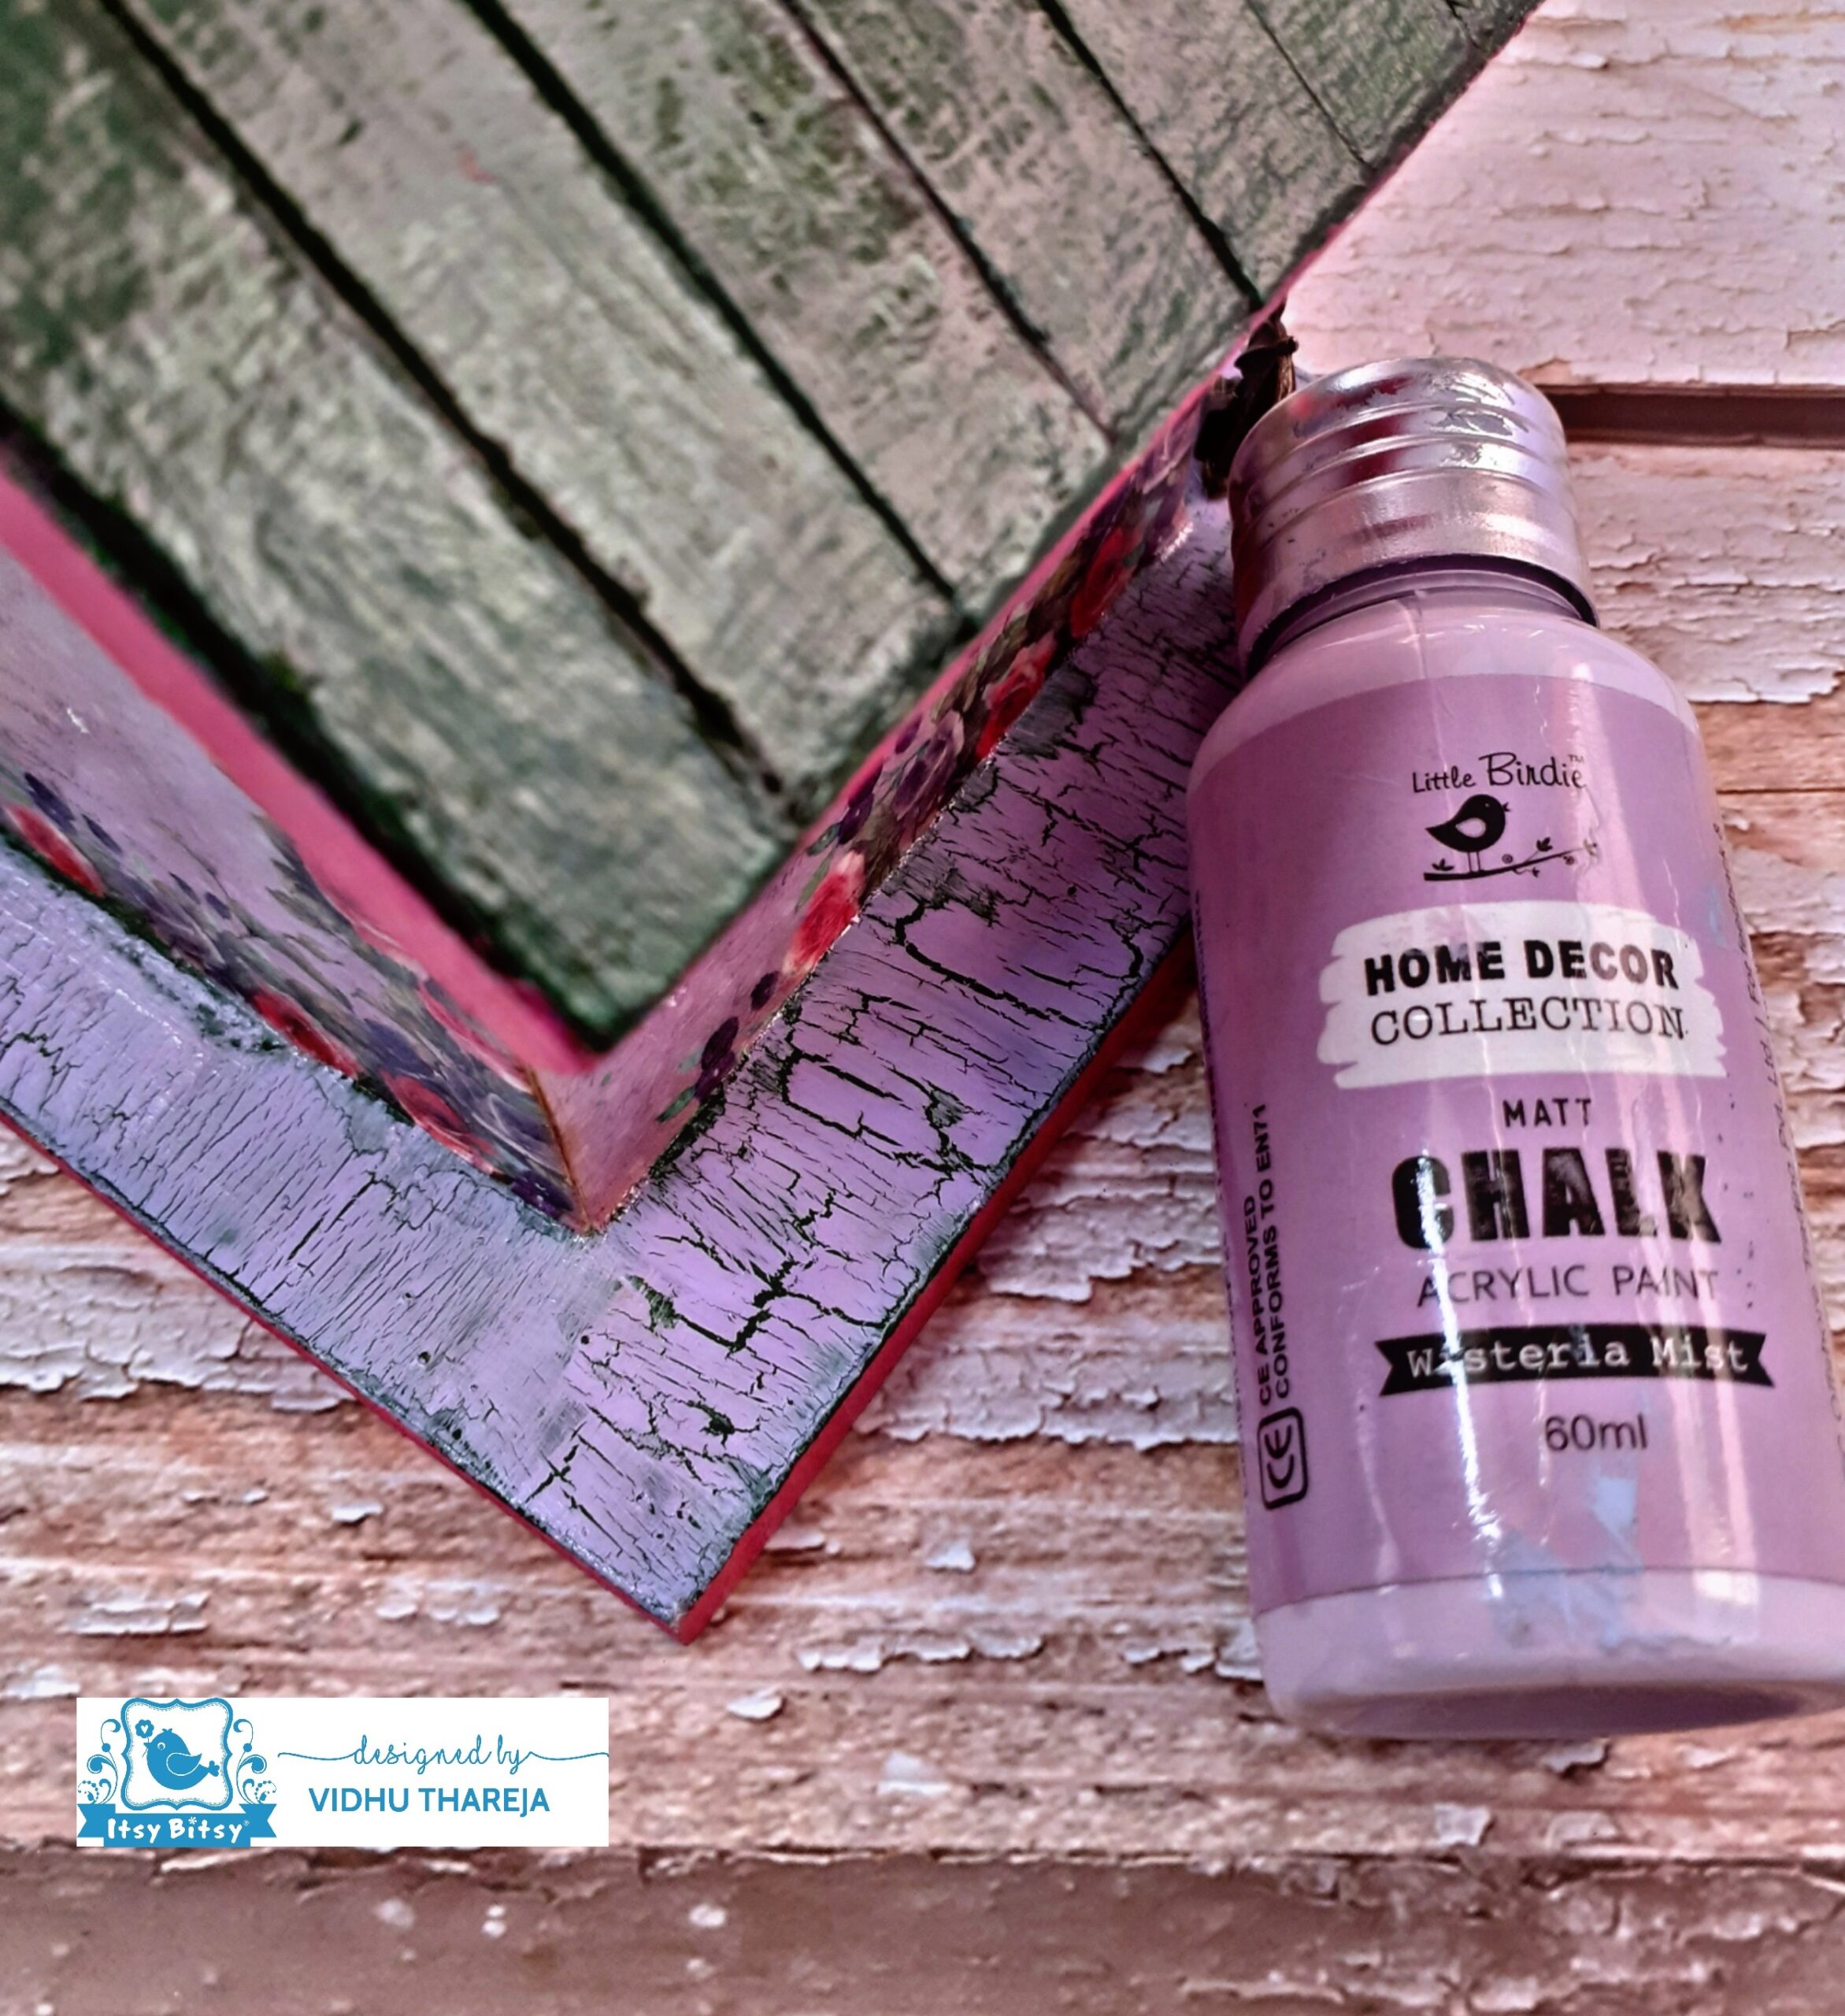 Now, it is time for decoupage. I adhered the paper cutouts on 3 sides and on top of the door using Little Birdie Deco Magic Glue- Matte and left it to dry. After a few hours, I sealed the adhered papers using the same decoupage glue. I left it to dry. I wanted to highlight the gaps between the chipboard pieces, pasted on top of the roof. For that I have applied diluted dark brown acrylic color with a zero number brush between two chipboard pieces and immediately wiped it with a tissue paper.
  I sealed my project with 3 coats of Little Birdie Decor Varnish – Matte, leaving enough drying time between each coat.
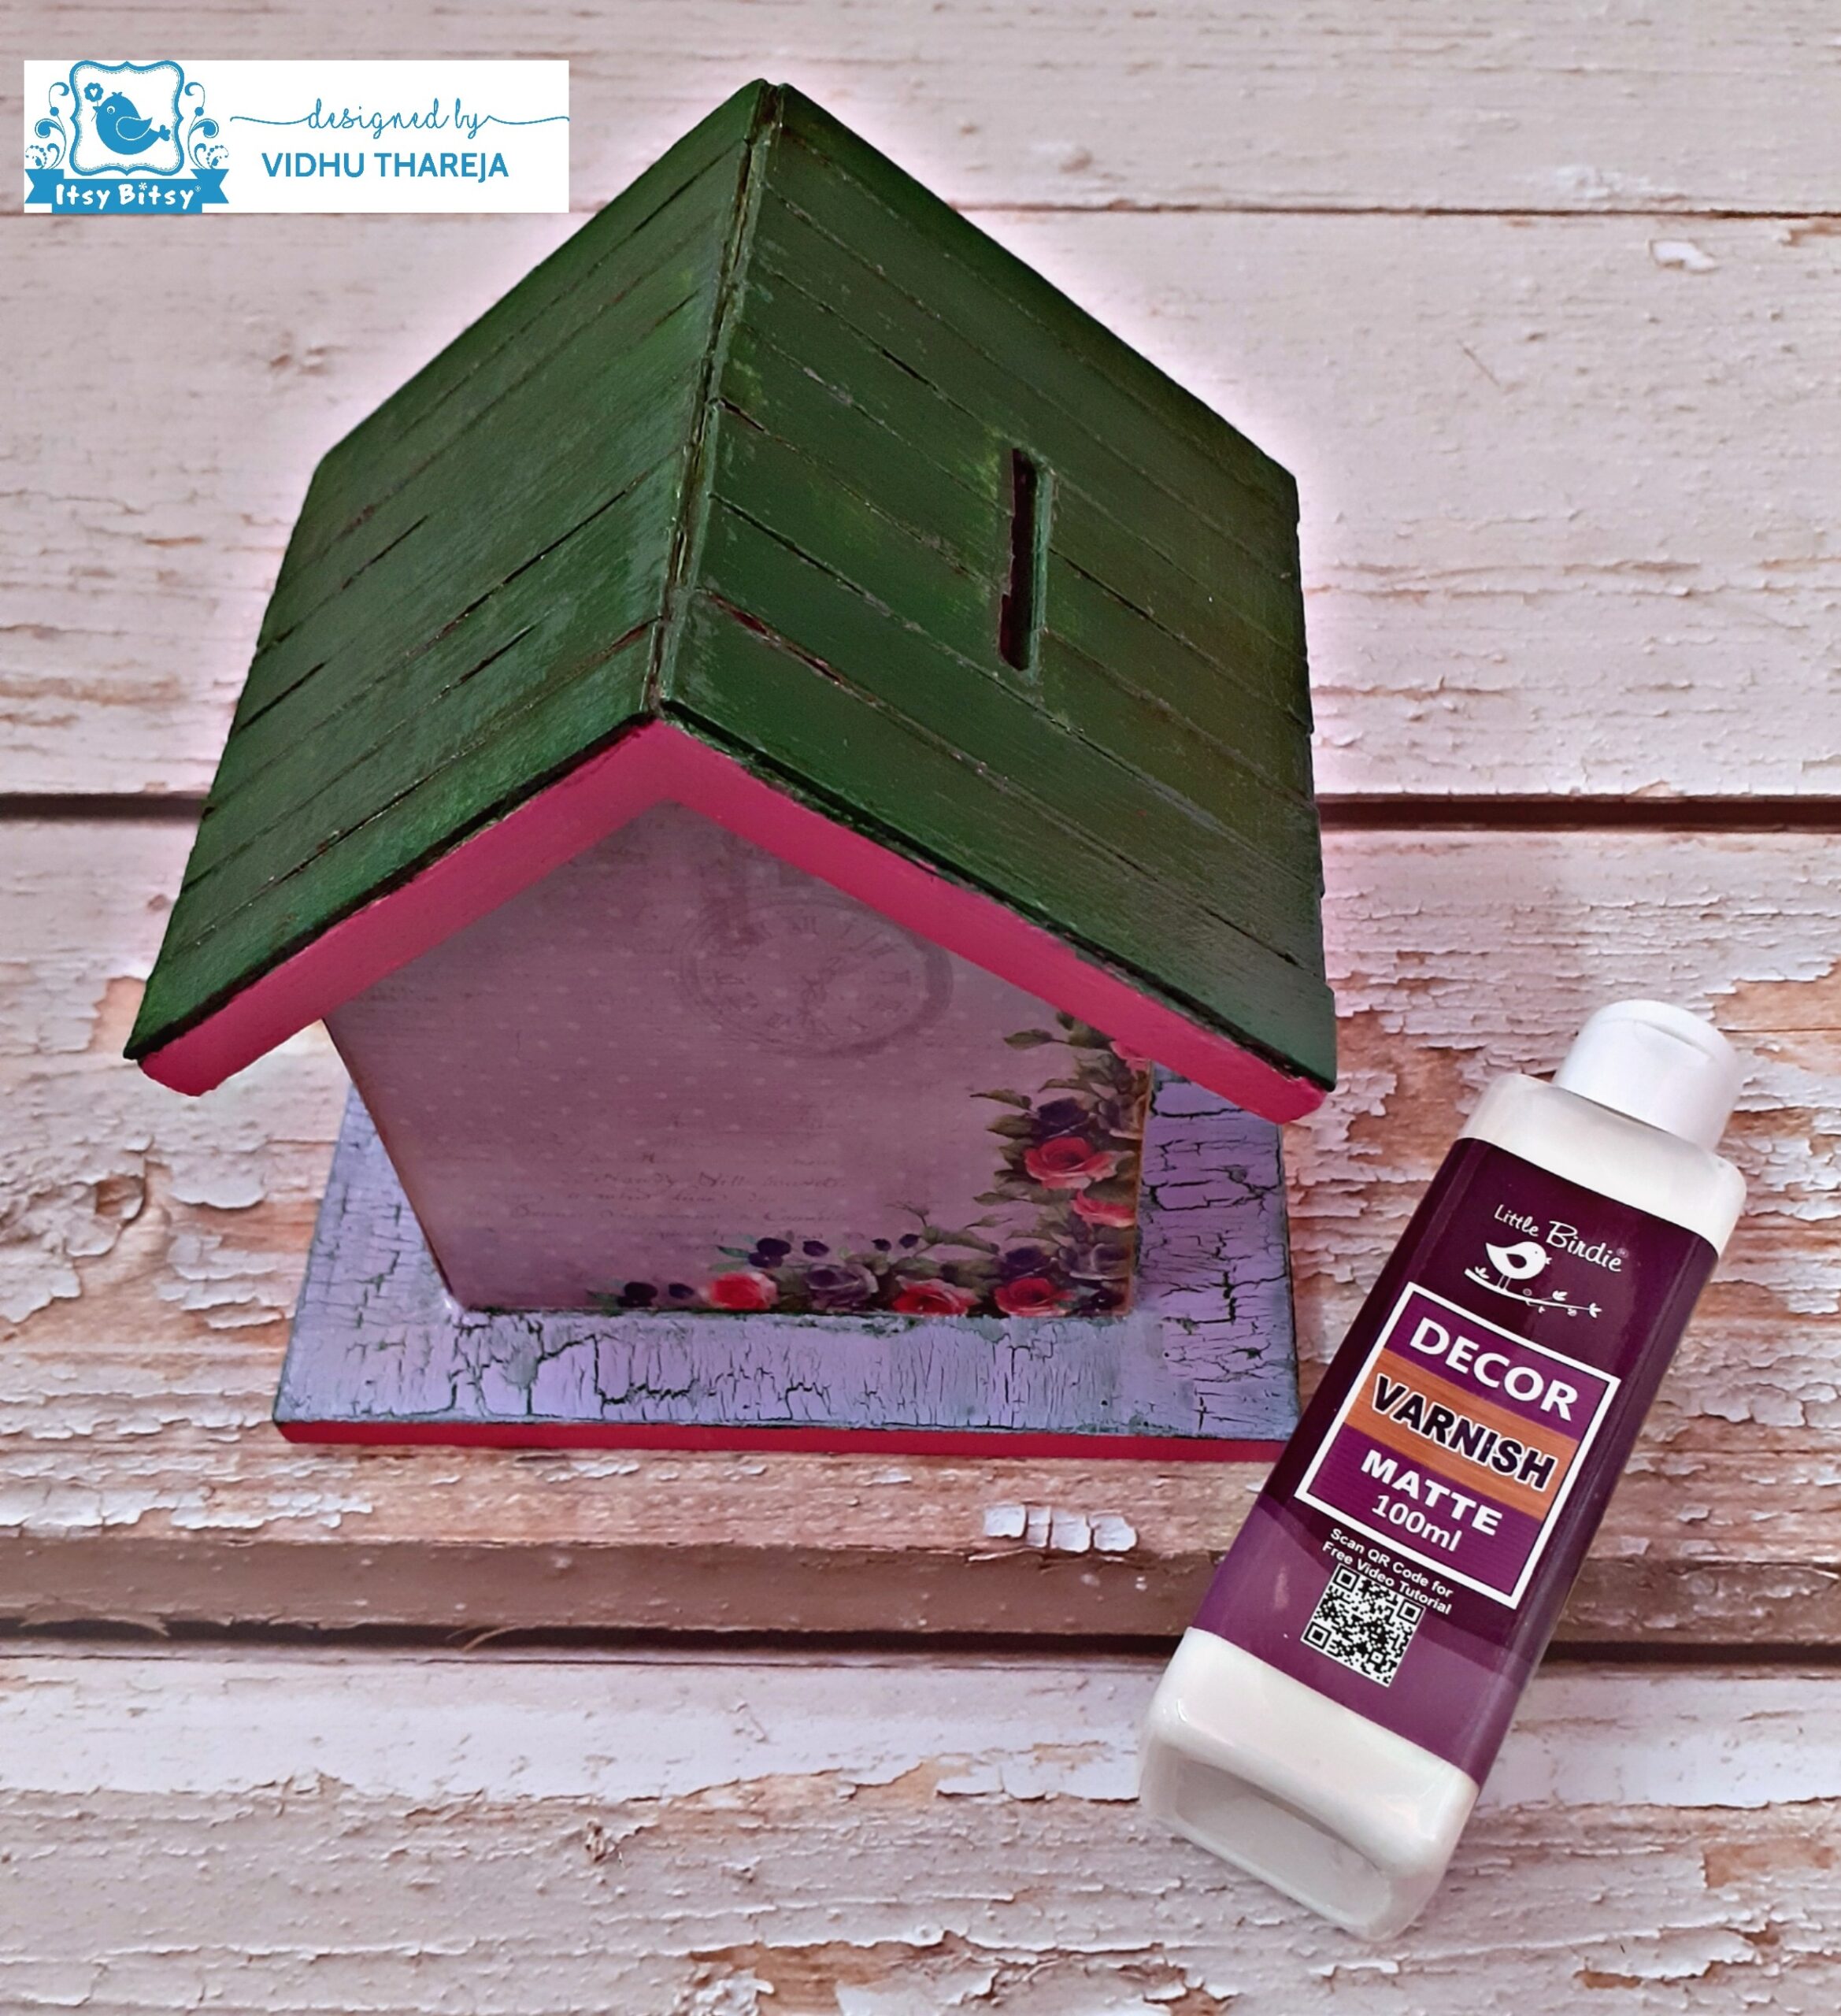

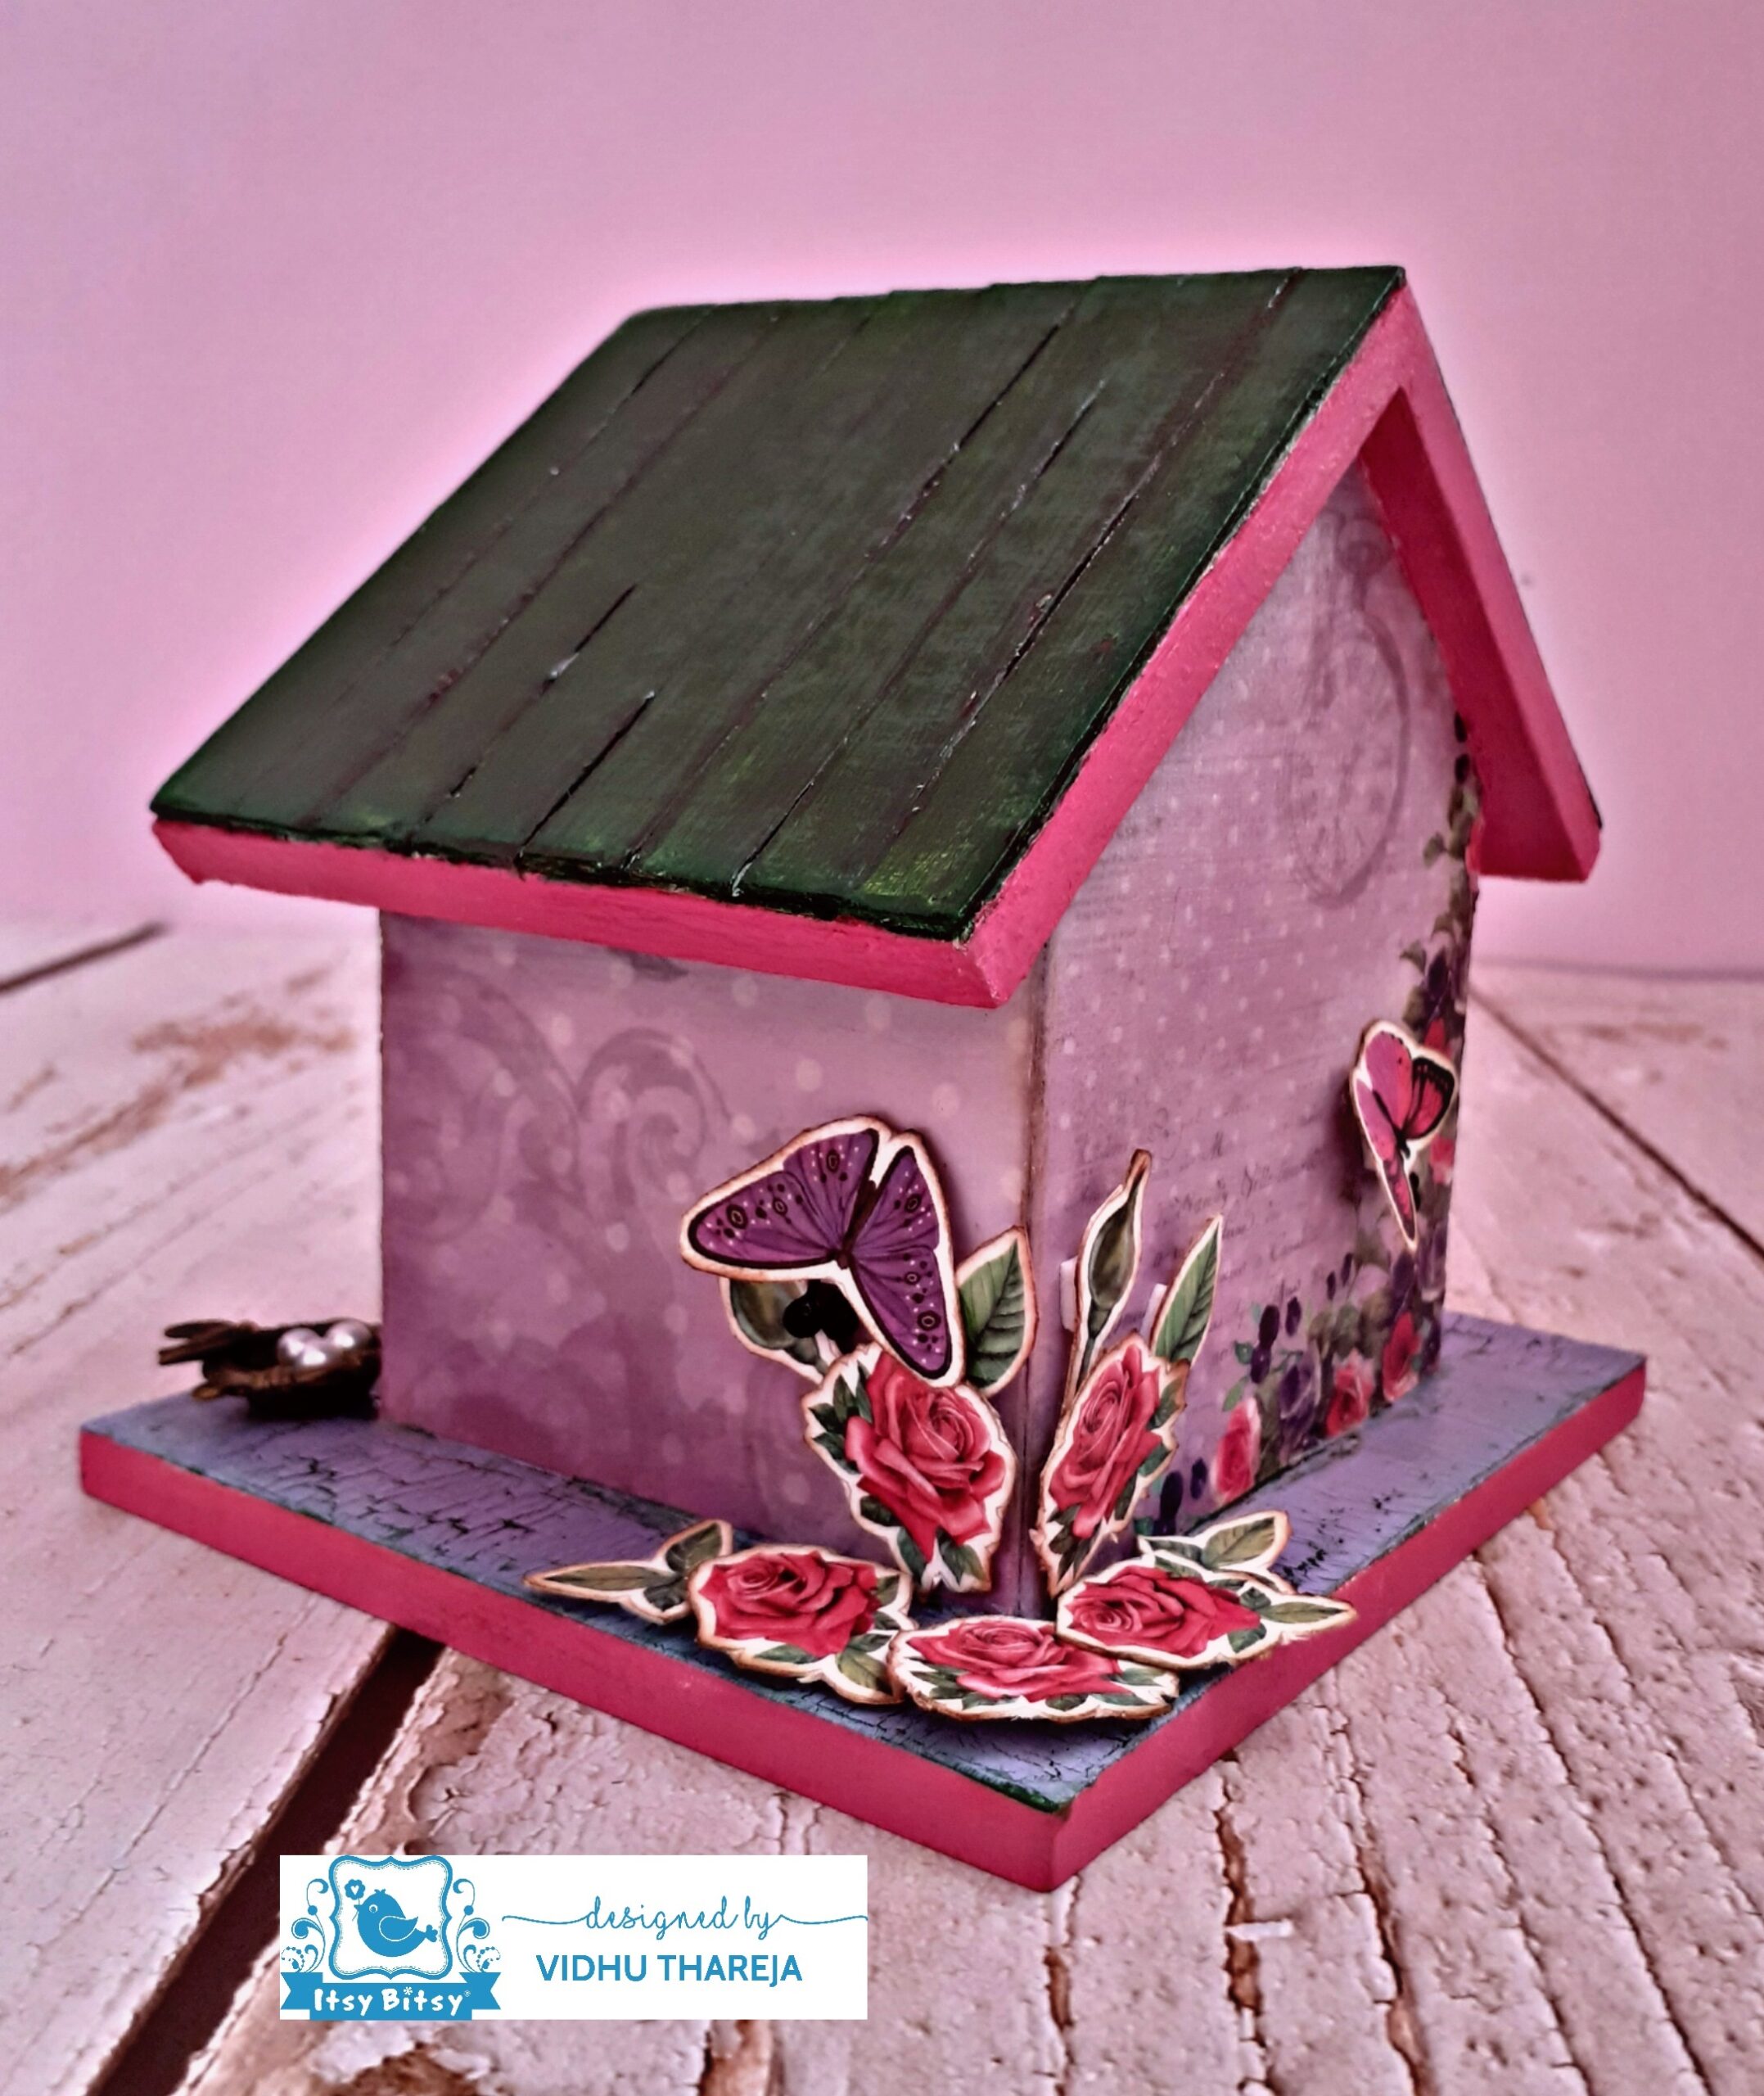
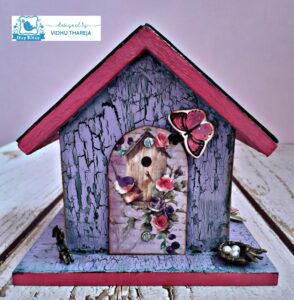
A fun and cute piggy bank is ready which makes a beautiful gift for the little ones. Every kid would love to have this as a gift. Sharing some more images of my project….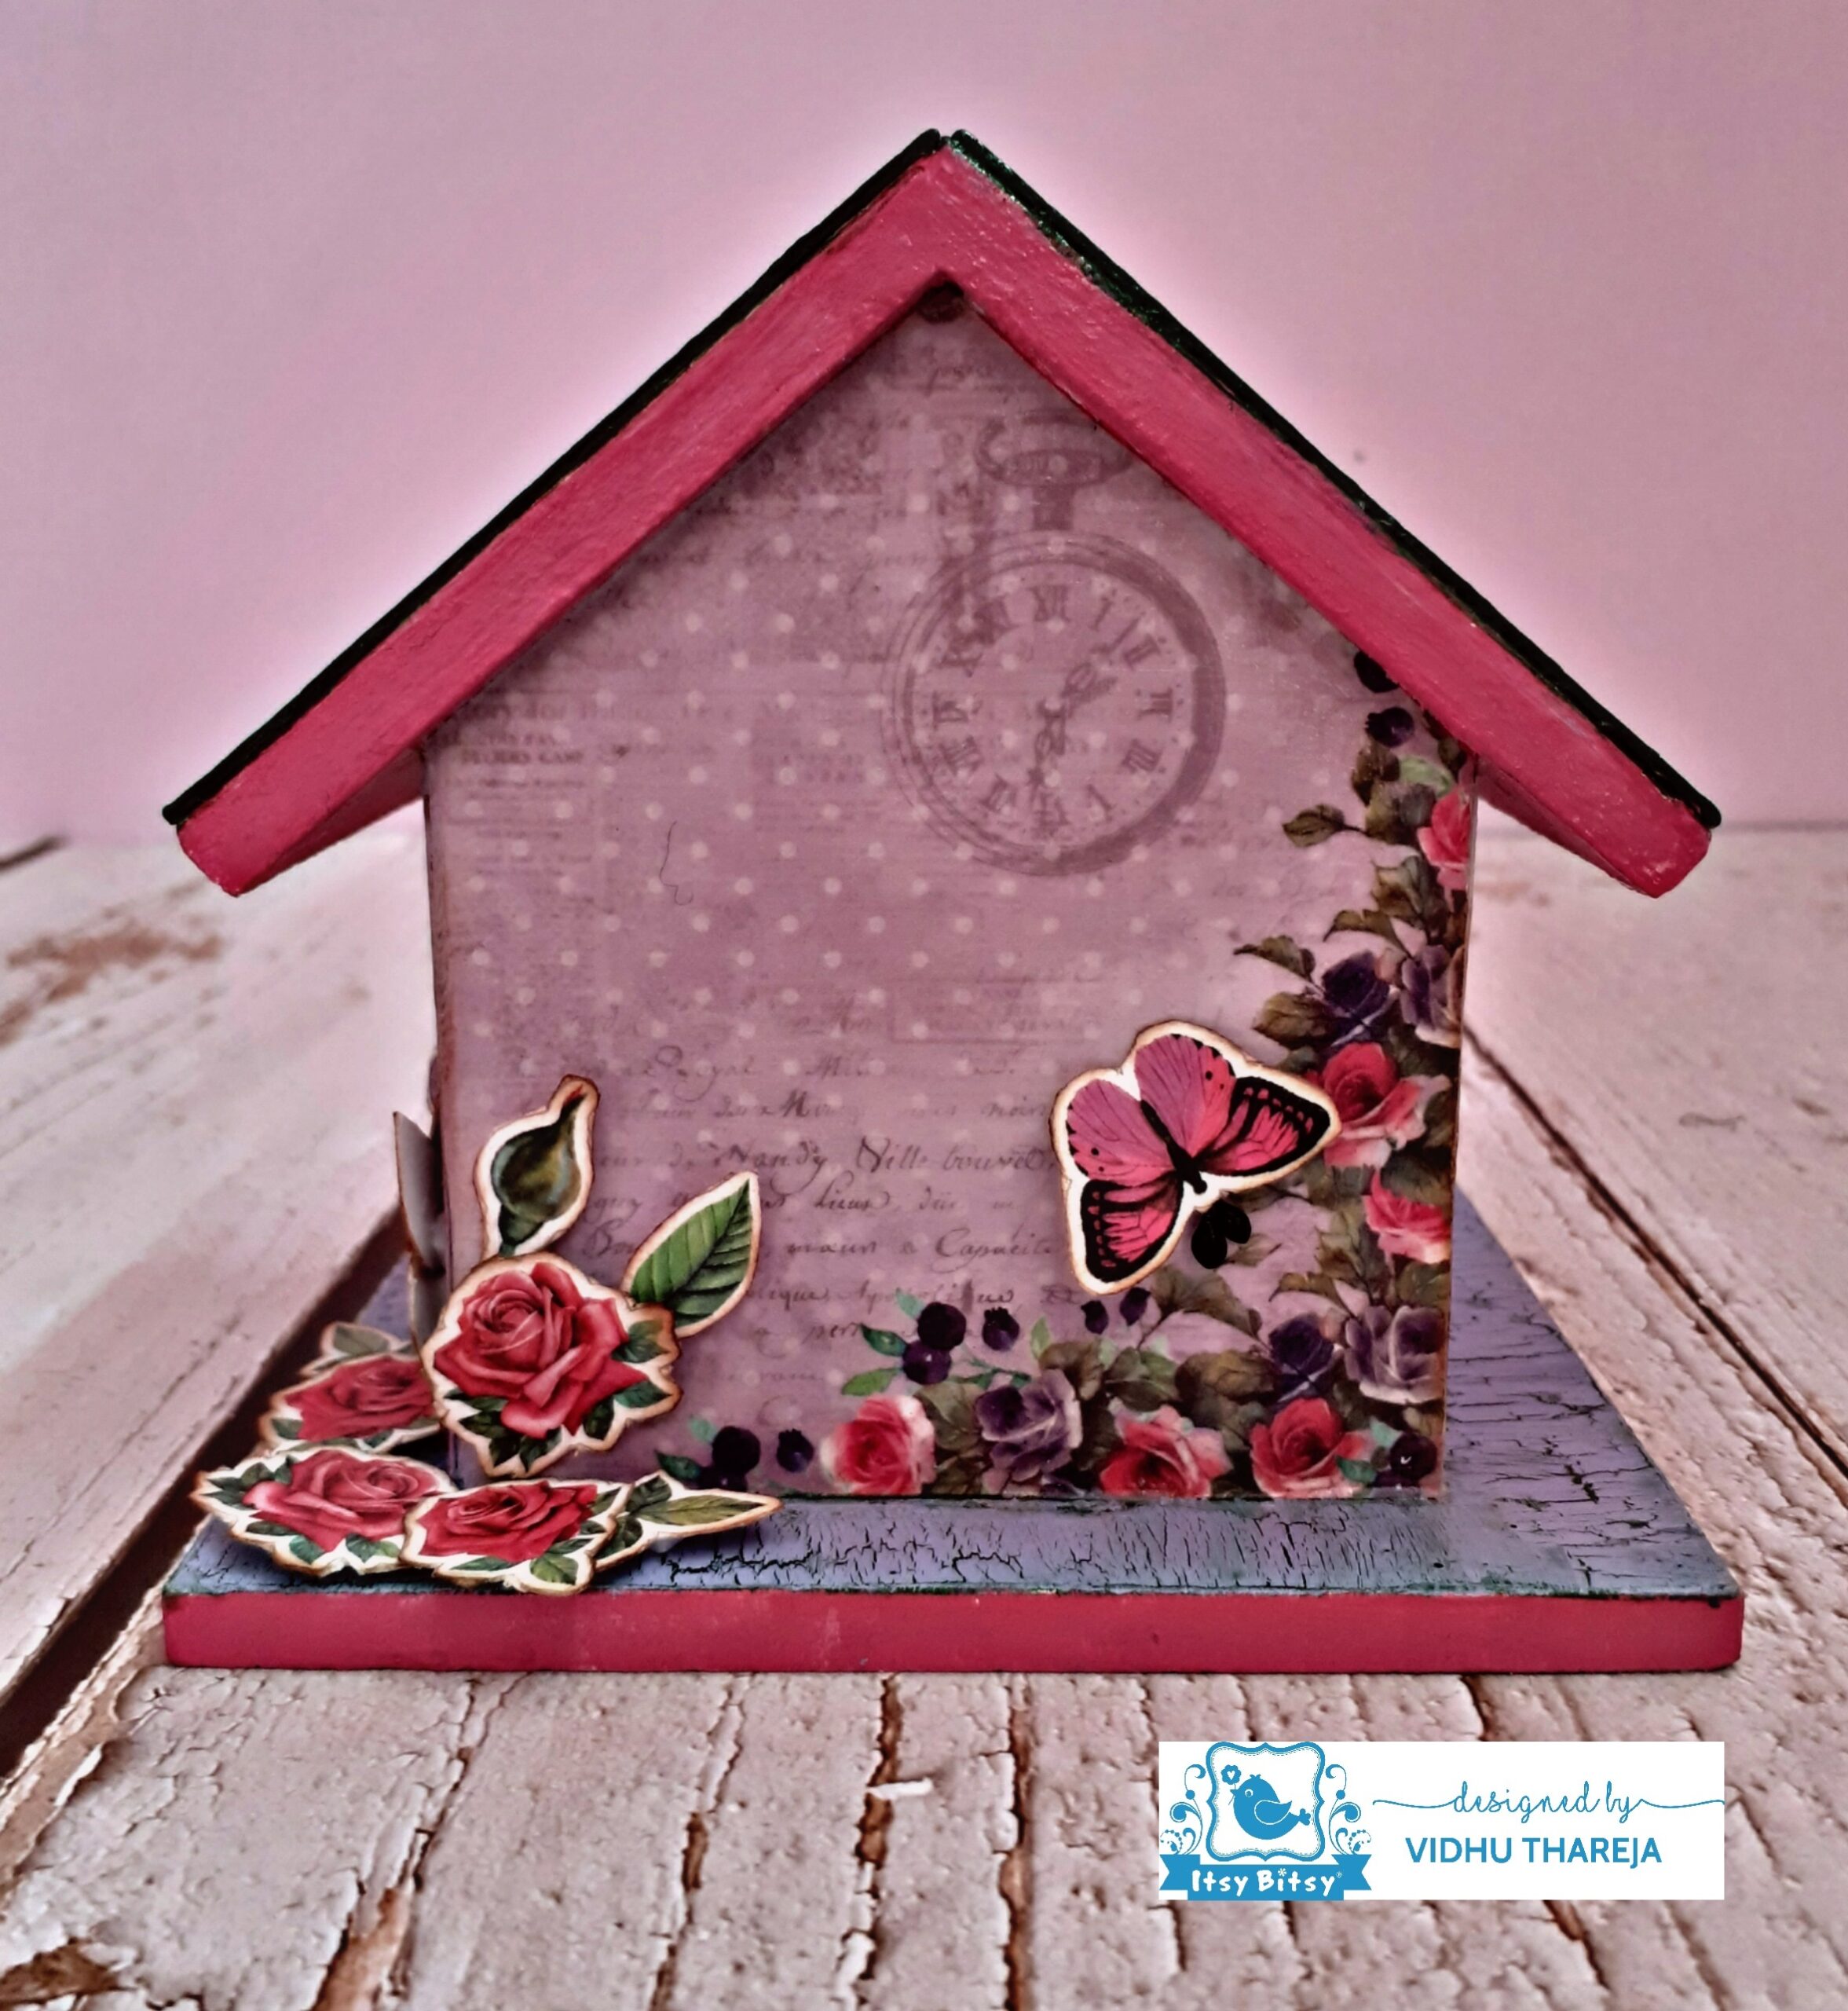

I am excited to inform you that all these products come with a unique QR code!
Point your mobile phone at the QR code on the product & scan them to take you directly to our YouTube links where you can see how each of these products are used! Check out all our new products for QR codes in the future ( this will be either on the label or on cap of the bottle).
Use code VIDHU5 to buy any product at www.itsybitsy.in and get 5% discount on your total bill.
Happy Crafting
Vidhu Thareja
List of material used:


