Hi everyone, Serene from Sereneshandmade here today with some cute little Christmas diys for the kids to make and have fun during Christmas time. Some of them might require a bit of parental help at time. Rest are absolutely easy. Now enjoy some family fun to with this cute diys.
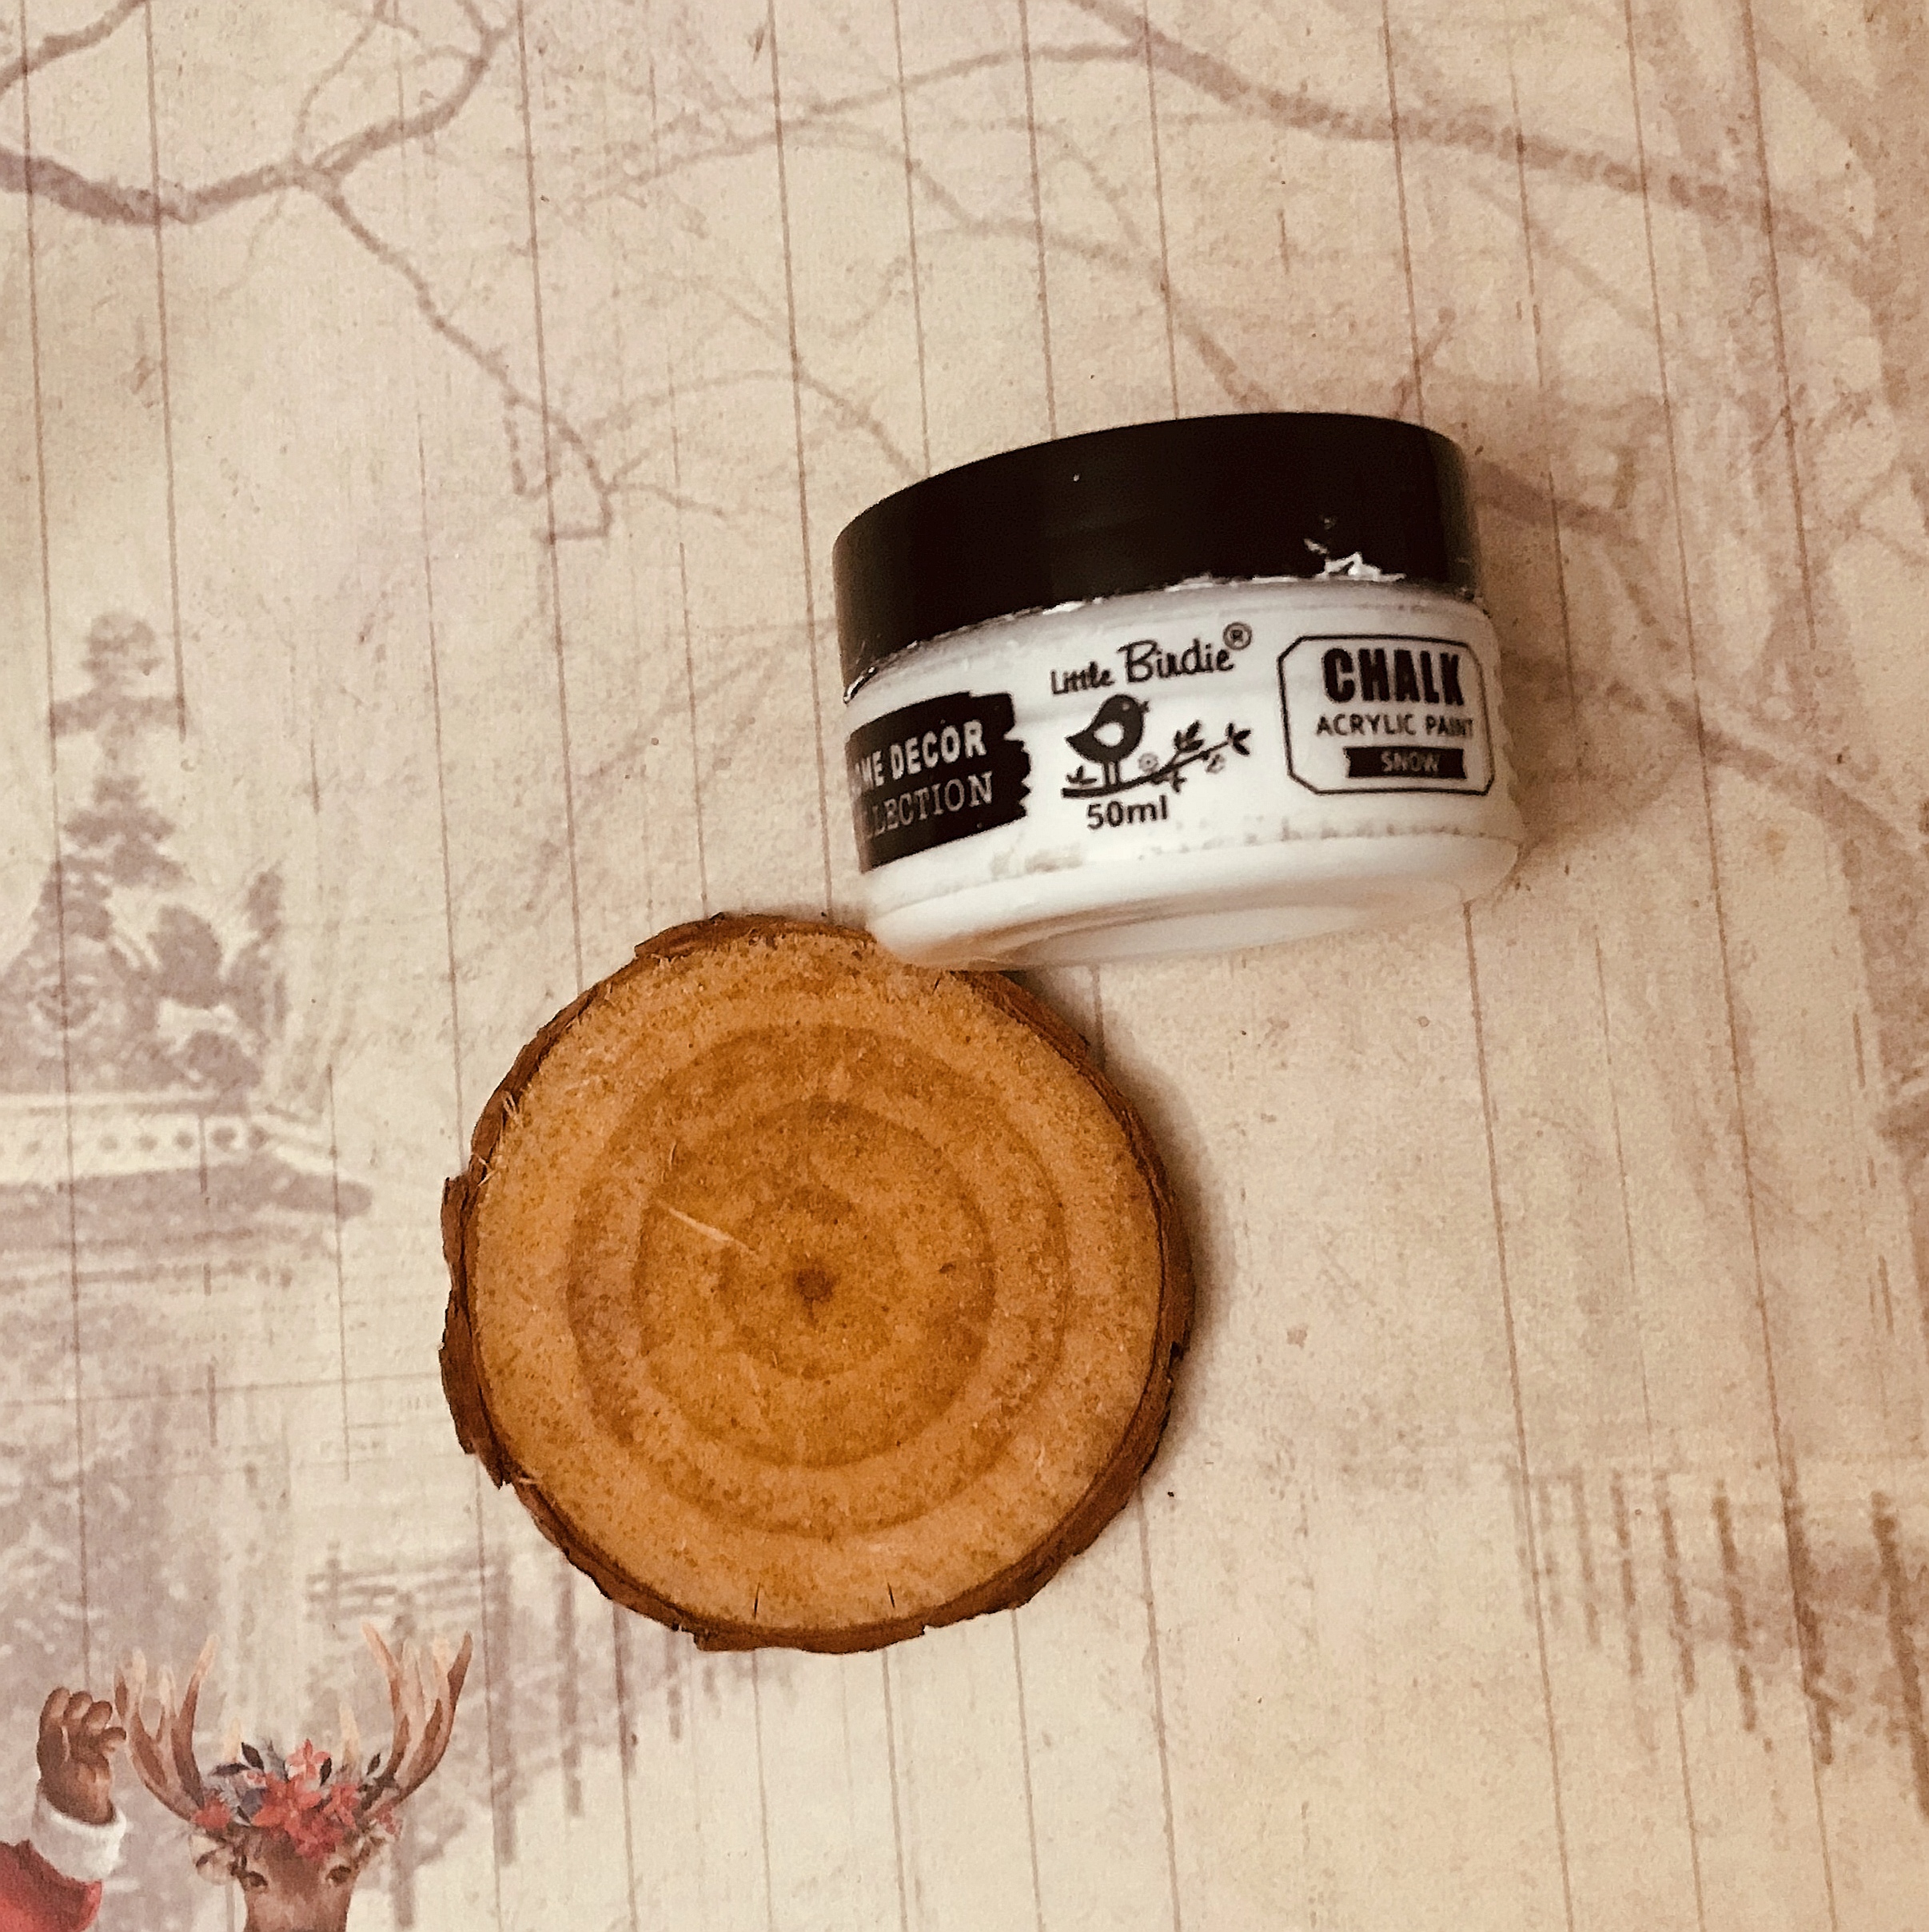
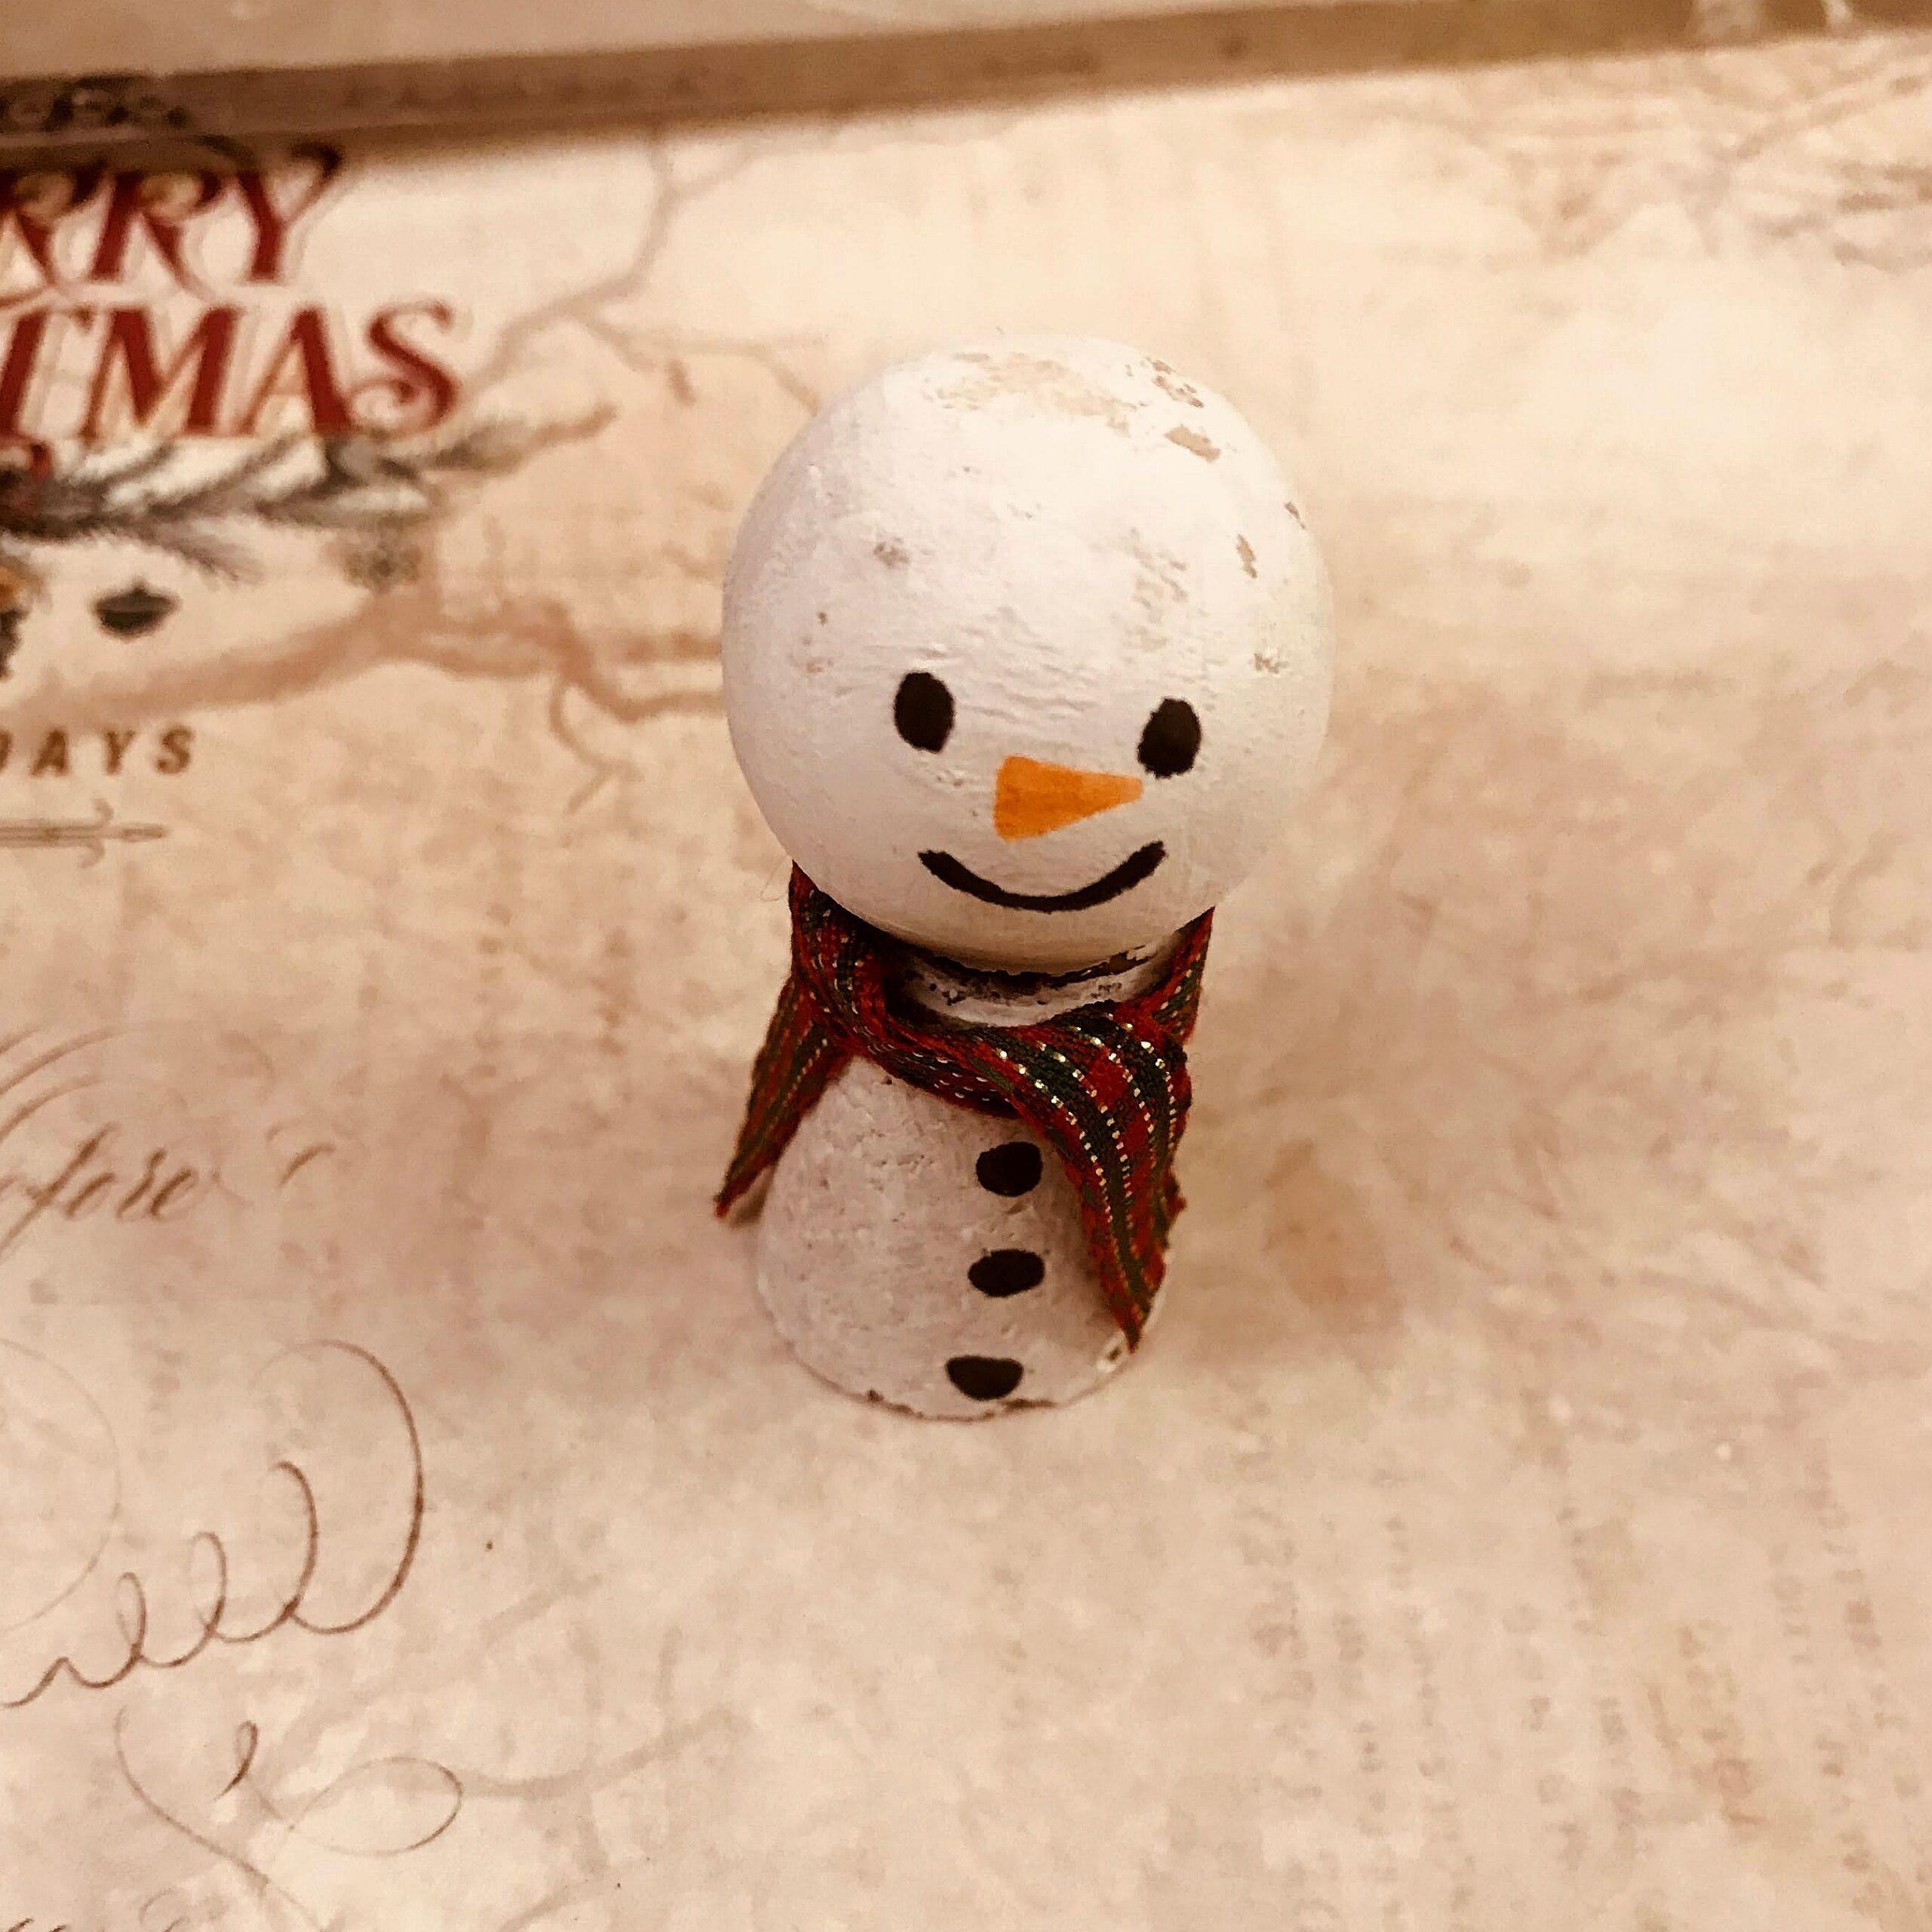
1.Melting snowman table decor
This melting snowman is a really cute project.
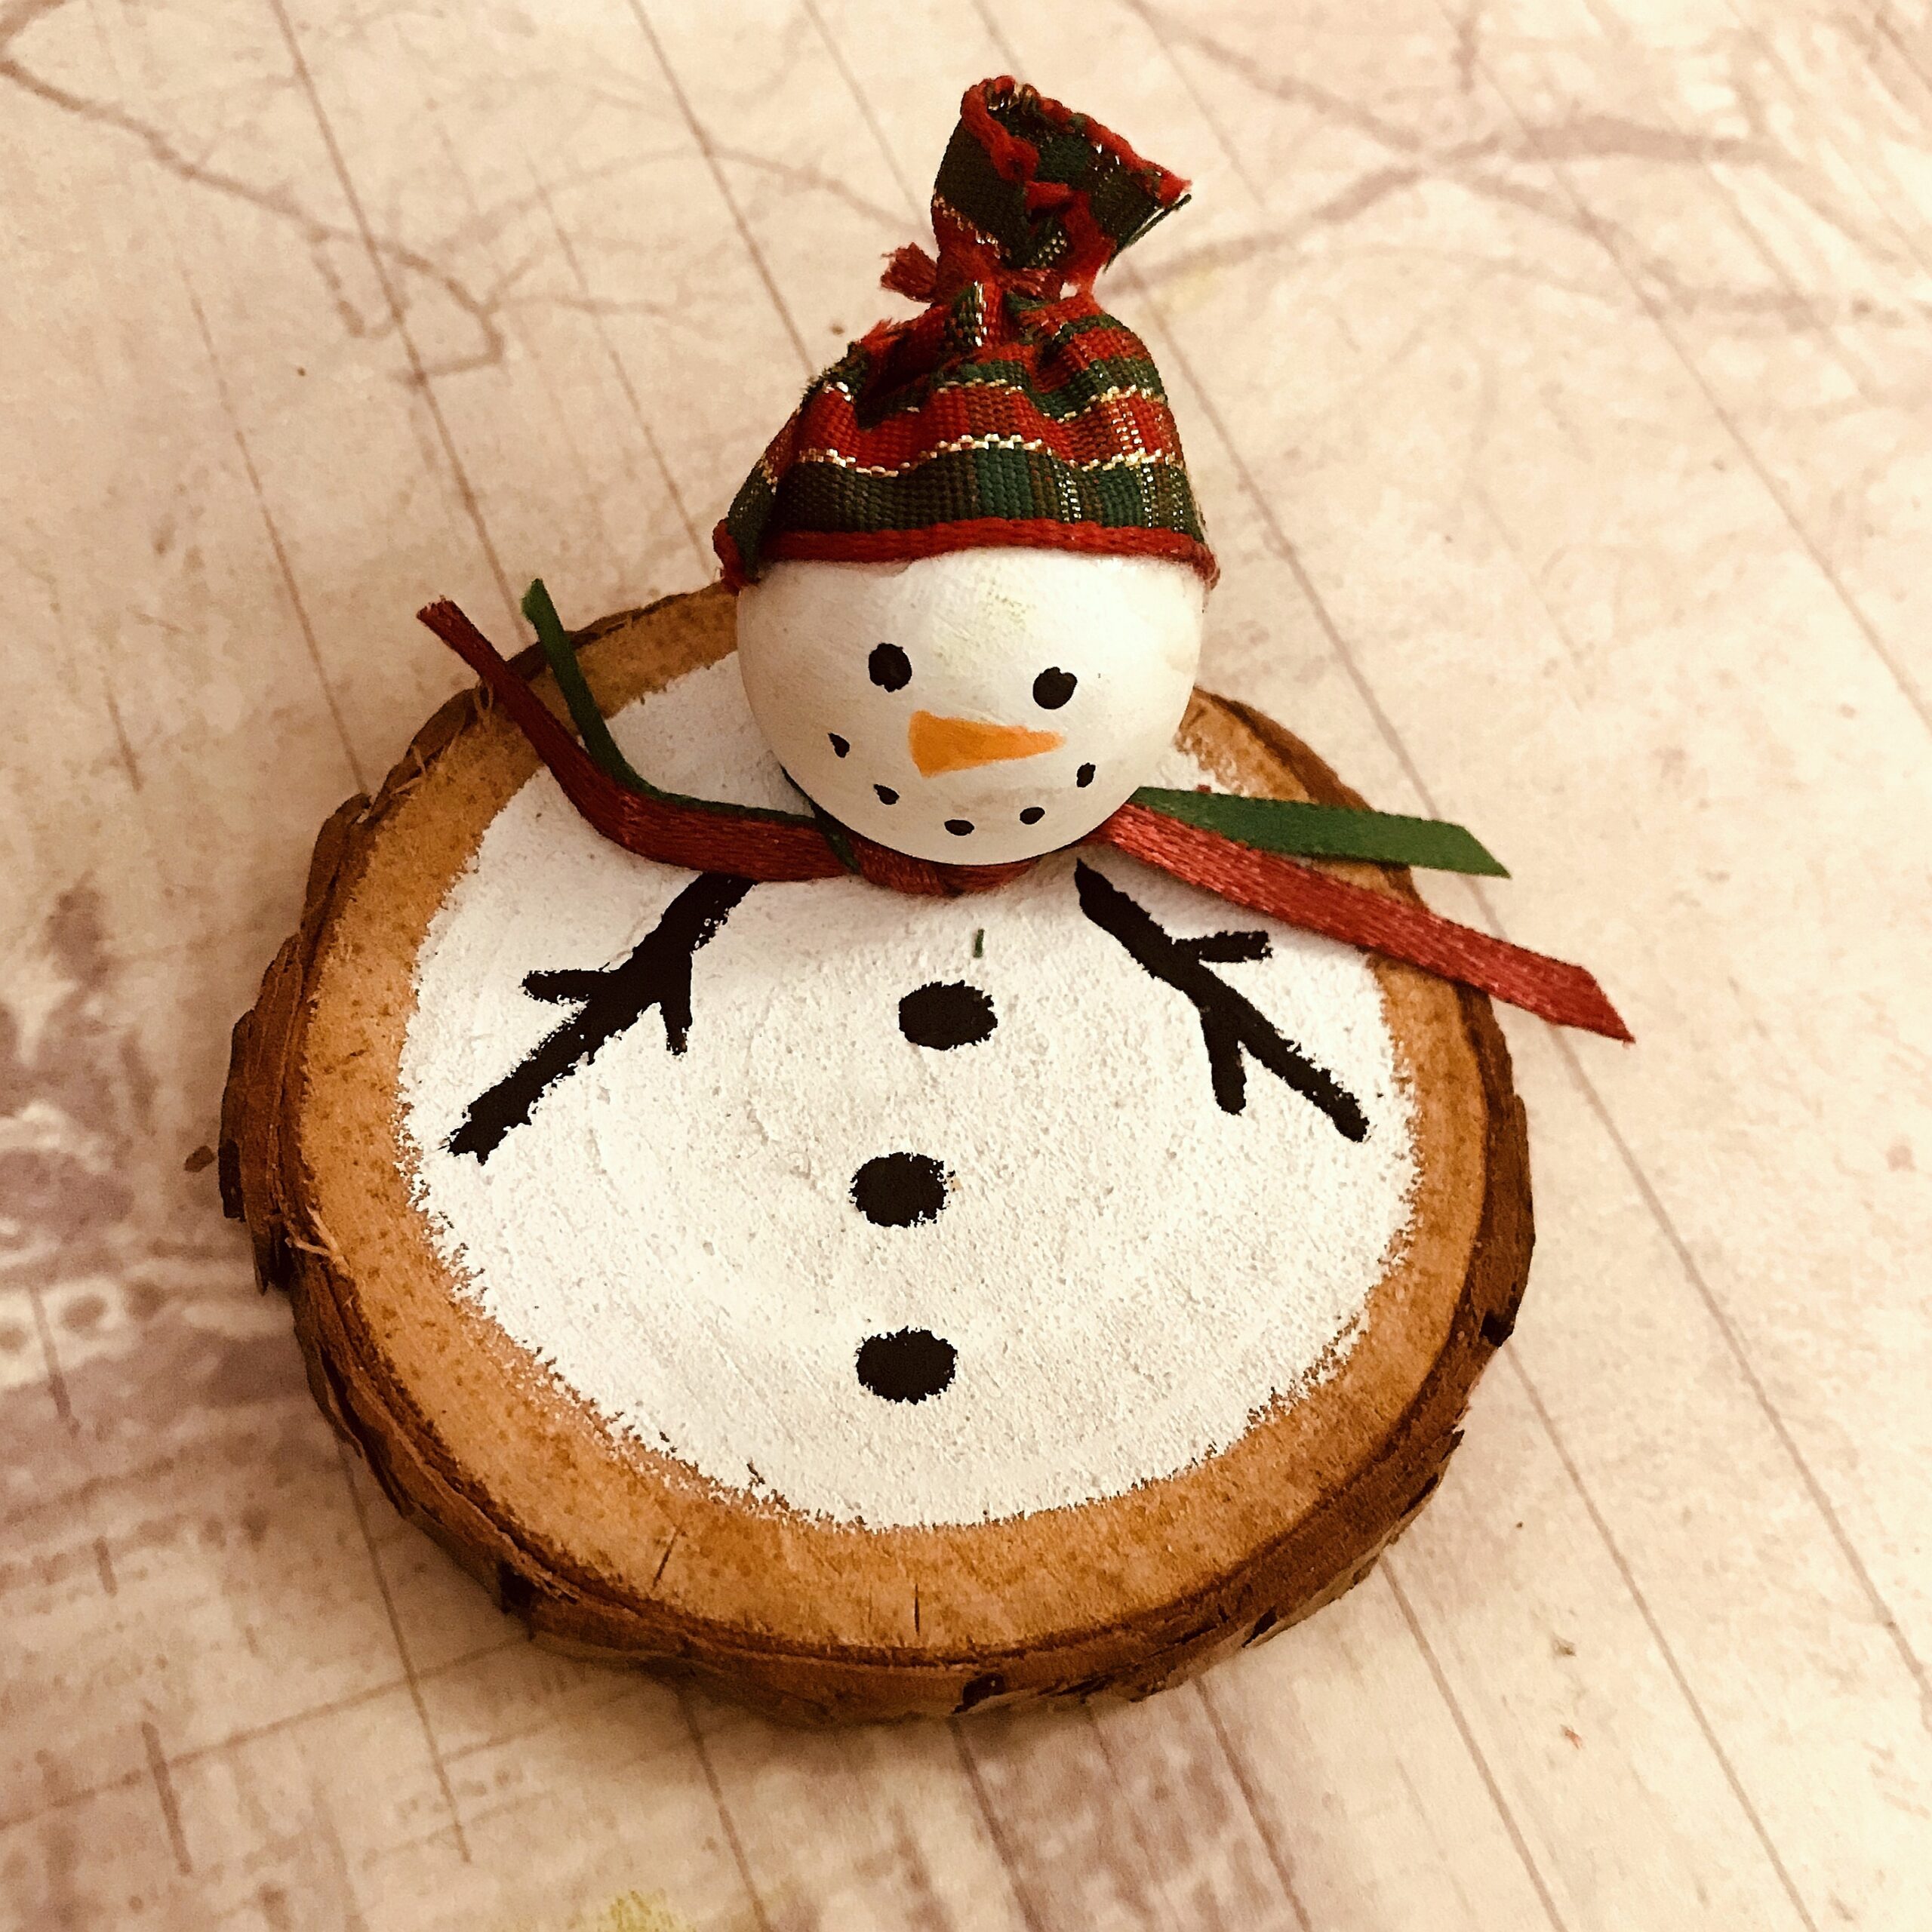
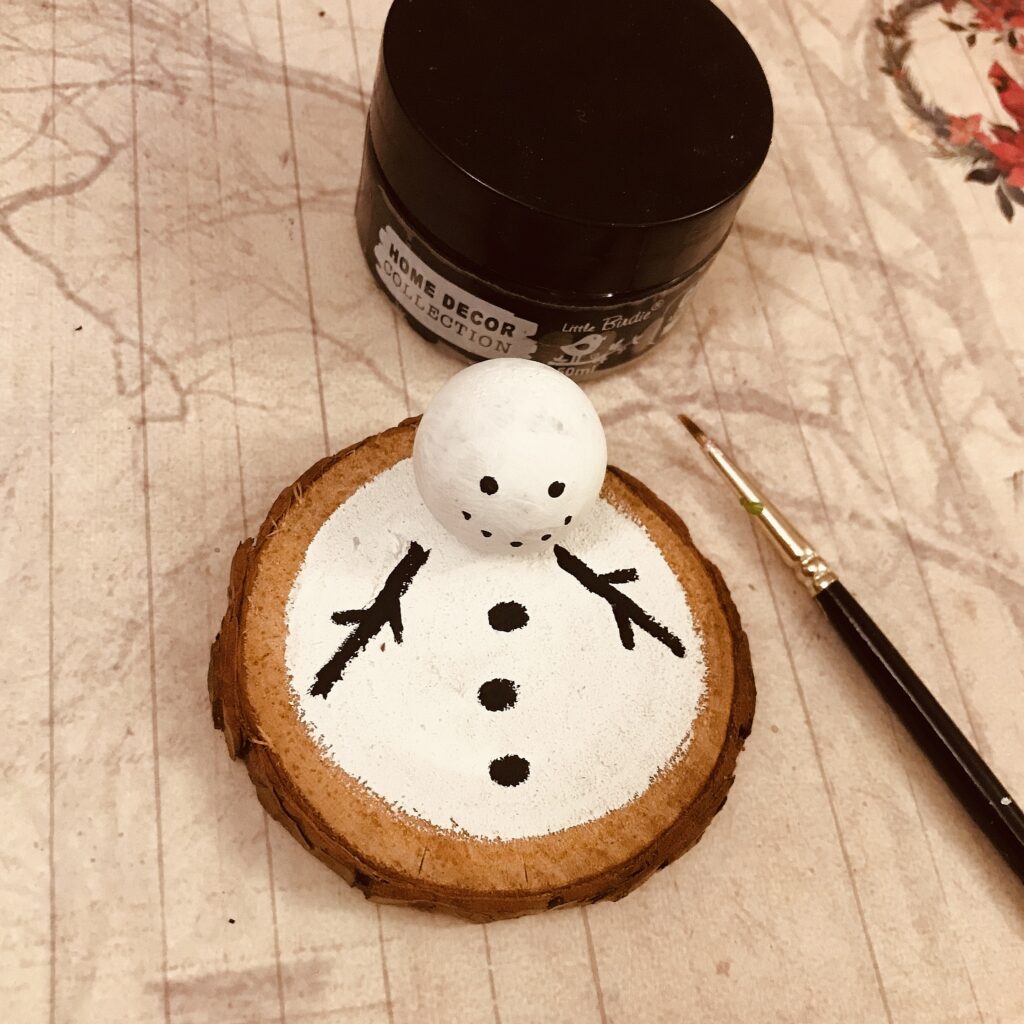
1.Paint the centre of the wood slice with chalk paint snow and let it dry.
2.Stick the wooden ball at the edge of the wood slice using wood glue and wait for 2 hours for it to dry.

3.Paint the wooden ball in chalk paint snow. Paint eyes mouth, on the ball and buttons and twig arms on the wood slice.
4.Tie two thin satin ribbon around the neck and cut to desired length. You can apply decor varnish and use the snowman as such.
Or take a 7 cm length of tartan ribbon, stick to the top of wooden ball using silicon glue, tie the top with a thin satin ribbon and cut the excess. Your cute melted snowman is ready.
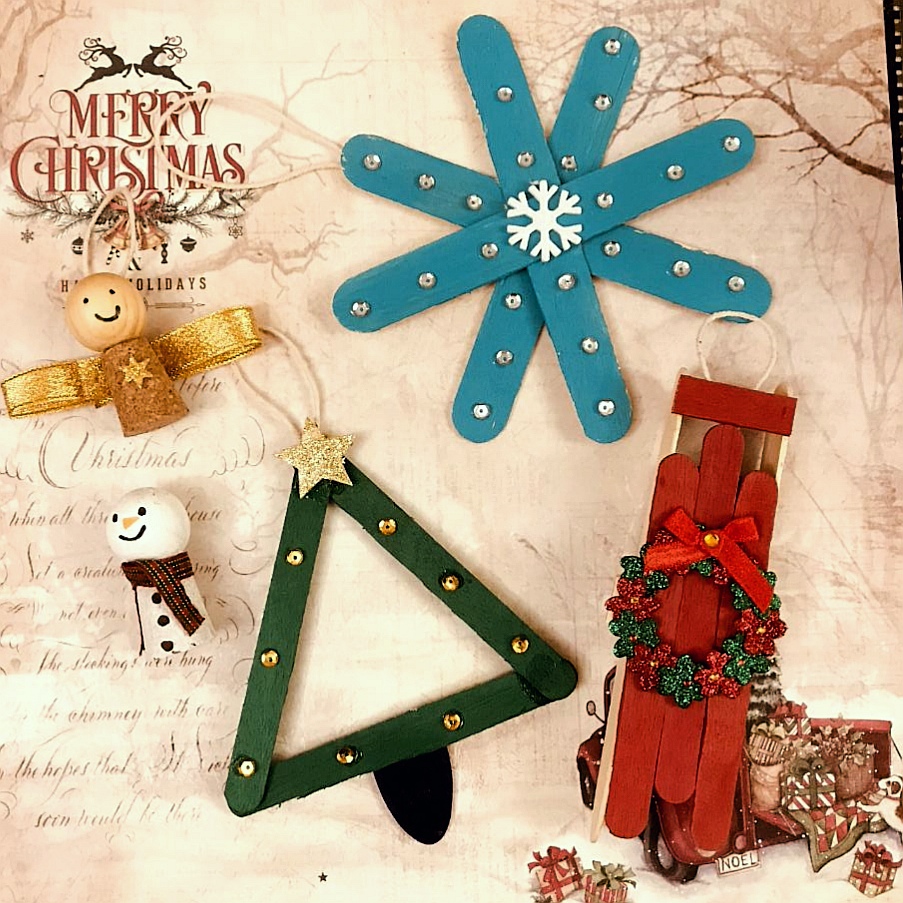
2.Popsicle stick Christmas tree.
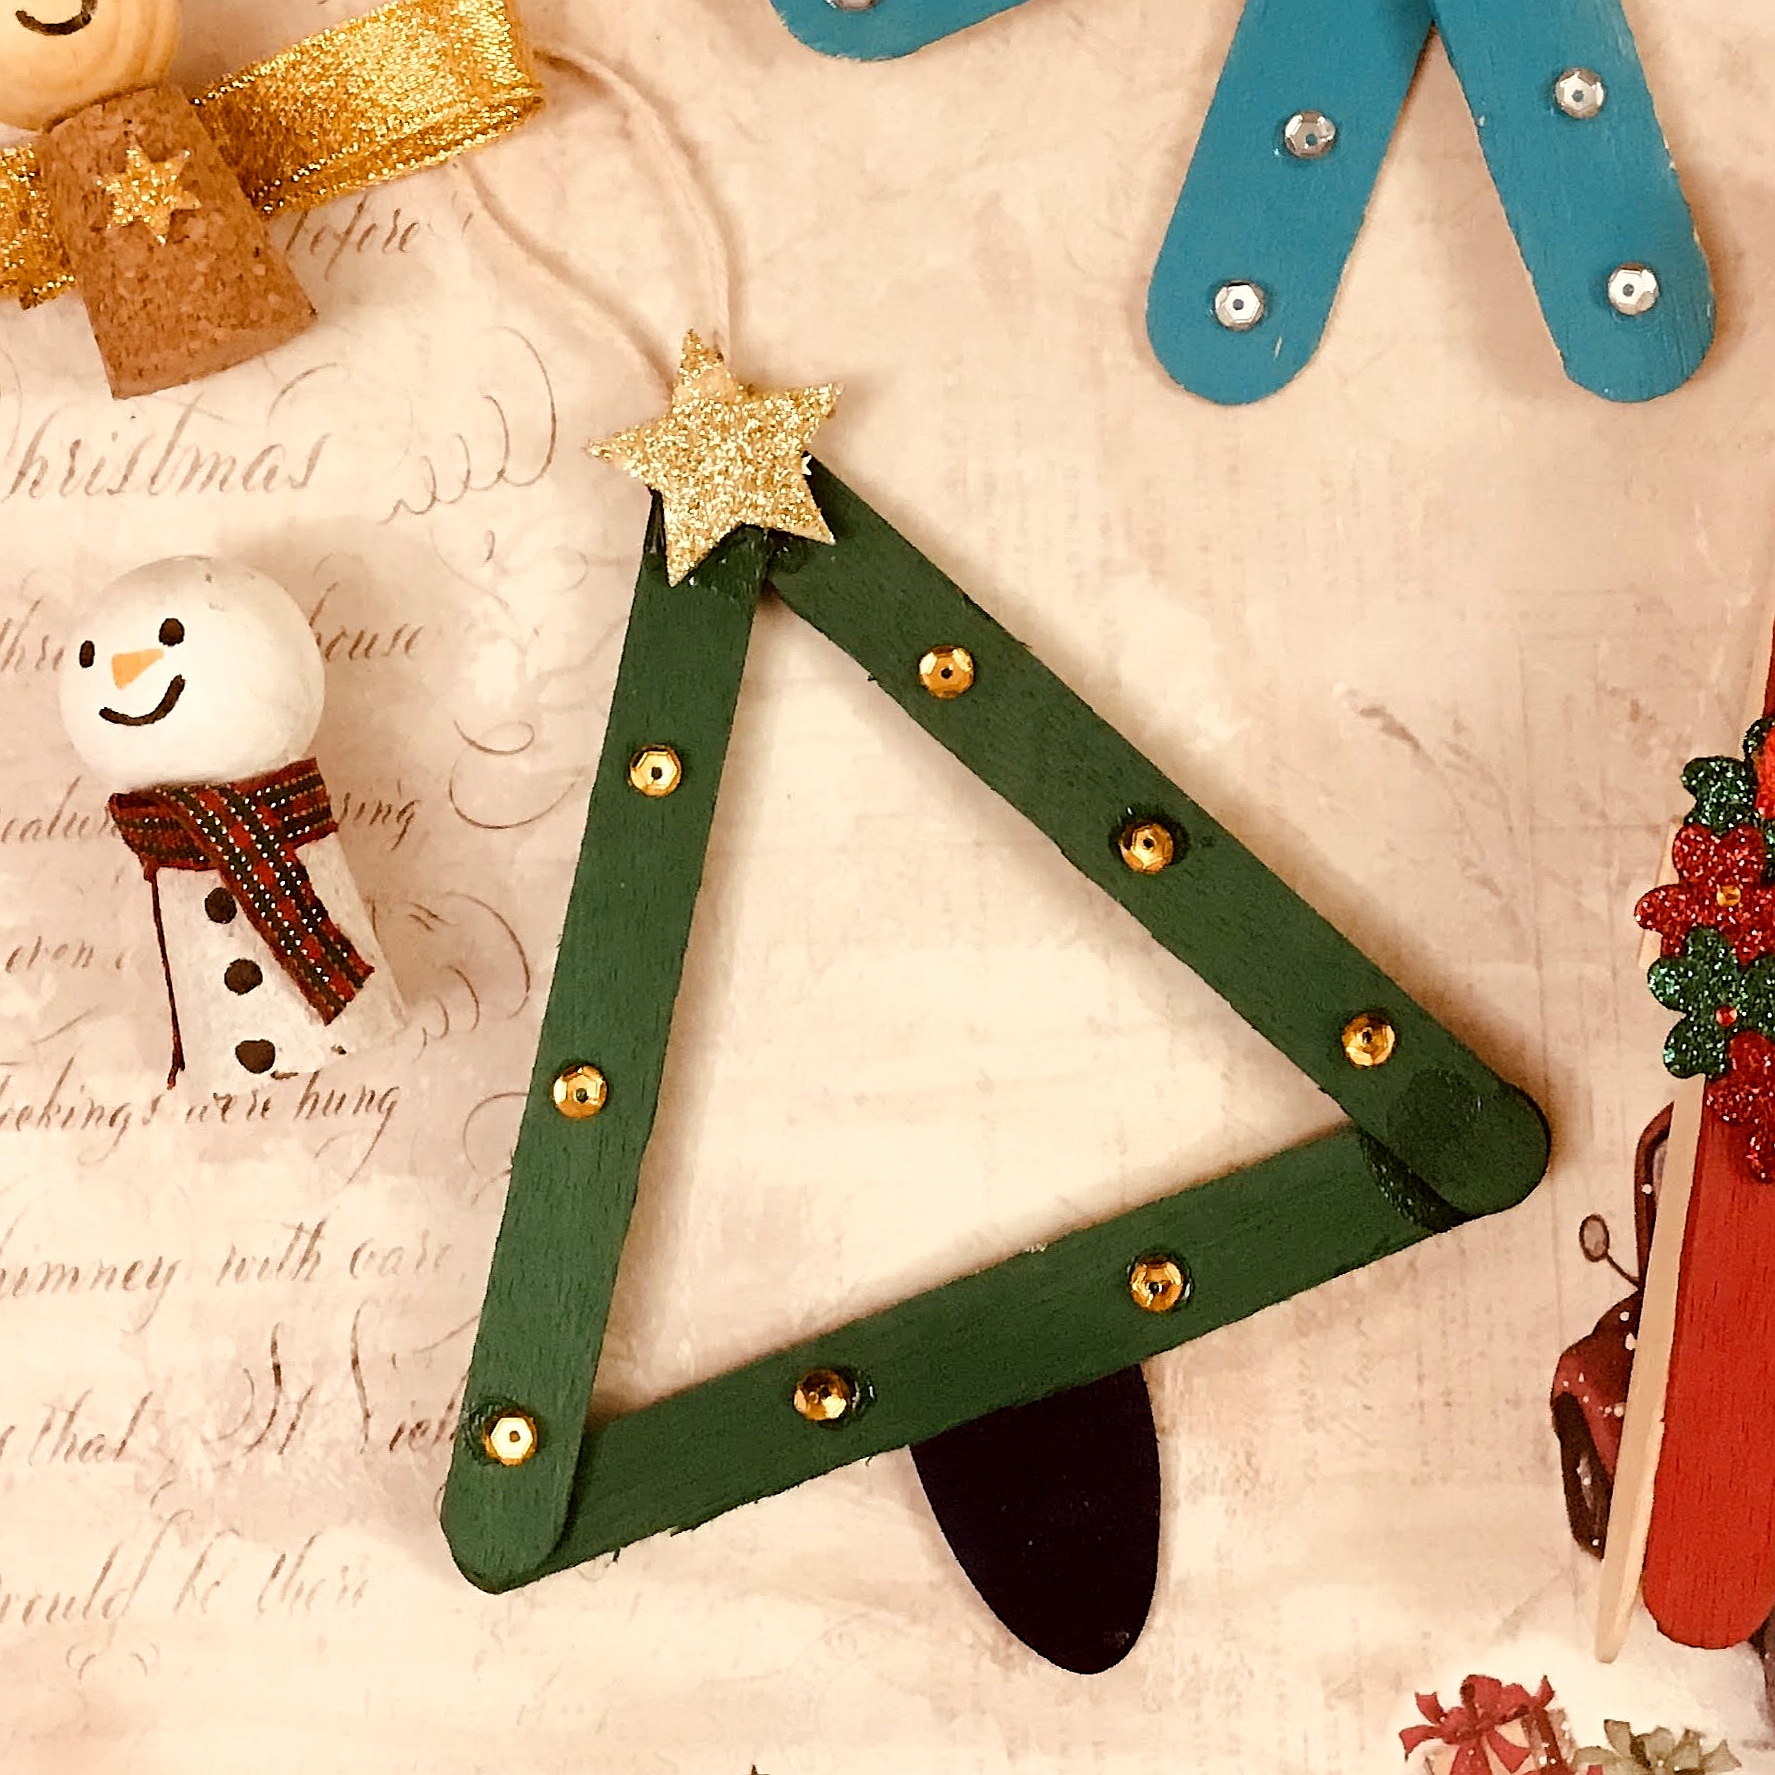
1.Take three green coloured popsicle sticks and a blue colored ice-cream spoon.
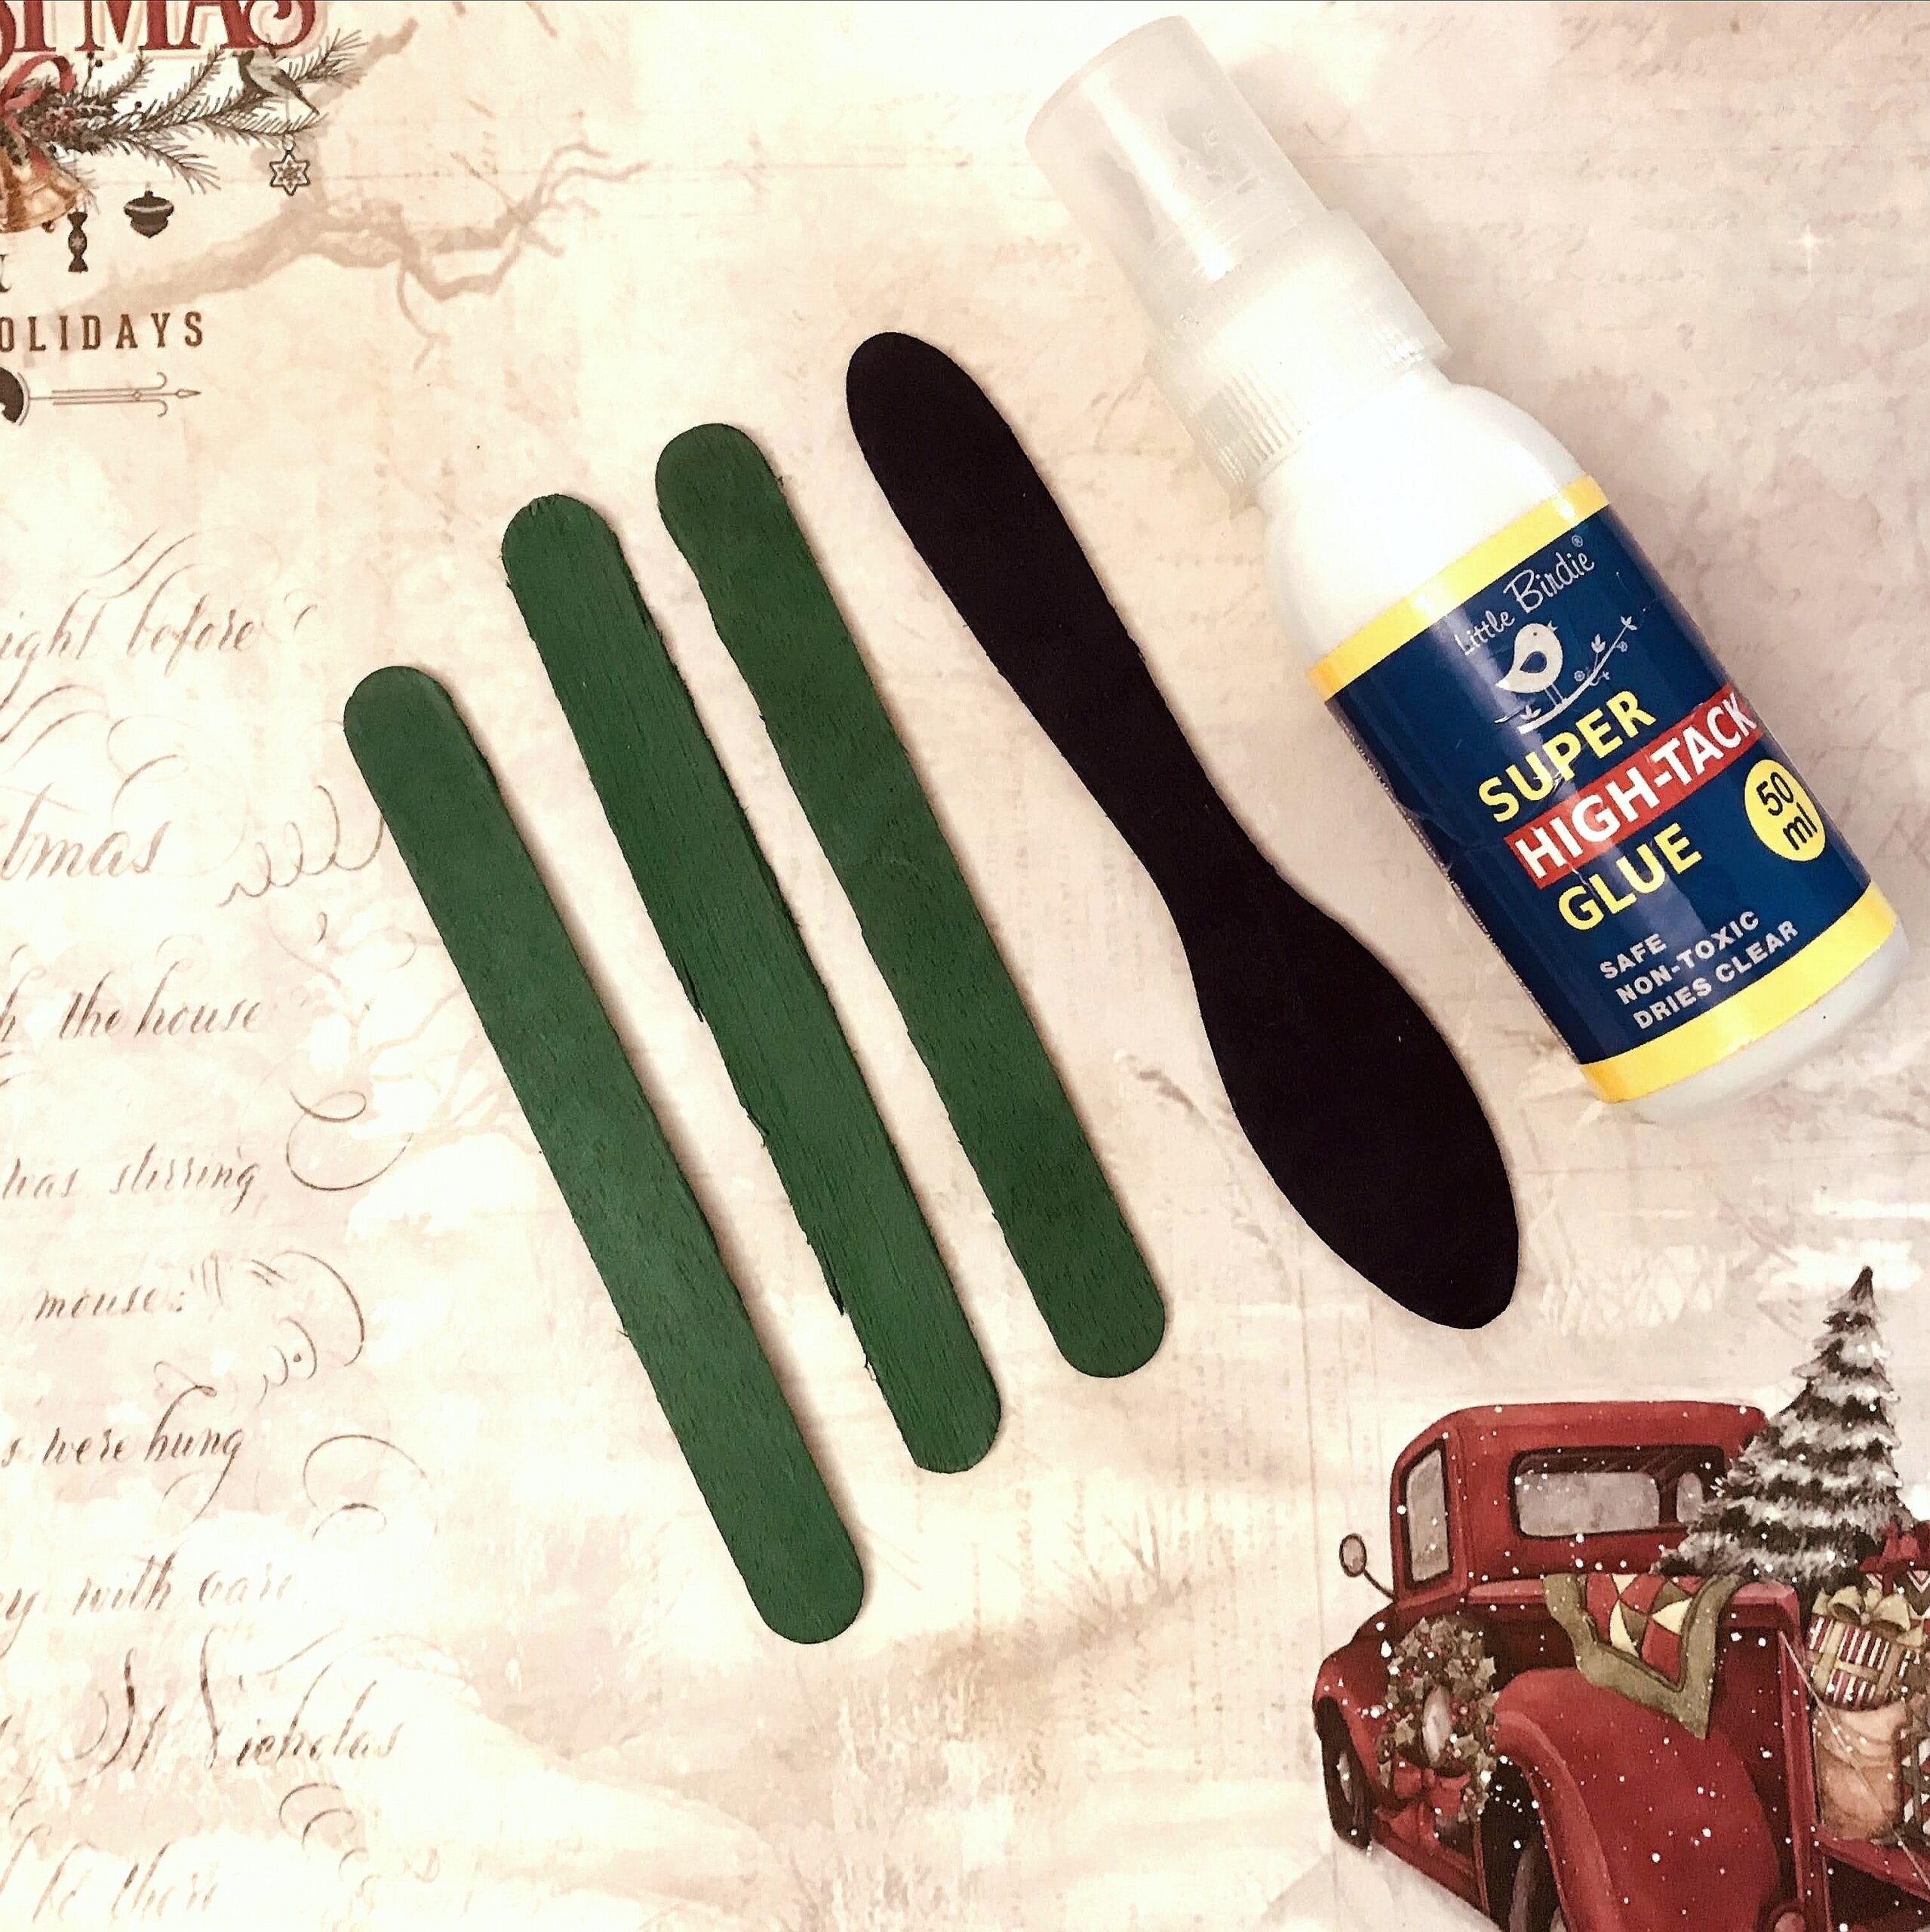
2.Stick the 3 green sticks into a triangle. Cut the broad part of the blue ice-cream stick.
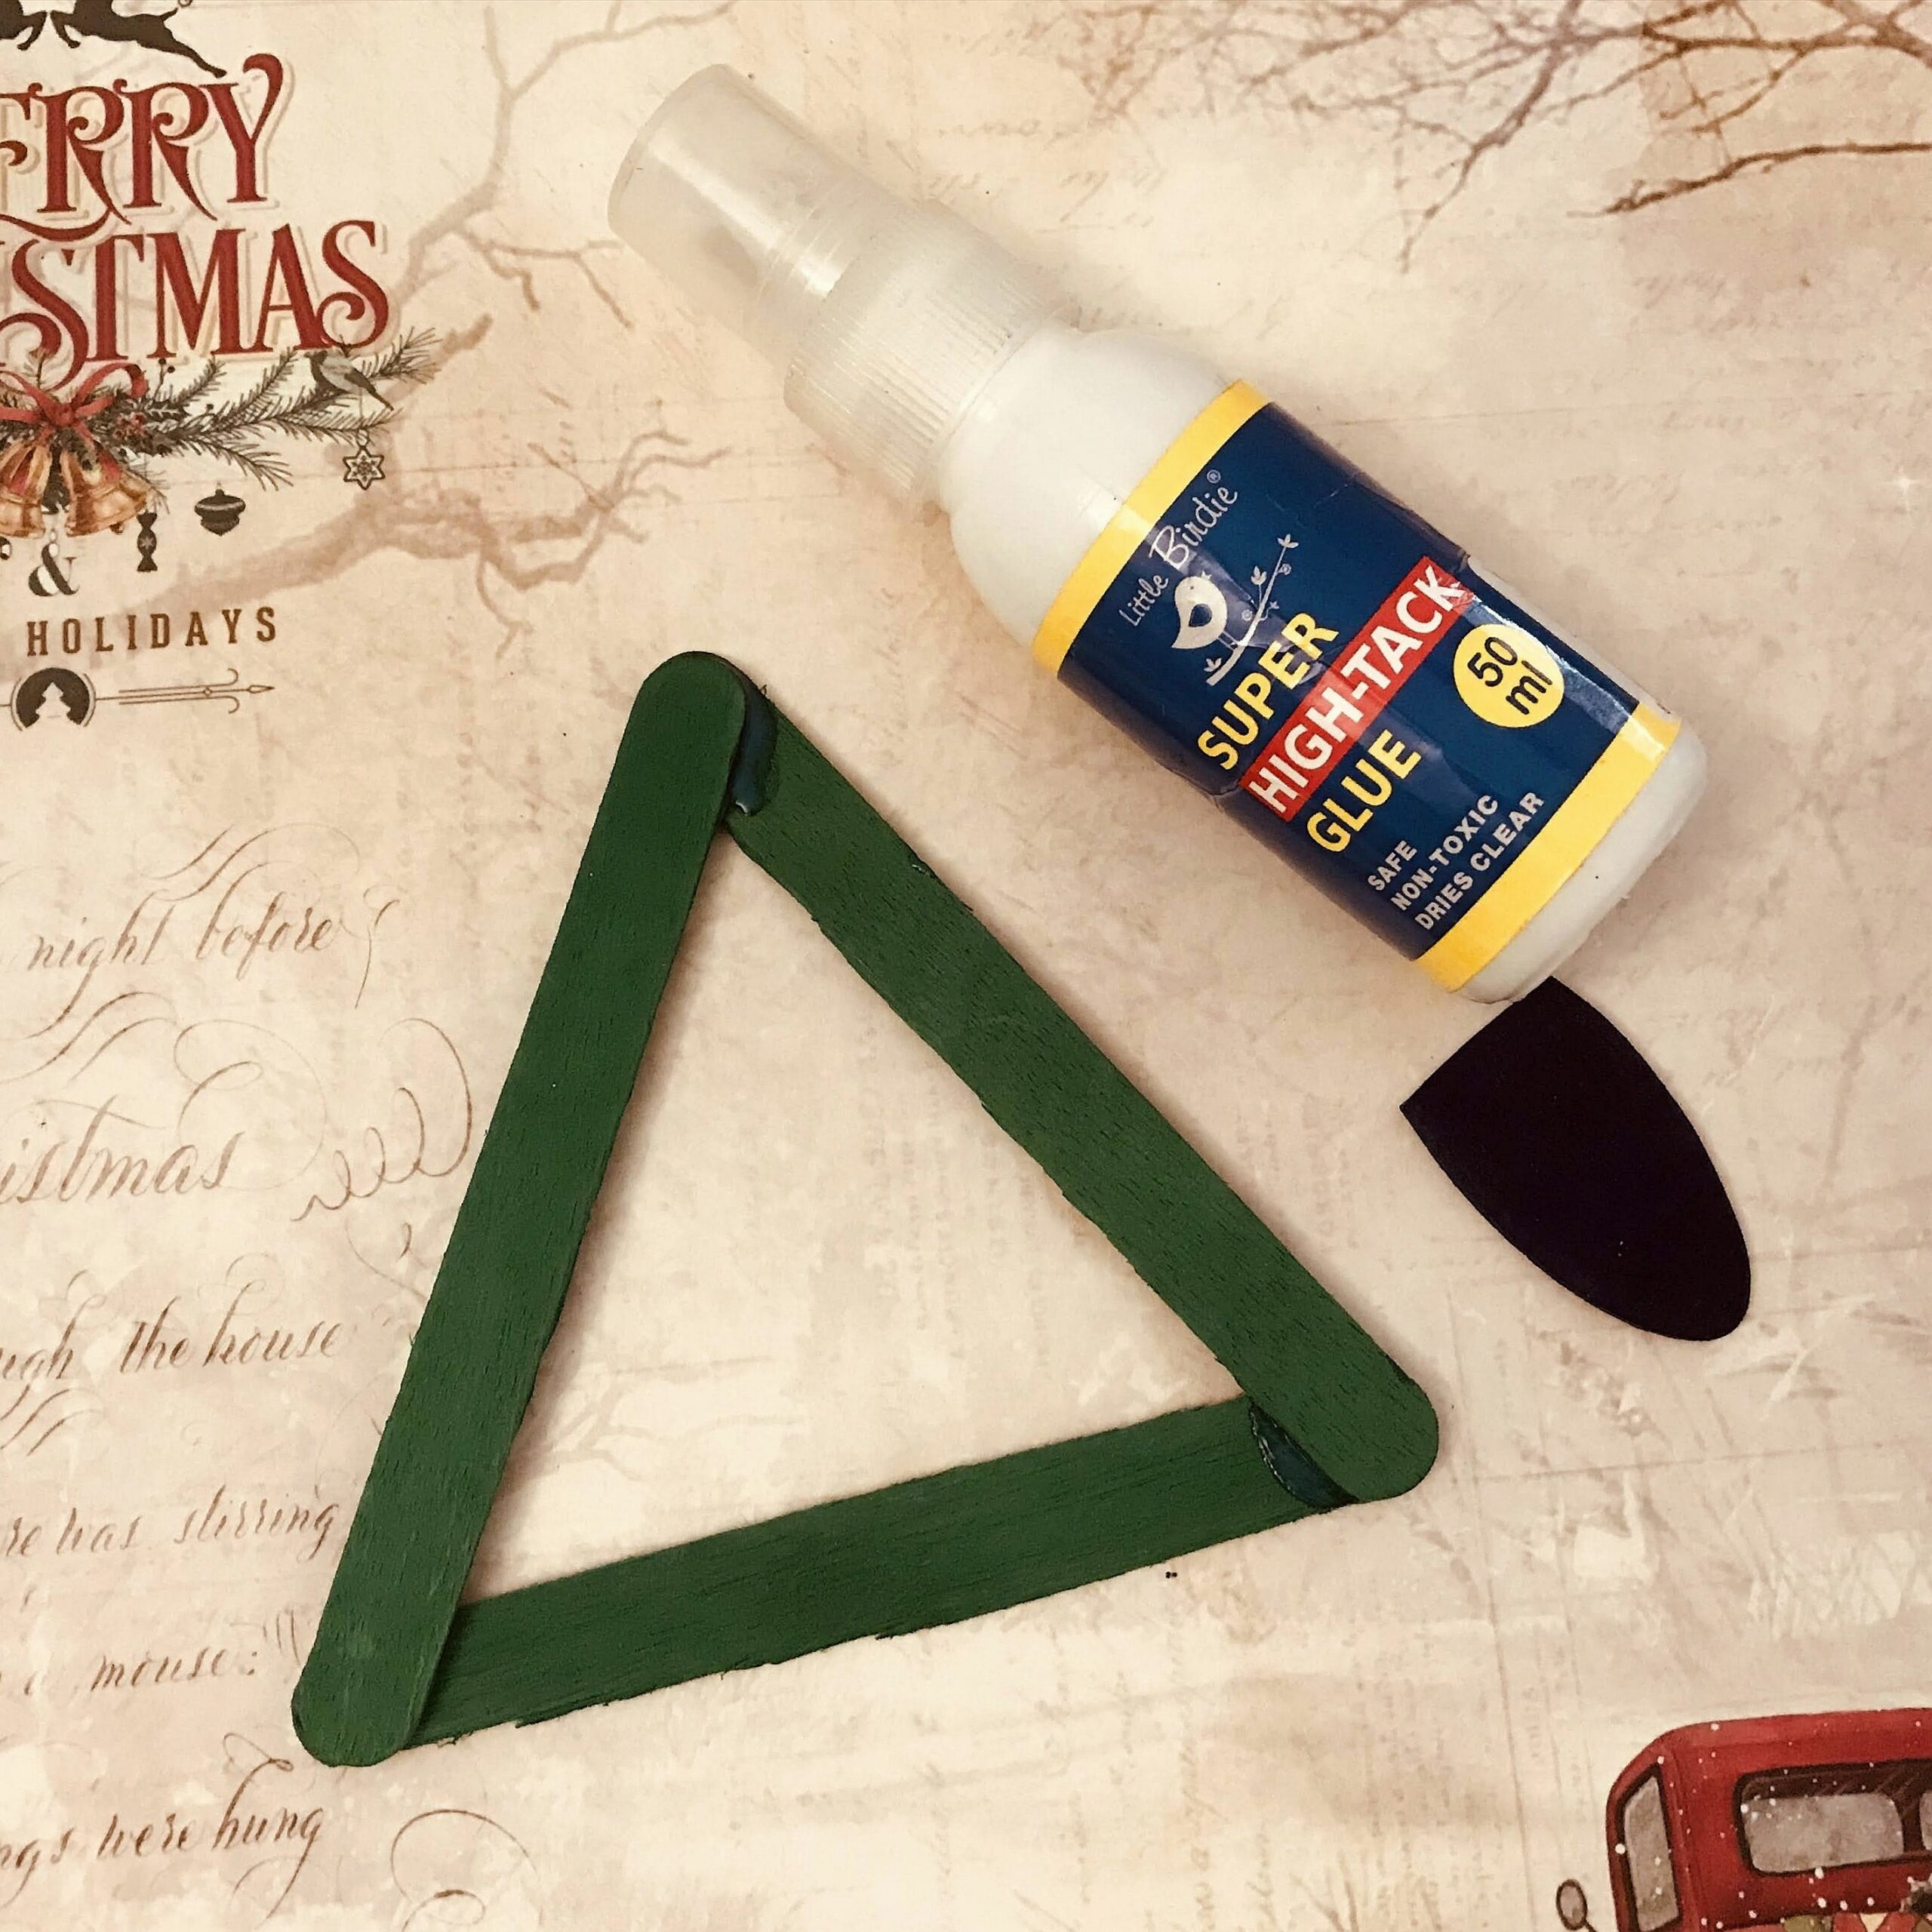
3.Stick the part of blue ice-cream stick to form a planter for the tree. Decorate the tree with golden Sequins and a glitter star.
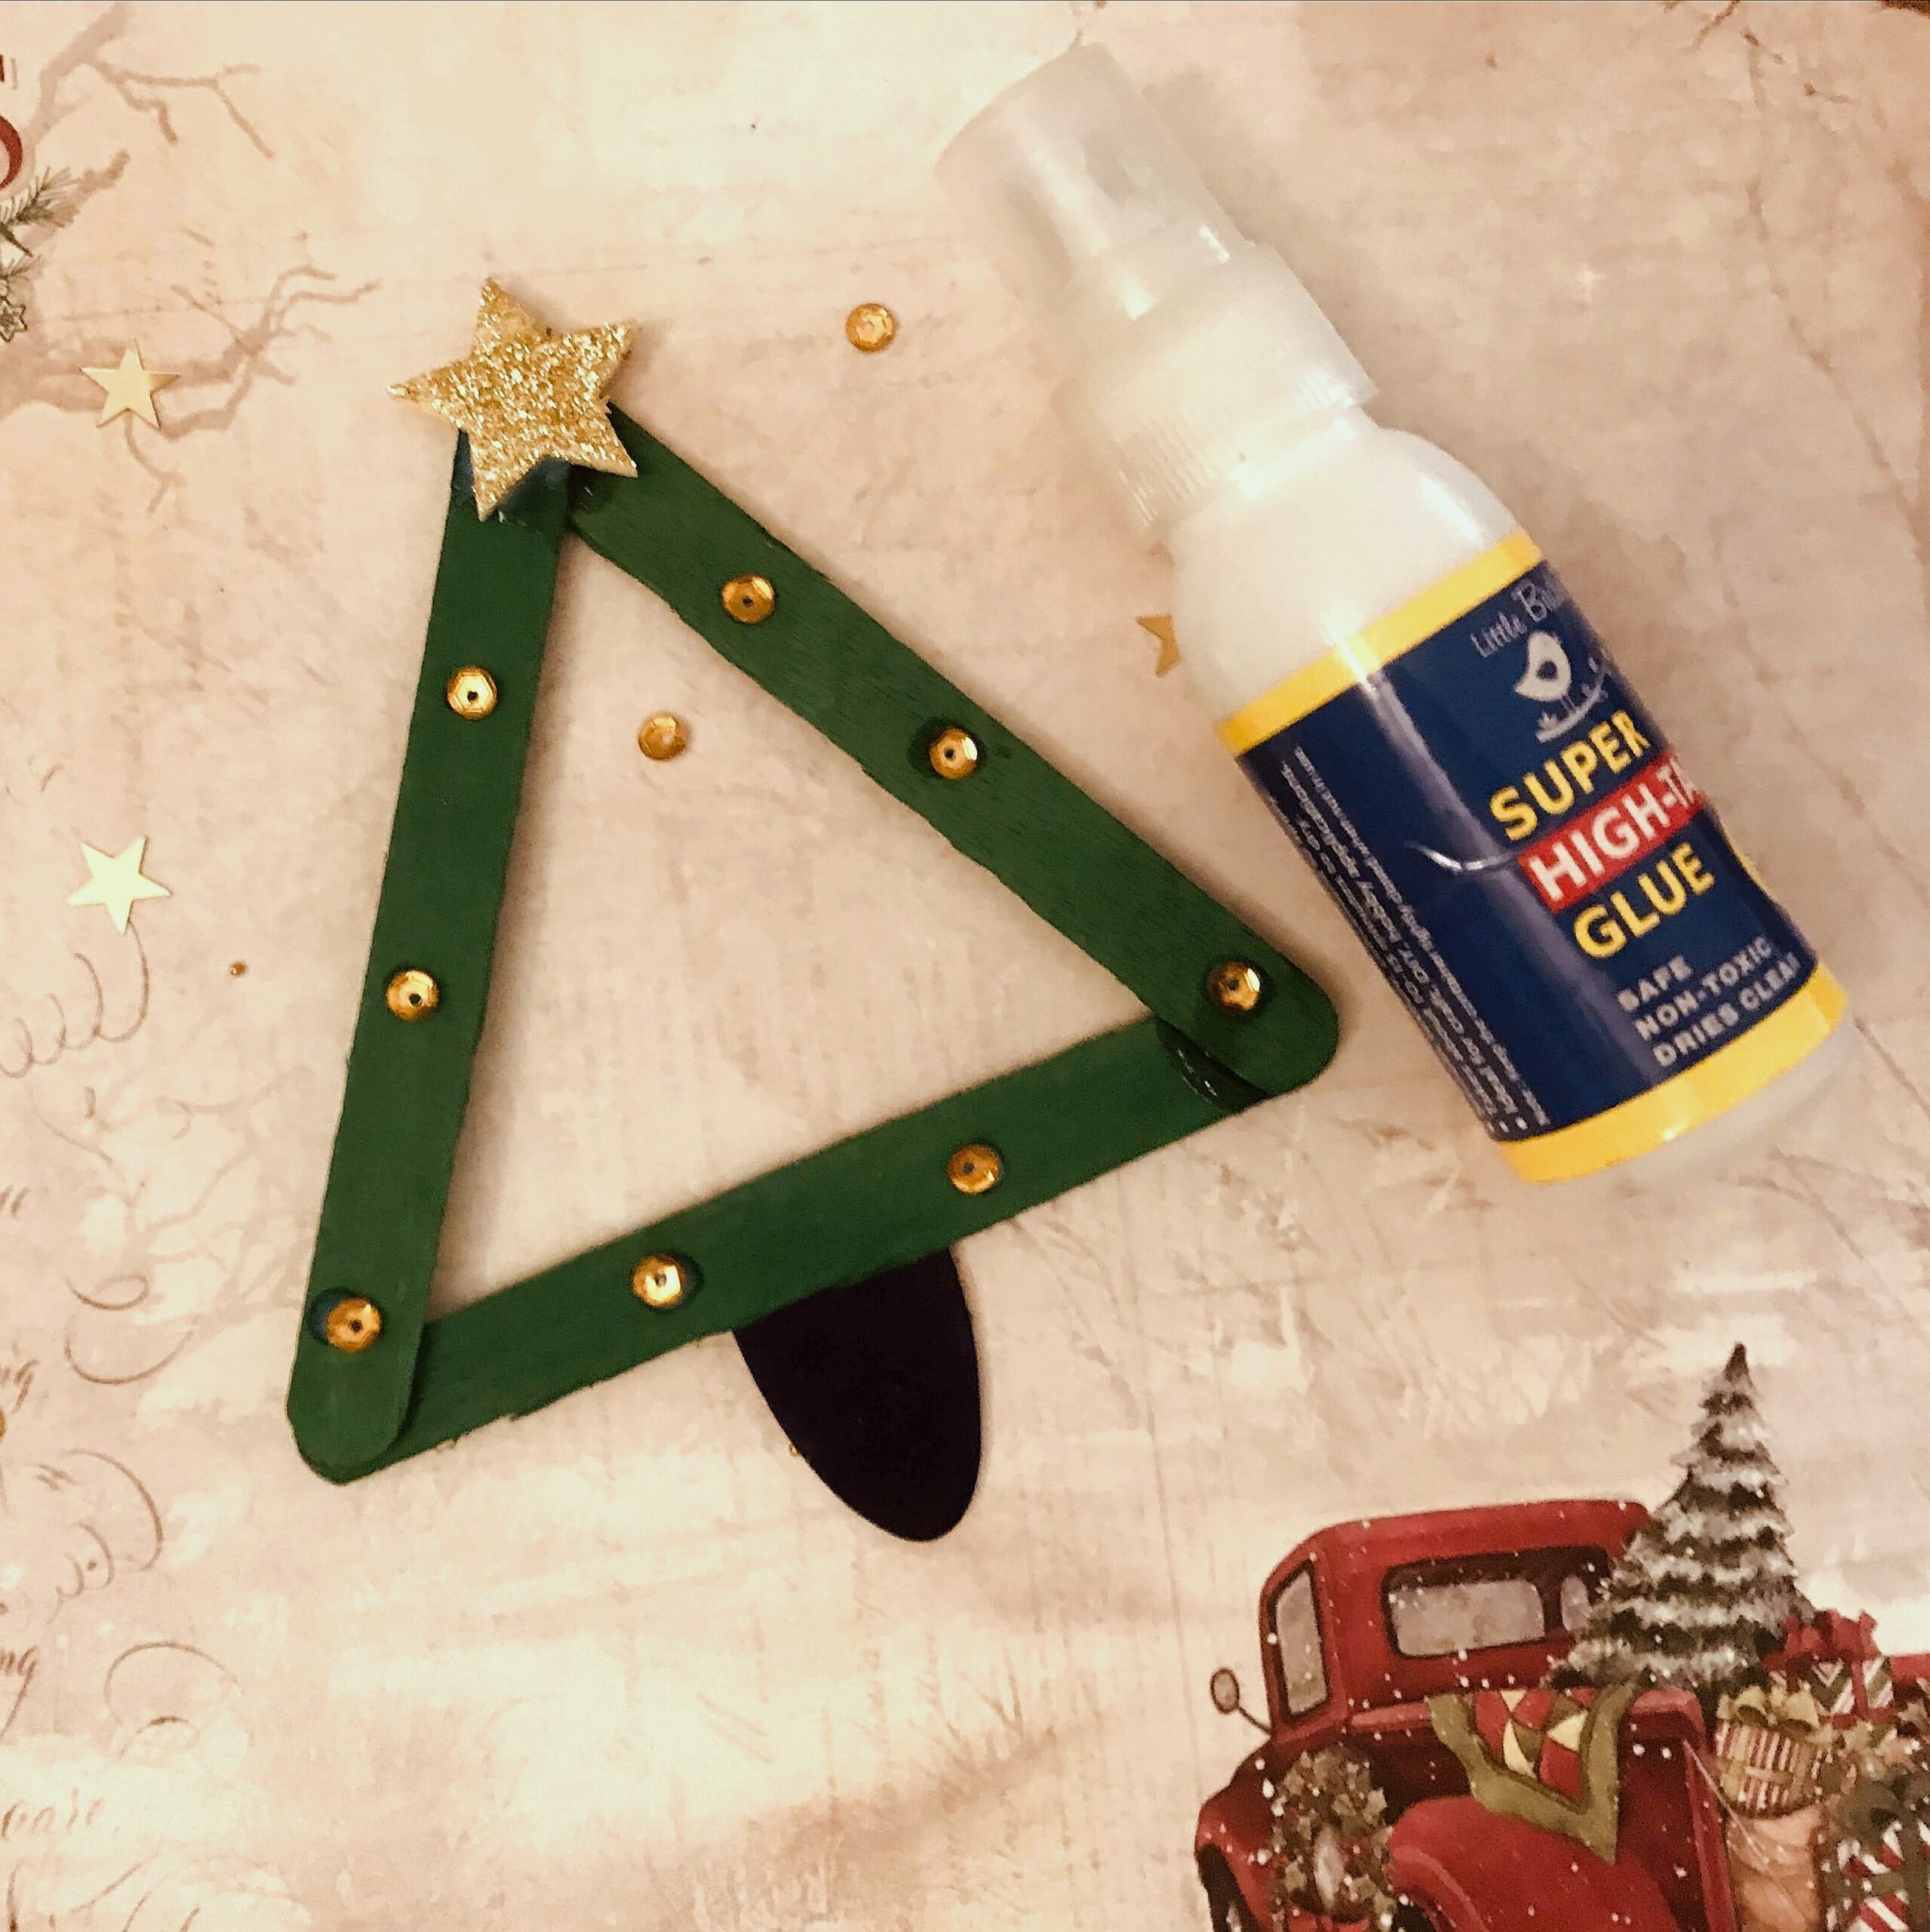
4.Stick a cotton cord at back with Super hi tac glue and let it dry.
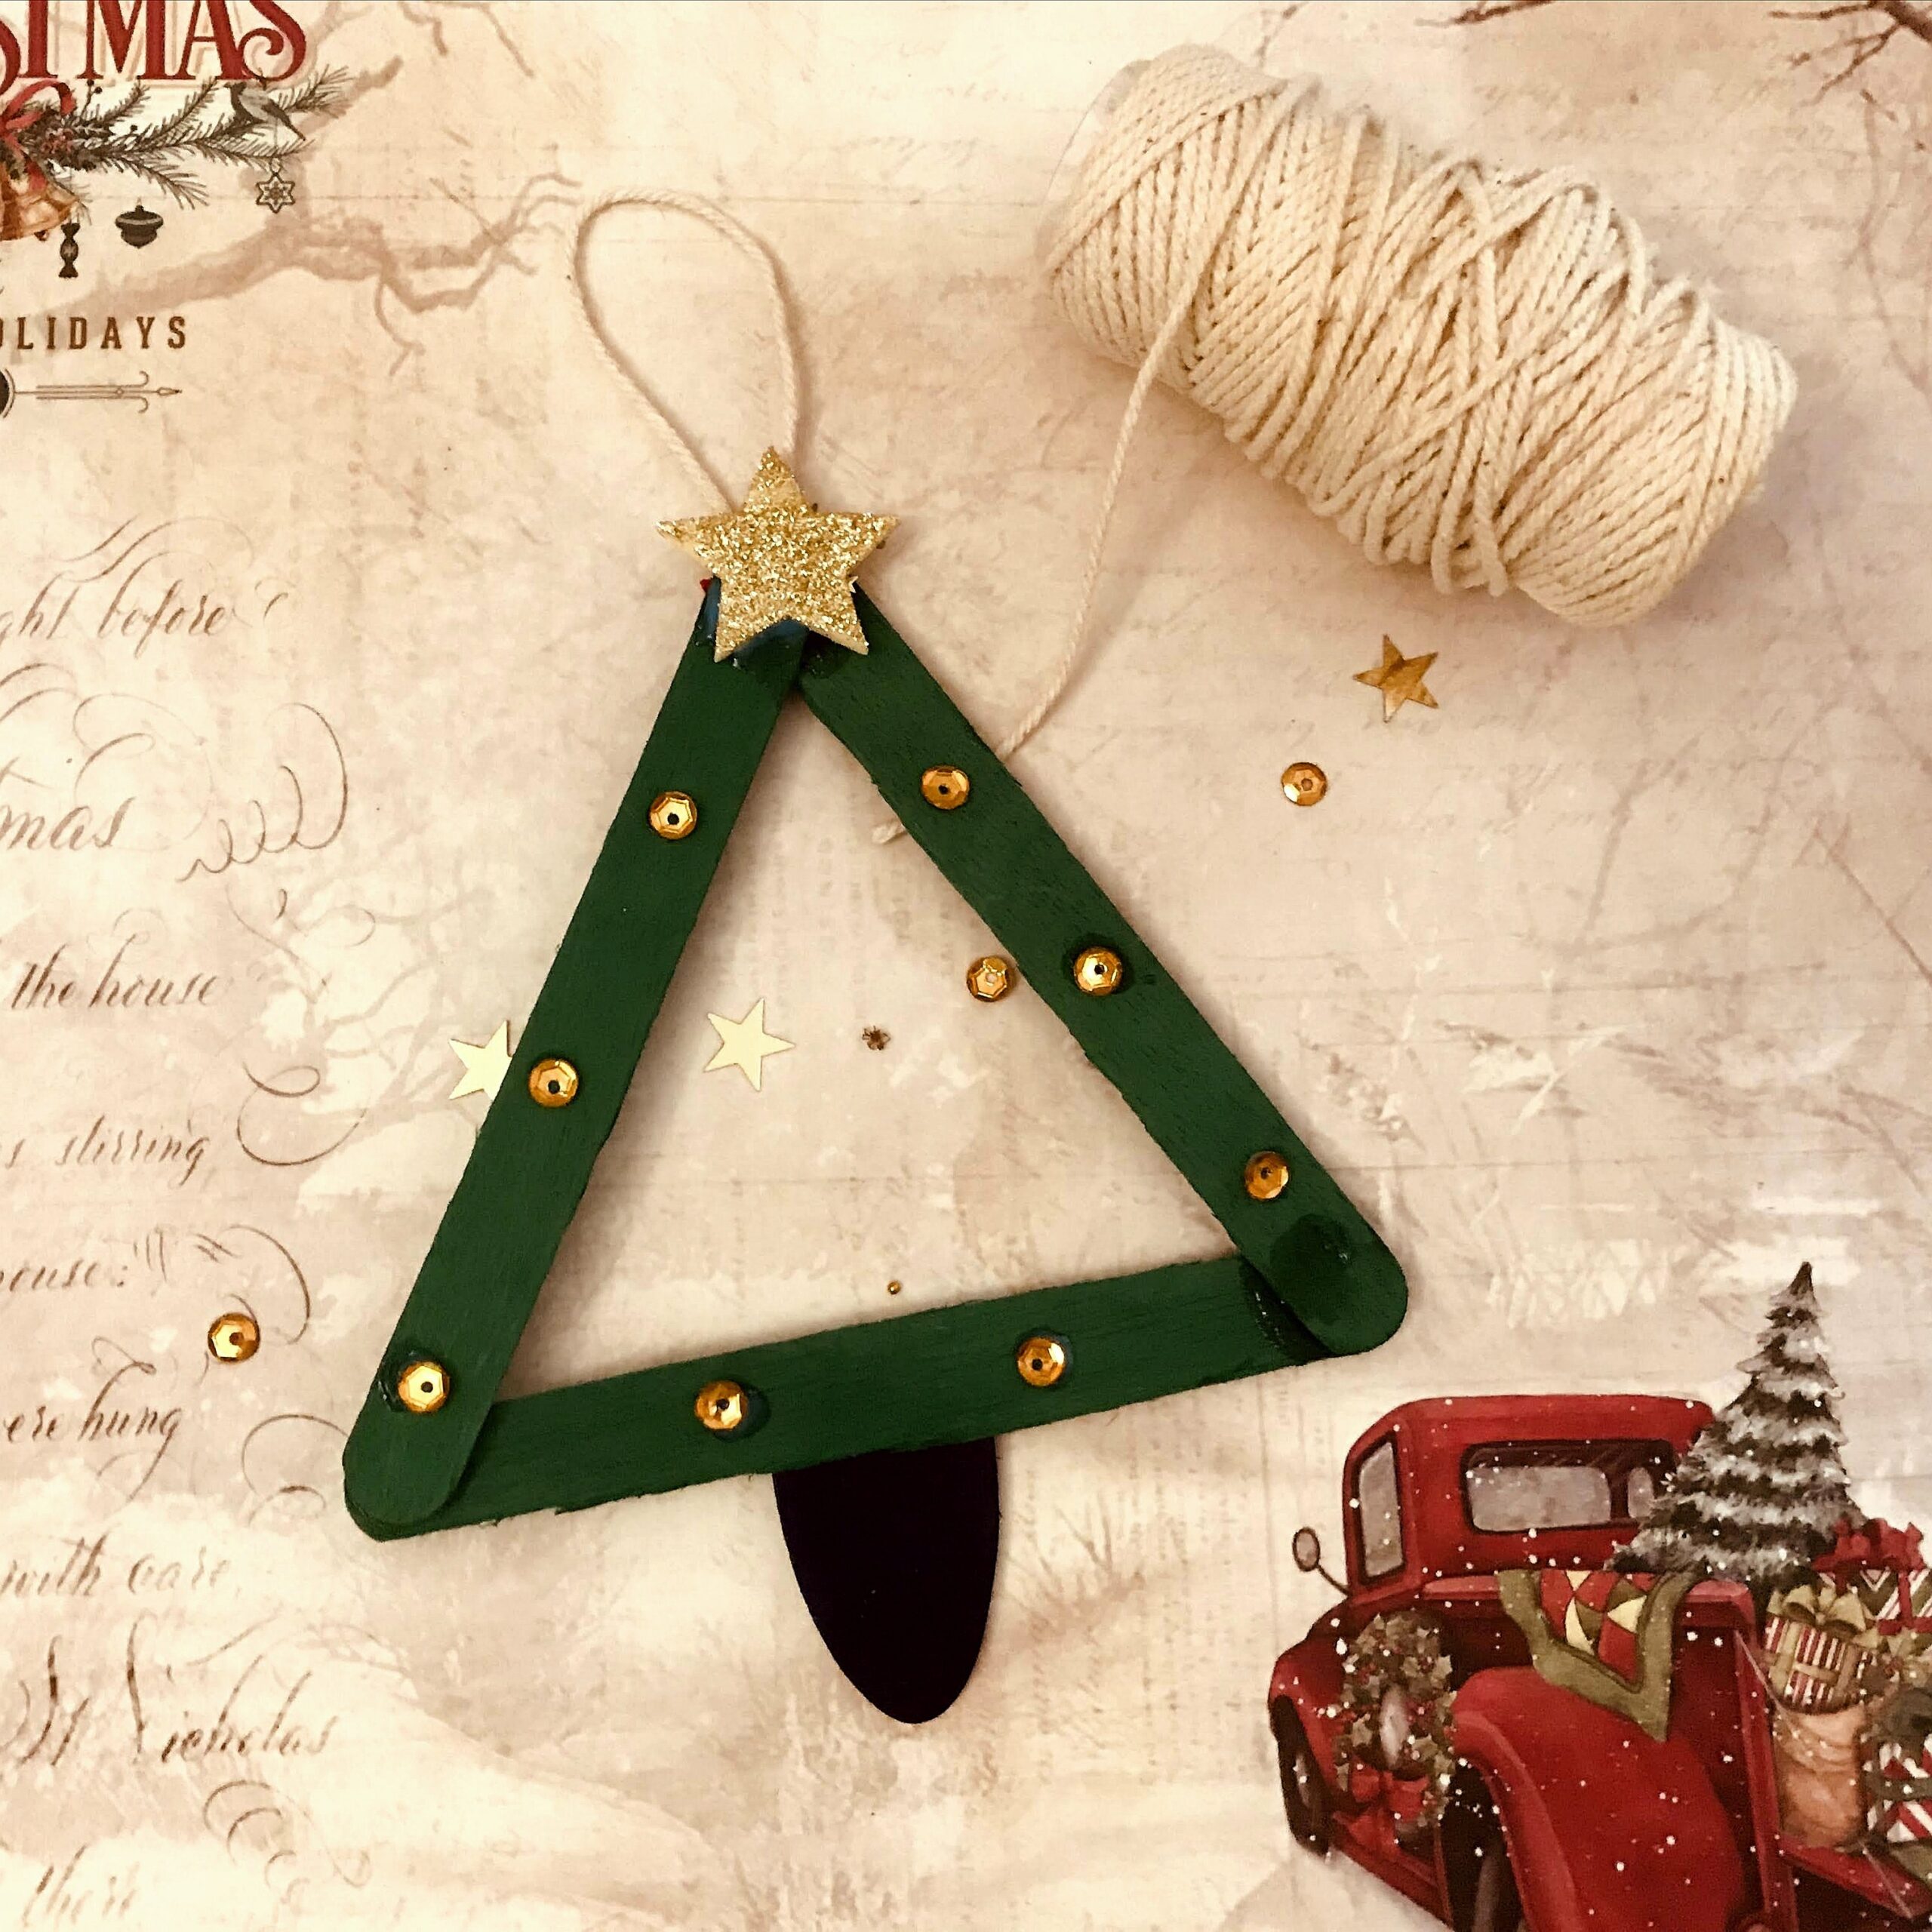
The cute tree is ready.
3.Popsicle stick snowflake.
This lovely ornament is beautiful and is very easy to create.
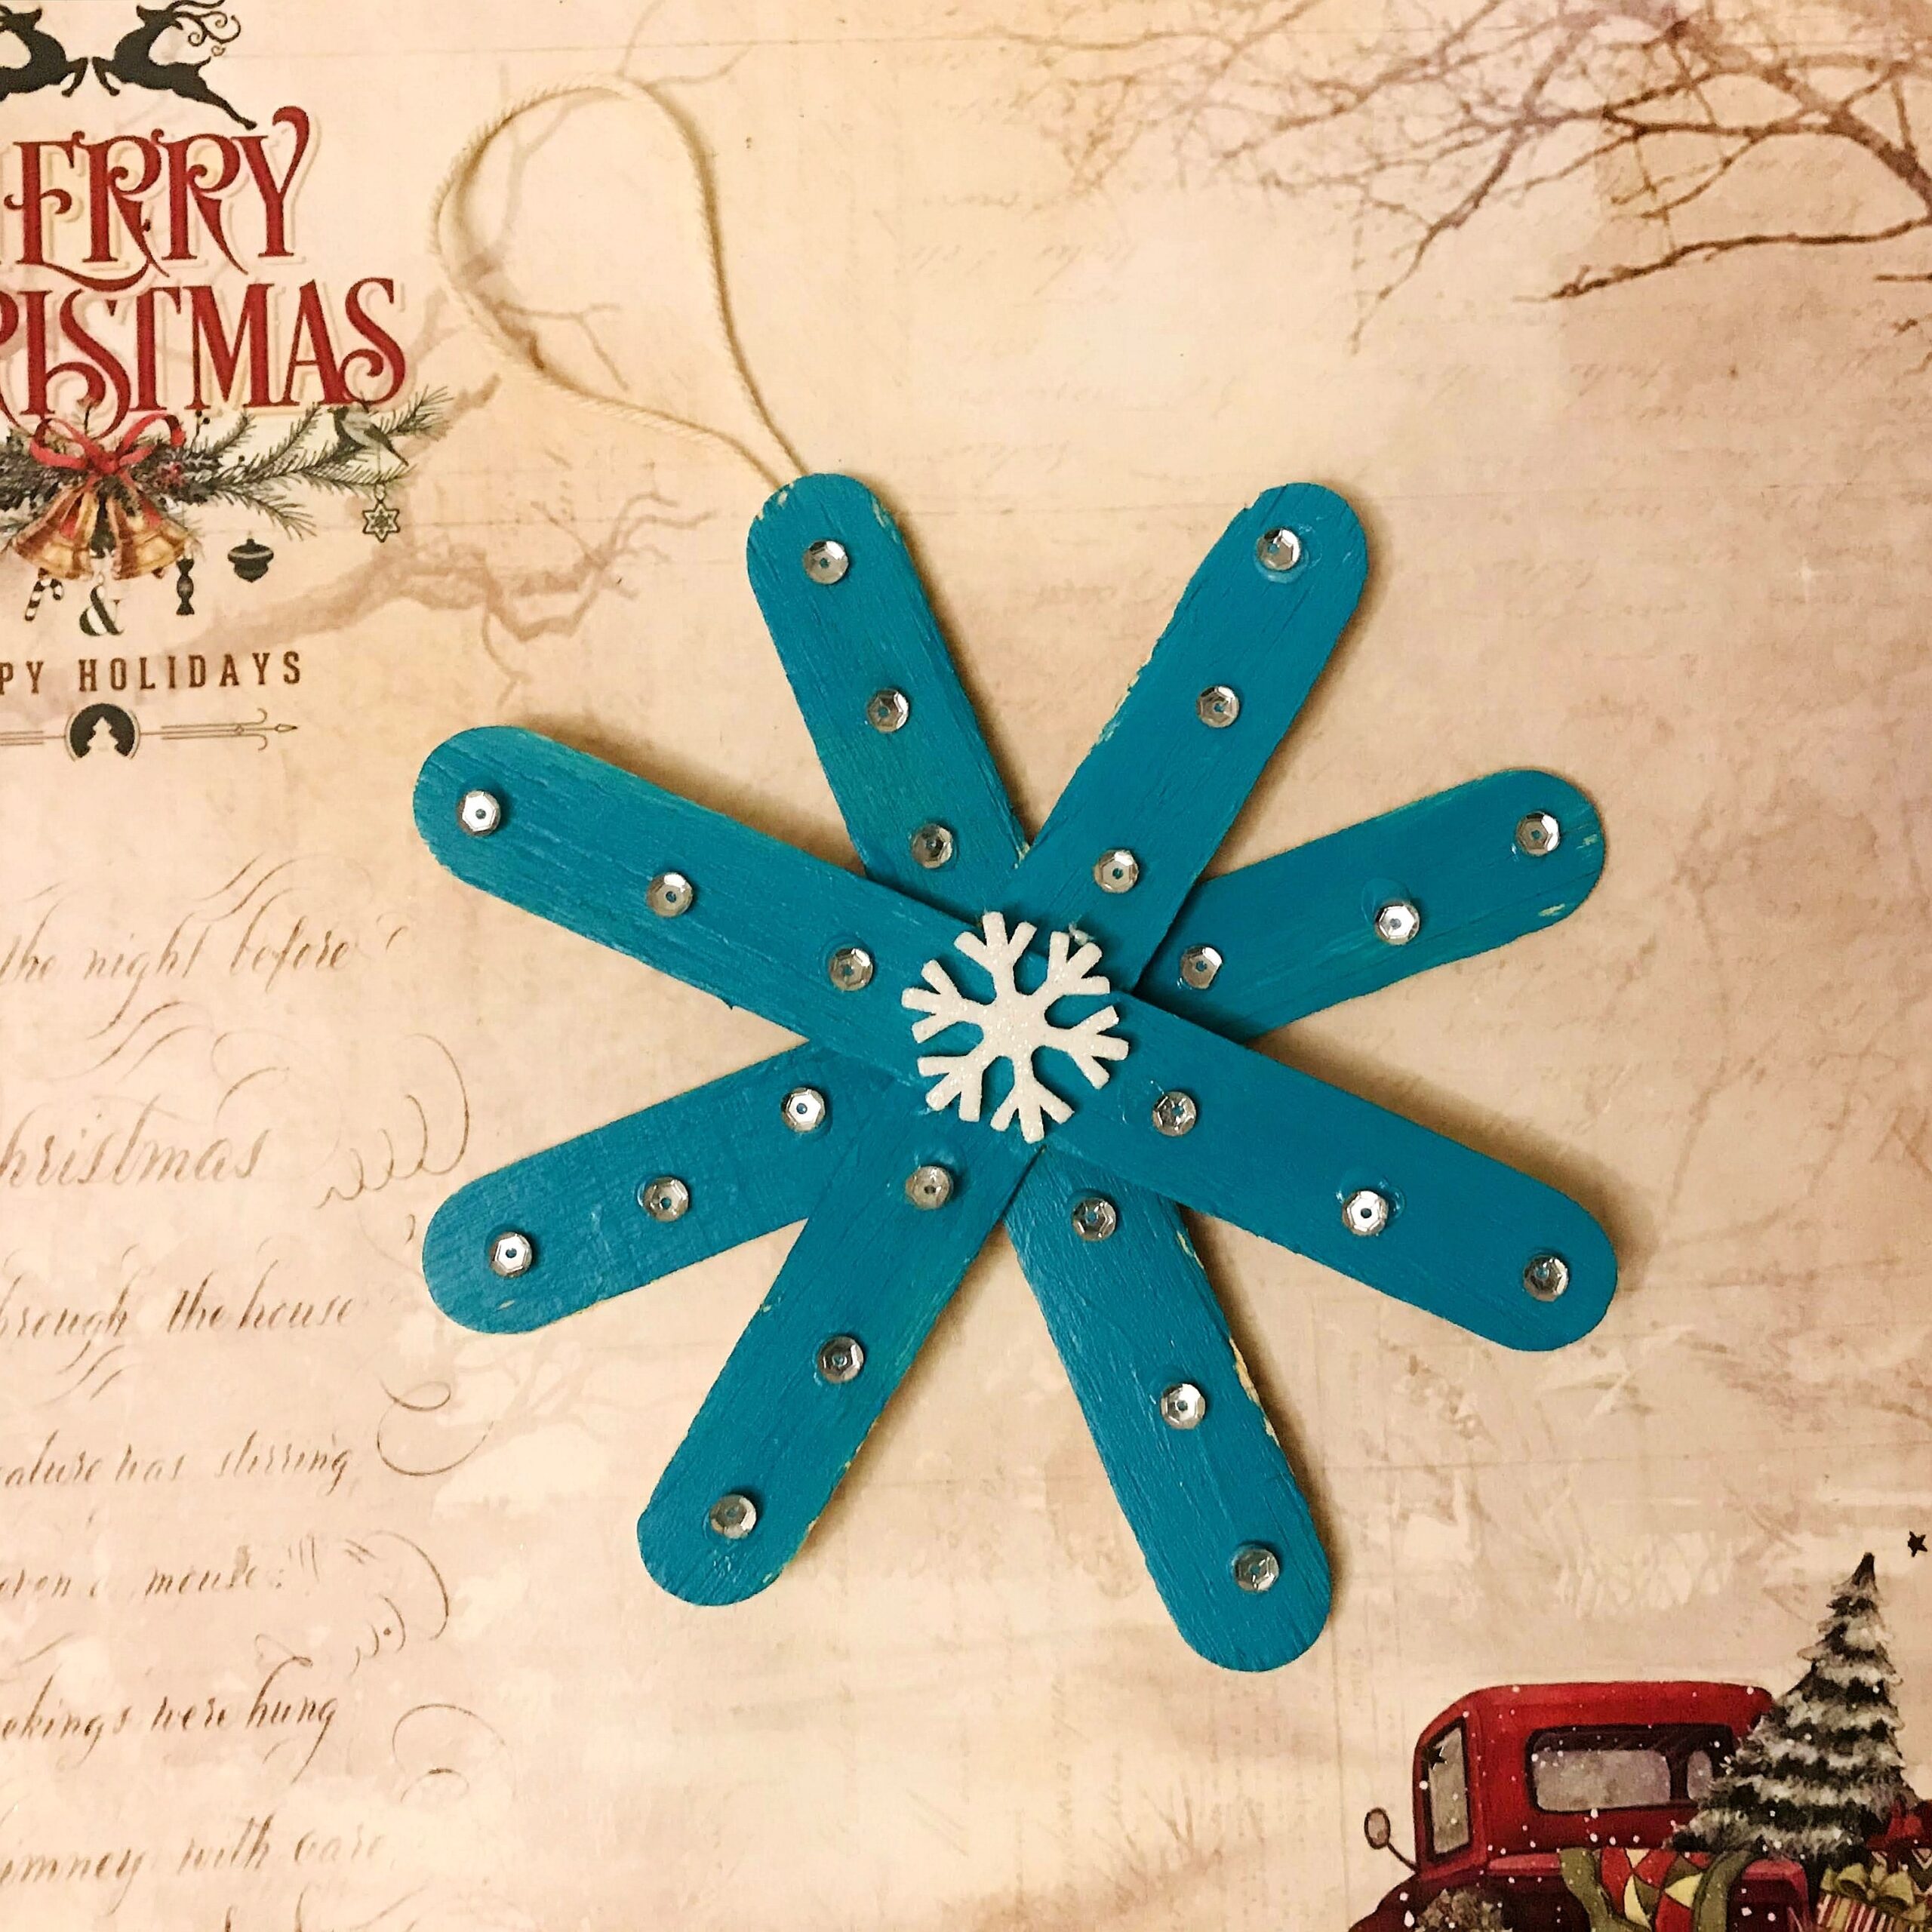
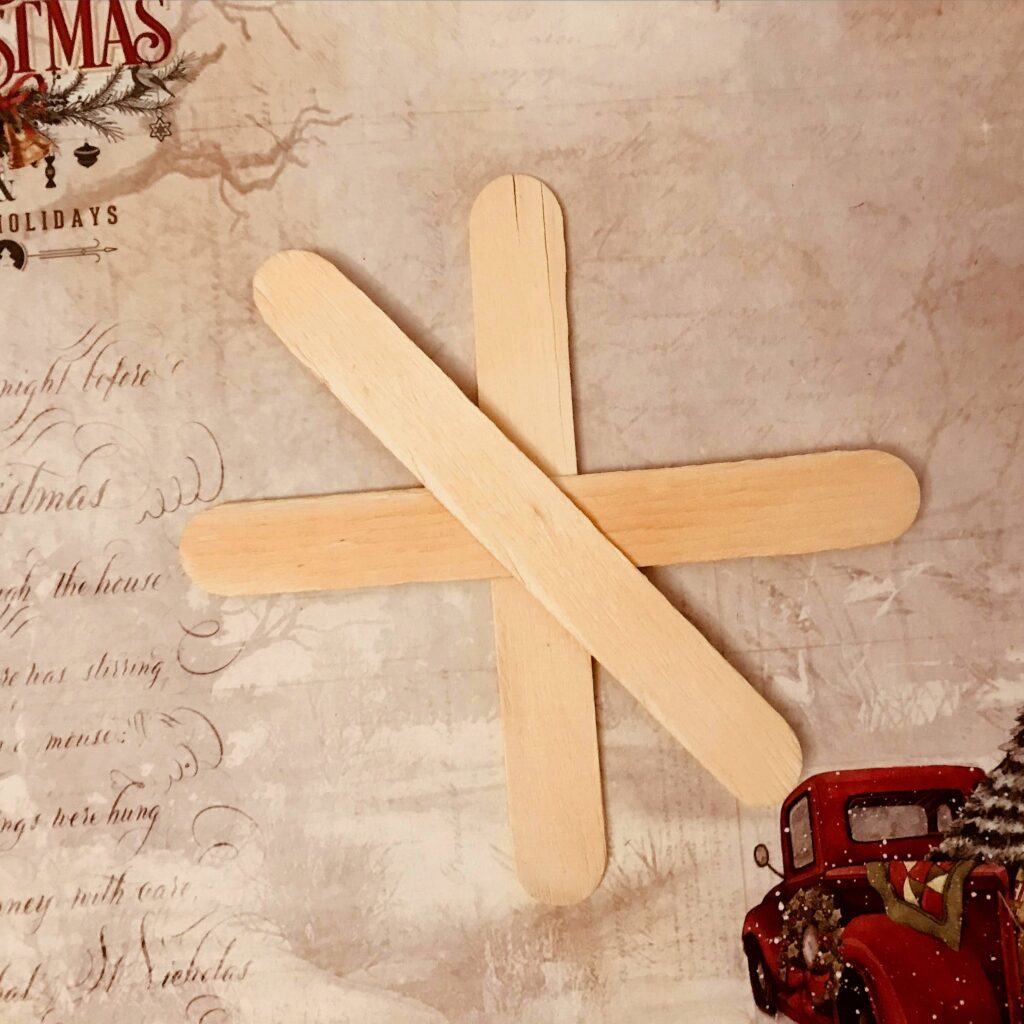
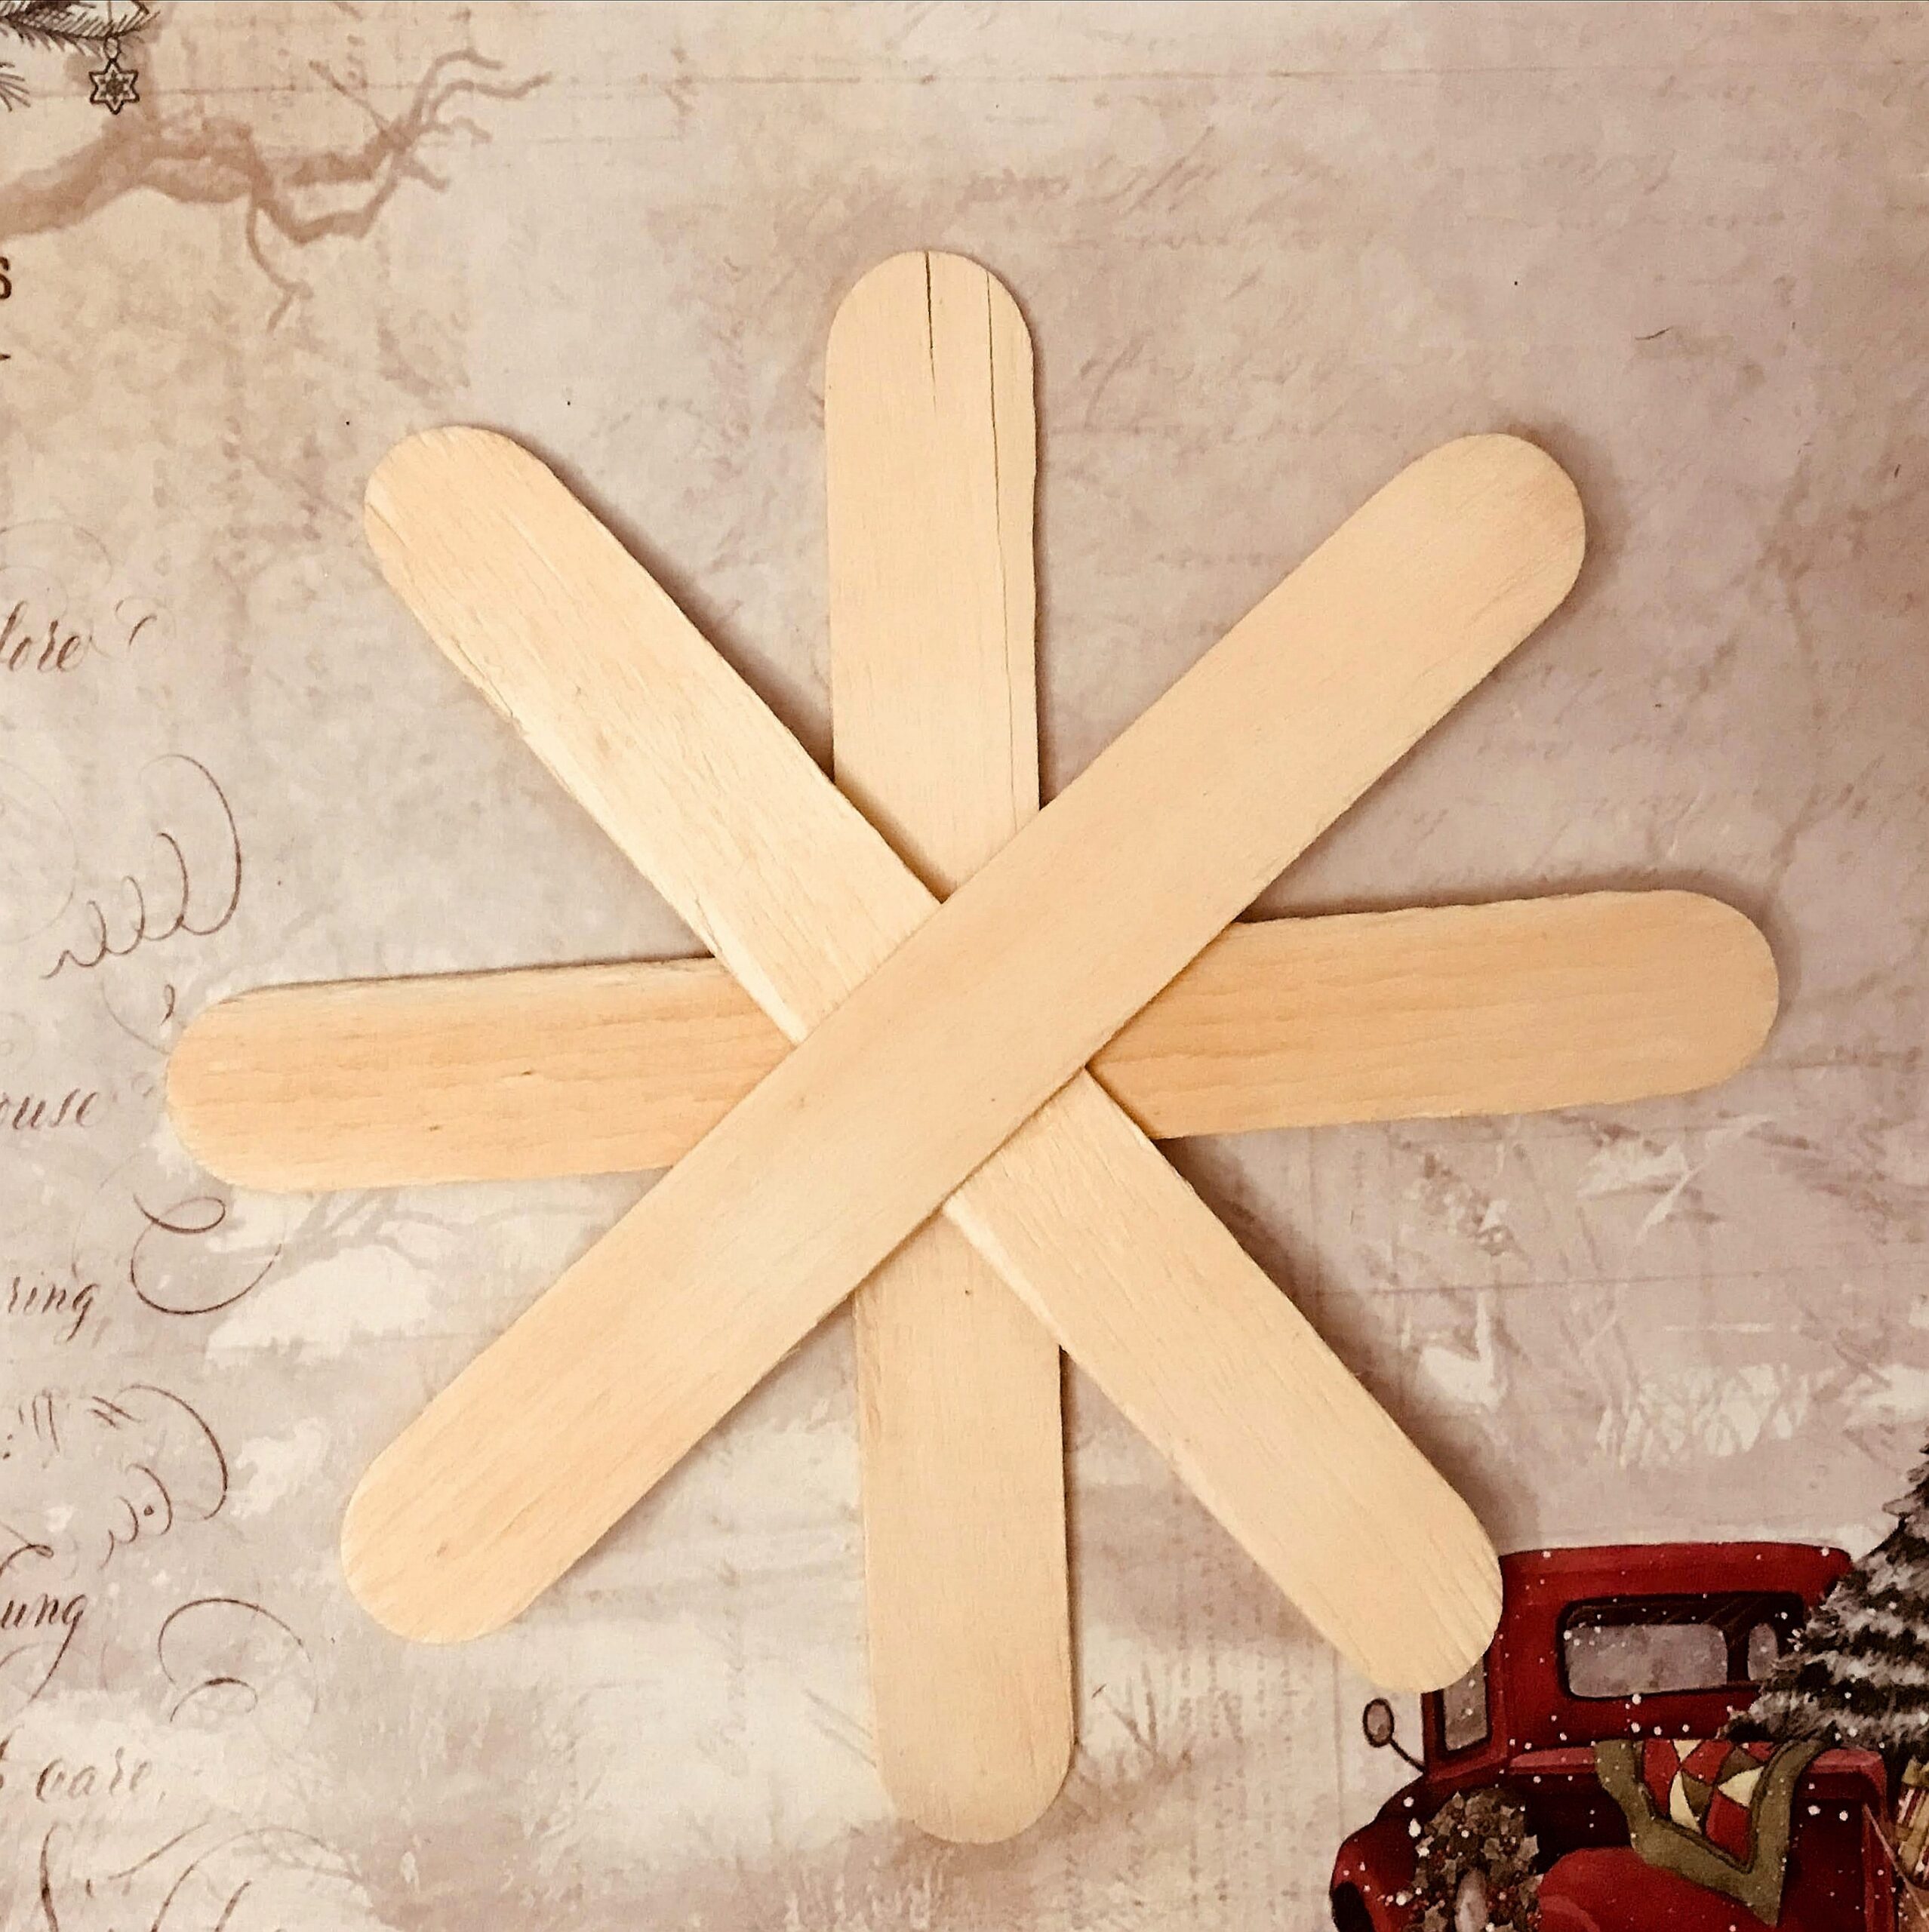
1.Take 4 equal sized popsicle sticks. And stick them on top of one another as shown below with Super hitac glue.

2.Once all the pieces are glued, let it dry for at least half and hour.
3.Paint the snowflake with Arichval multisurface paint Icy aqua.

4.Decorate with sliver Sequins with Super hi tac glue.
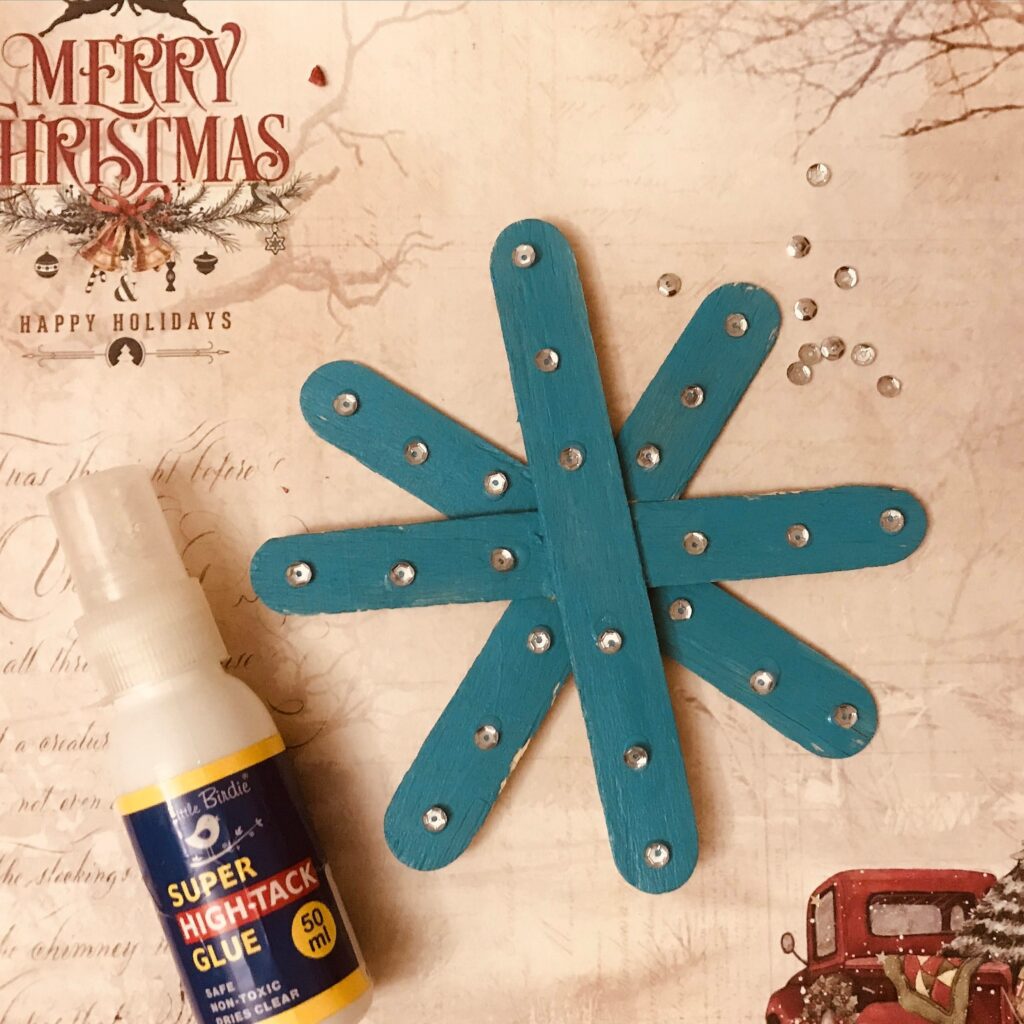
5.Add a glitter snow flake in centre.
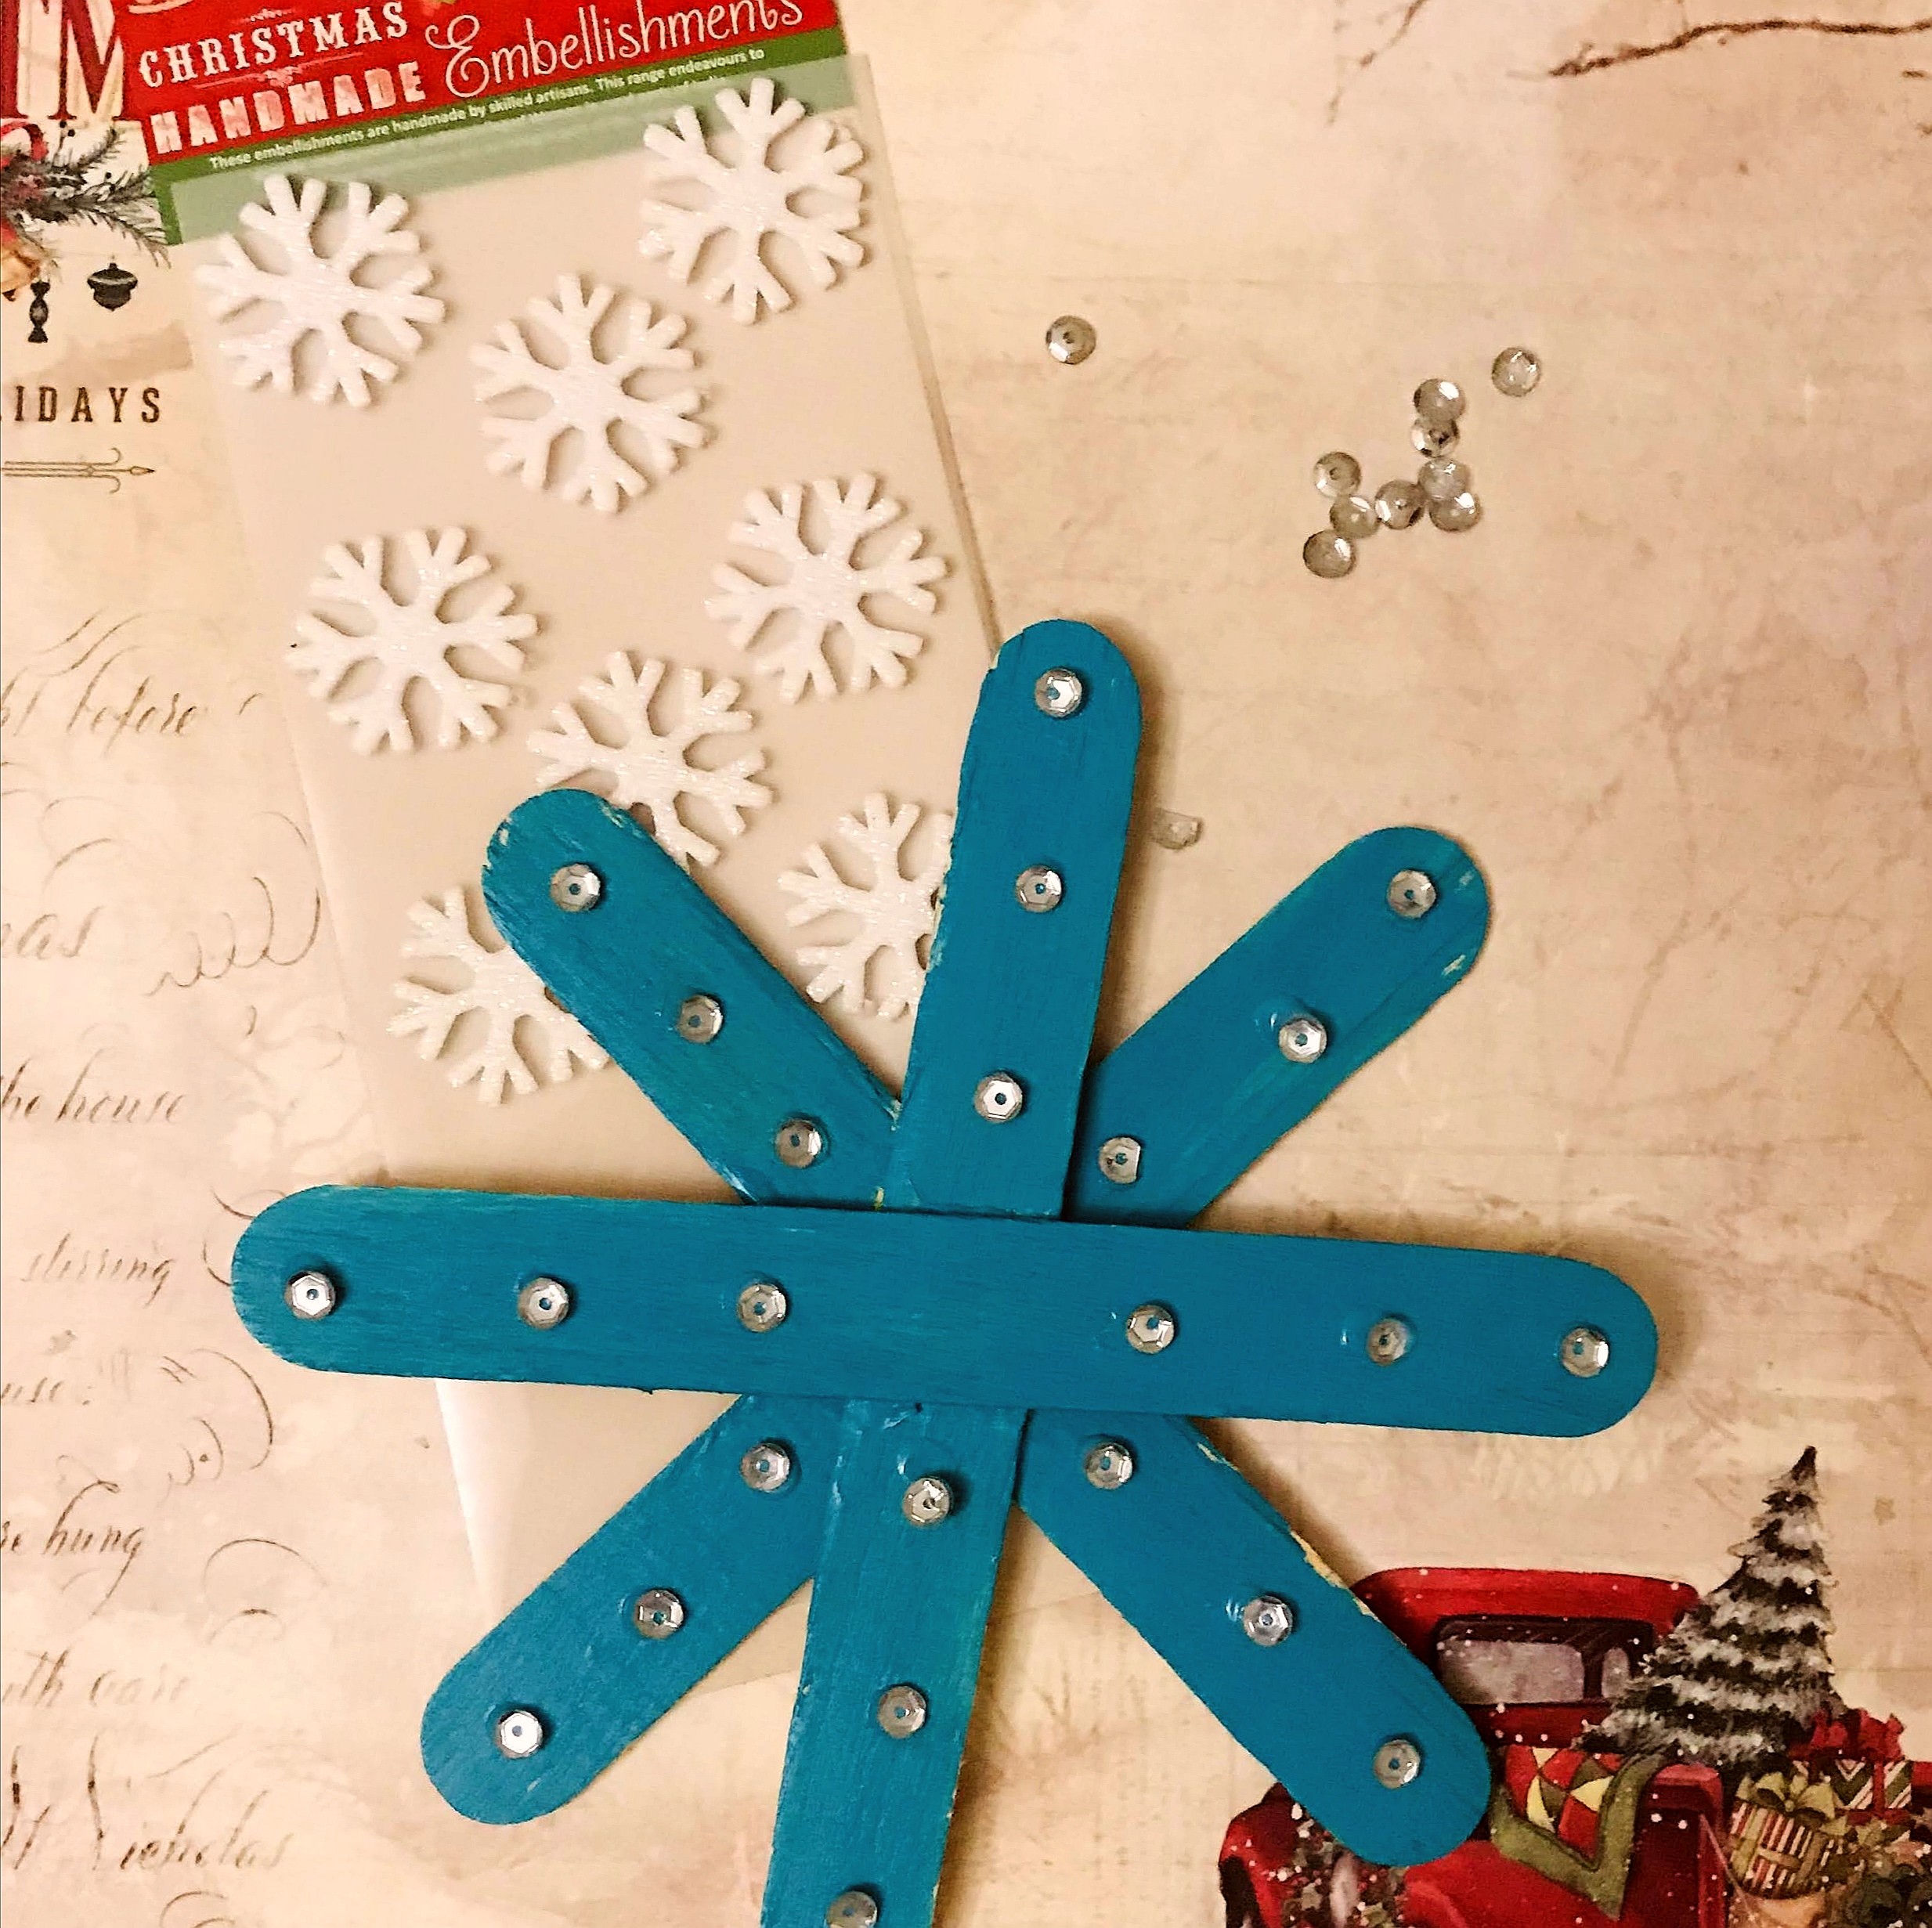
6. Cut a 6 cm length of cotton cord and stick it to back with Hi tac glue.
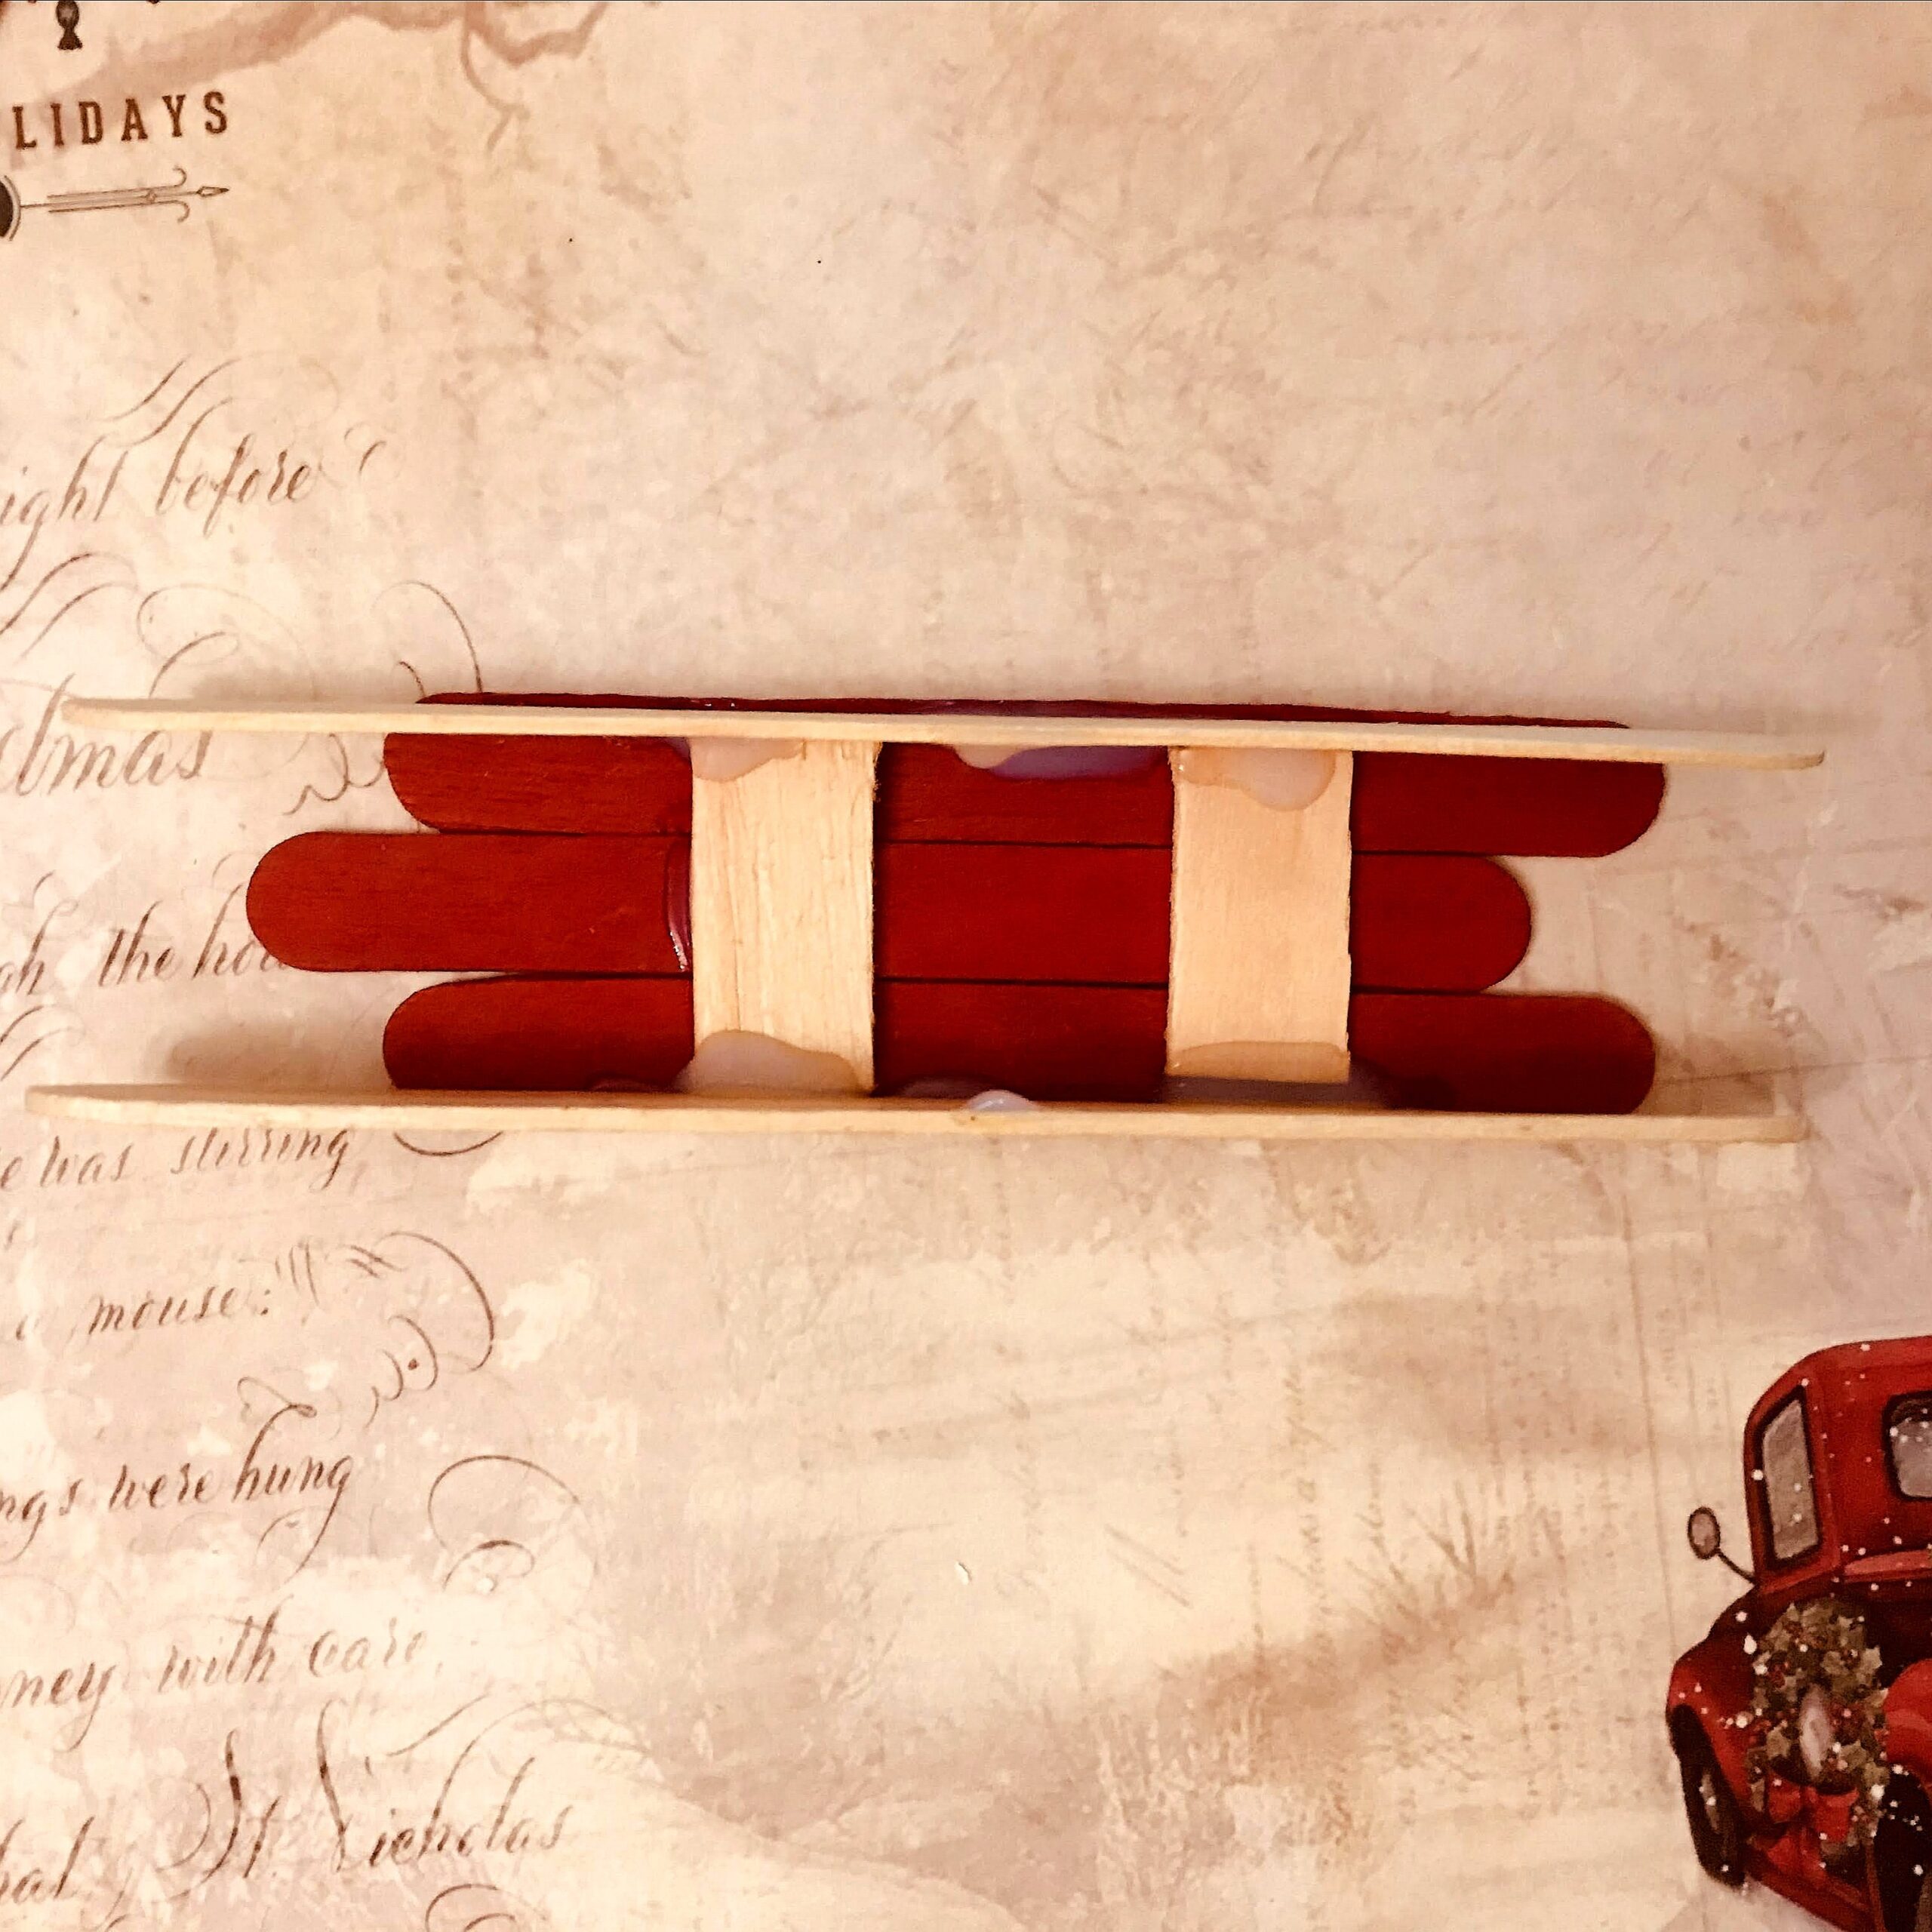
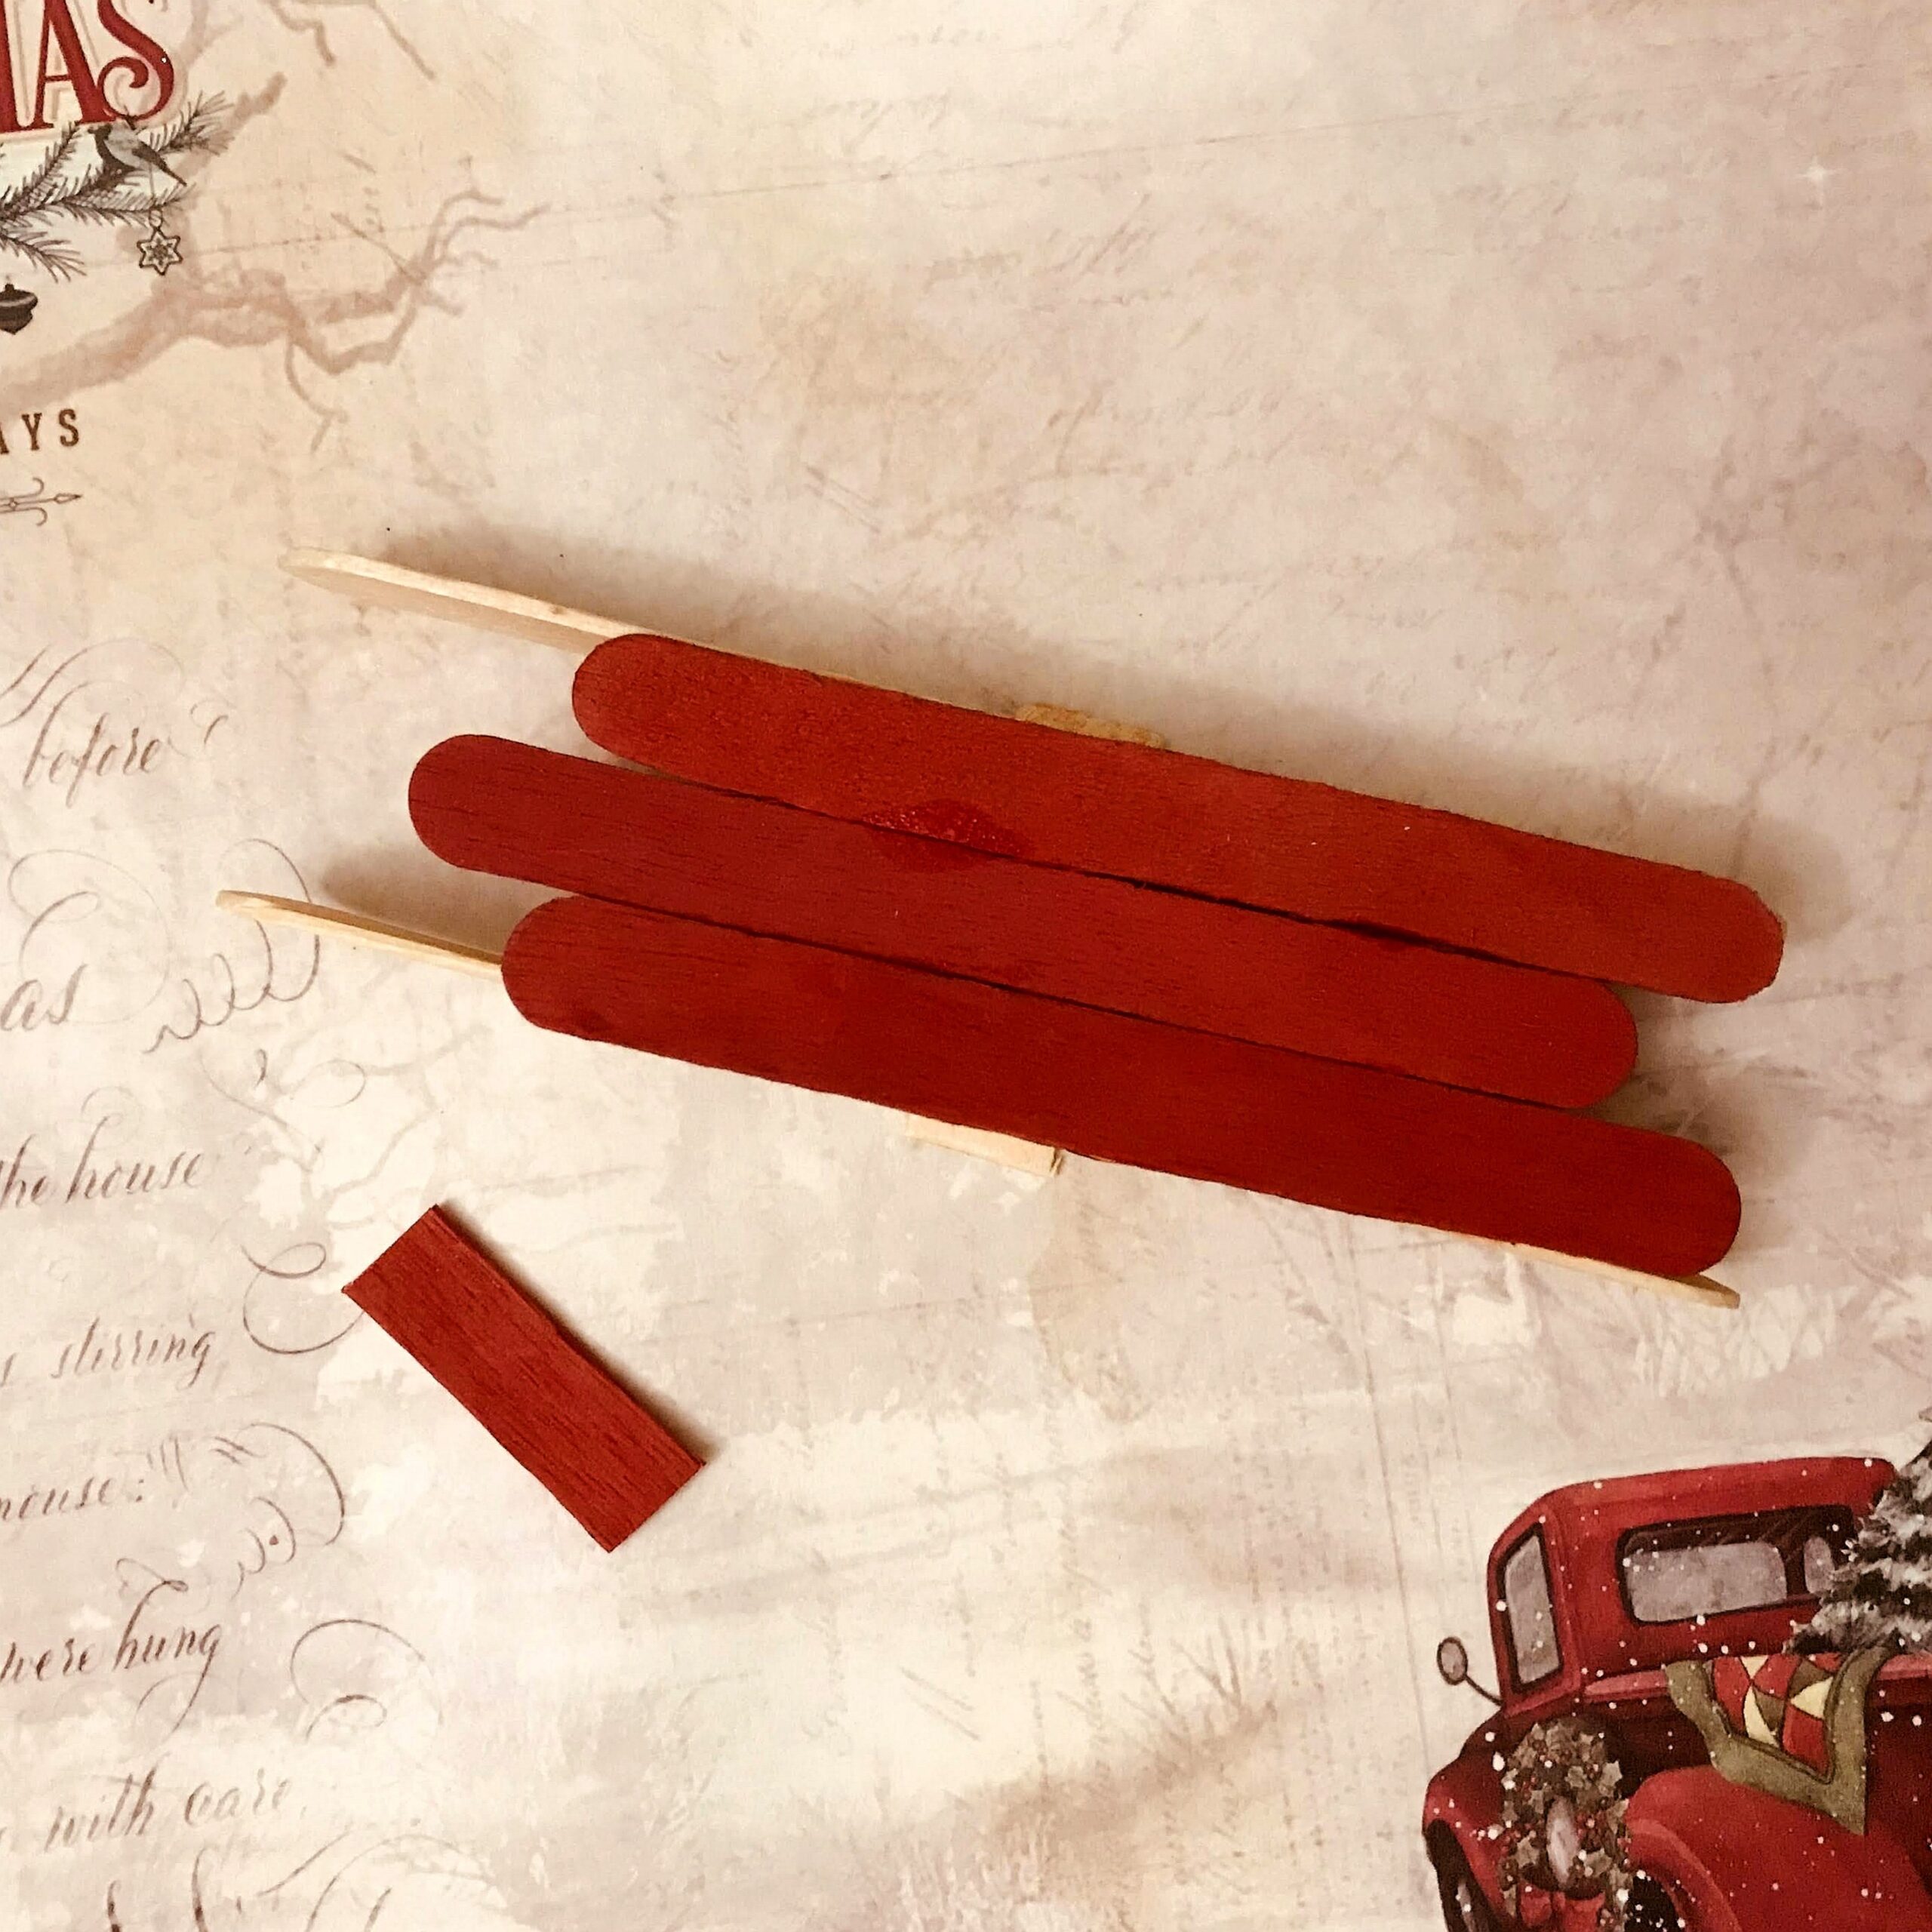
3.Santa’s sleigh Christmas ornament.
This is a really beautiful project but it involves little bit of cutting, so this would be perfect for older children
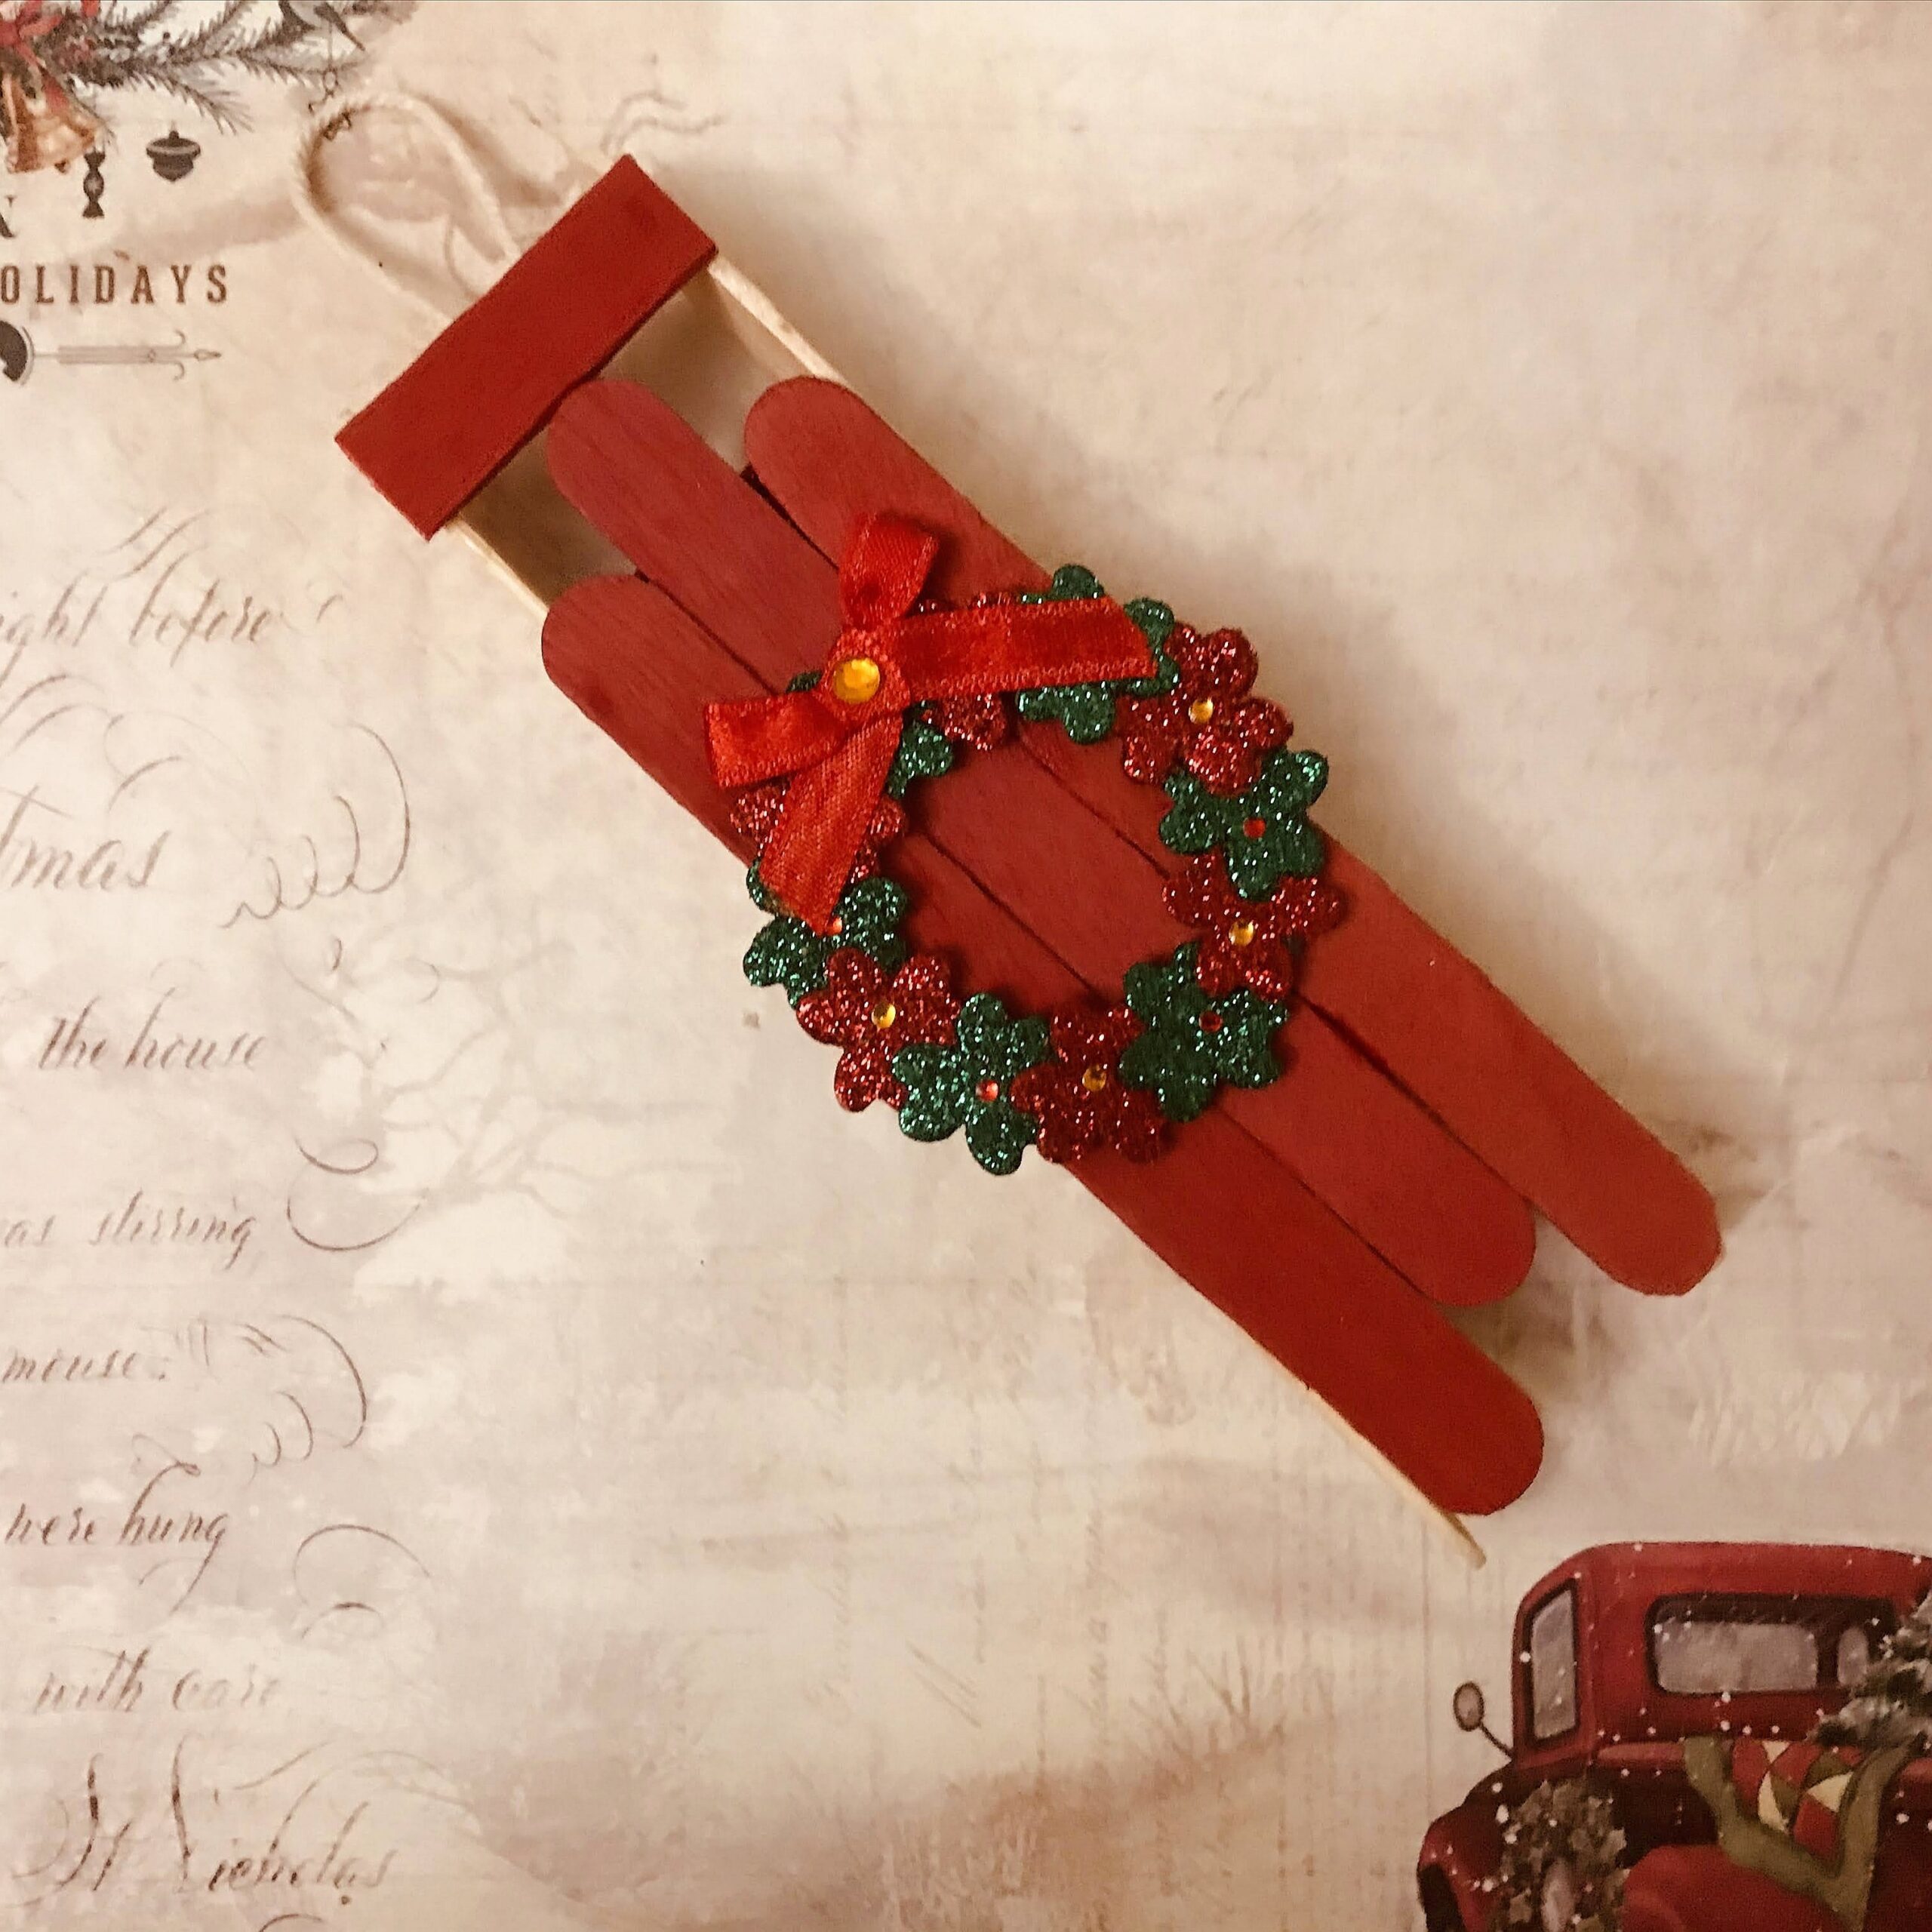
1.Take 4 red color popsicle pieces and 2 bigger slices in natural shade and a smaller slice in red.
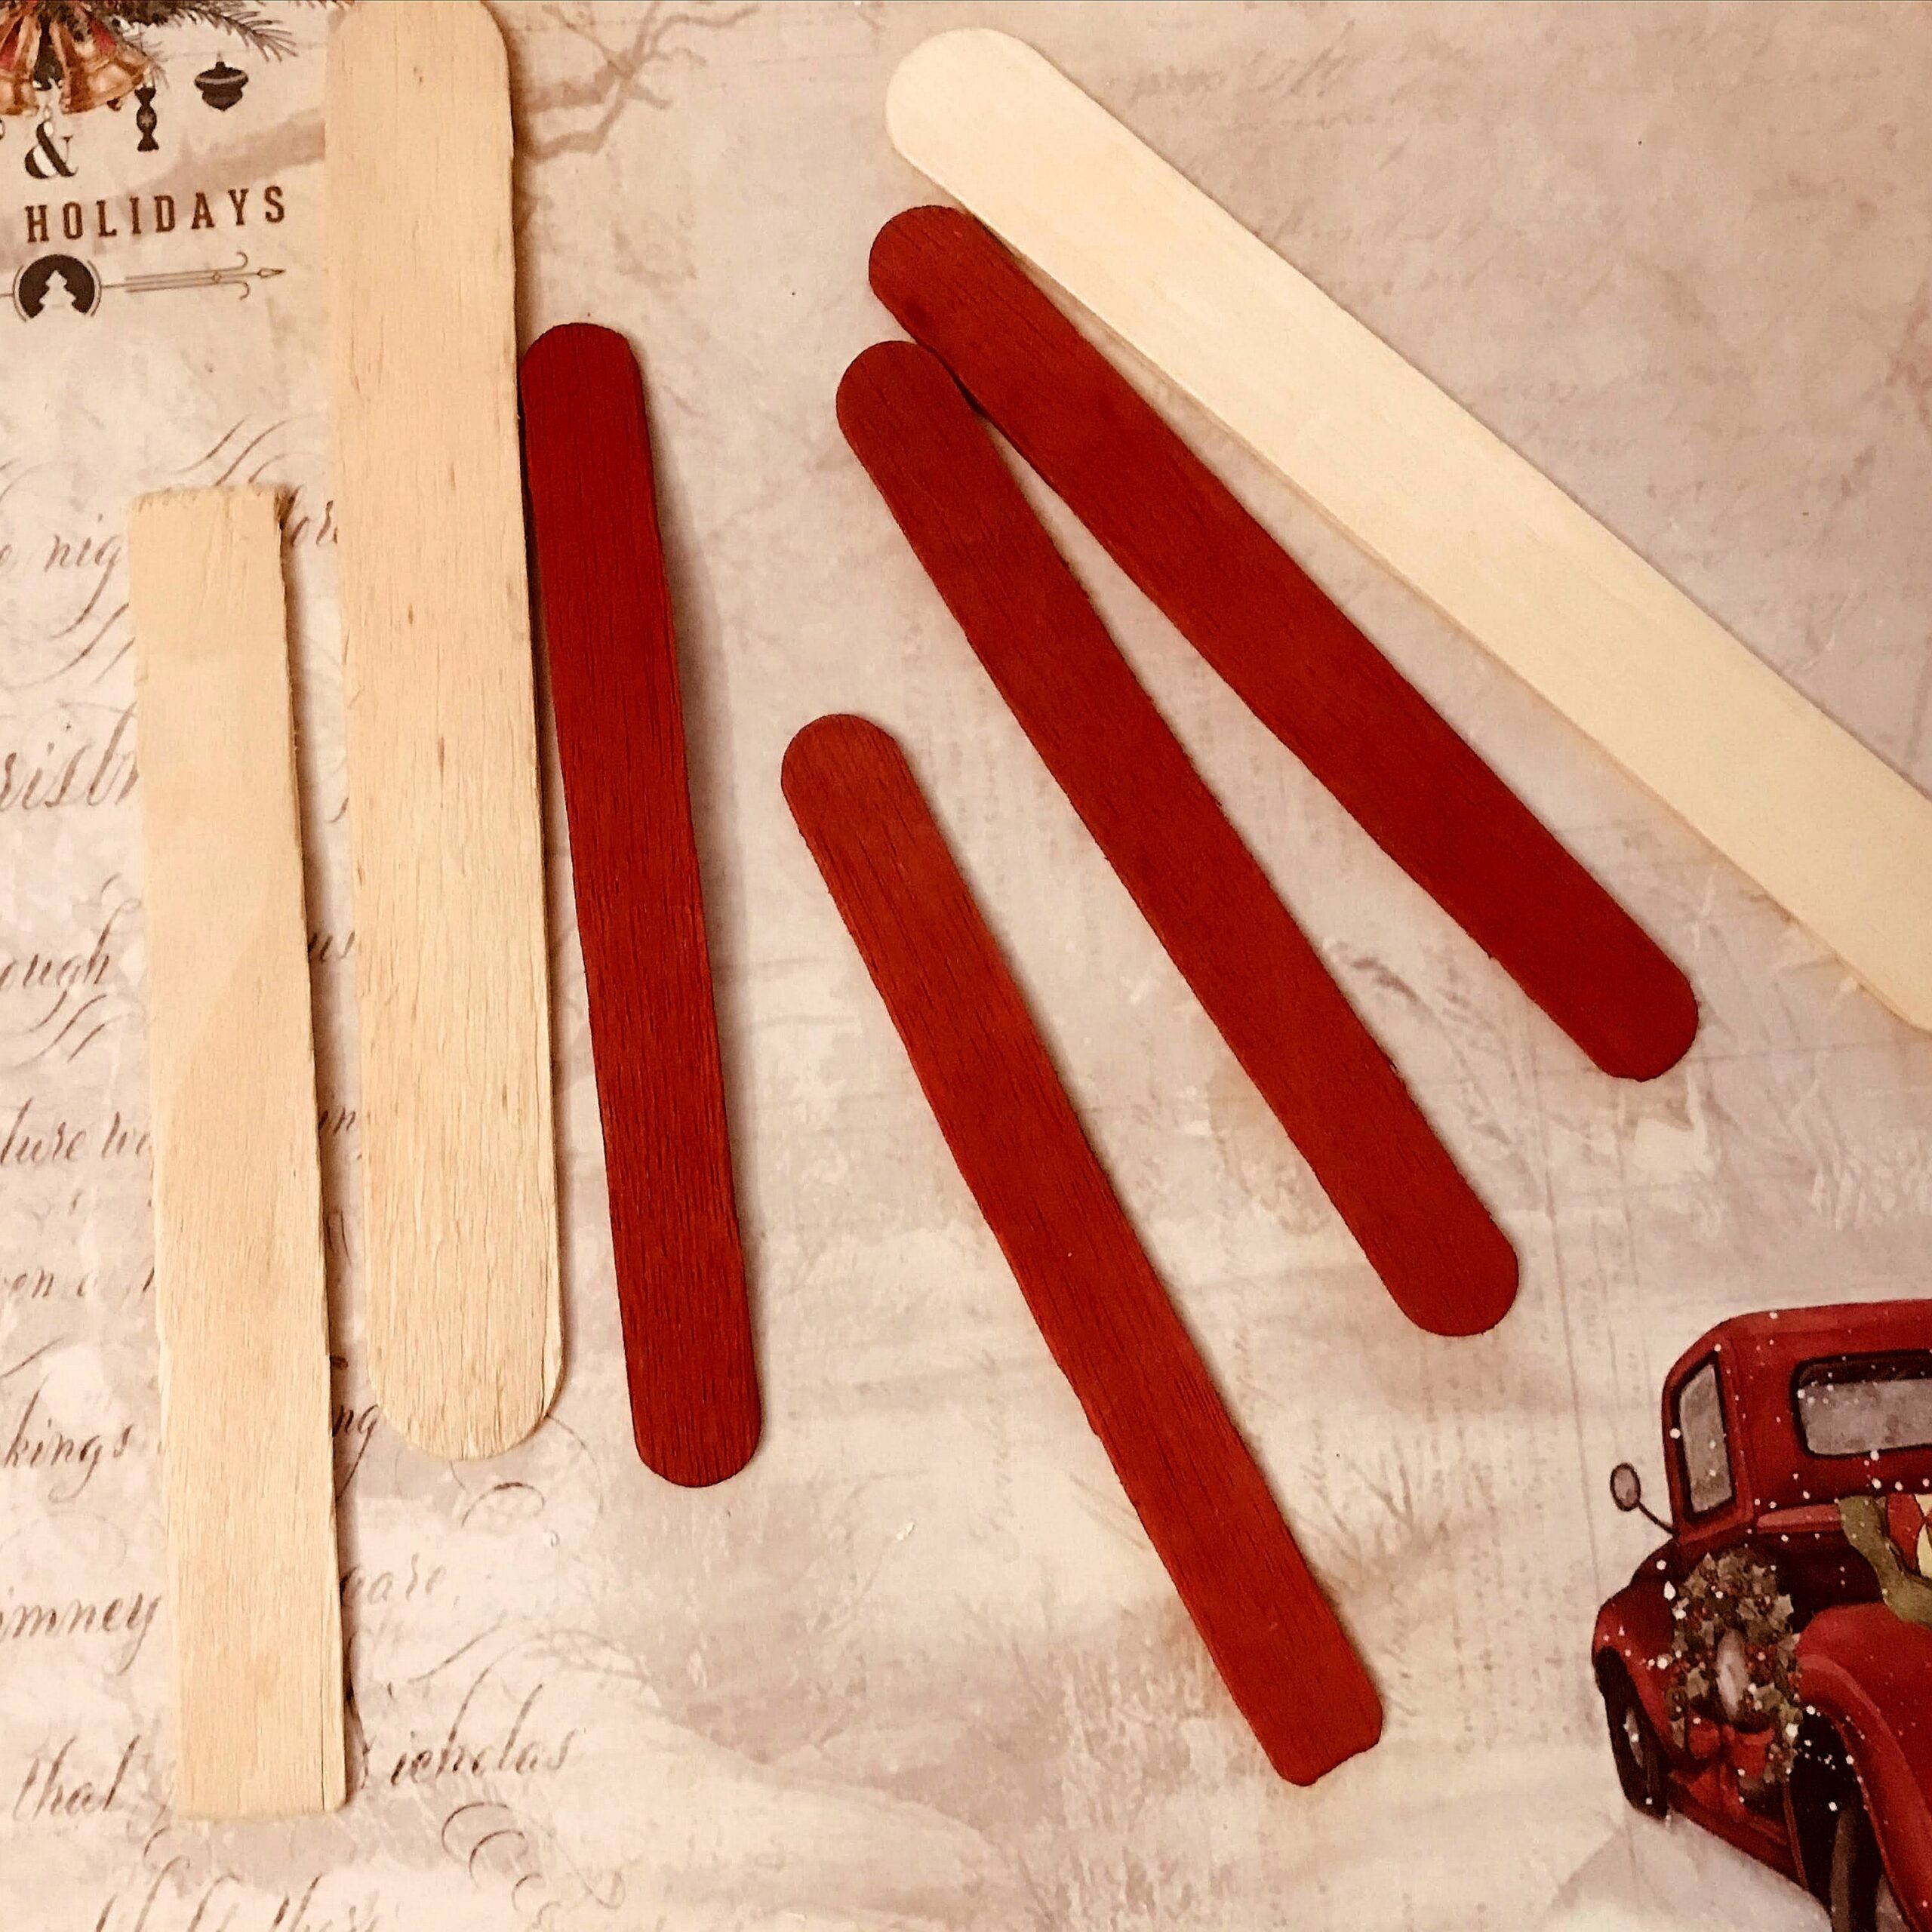
2. Arrange the red pieces as shown picture. Cut two small pieces in natural colour and glue with Super tac glue.

3. Let it dry, and stick to long natural on both side.
4.Once dry place a slice of natural slice cut into 2 cm and Place on top.
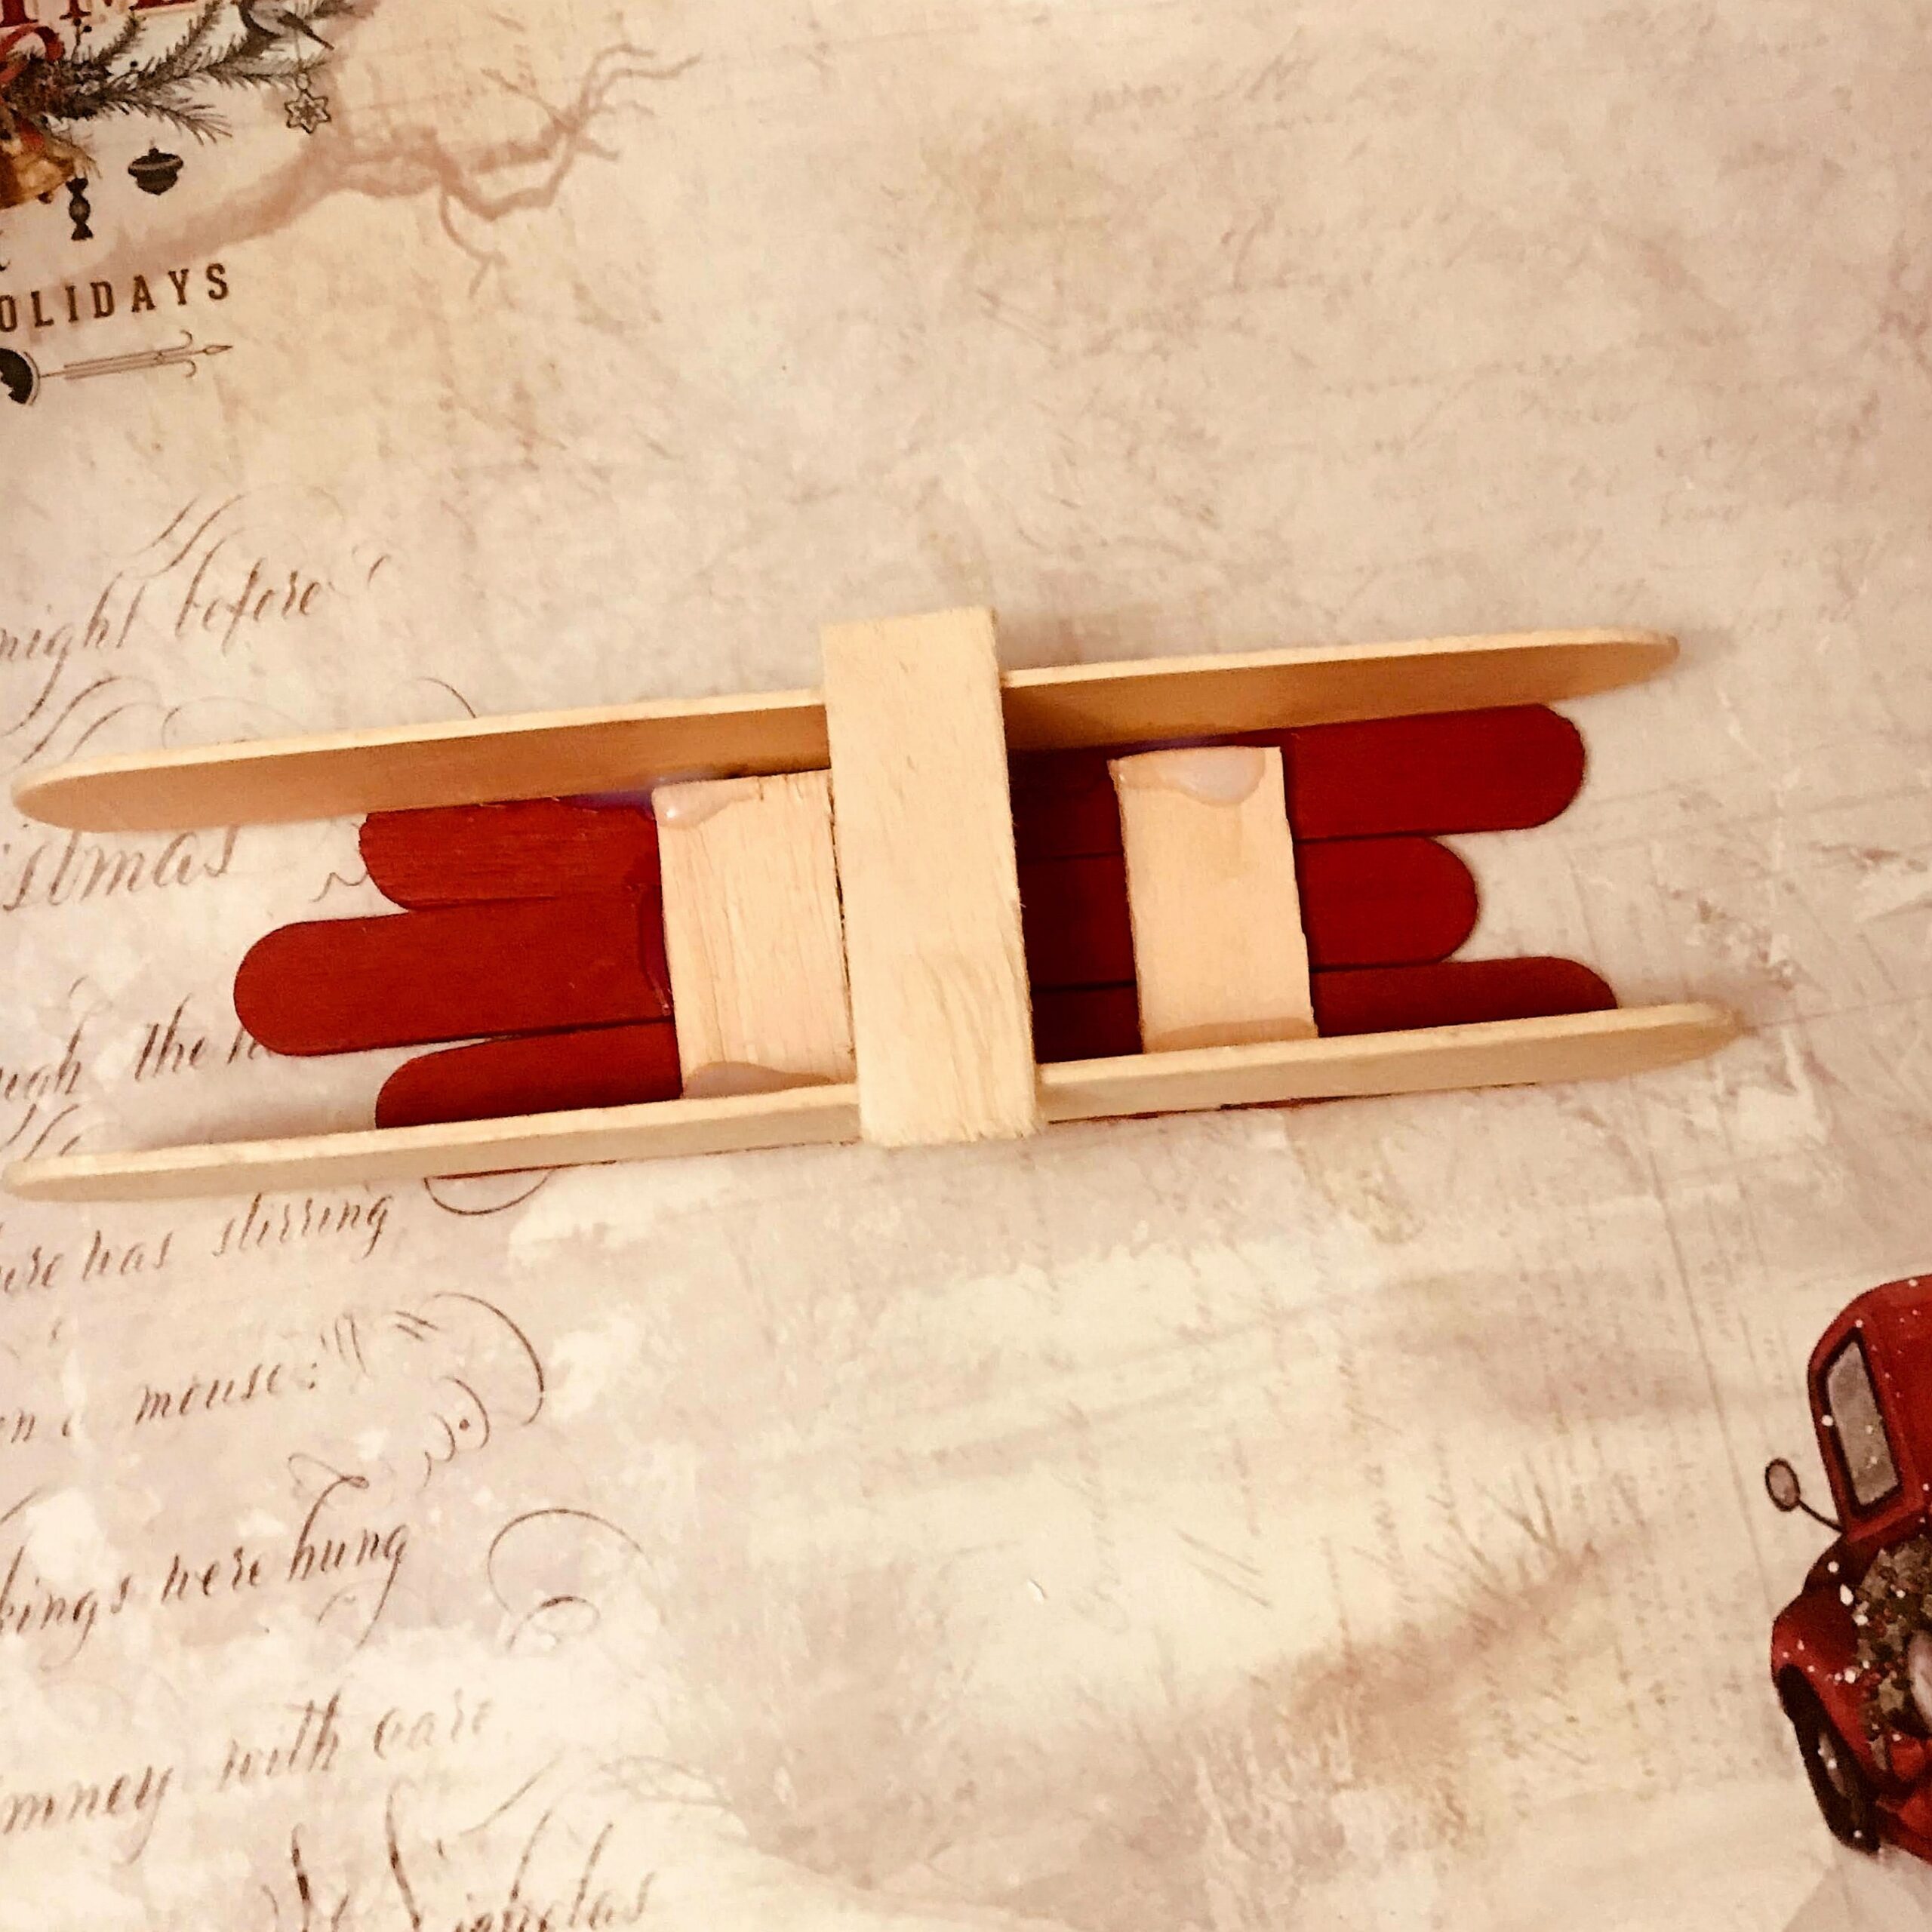
5.Once dry turn it around, and slice a wooden slice of 2 cm at the front.
6.Stick a Christmas mini wreath on top and stick a wooden cotton cord at back to hang it from the tree.

4.Cork angel ornament.
This is a fun and easy project for everyone.
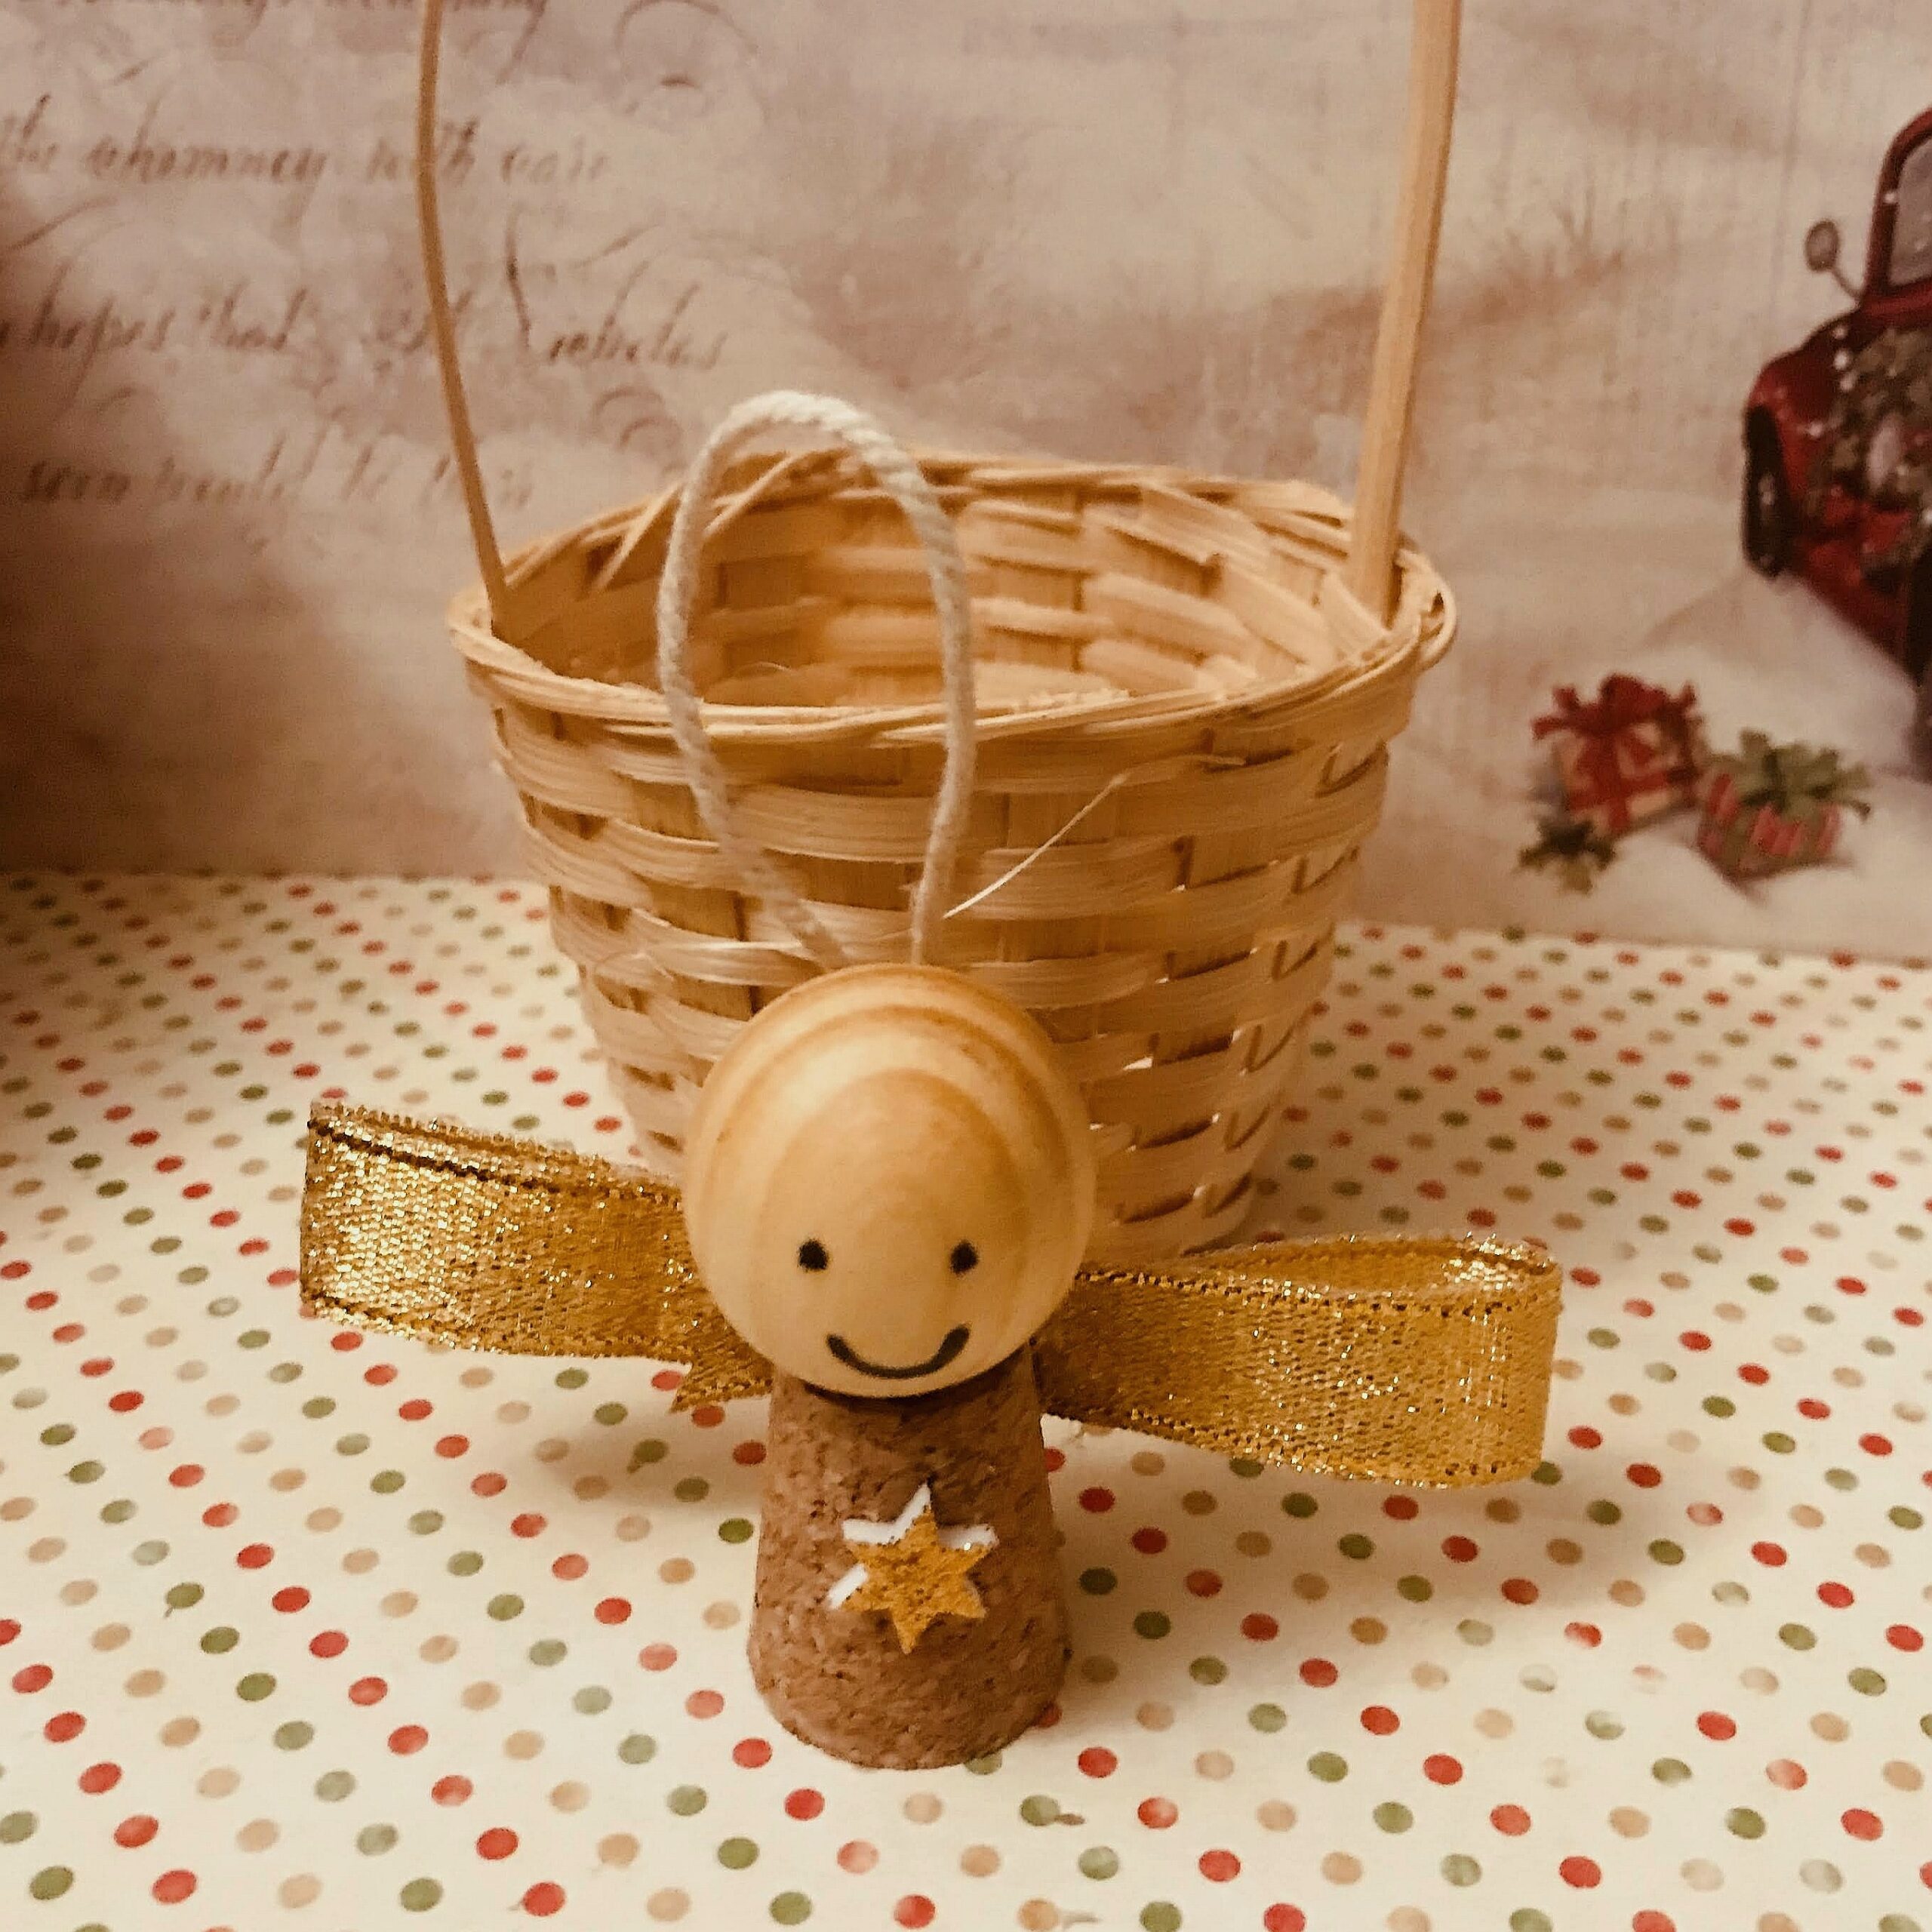
1.Take a cork and a wooden ball and stick it with Super quick tac glue.Let it dry for at least half an hour.

3.Paint eyes and lips with a permanent marker or black multisurface archival paint.

4.Cut 10cm of Gold shimmer ribbon and fold from both sides towards the centre and stick at the at the back like a bow using silicon glue.
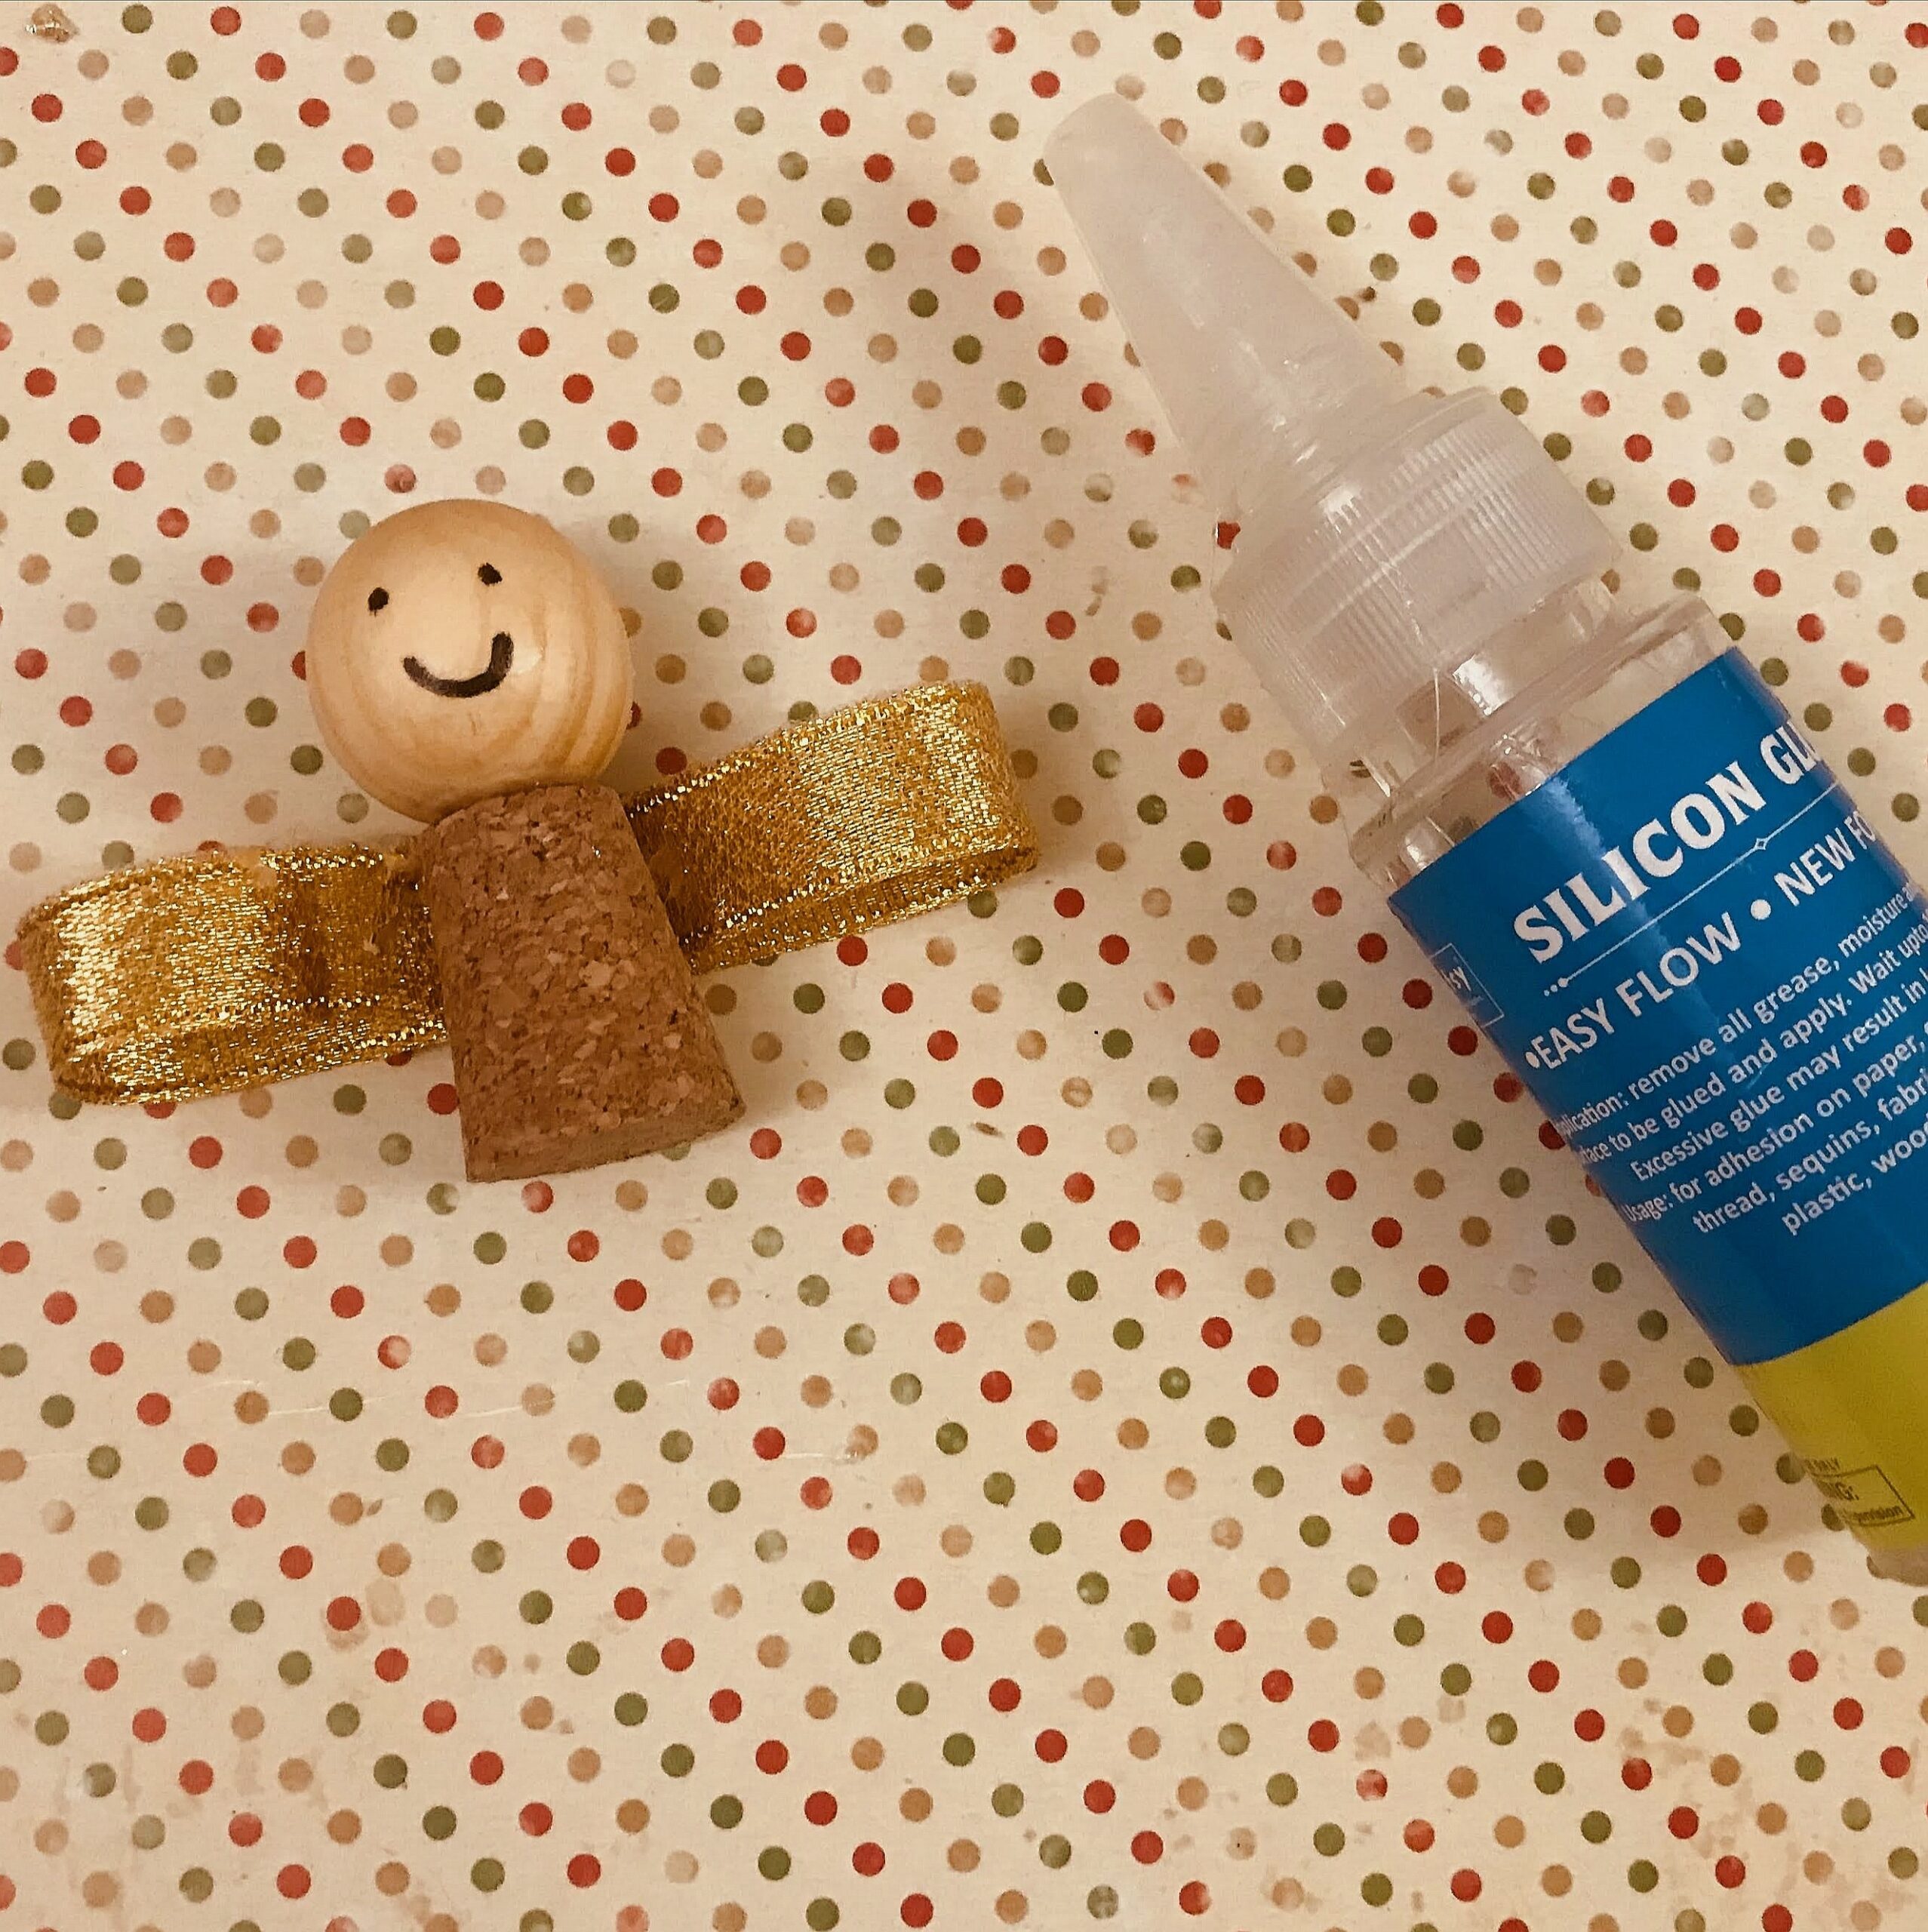
5.Stick on a star, on the cork.

6.Glue on a cotton cord of app 10 cm and the ornament is ready.
5.Jingle bells star ornaments
Simple and cute Christmas star ornament.
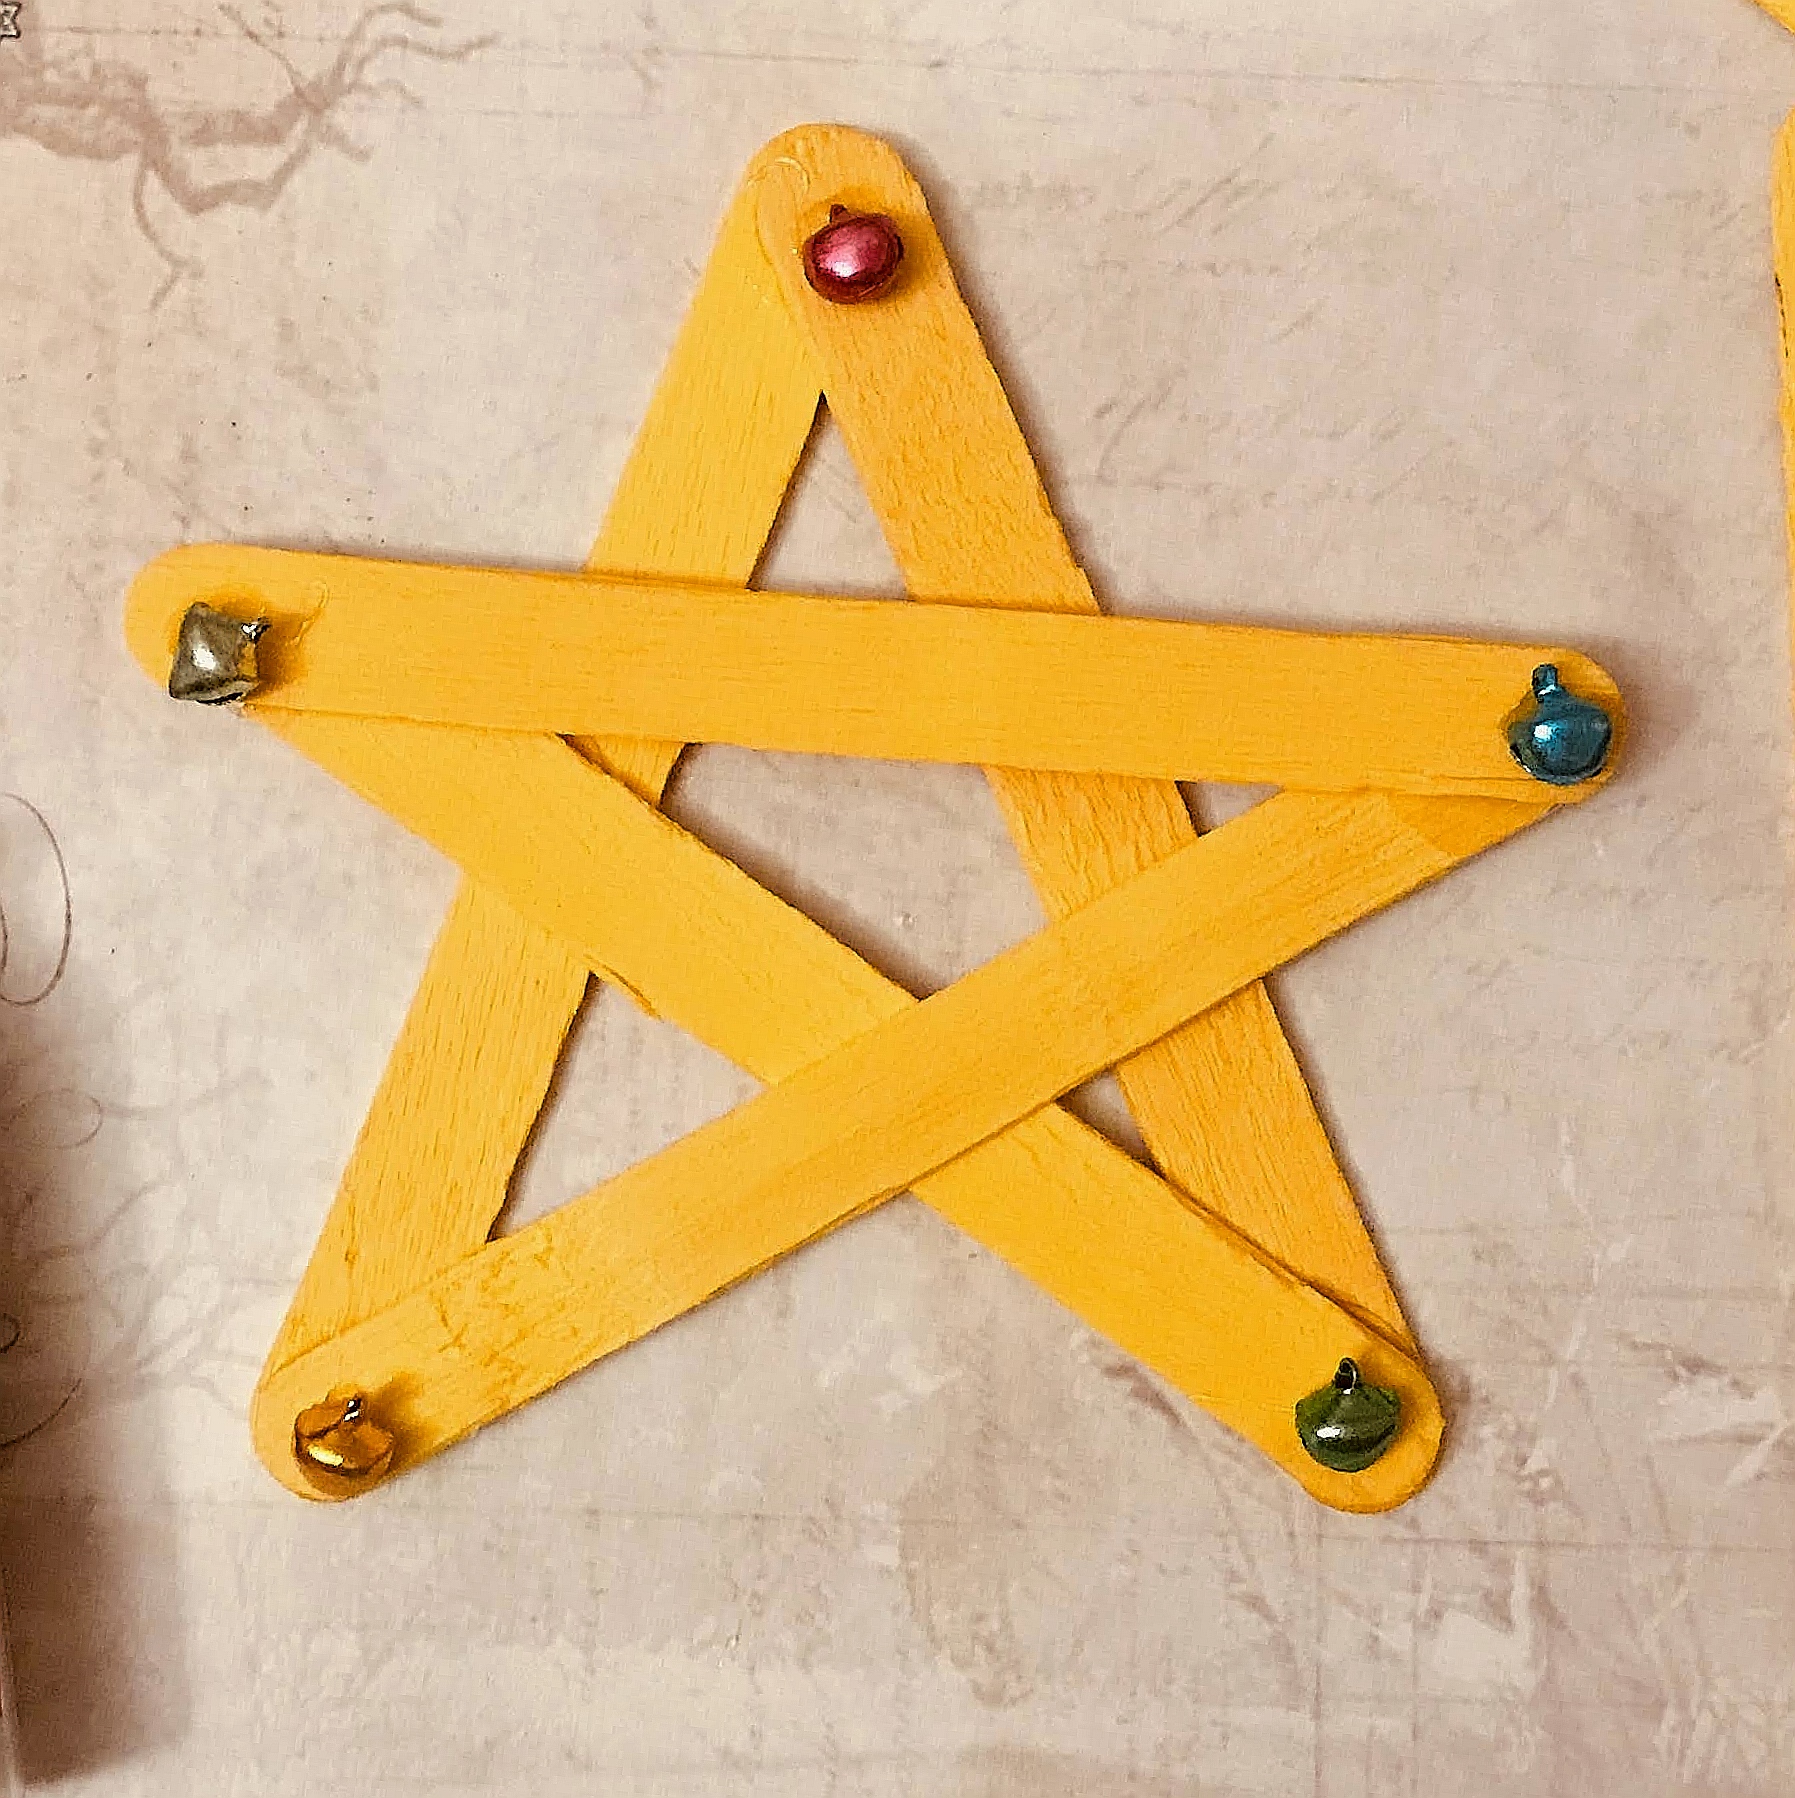
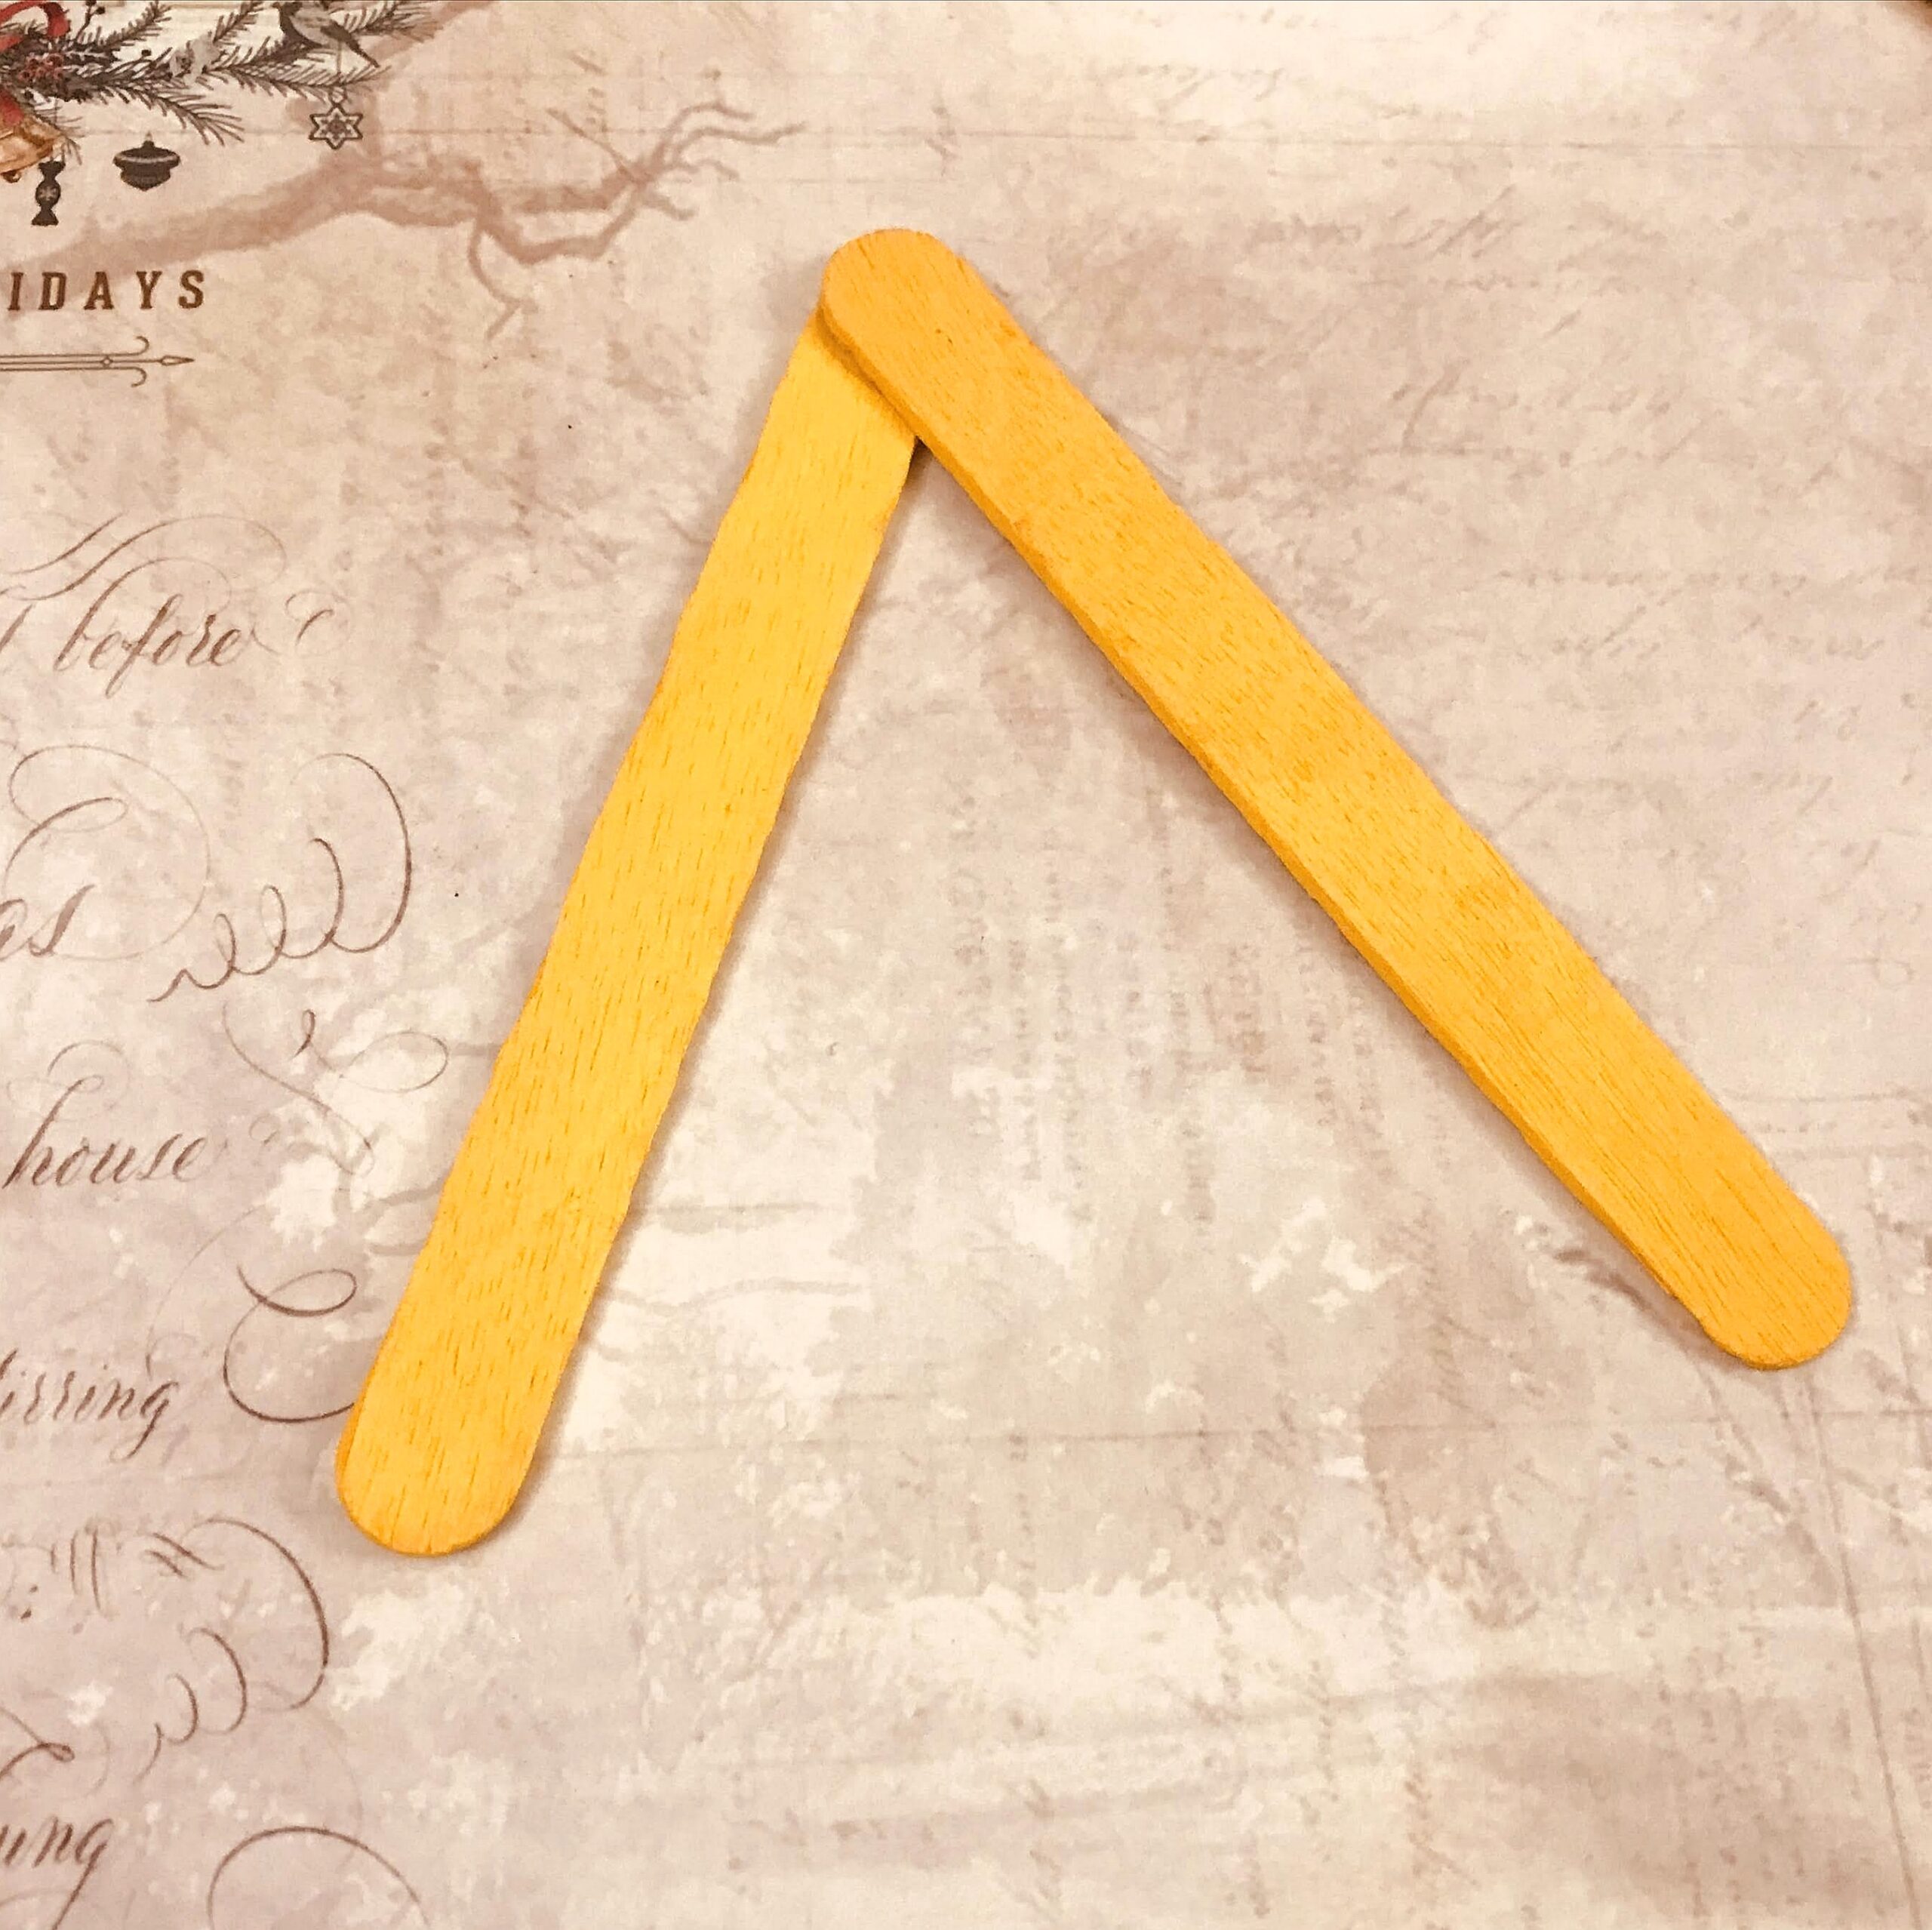
1.Take 5 popsicle sticks in yellow colour or paint it with yellow acrylic paint. Stick the popsicle sticks using Super hi tac glue into an inverted V.
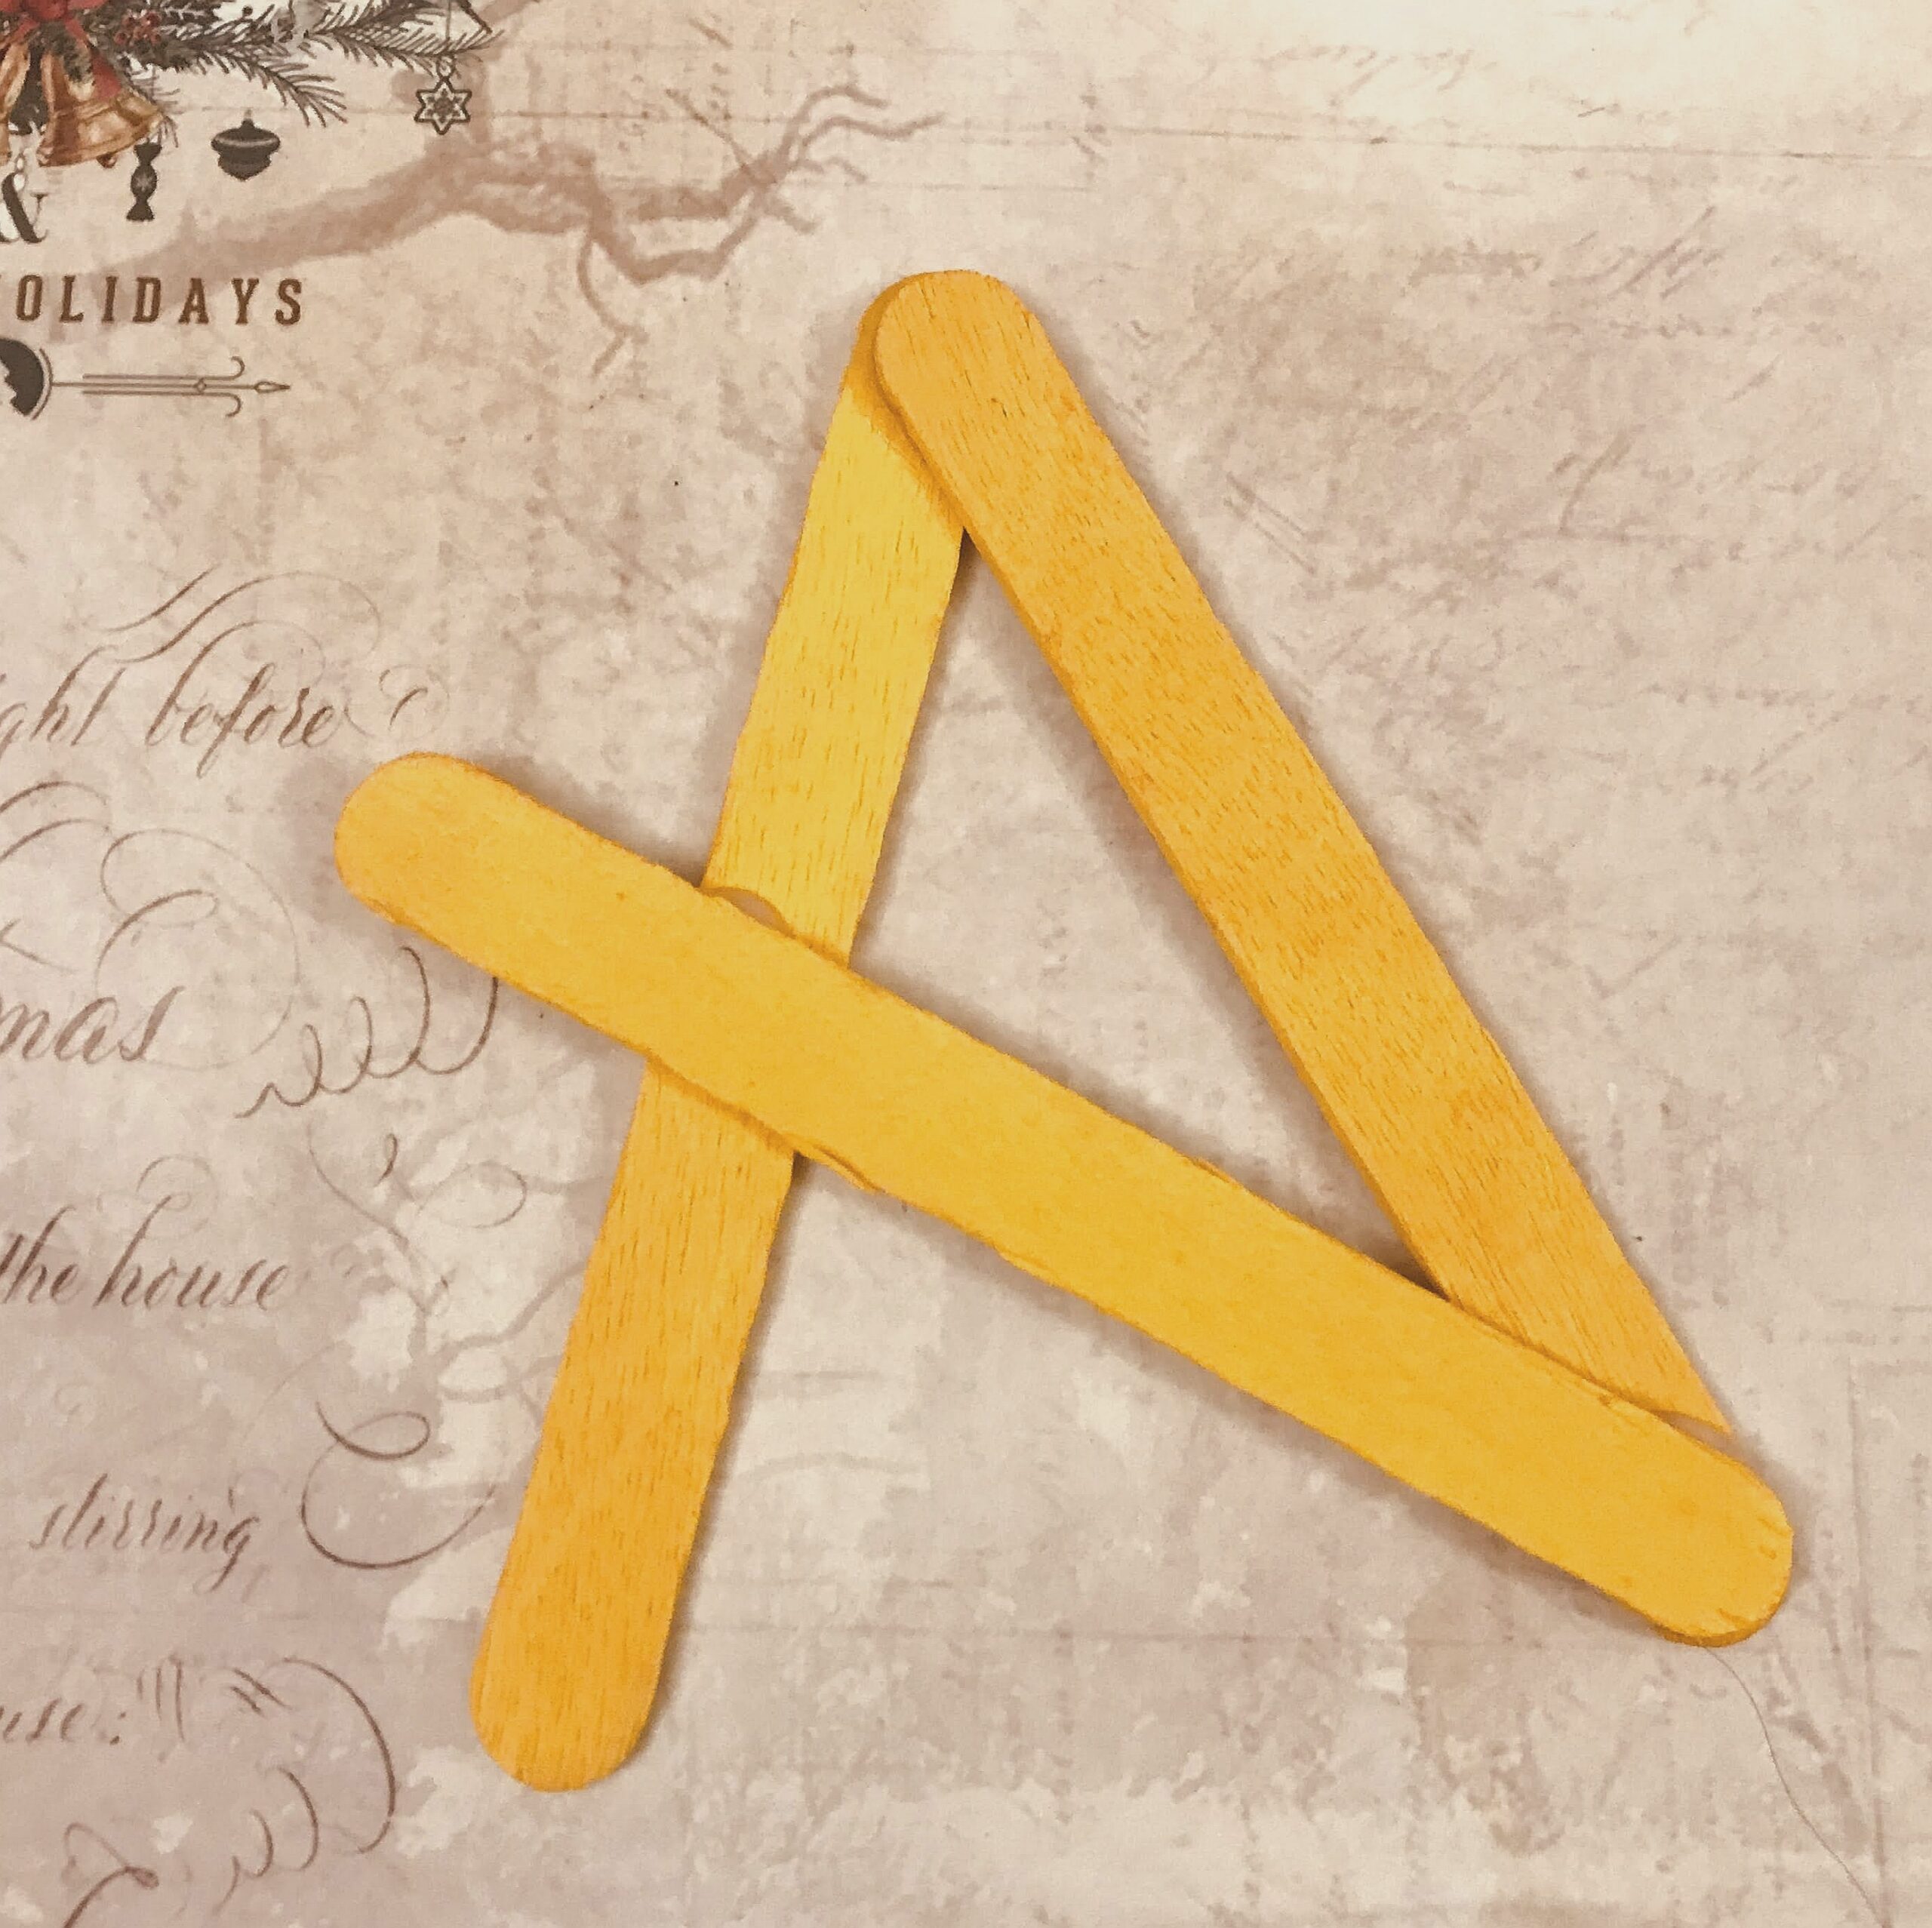
2.Then stick the next stick as shown in image.
3.Stick the next stick at an angle to the 3rd popsicle stick.
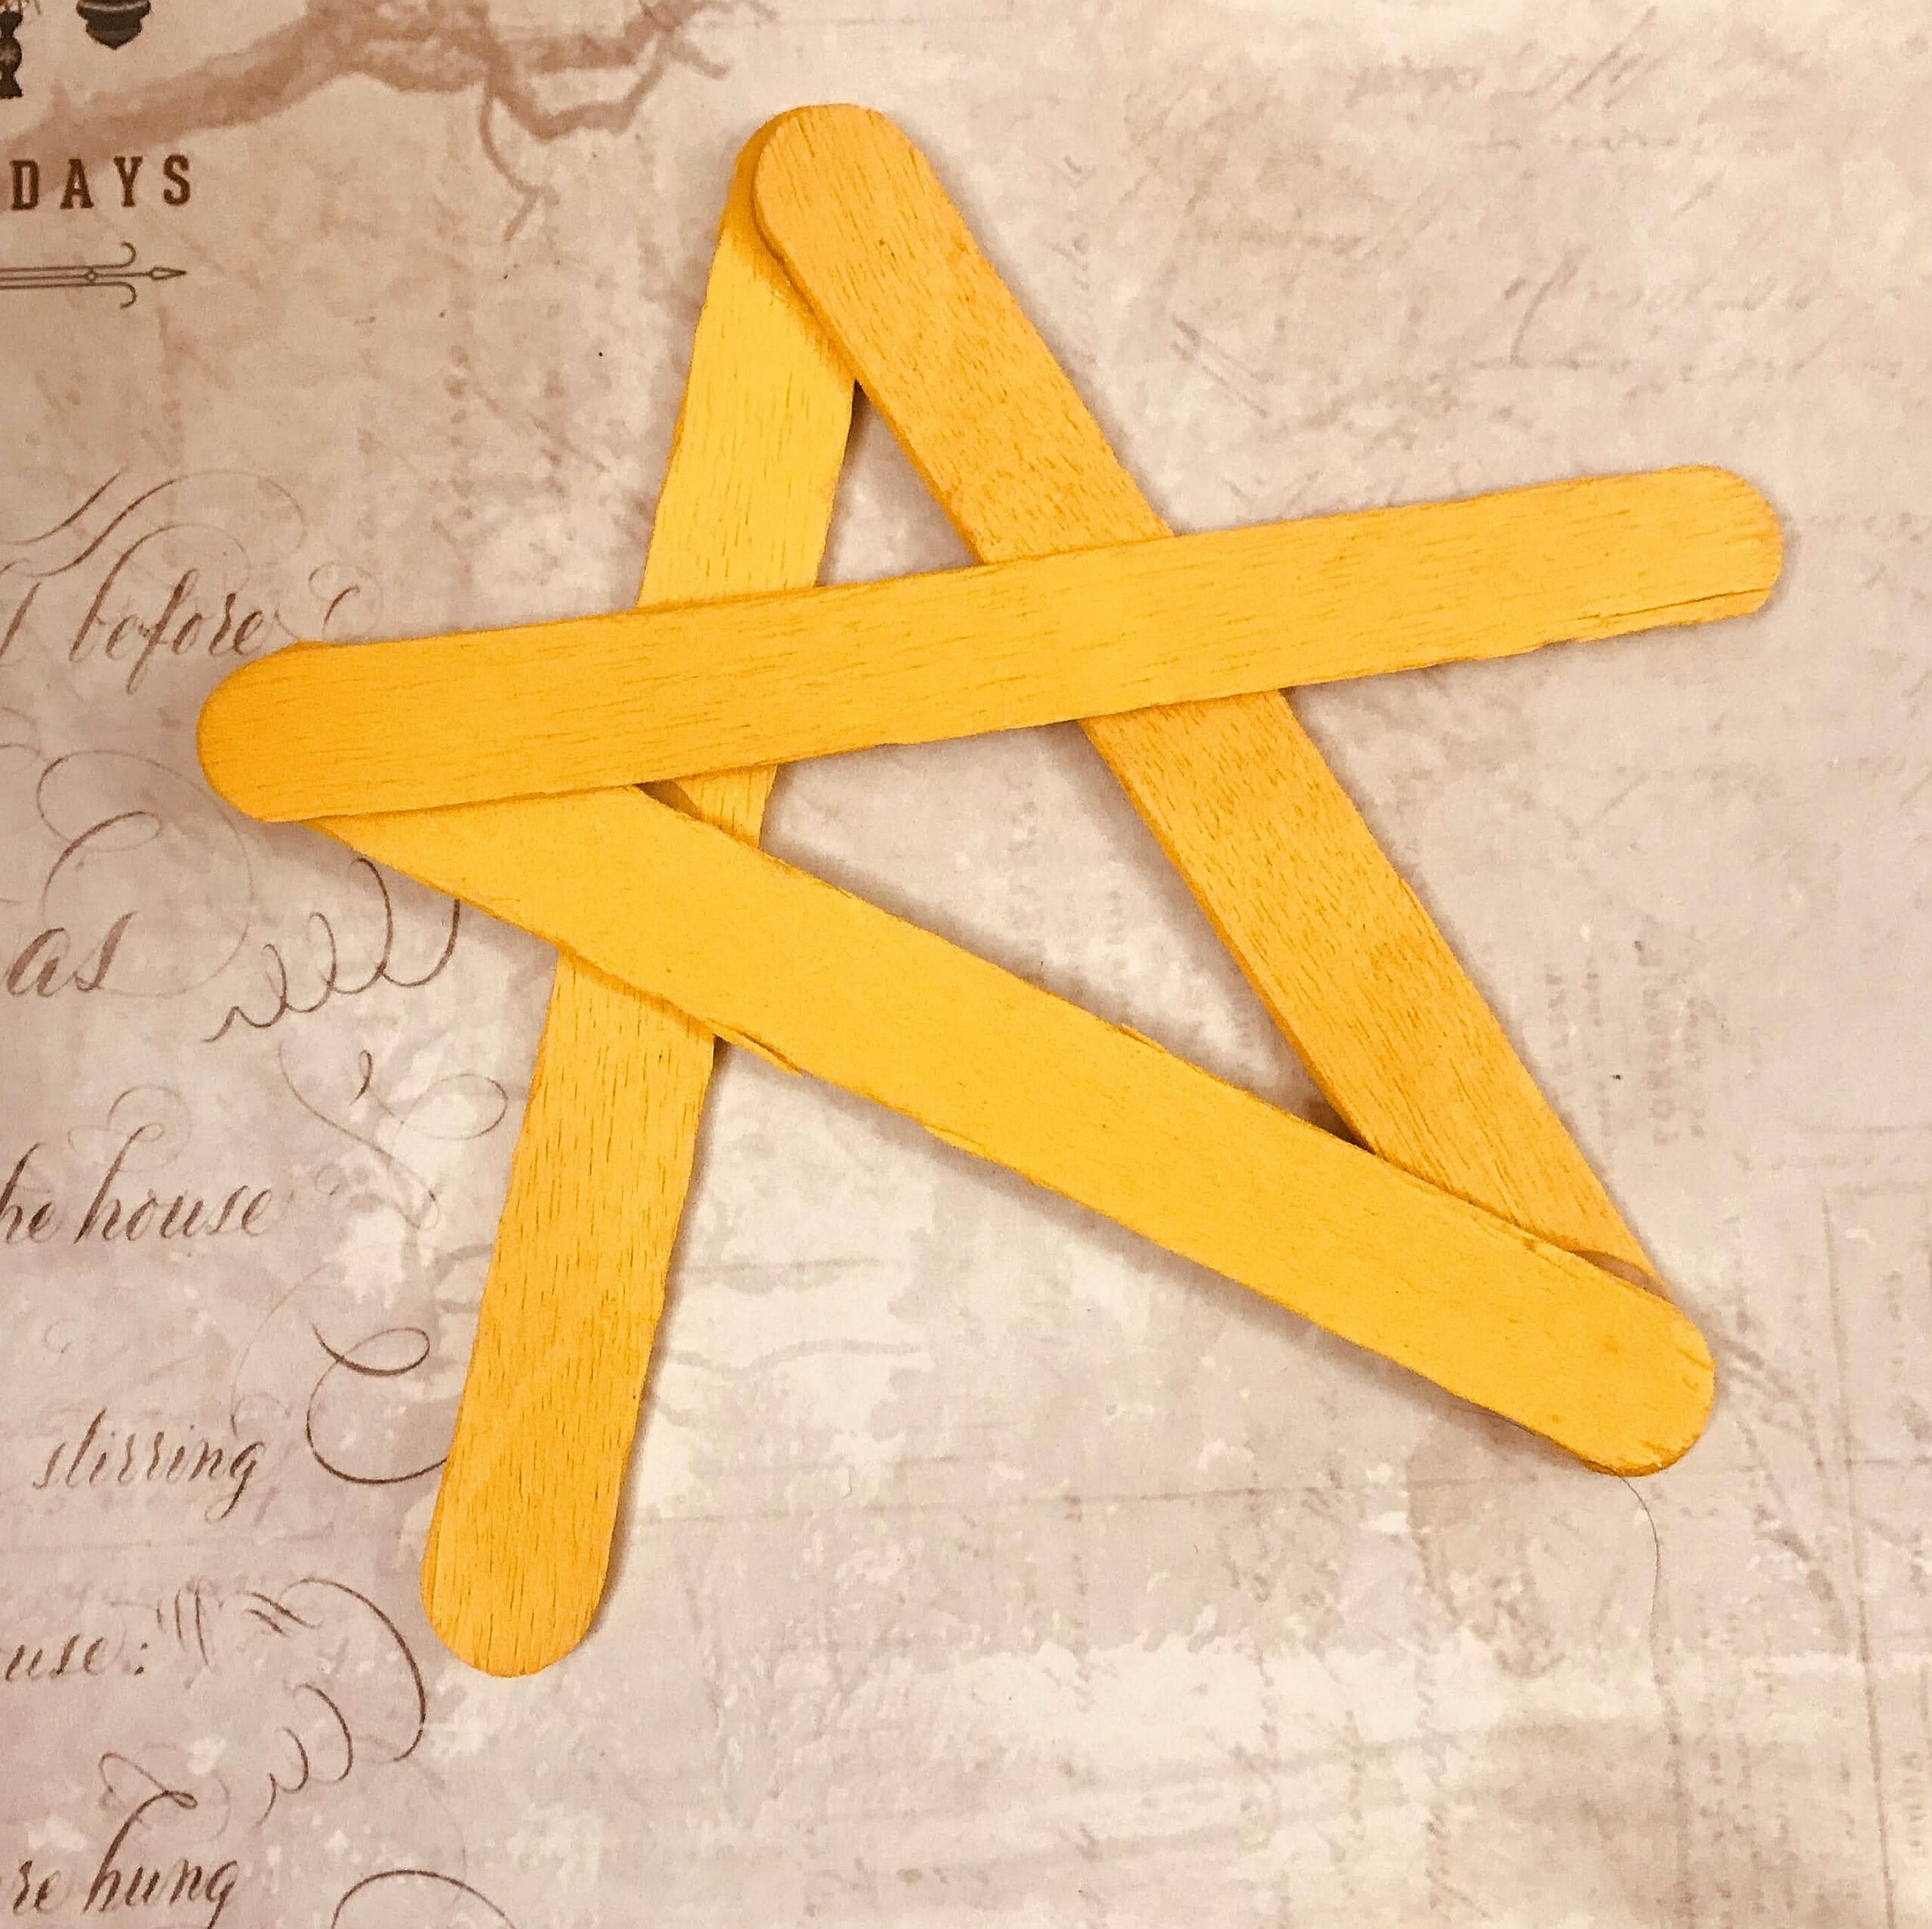
4.Complete the star as shown in image.

5.Glue on Christmas jingle bells in assorted colours and stick on the corners of the star.
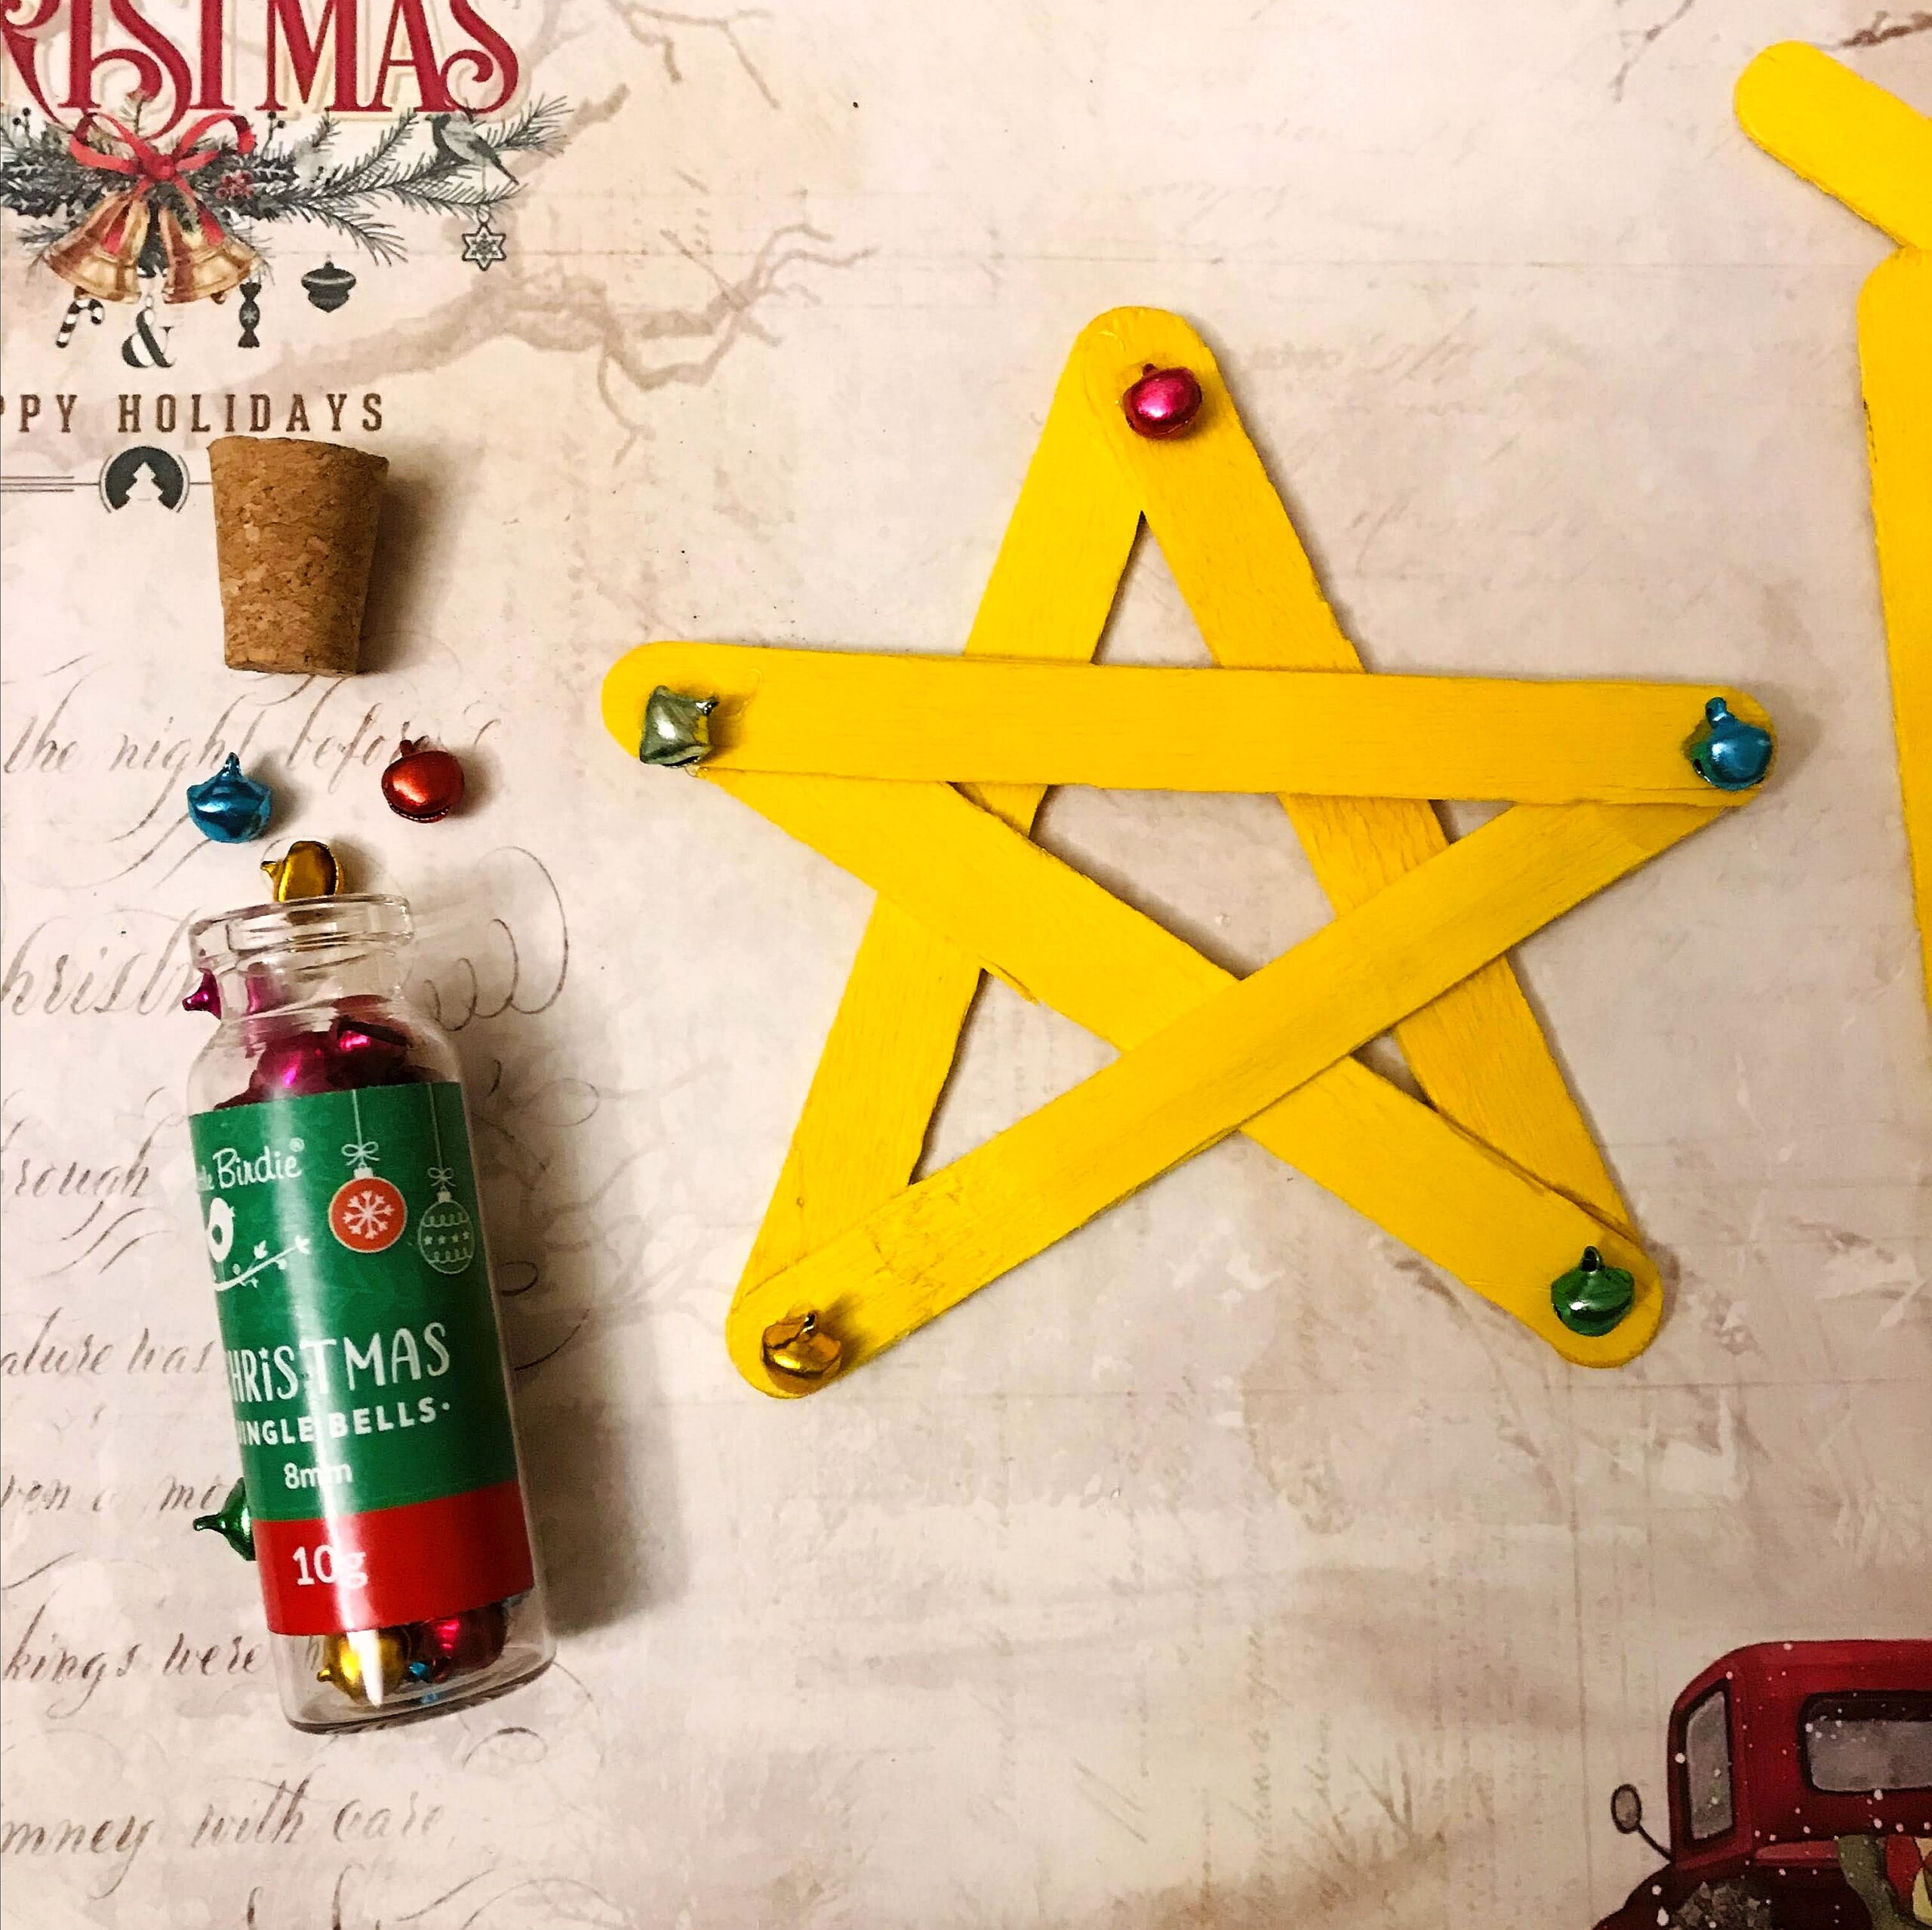
6.The beautiful star is ready.

6.Cork snowman decor

1.Take a 1 inch wooden ball and a cork and stick it using Super high tac glue.
2.Paint the body and head with chalkpaints snow and face and buttons with chalkpaint charcoal and paint the nose with orange or red paint.

3. Tie a Christmas Tartan Ribbon around the neck and cut it according to the length.
The cute little snowman is ready..
7.Santa belt ornament
This cute little ornament is so easy and cute to make.
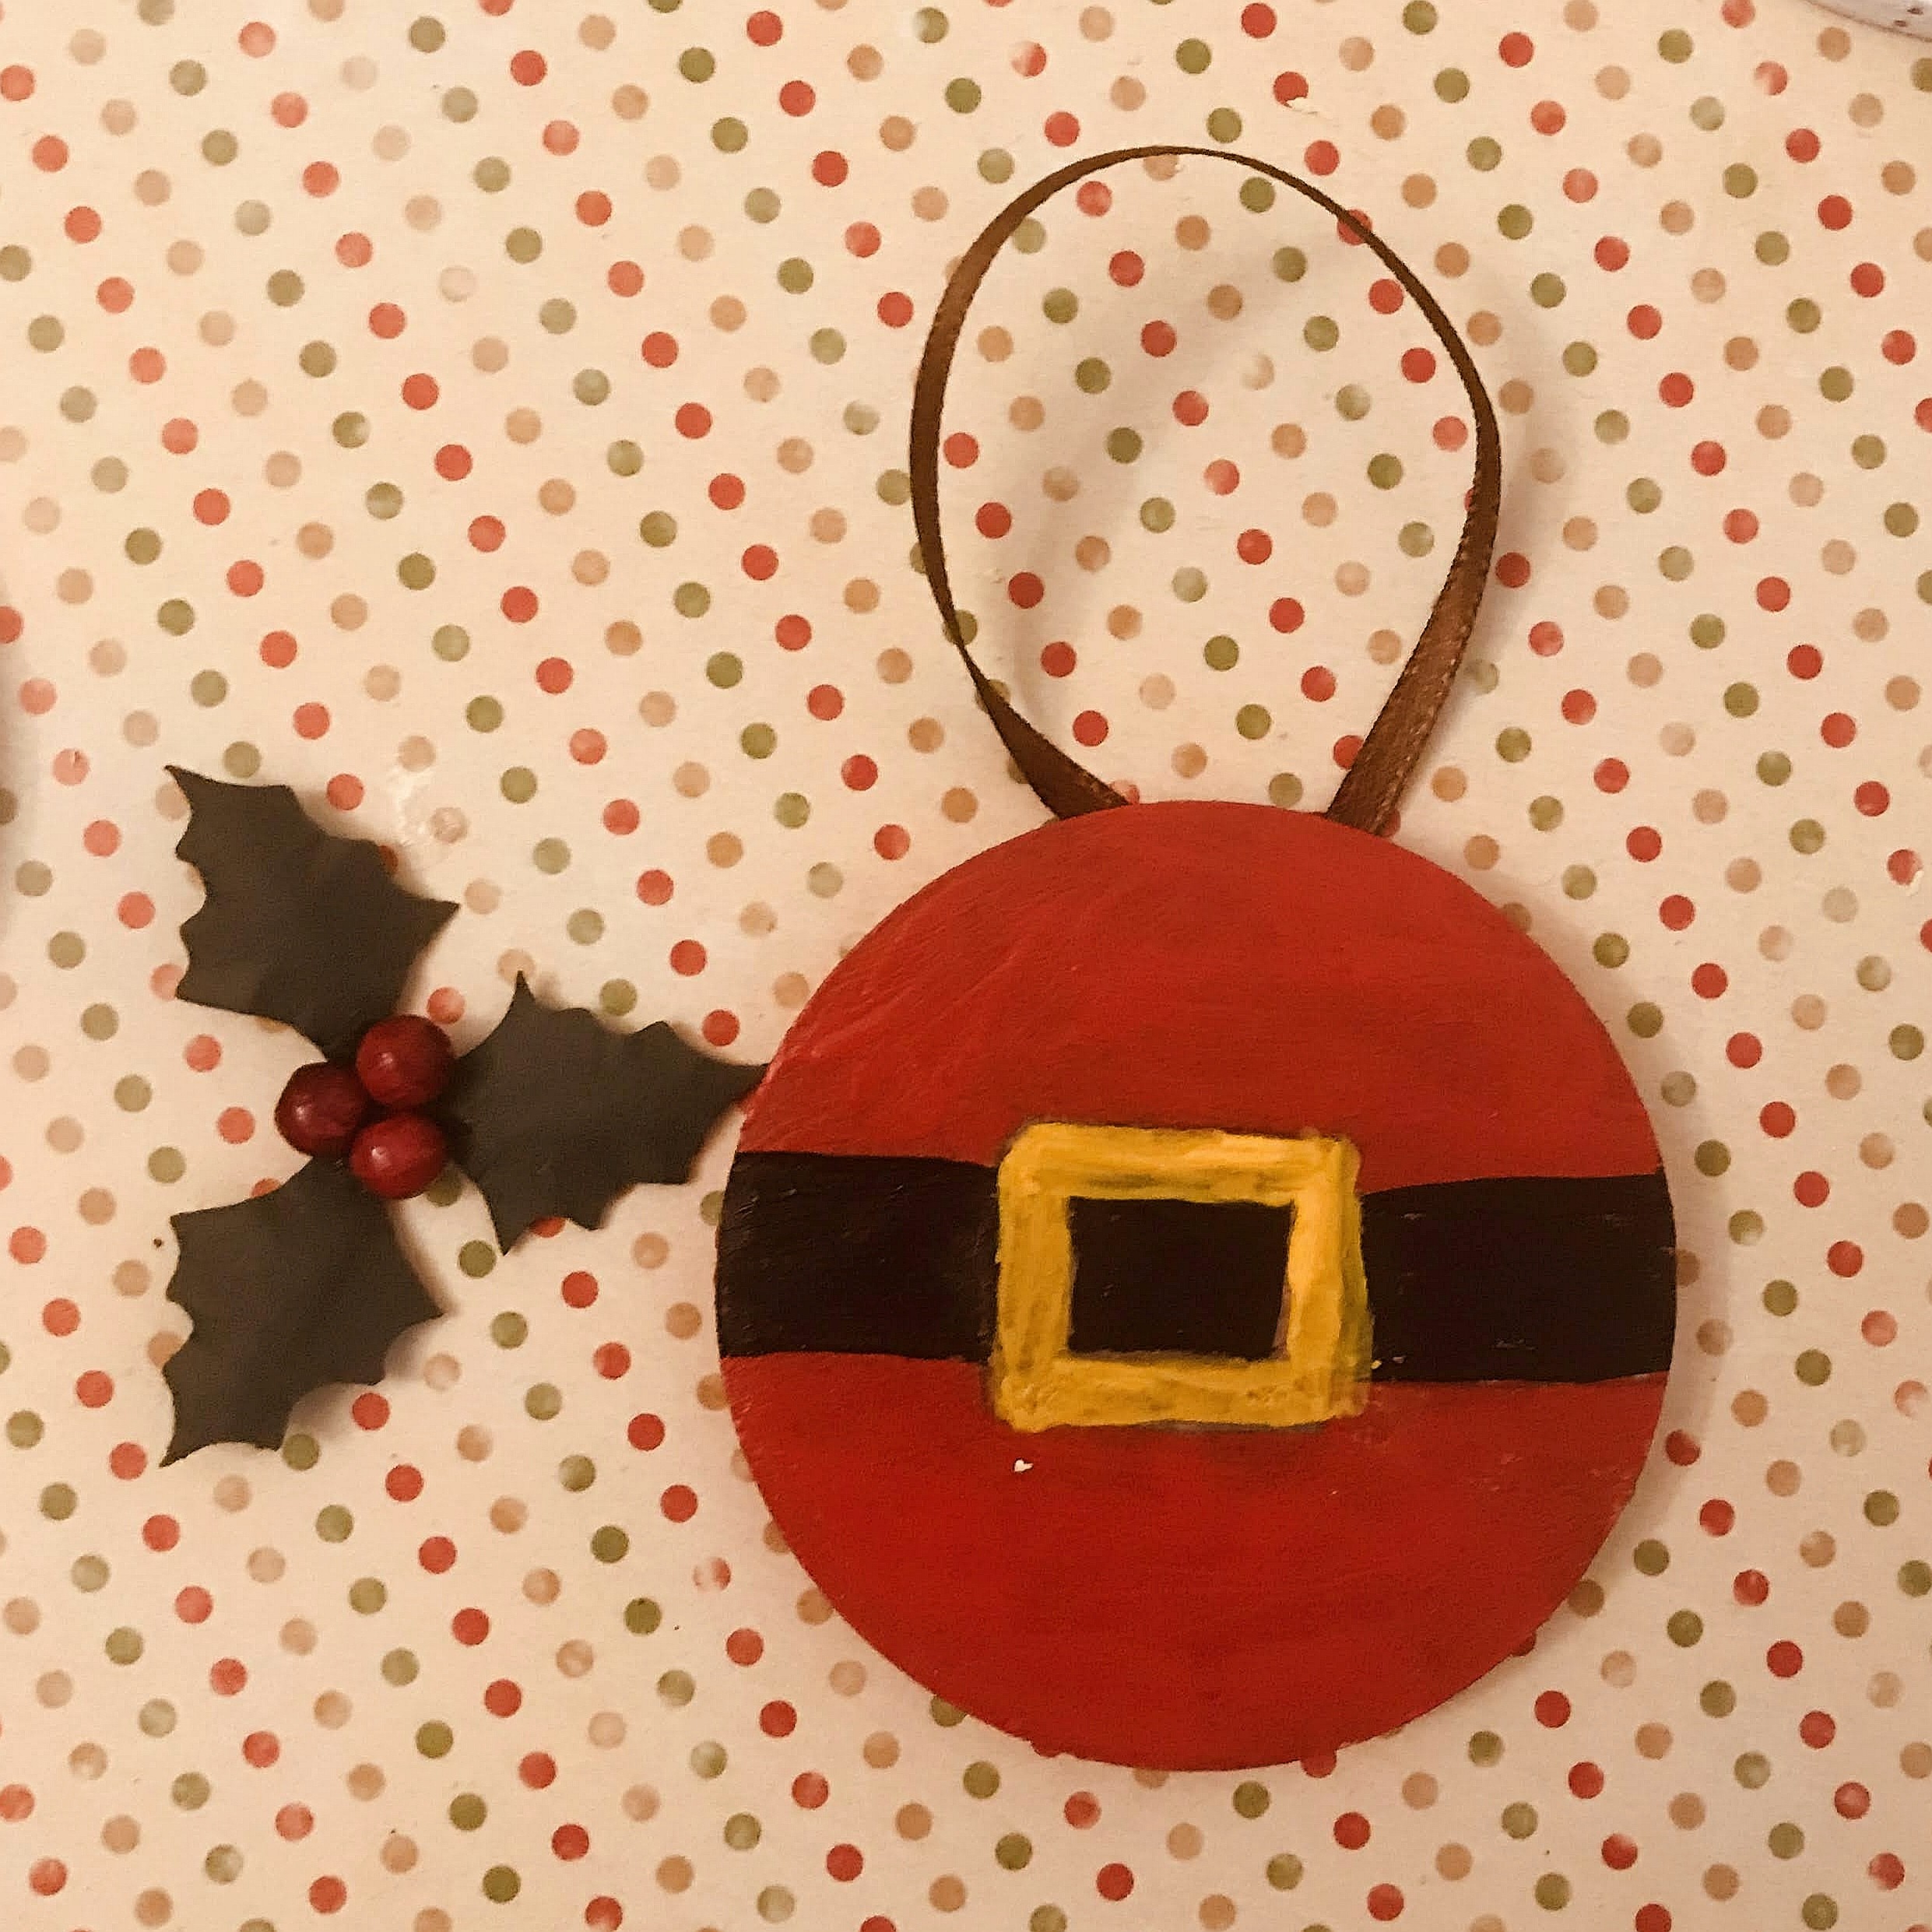
1. Take an mdf circle of 5 x5 cm size and draw a Santa’s belt.

2.Paint the belt in Archival multisurface paints black pearl and tangy tomato orthe rest of area and let dry.
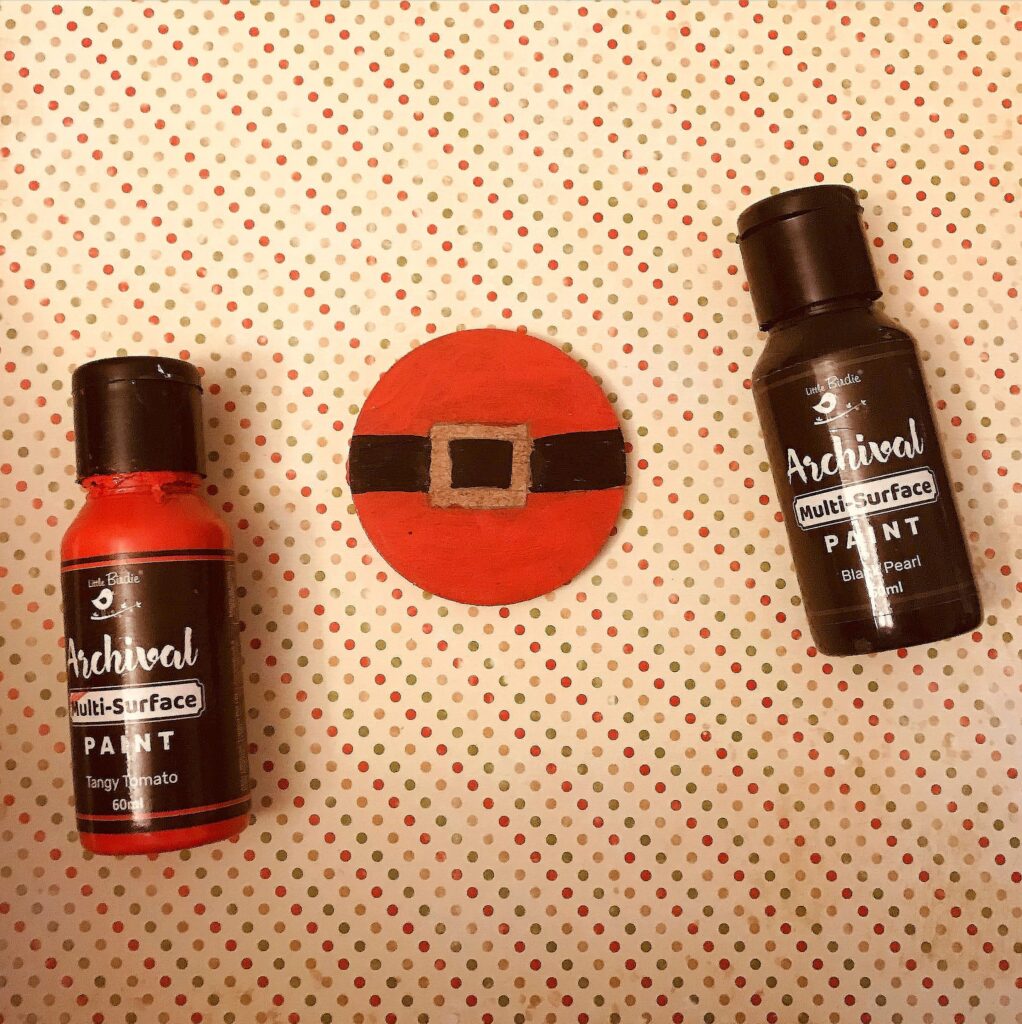
3.Paint the centre of the belt with archival multisurface paint sunshine yellow.Attach a satin ribbon at back with Super high tac glue and the ornament is ready.
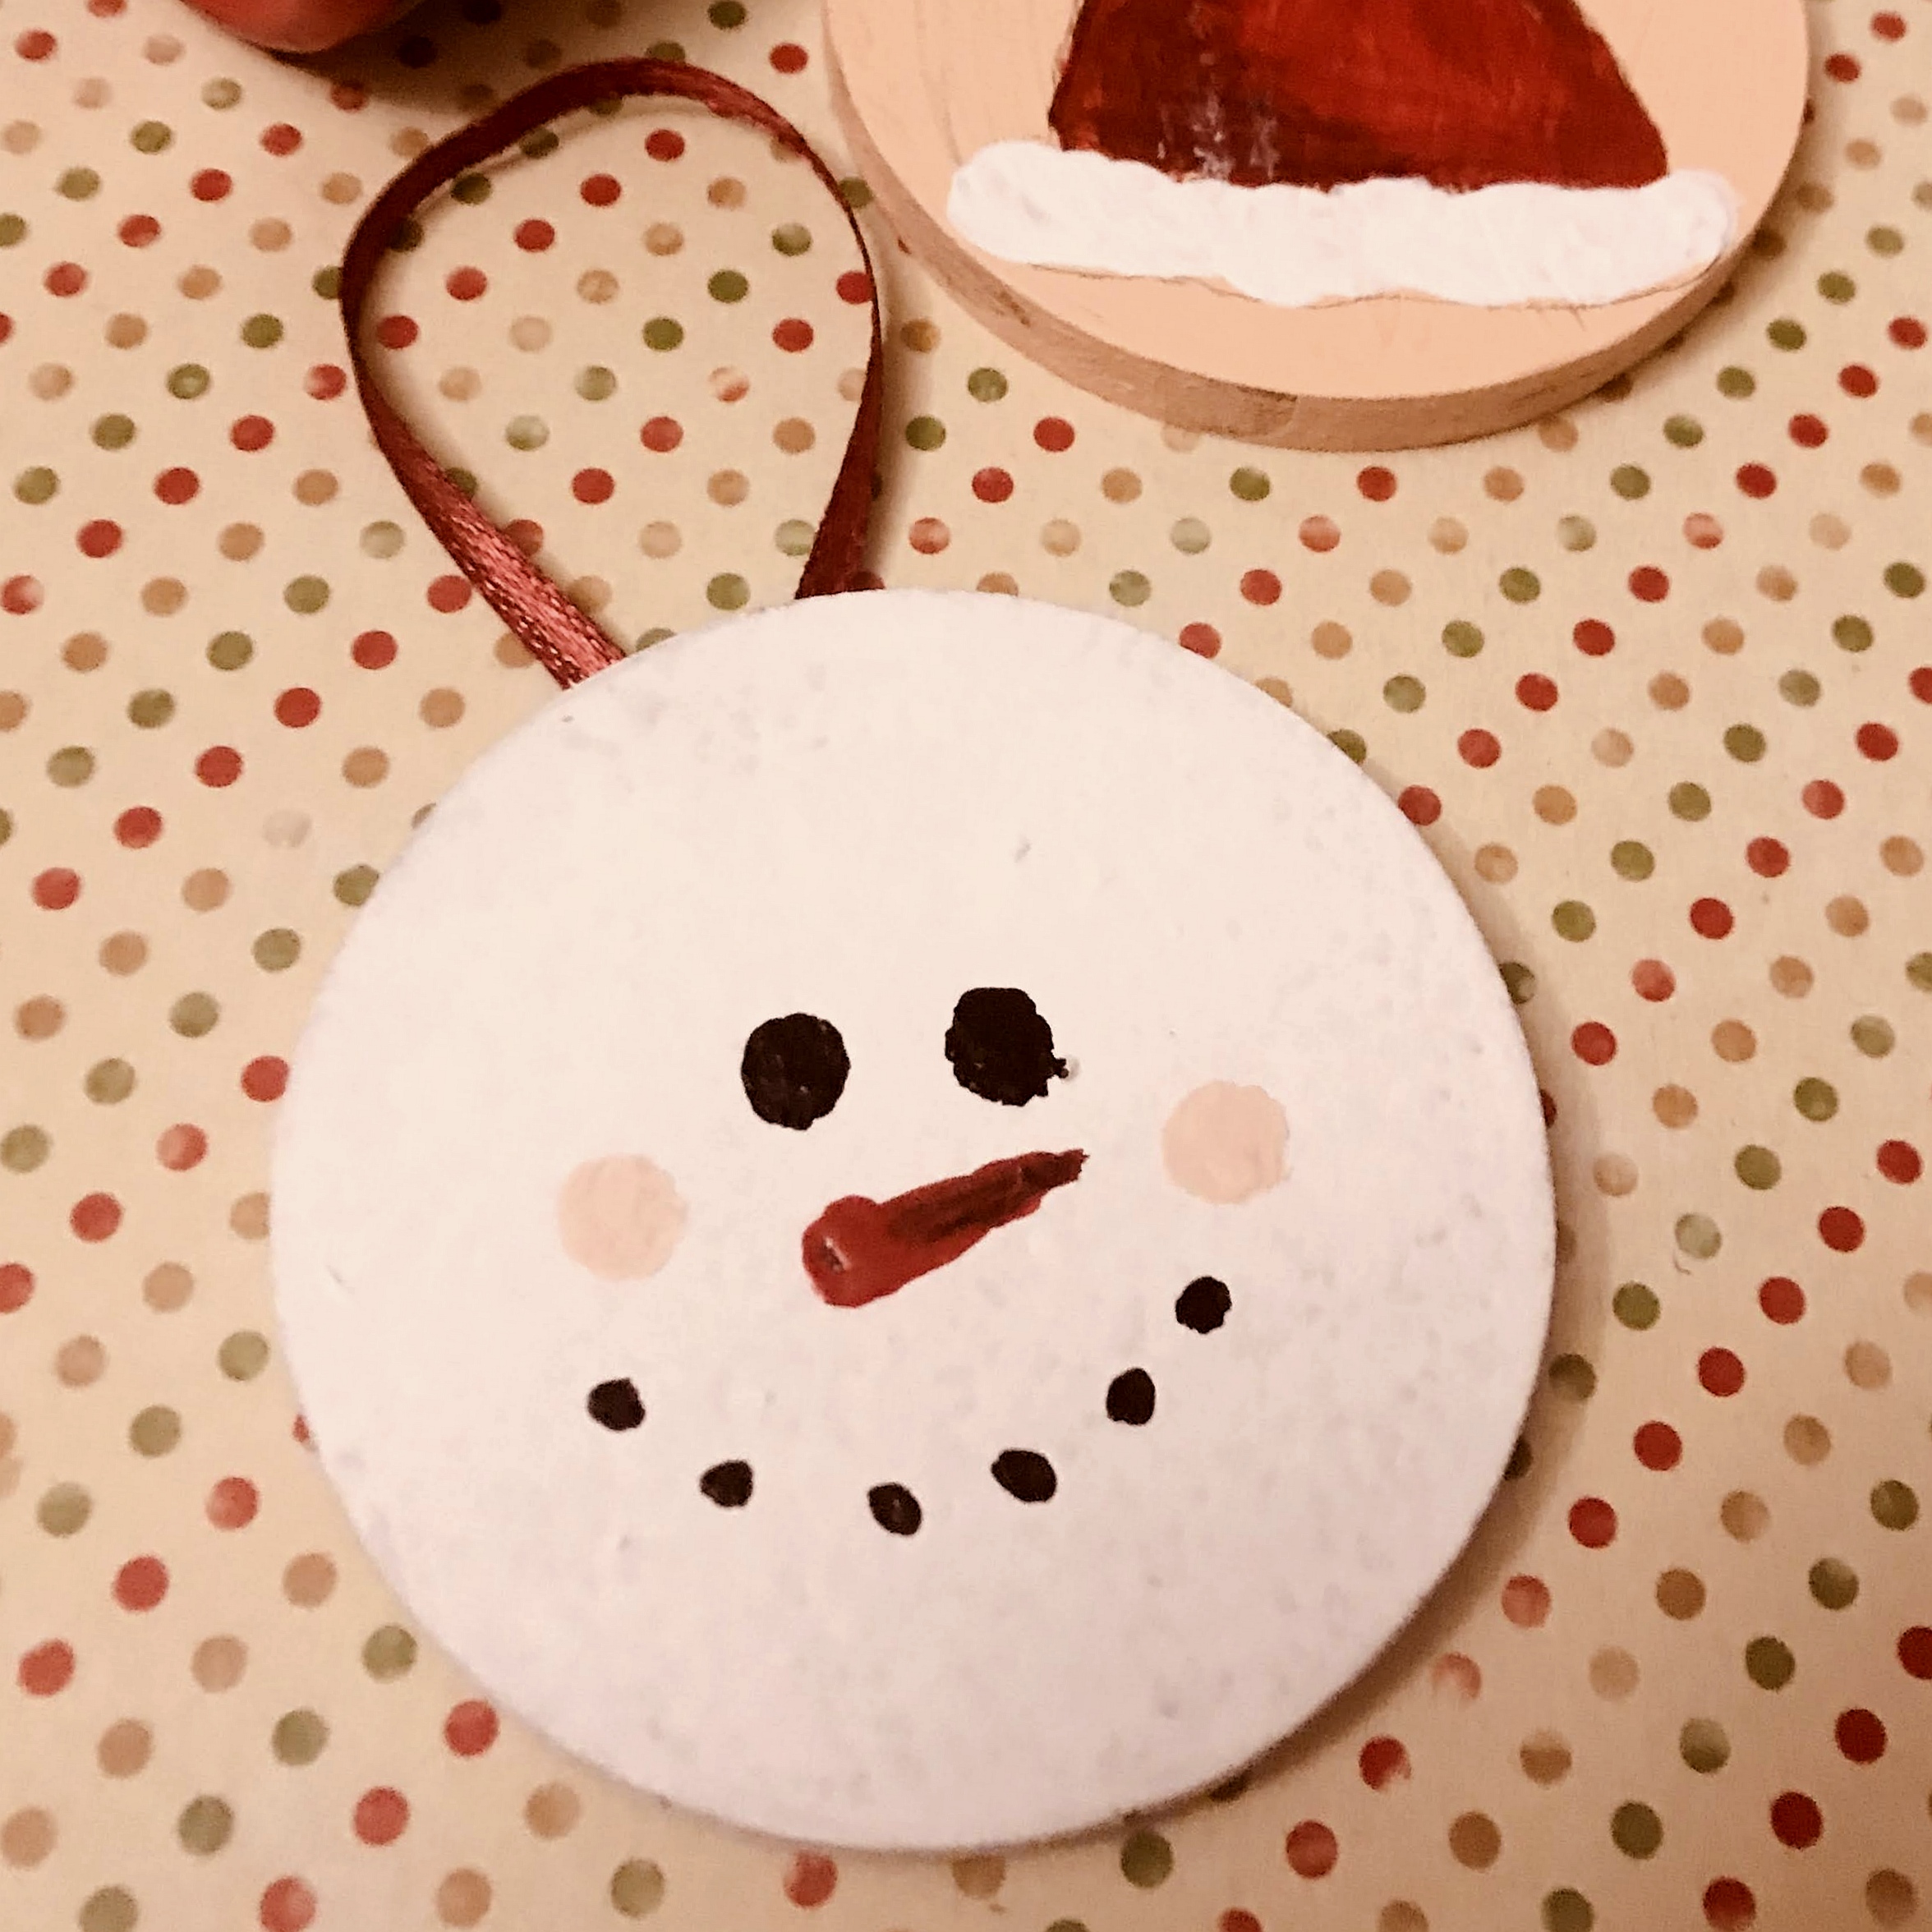
8.Snowman Christmas ornament
This cute snowman ornament is so cute.
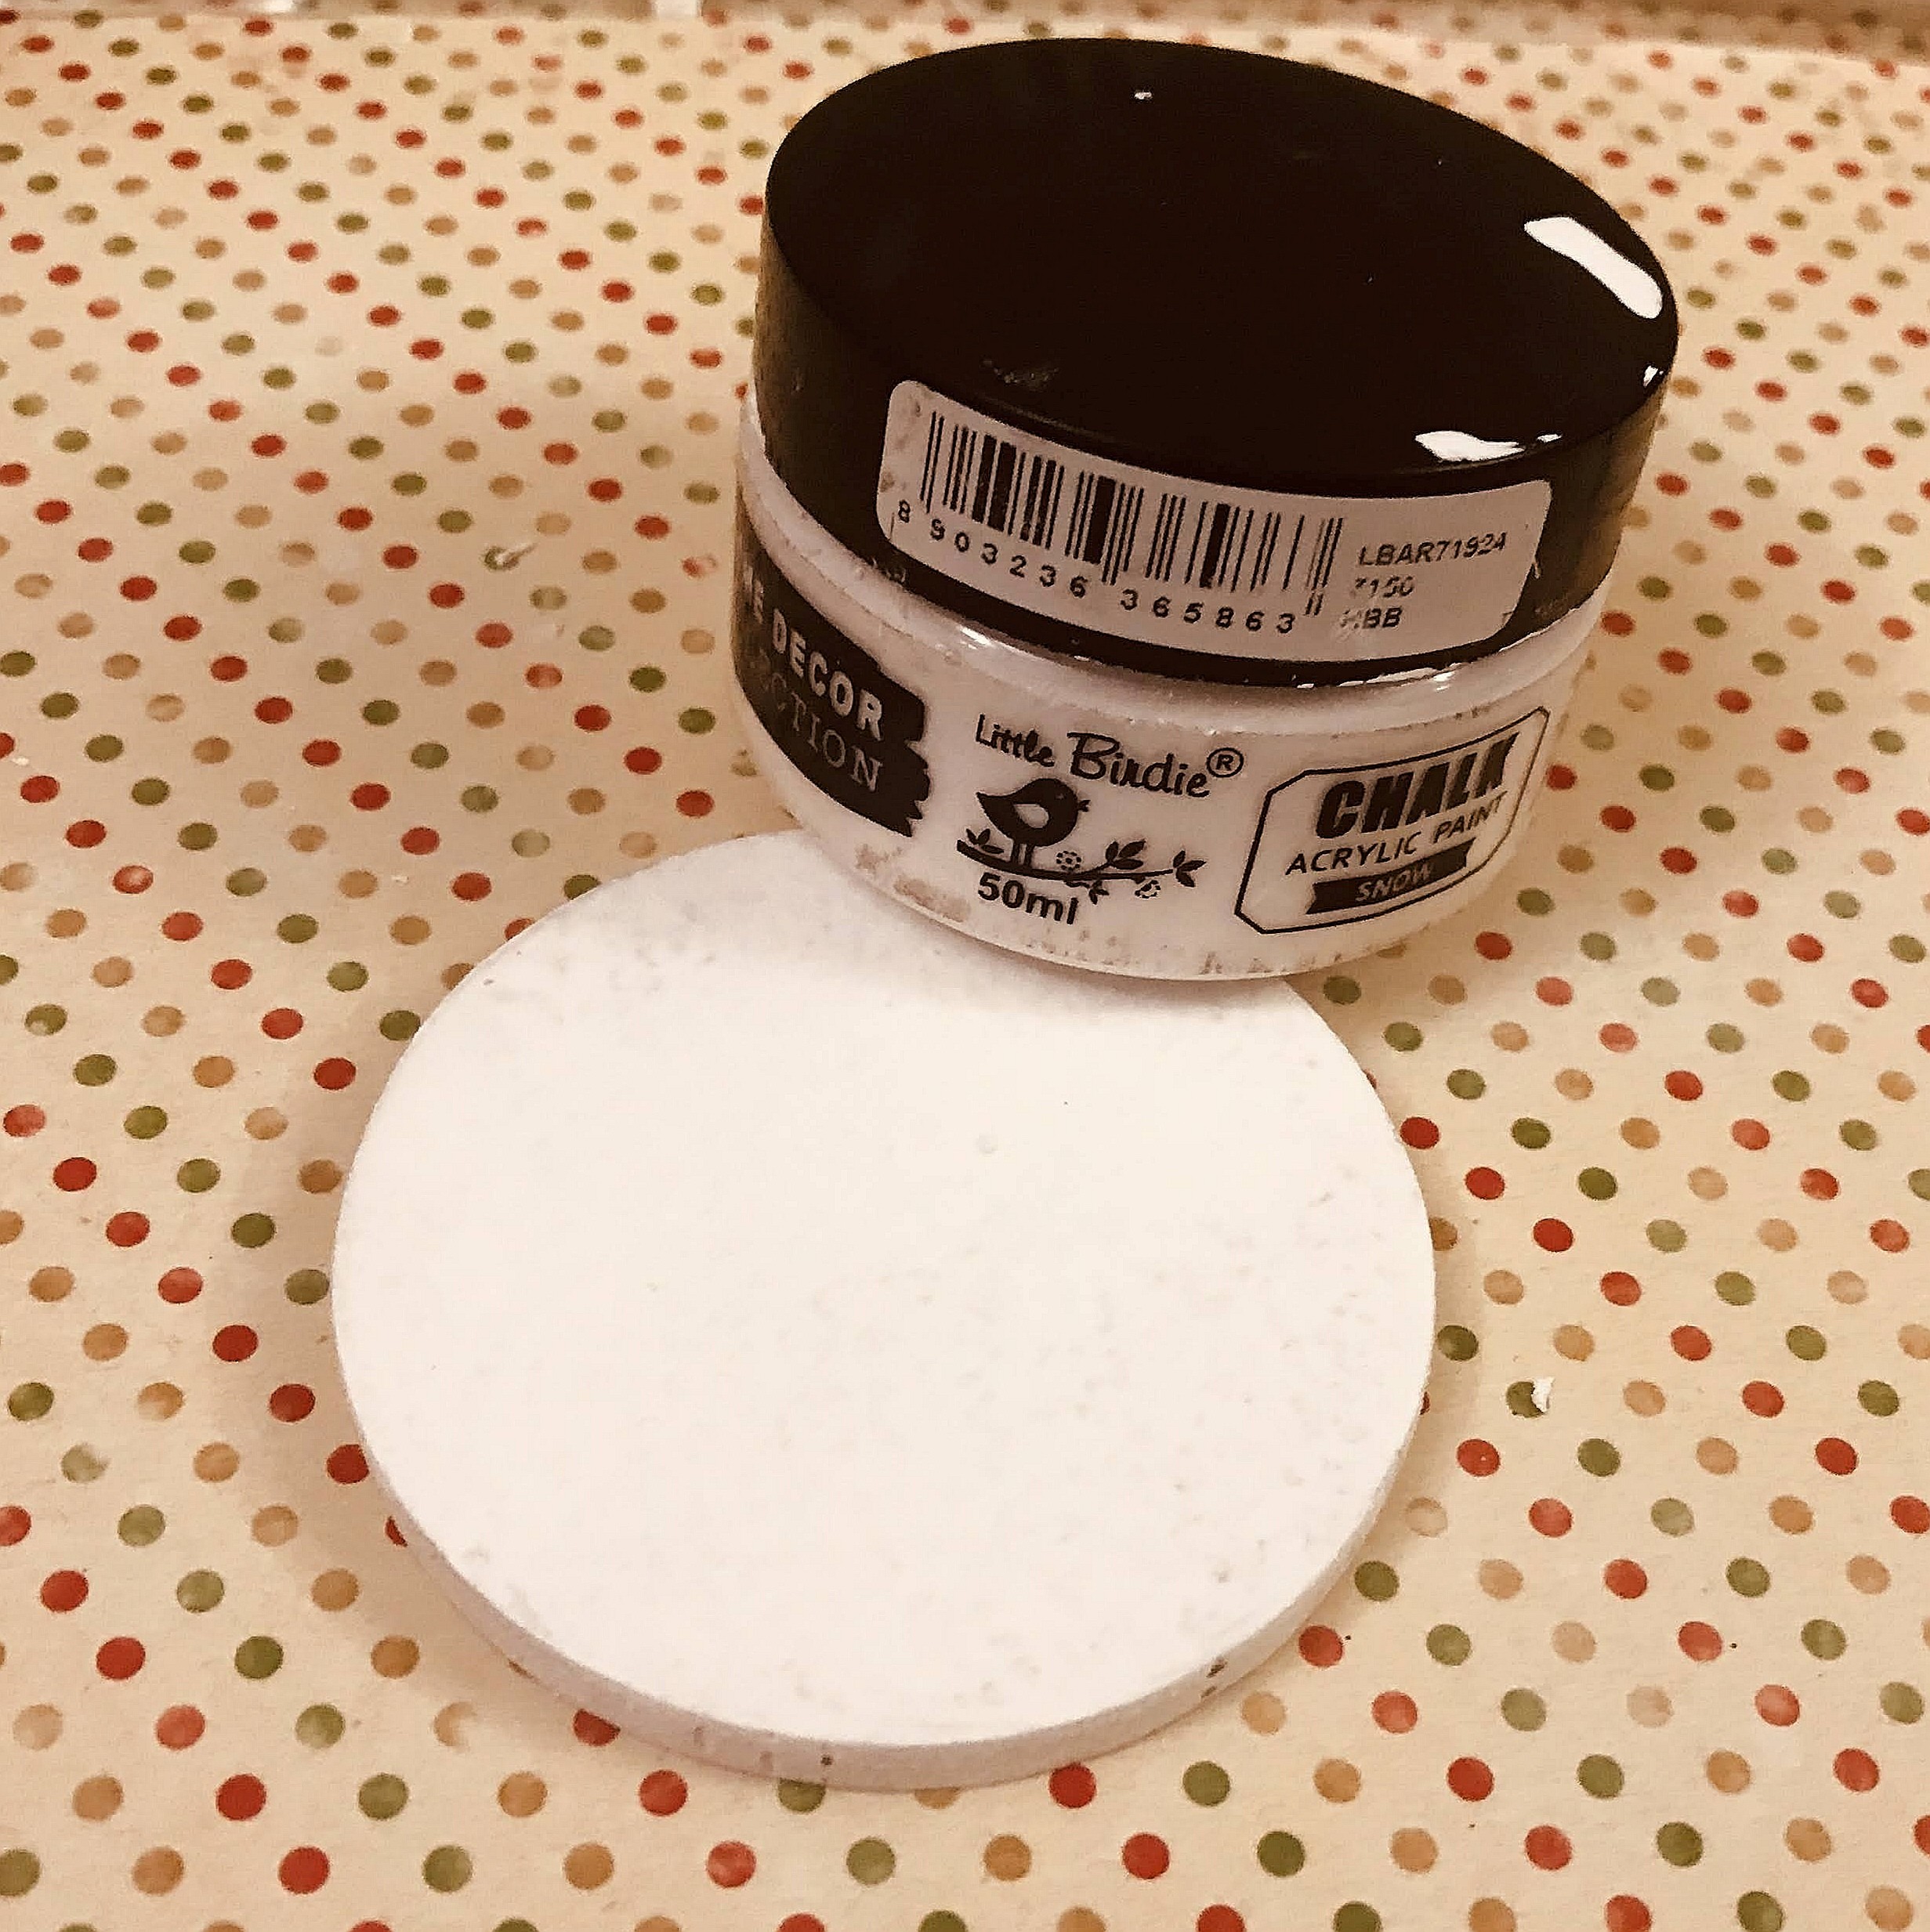
2.Paint the 5 x 5 cm mdf circle in Chalkpaint Snow.
2.Mark eyes and lips with Arichval multisurface paints black Pearl and the nose with Arichval multisurface paint tangy tomato
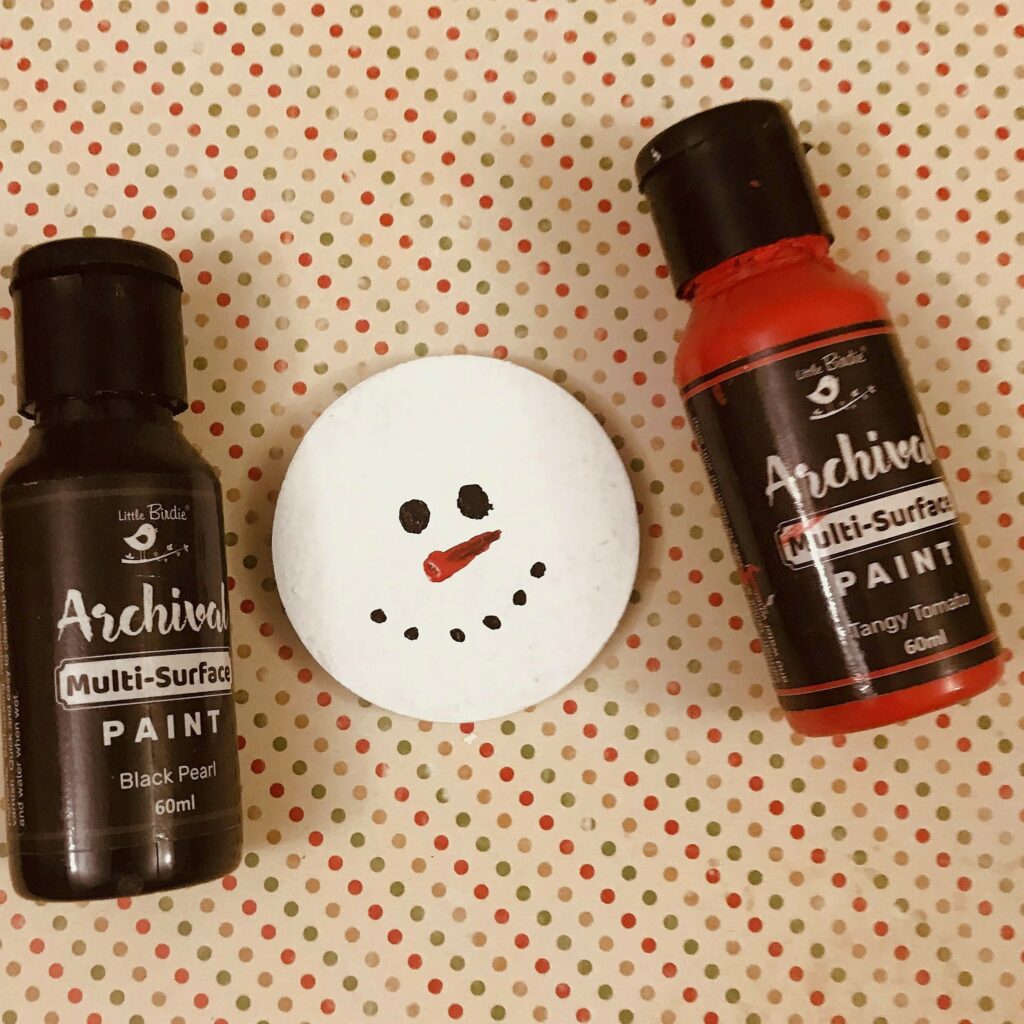
3.Glue on a thin satin ribbon as a loop on the back and let dry.The ornament is ready.
9.Pinecone gnome
This Christmas gnome is so cute.
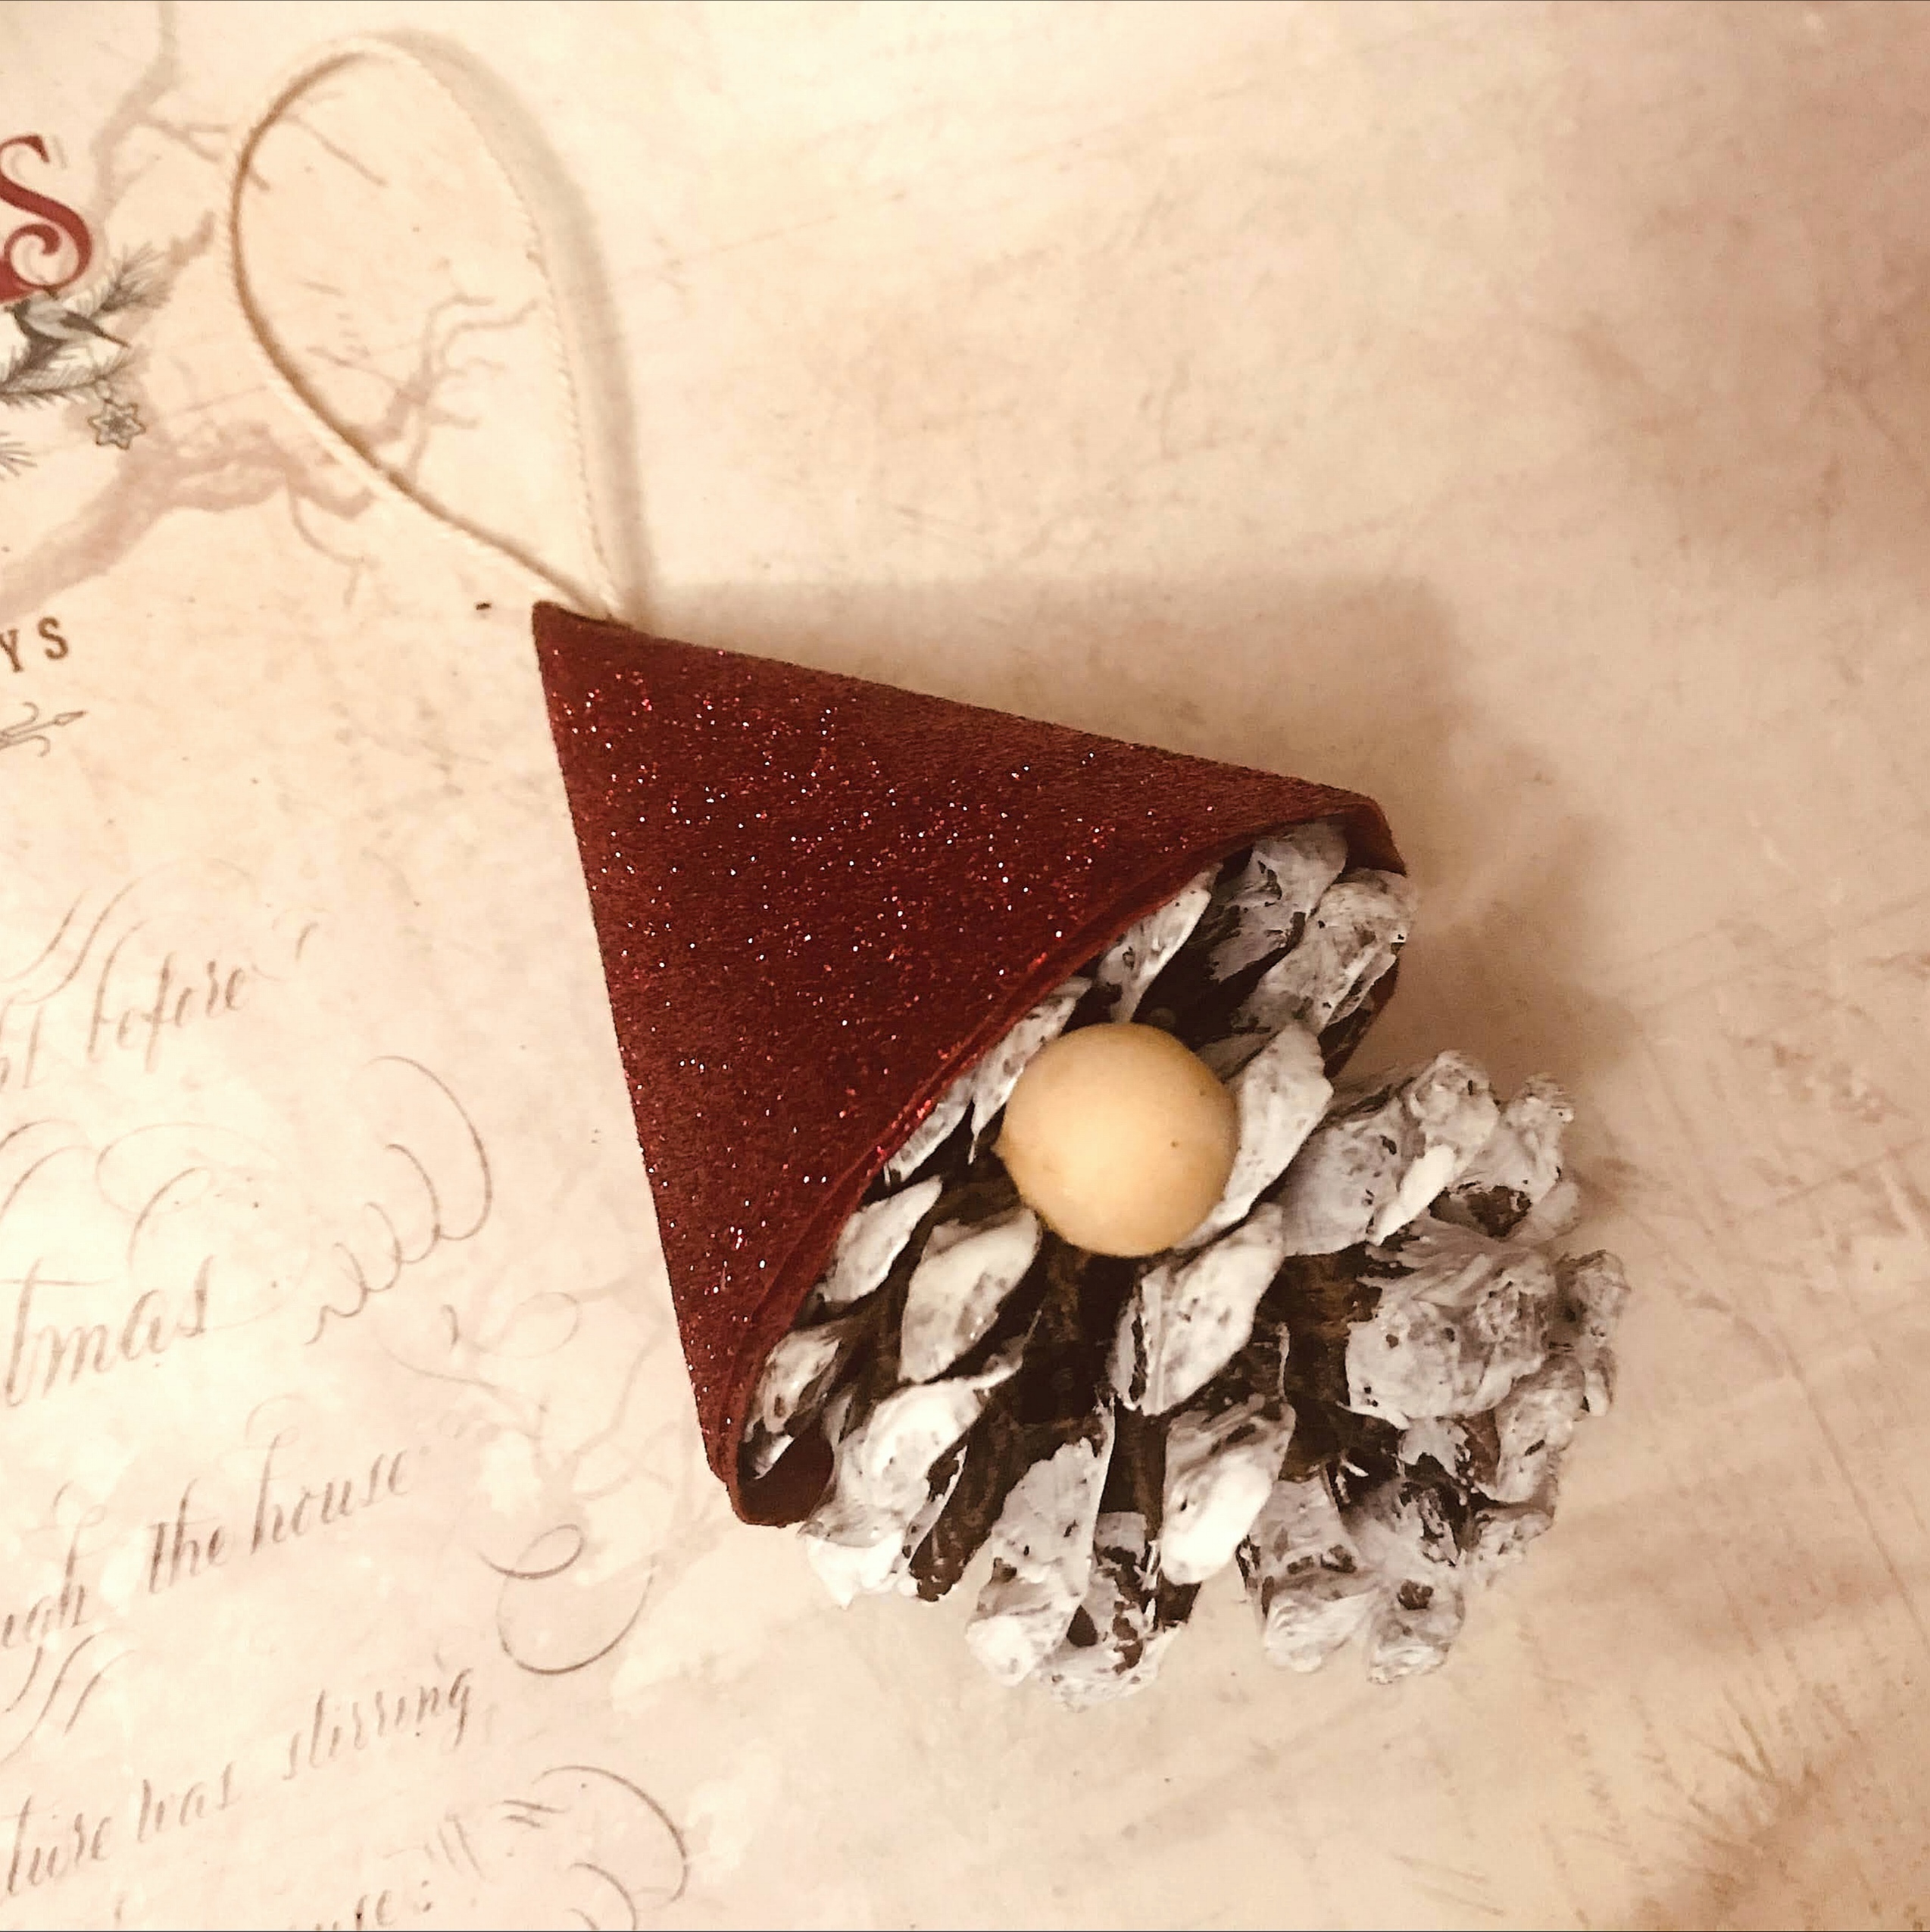
1.Take a large pinecone and paint with chalkpaint snow, let it dry.

2.Cut out a circle of approximately 6 inch diameter.
3. Cut out a segment as shown in picture.

4.Roll the circle into a tight cone and glue in place with Super high tac glue or paper graft glue.
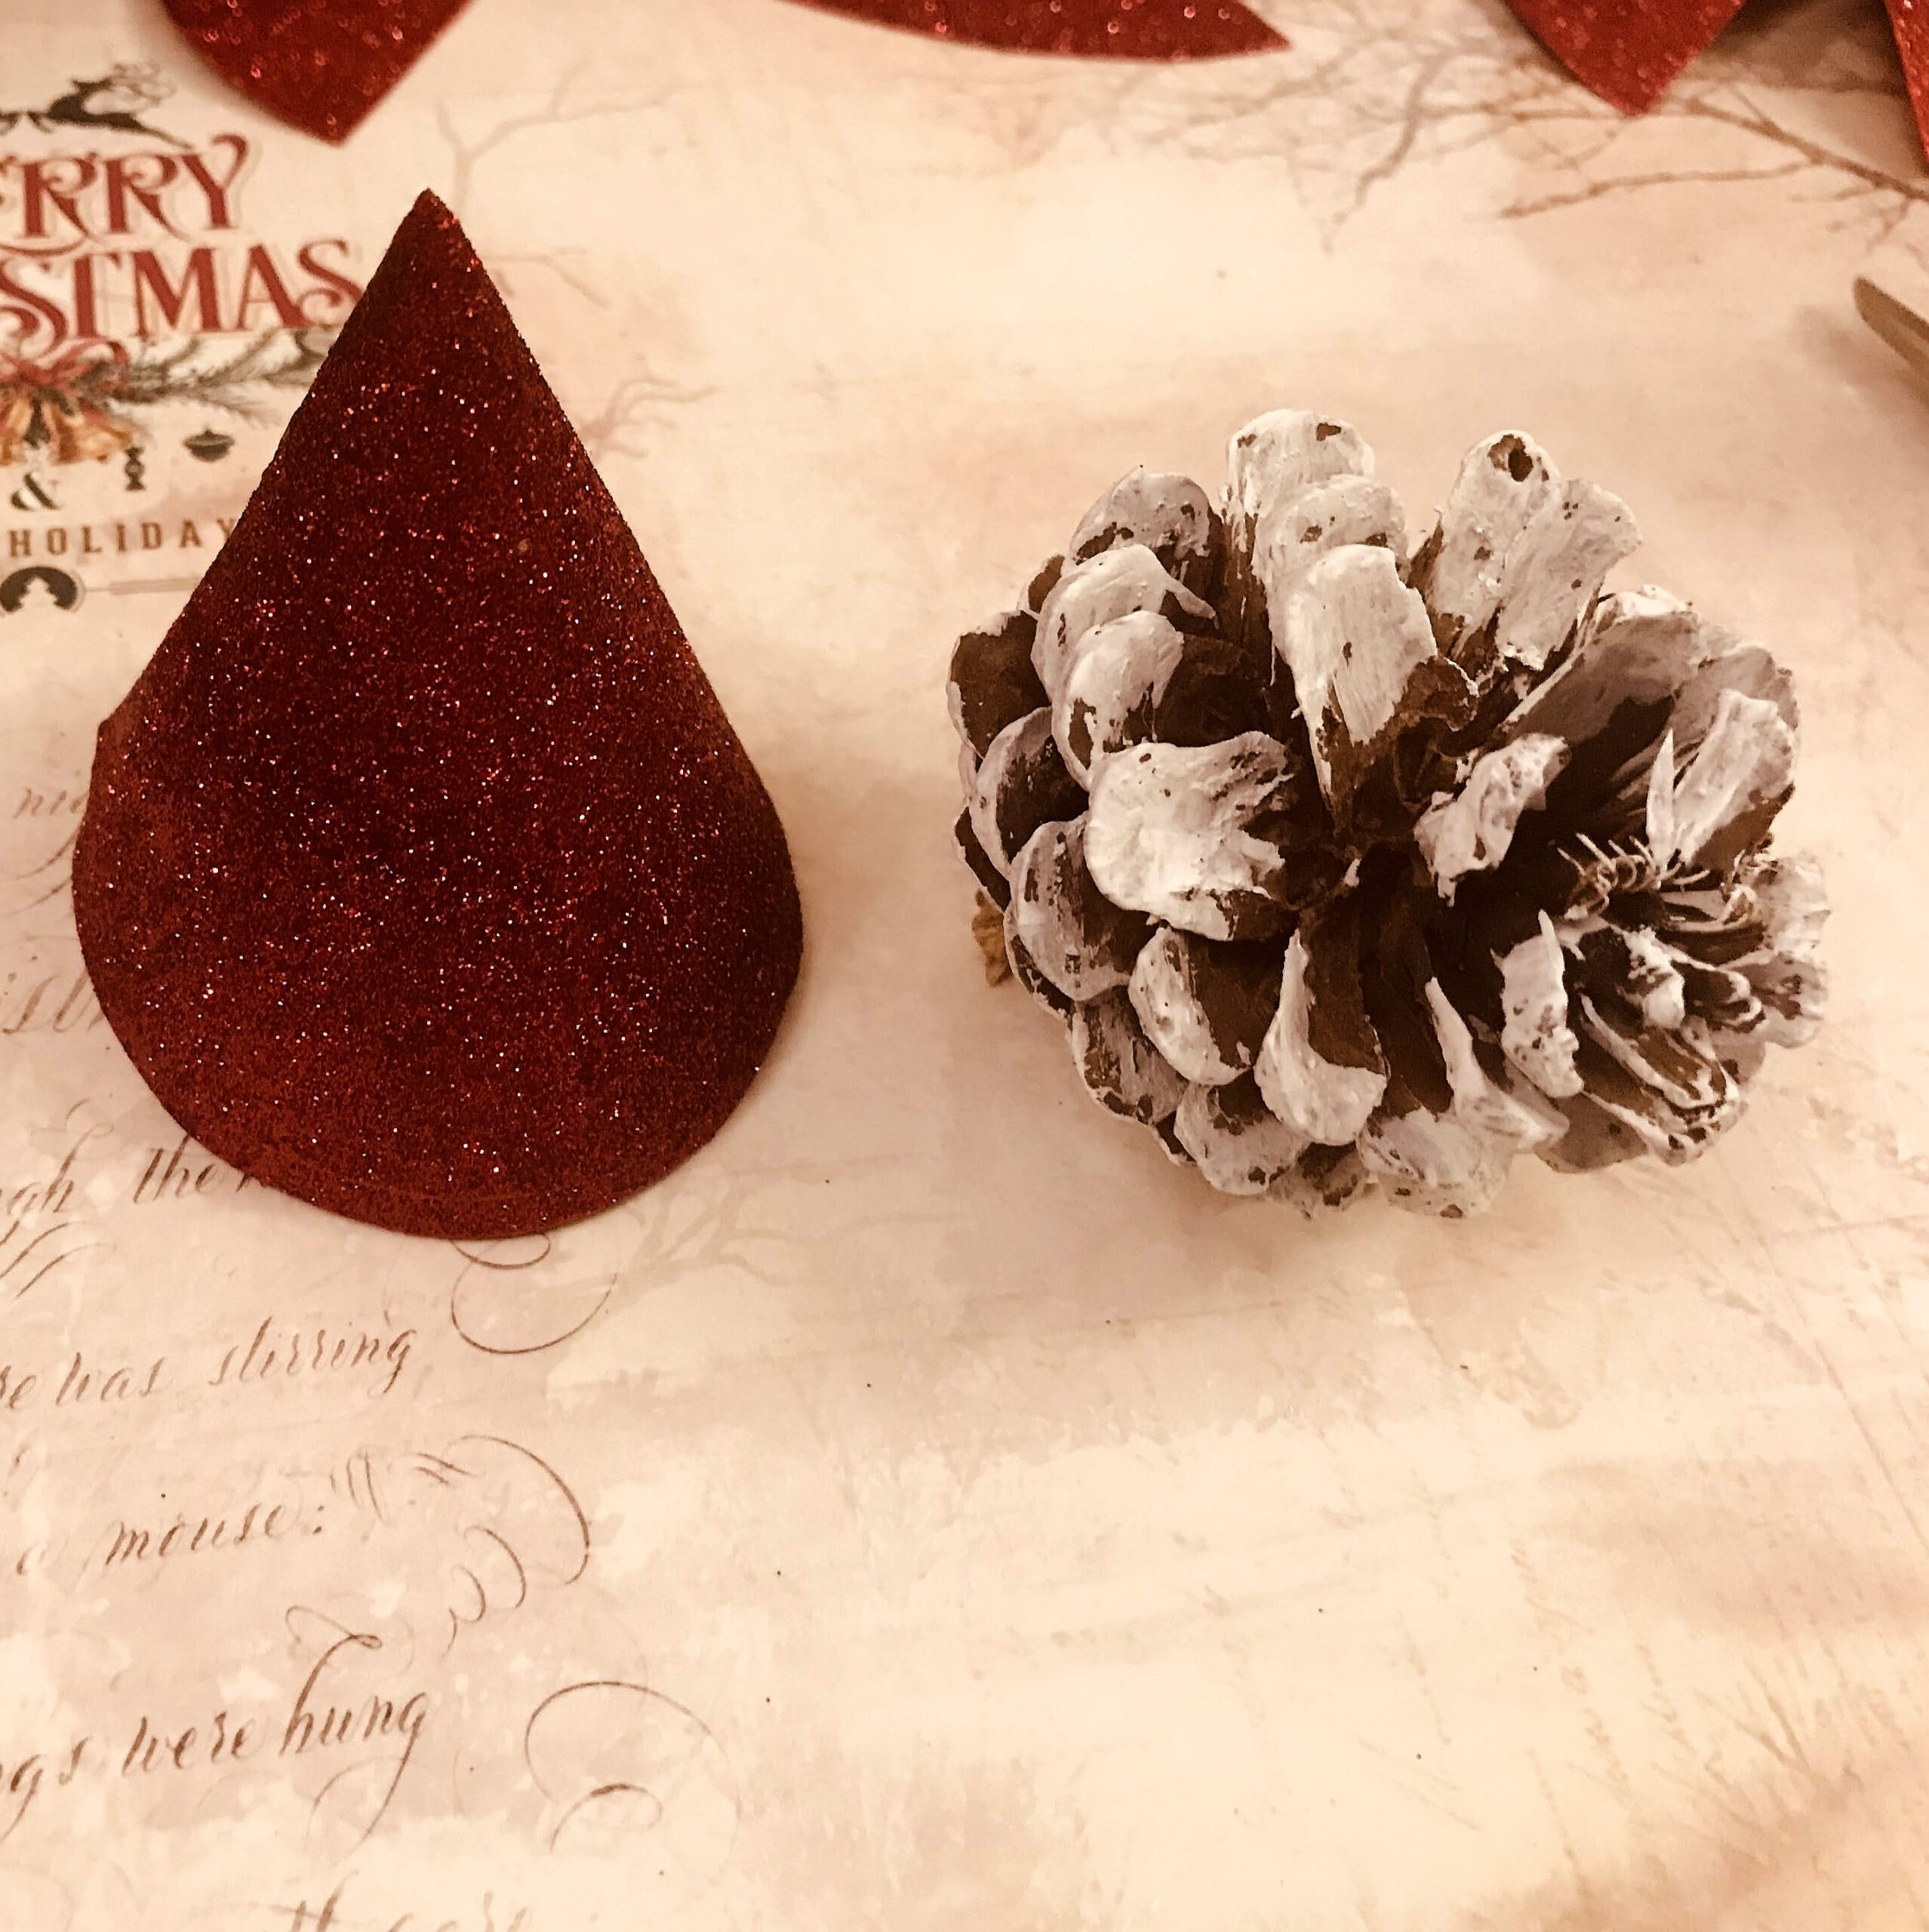
5.Once dry ,apply glue on the inner part of the cone and place it over the top broad part of the pinecone and glue on a wooden bead of 1 cm.
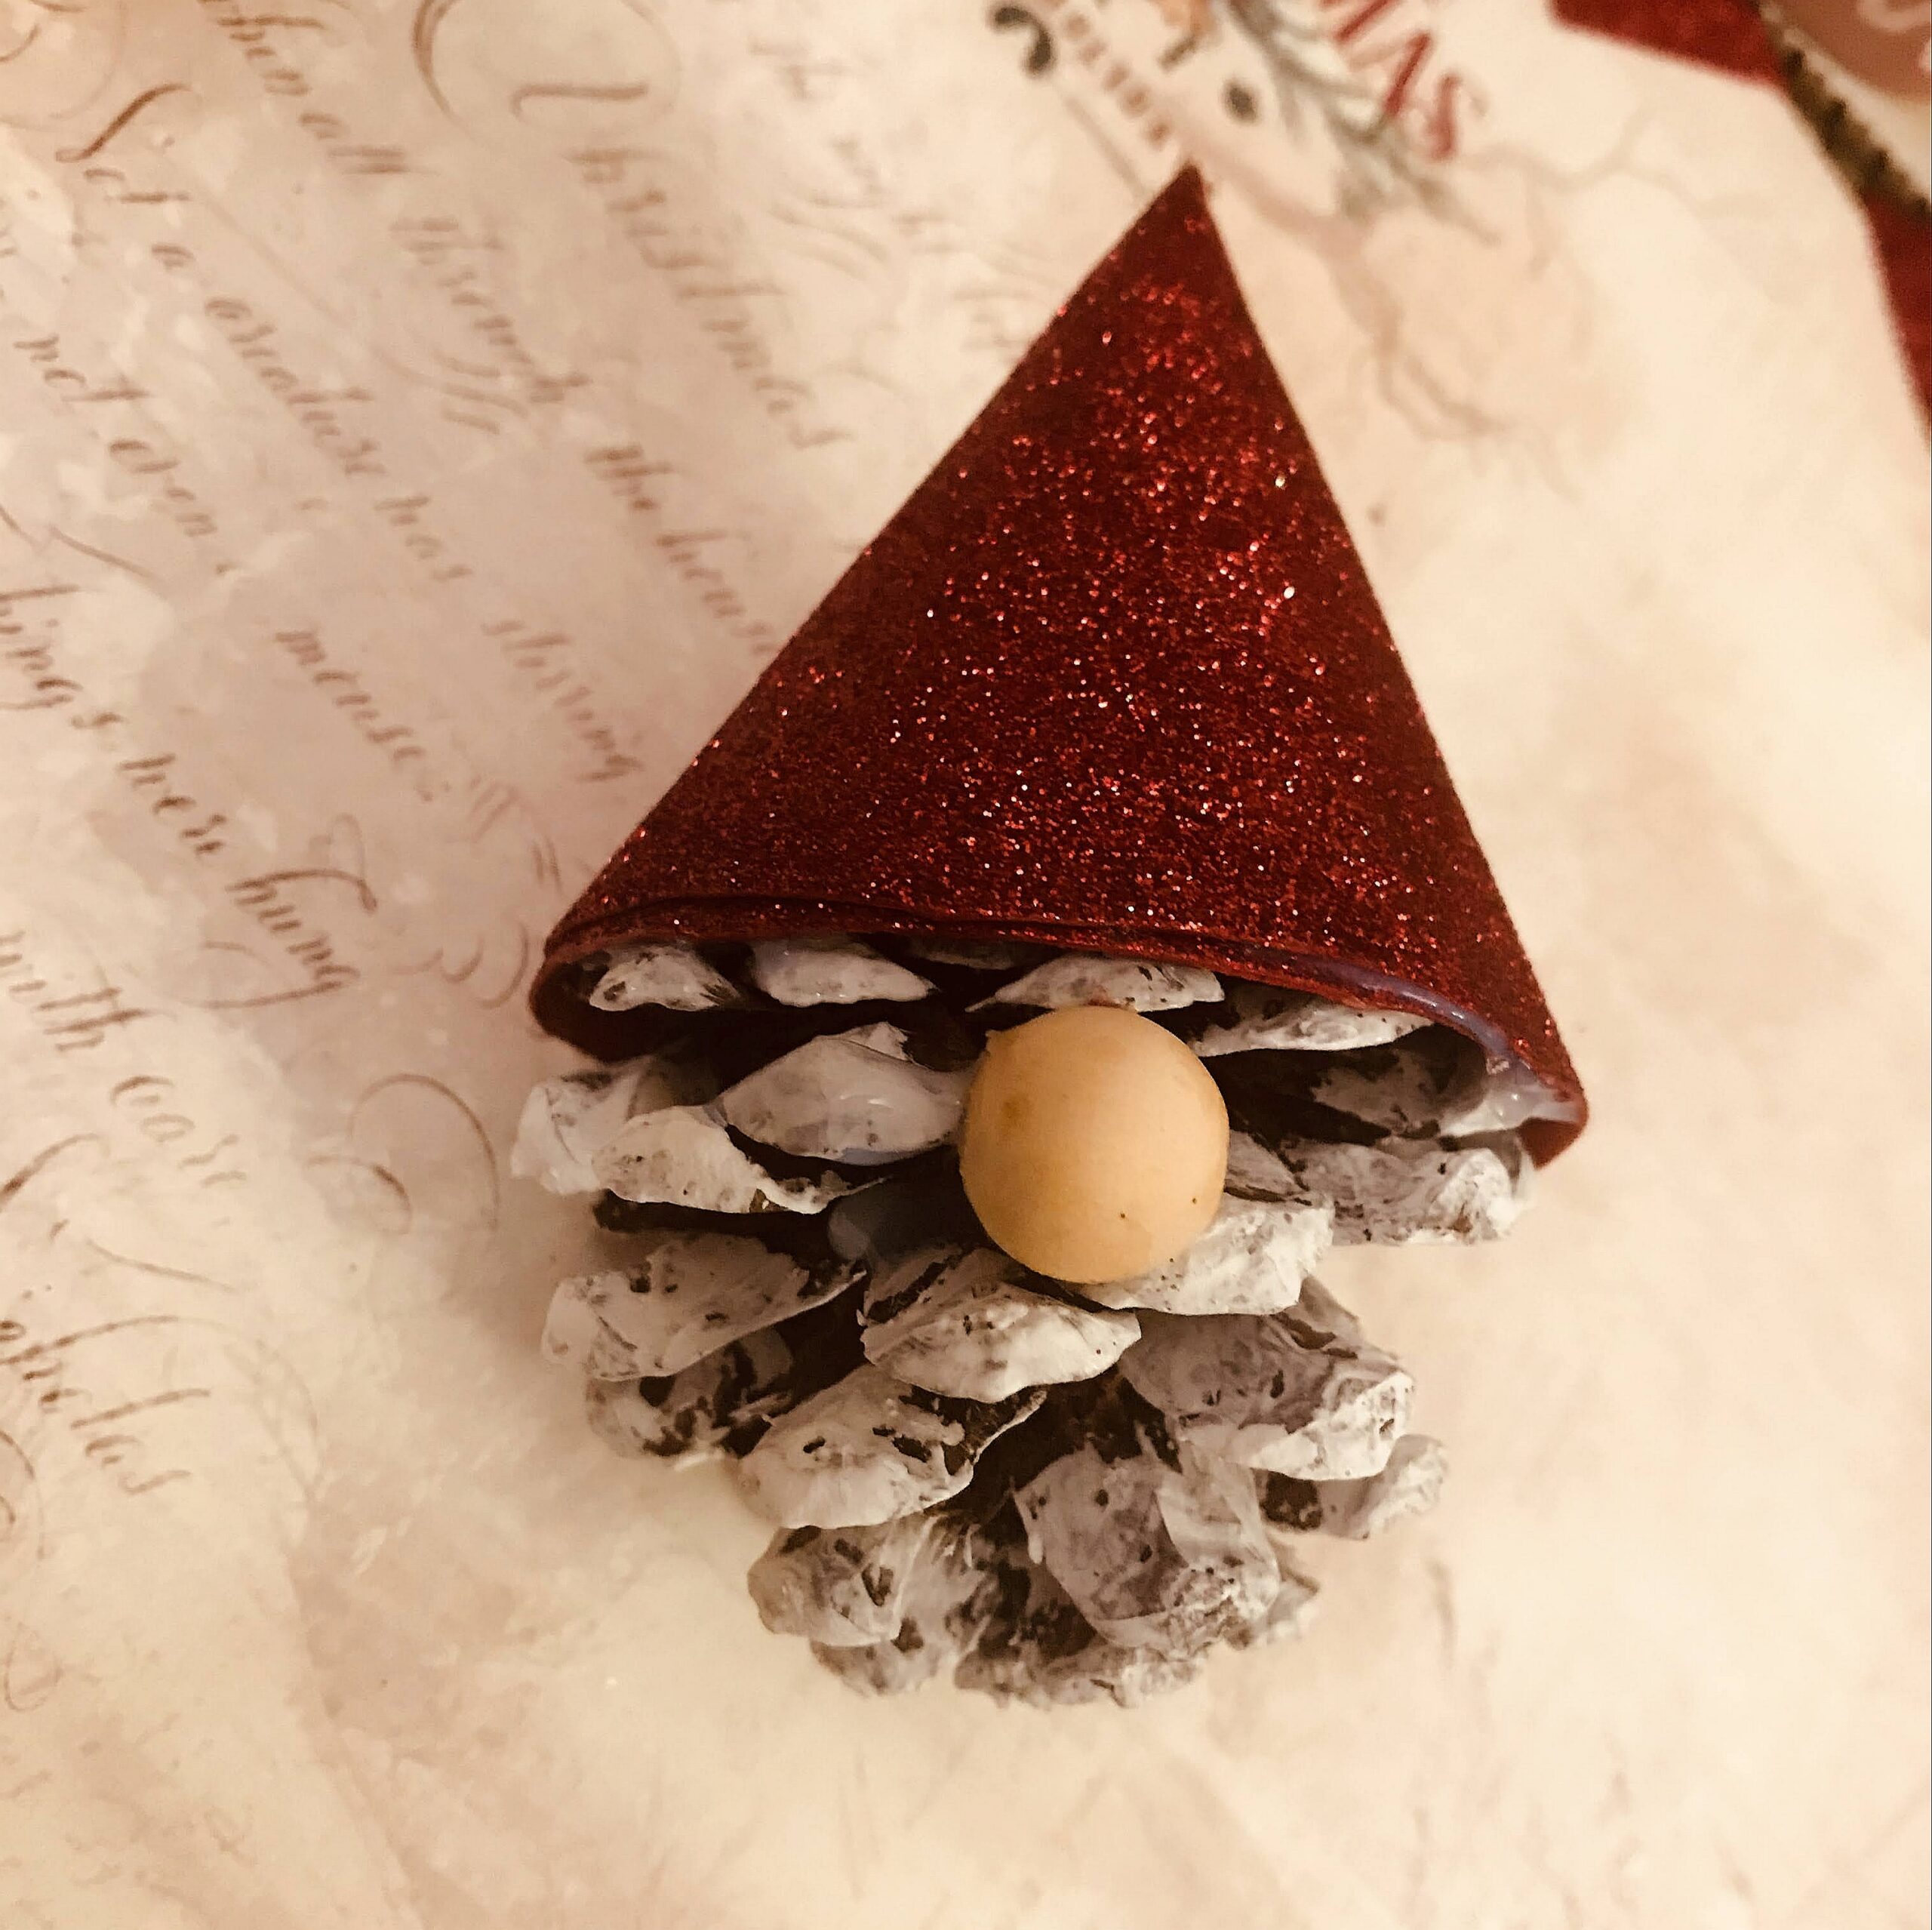
6. Glue on a cotton cord as a loop and the cute gnome is ready to adorn your trees.
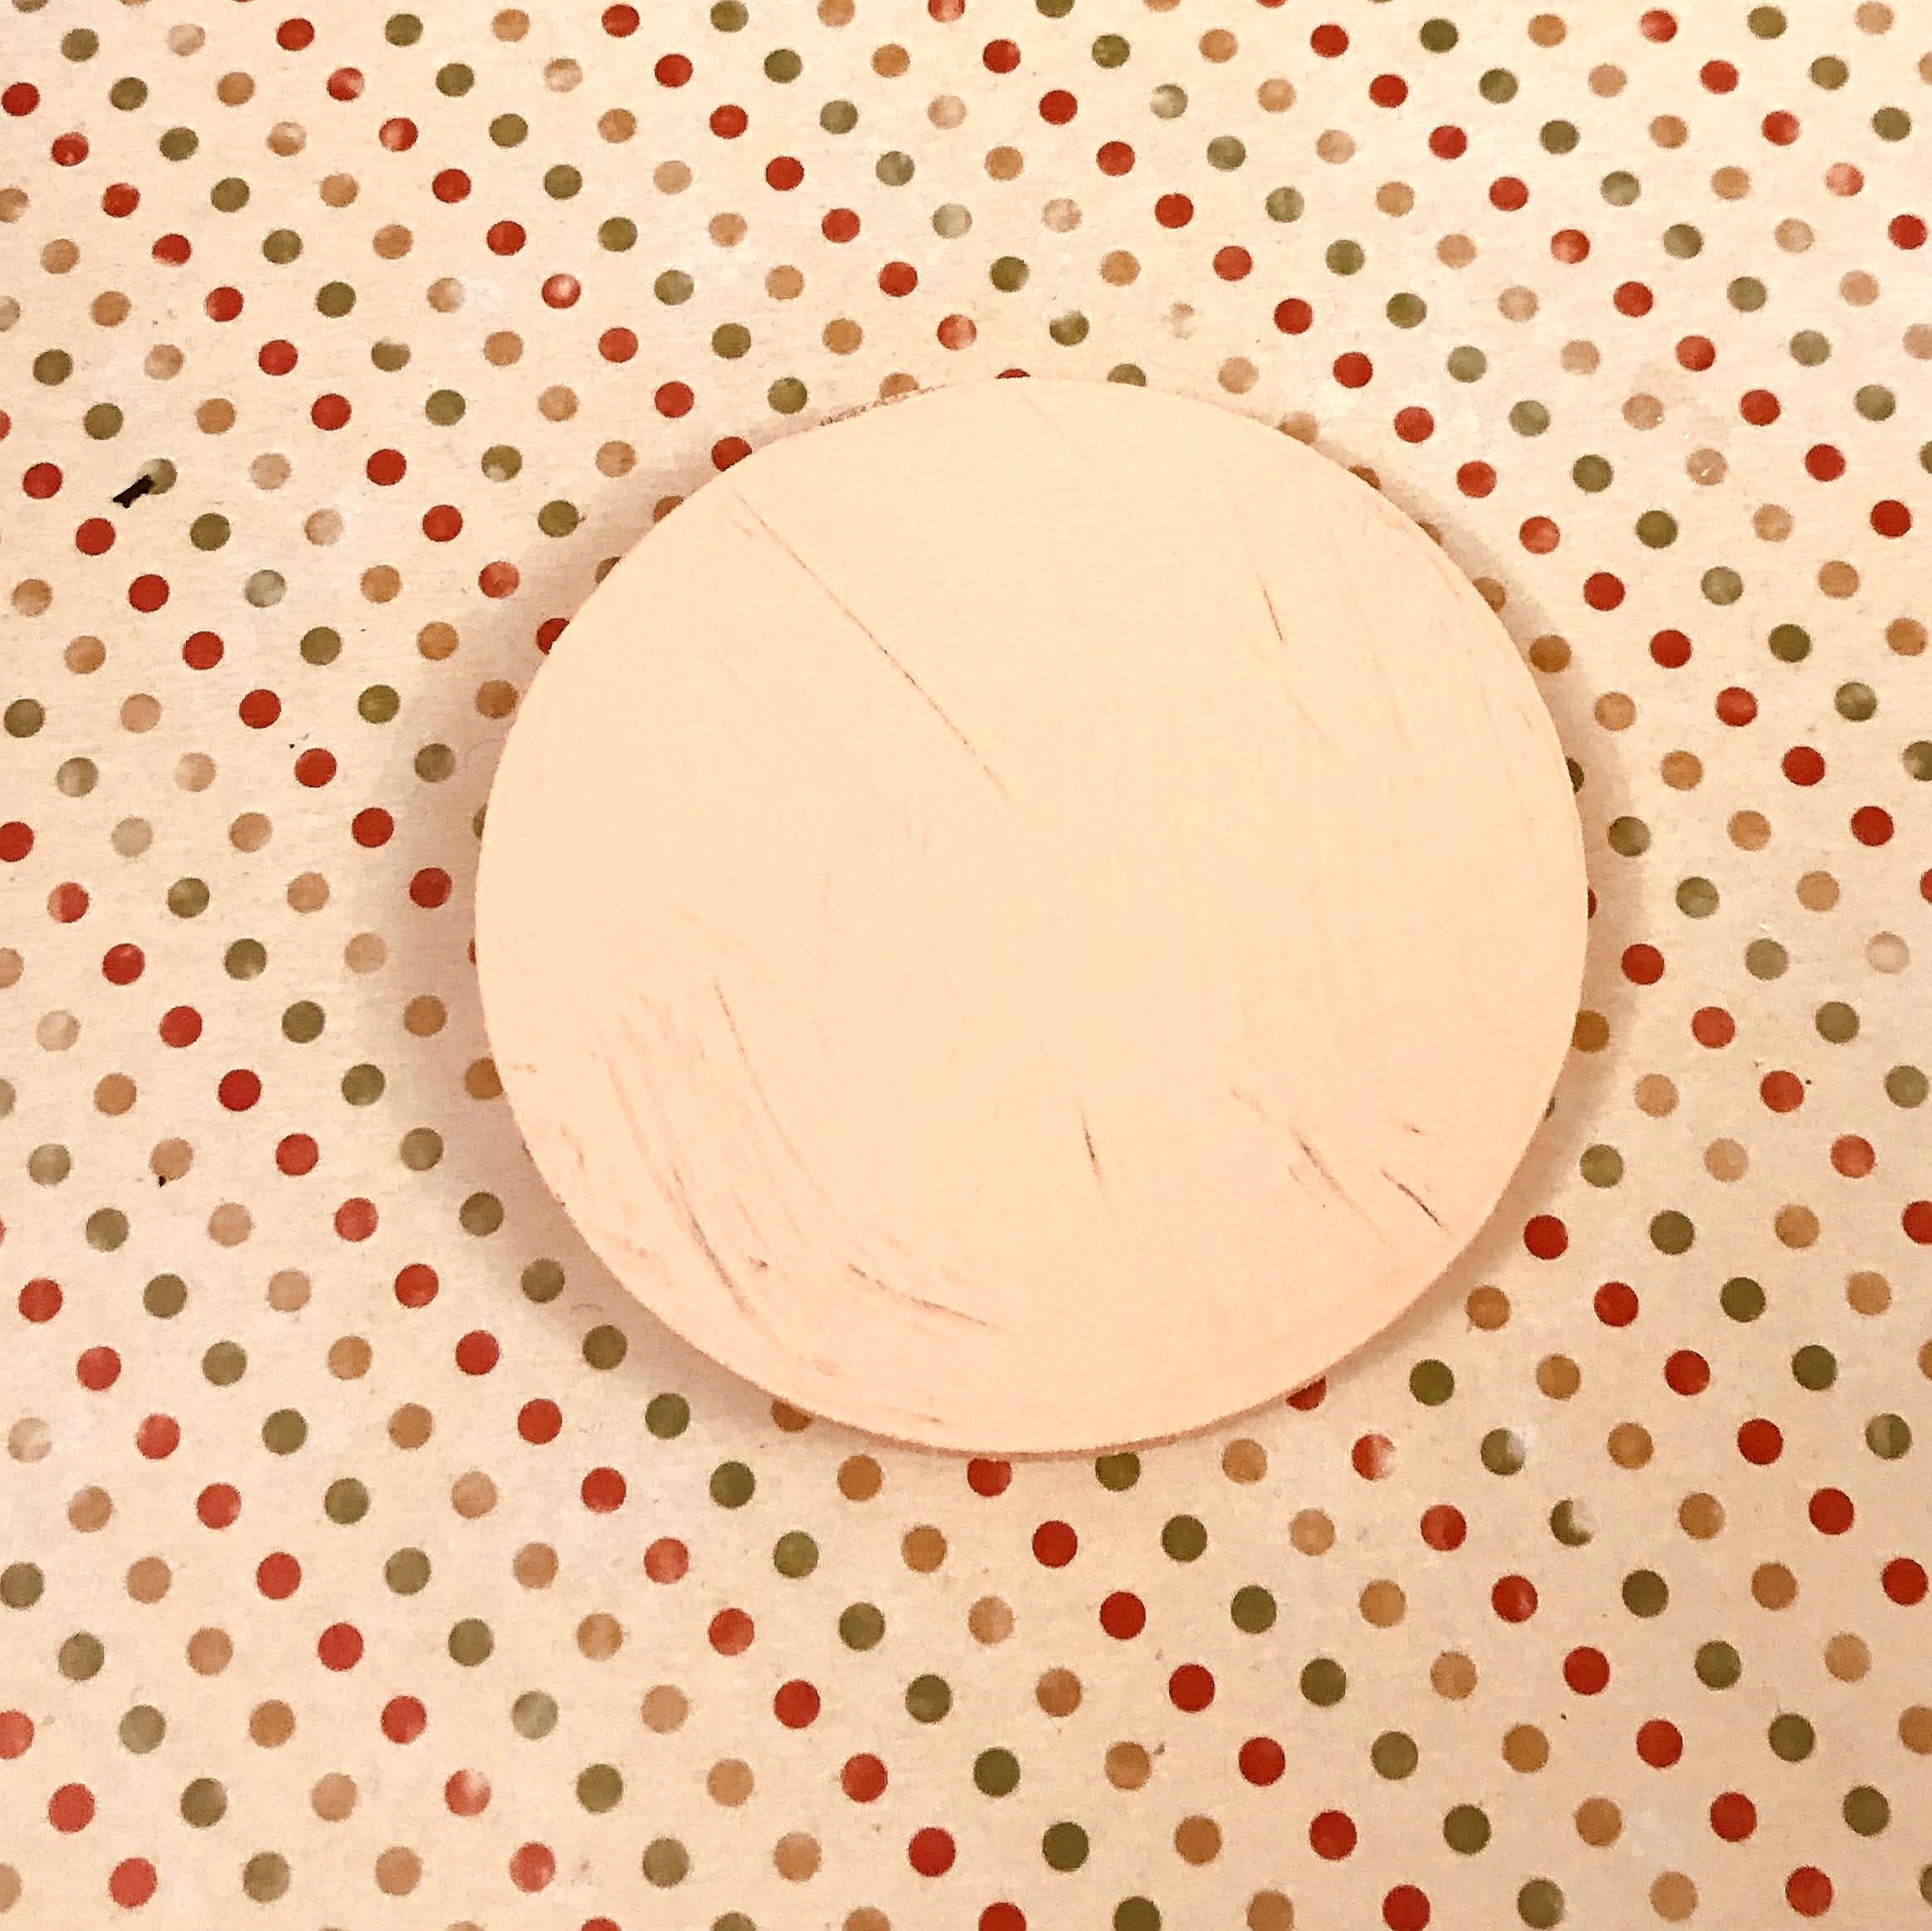
9.Santa hat Christmas ornament

1.Take a 5 x5 cm mdf circle and paint with chalk paint sandstone.
2.Draw a santa hat with a pencil as shown in picture.
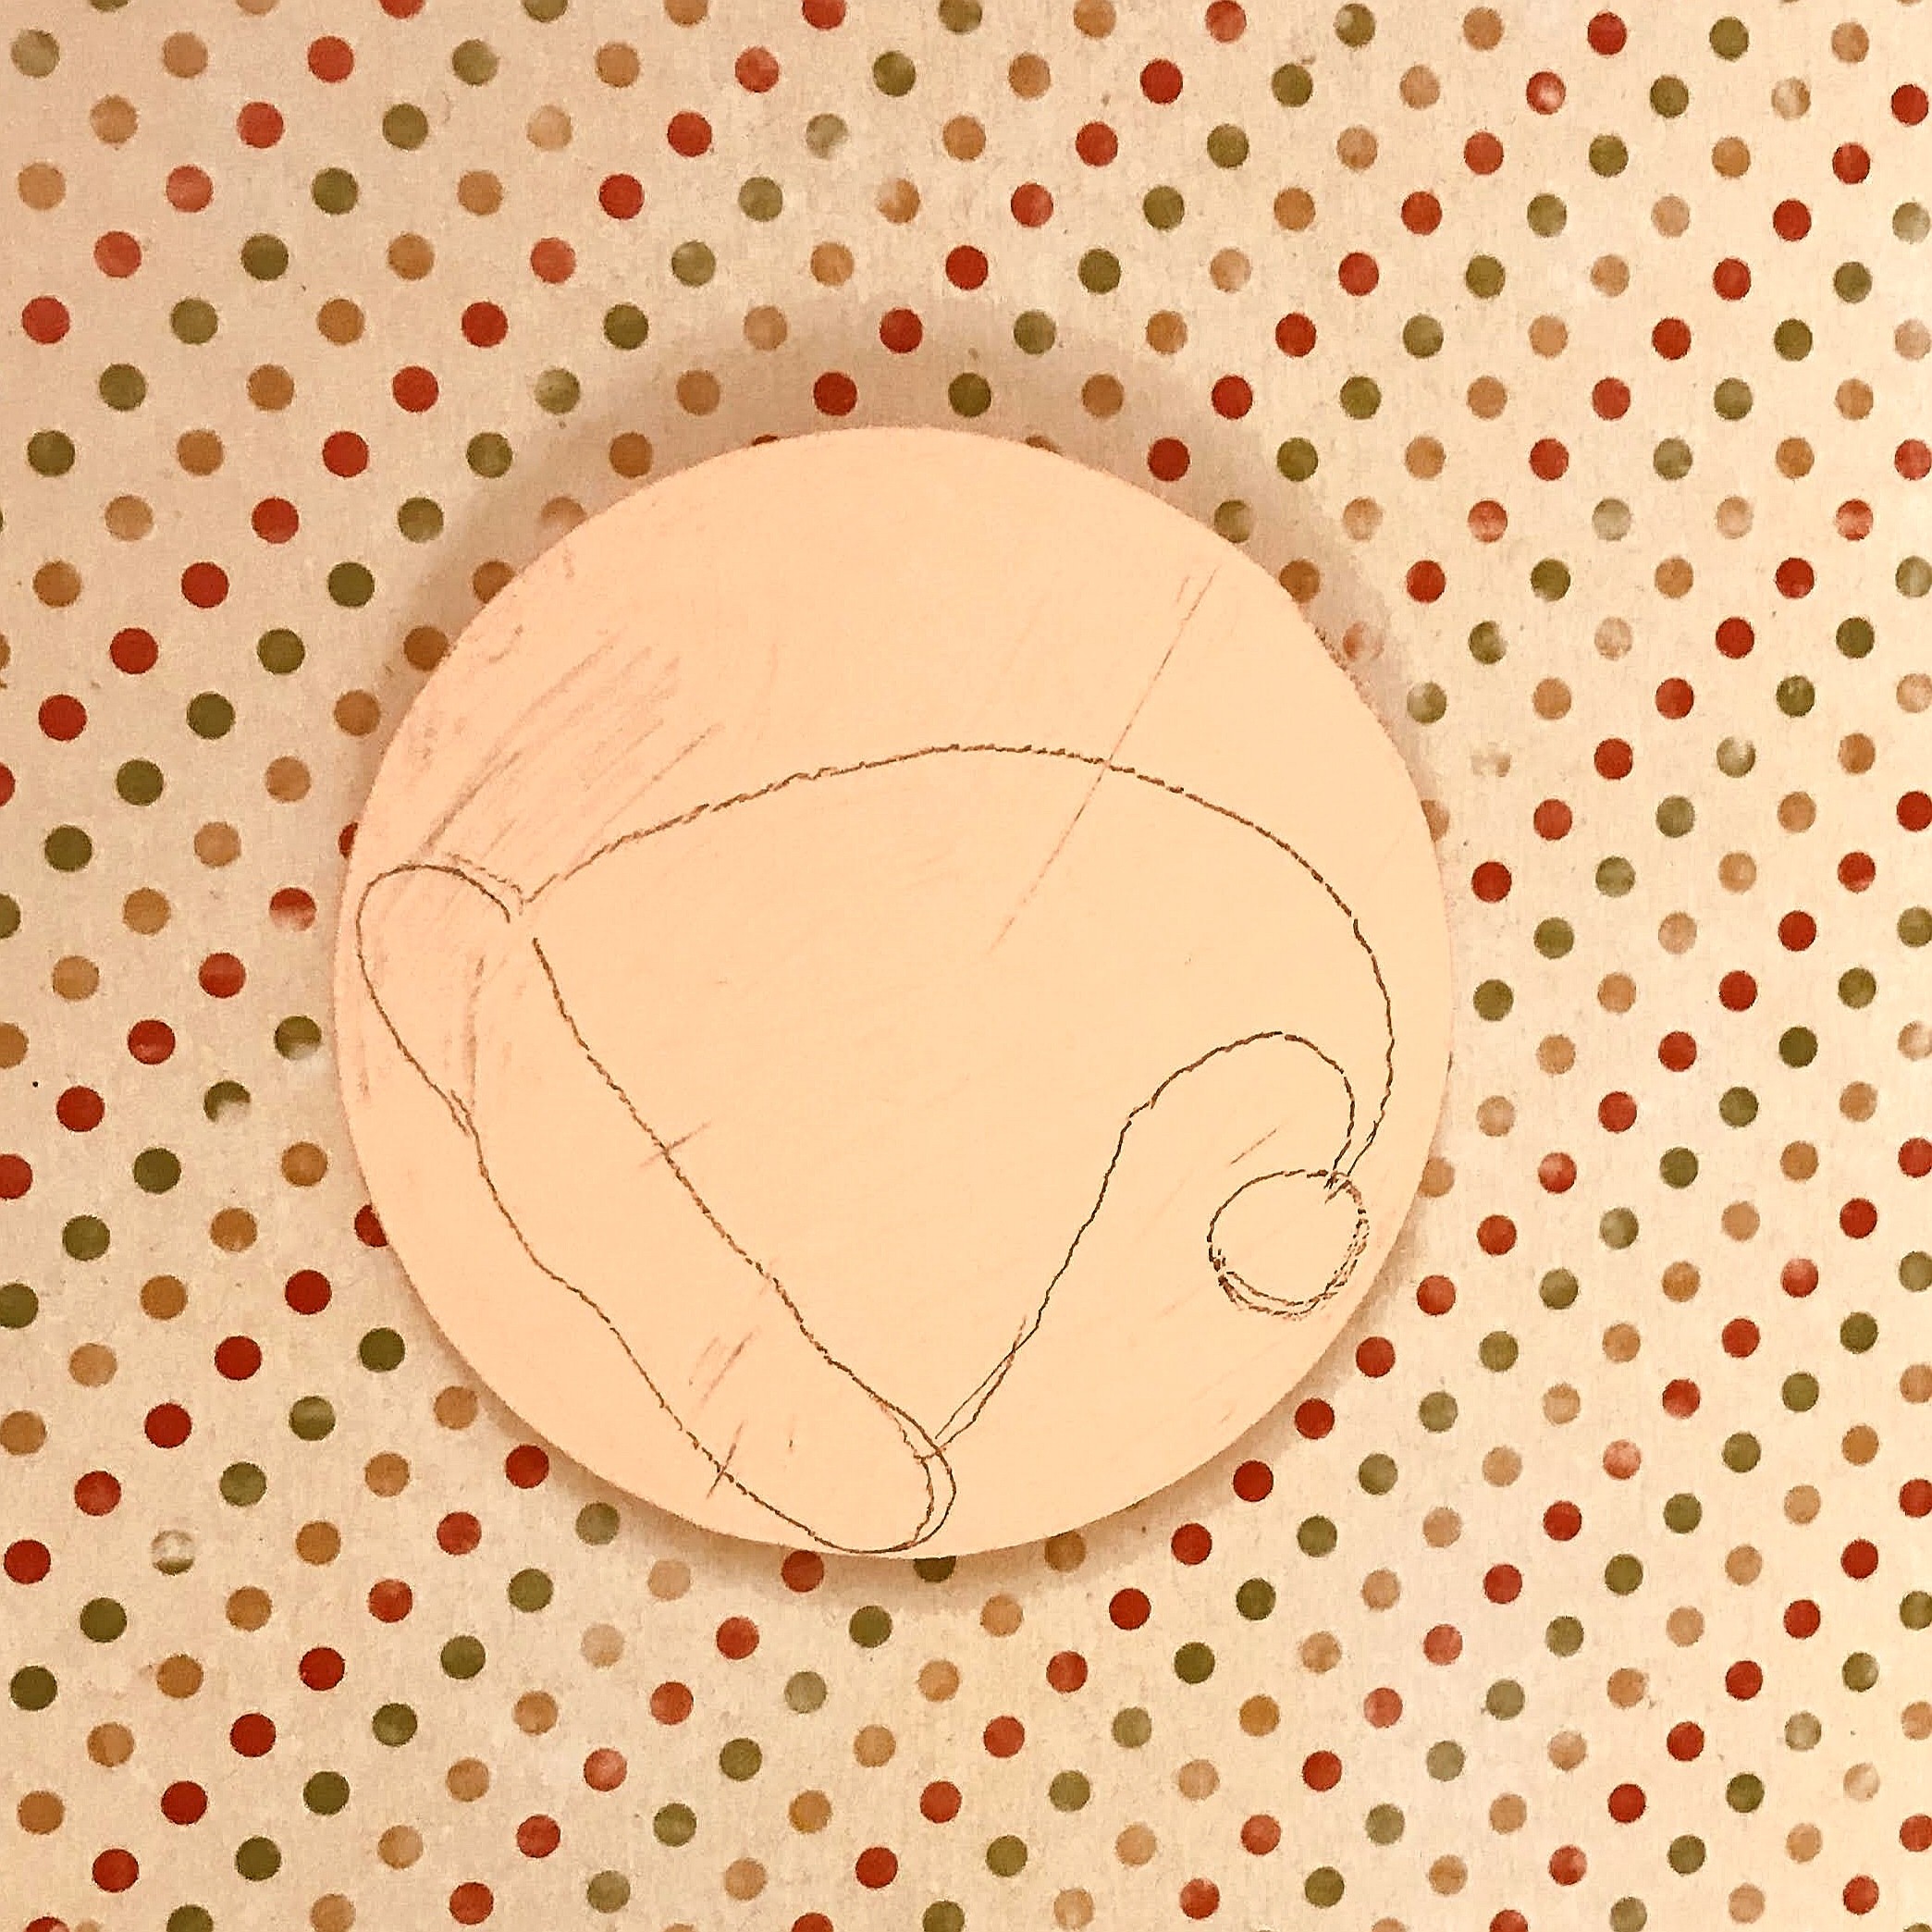
3.Paint the white part of it, with chalkpaints snow and body of hat in archival multisurface paints tangy tomato. And add a light shading with archival multisurface paints black pearl.

4.Attach a satin ribbon at back with glue and the ornament is ready.
Hope all kids enjoyed all the lovely crafts.
Materials required